


Raspberry Pi USB Webcam User guide

We made a commitment that we would release a series of user guide for Raspberry Pi products, besides the previous Raspberry Pi 2 System Installation And Start , currently the second Raspberry Pi USB Webcam User Guide will meet with everyone. Last month since the 300K Pixel USB 2.0 Mini Webcam was presented in the market, we have received lots of orders for it, as it is well known and commonly used in the household, threfore, we really hope this user guide could more or less assist hobbyists on the Raspberry Pi operation.
Part 1 Preparation
Hardware preparation
- Raspberry Pi 2
- USB webcam
- PC
Software Preparation
- Raspberry pi mirror system, Firefox browser (Only in the Firefox browser, you can view the video monitor screen),
- FTP software (FileZilla).
- Install Firefox browser and FTP software to your PC
Part 2 The installation and configuration of camera and monitoring software
2.1 the use of USB camera in Raspberry Pi When the raspberry pi 2 starts, plug in USB camera, and through lsusb you can see the following screen, which indicates that the USB camera has been identified by the system

Users can also check whether there exists video0 in the dev directory by cd/dev command. If the answer is yes, that means the webcam has been identified by the system, and users can DIY some simple video monitoring product with it.
2.2 motion software installation and configuration
(1) motion software installation Type apt-get install motion command in the system terminal, and you can install the motion software. If not, users can input apt-get update command to update system.

Through command vim /etc/motion/motion.conf, open file of motion.conf and modify webcam_localhost on into off

Modify control_localhost on into off

Use motion software 3.1、Start motion in Terminal Type motion command to start motion,the appearance of such screen as below represents the USB webcam start to work.

From the above screenshot, we can see that camera constantly takes pictures and the photos are stored in / tmp / motion directory. Users can transfer photos from raspberry pi system to the windows system with the transferring files software of FileZilla, mentioned previously. But when using FileZilla, you must use the root account, as other accounts do not have permissions to transfer files to the windows 3.2、Achieve remote monitor in the browser
(1) Display control information in the browser Type 192.168.0.128:8080 in the browser, you could see the page as below.

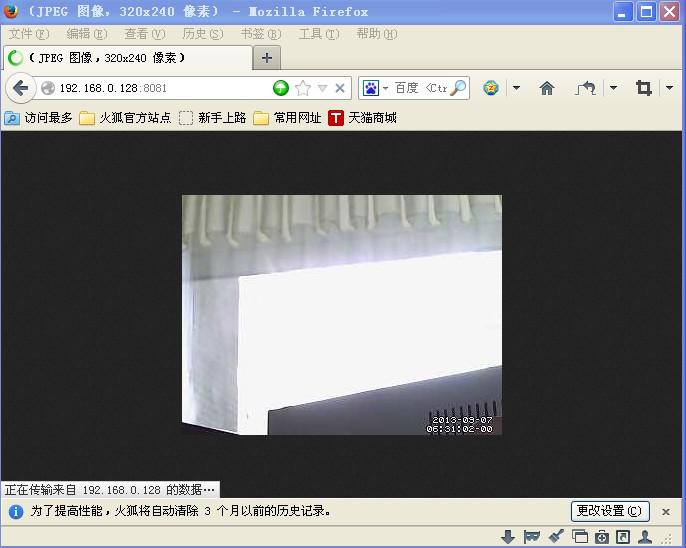
(2) Display monitor information in the browser Type 192.168.0.128:8081 in the Firefox browser, you could see the screen as below. 
Note: The above IP is the address when use raspberry pi to do testing, and users must replace it into the IP address corresponding to their raspberry pi when in use. Here we recommend the Firefox browser, as the monitor screen can not display if our engineers use other browsers.
About the Author


How to Send Micro:bit Data to ThingSpeak IoT Platform
January 11, 2018

VC0706 Camera Module DIY Guide
December 18, 2014

nRF24L01 Module Demo for Arduino
May 6, 2011


Children’s Programming Education is the Future Trend
March 20, 2024
ELECFREAKS AI Smart Lens Now Compatible with Gigo Building Blocks!
February 21, 2024


Comments