


Micro:bit Experiment 07:Temperature Sensor —???Elecfreaks Mirco: bit Starter Kit Course

Introduction:
Temperature sensor is a kind of sensor that can feel temperature and transfer it into output data. Temperature sensor is the core component of temperature gauges and instruments. It has multiple categories. In this experiment, we are going to learn analog temperature sensor--TMP36 and display its data on the screen of Micro:bit.
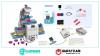
Components List
Hardware:
1 x Micro:bit Board
1 x Micro-B USB Cable
1 x Microbit Breadboard Adapter
1 x Transparent Breadboard - 83 * 55 mm
1 x TMP36 Temperature Sensor
1 x Breadborad jumper wire 65pcs pack
Tips: If you want all components above, you may need Elecfreaks Micro:bit Starter Kit.
Software:
Microsoft Makecode Online Editor
Major Components Introduction TMP36
TMP36 is a kind of analog temperature sensor. Its output voltage and temperature forms a linear relationship. That means higher temperature will have bigger output voltage.
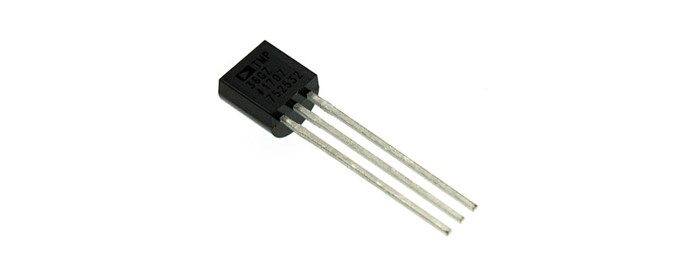
Note: When we look at the front side marked "TMP36", the left footer of the core is VCC, middle is Vout, and the right footer is GND. You can't connect it wrong or the components connected might be damaged.

Here's the curve chart for output voltage of TMP36 changing with temperature:
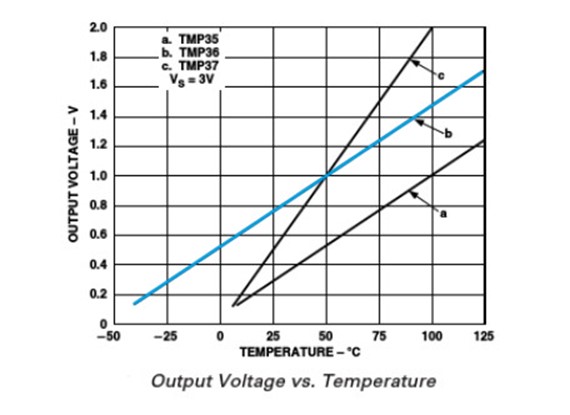
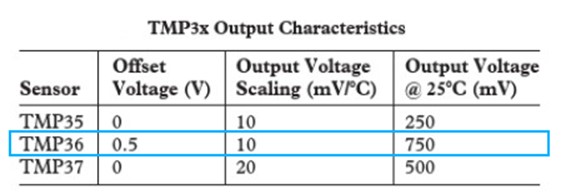
We can know from the above chart that the temperature formula is:
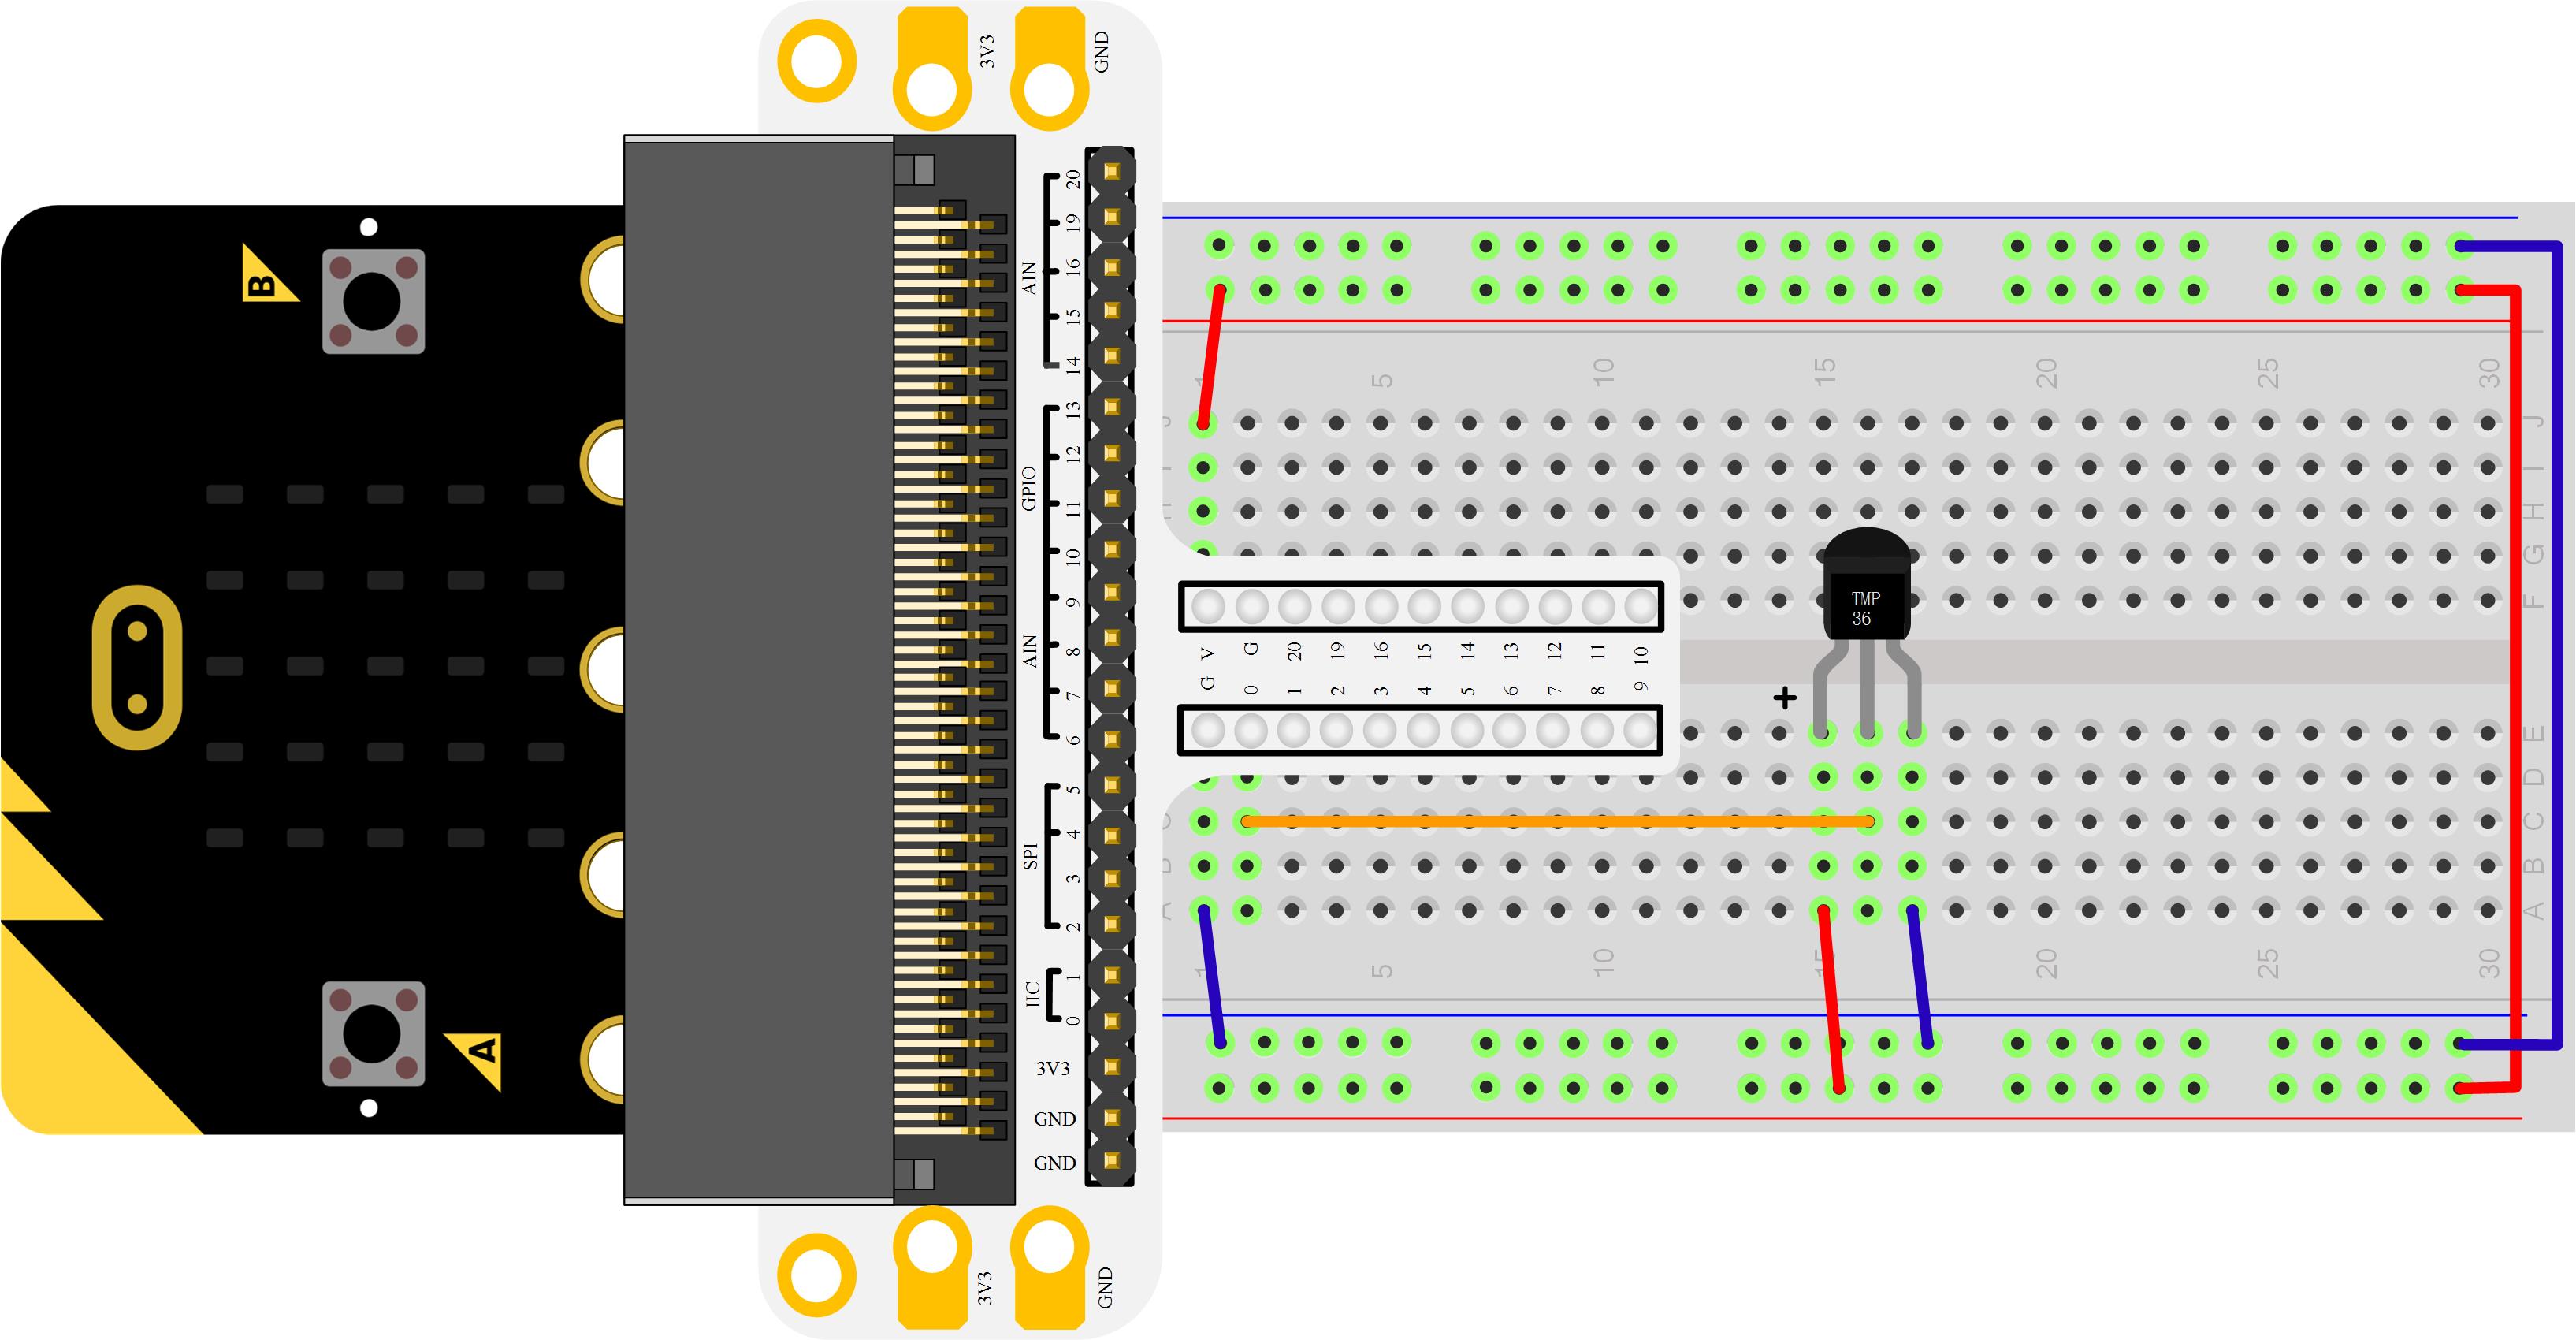
Hardware Connection
Please complete hardware connection according to the picture below.
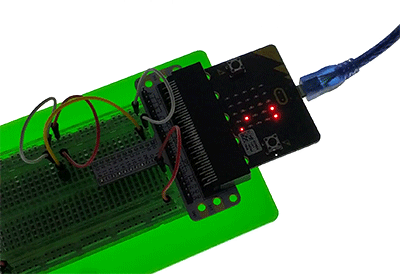
 After connection, you will see:
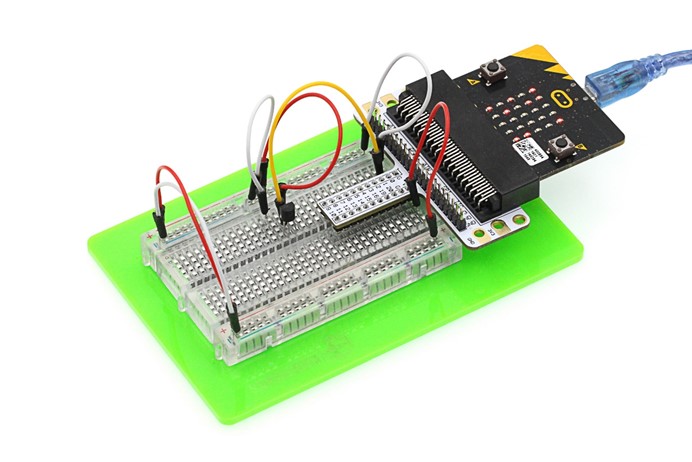
Programming
Open Microsoft Makecode, write your code in the edit area. I would like to suggest that you program by yourself first. Of course, you can see the whole program in the link below directly. Just click "Edit" on the top right corner of the interface, then click "Download" on the bottom right corner to download code into Micro:bit directly.
Code Explanation
map Remaps the specified value from one range to another. This function maps the value of from low to the value of to low, the value of from high to the value of to high, and intermediate values to intermediate values. This function does not constrain values to the ranges, because out-of-range values are sometimes intended and useful. If you need to limit a range, you can use the Math.clamp function before or after calling this function.
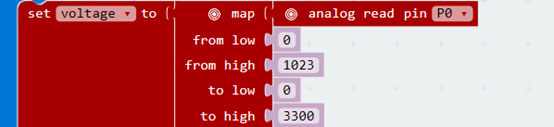
In our program, we have to use brick "Map" to transfer the read-out analog data into voltage(mV). If "analog read" value is 0 to 1023, so "from low"is 0, "from high" is 1023. The basic voltage of Micro:bit is 3.3V, i.e. 3300Mv. So "to low" is 0, "to high" is 3300.

Then according to the formula above to calculate temperature value.
Experiment Result
Micro:bit screen displays the present temperature value.
Question
In this experiment, Micro:bit displays the centigrade temperature. If we want to display the Fahrenheit temperature, then how to design circuit and program? We look forward to your comments or further discussion with us.
Relative Readings:
Start Your Micro:bit Programming Trip Micro:bit Experiment 01: LED Scroller —— Elecfreaks Micro:bit Starter Kit Course Micro:bit Experiment 02: Button —— Elecfreaks Mirco:bit Starter Kit Course Micro:bit Experiment 03: Trimpot —— Elecfreaks Mirco:bit Starter Kit Course Micro:bit Experiment 04: Photocell —— Elecfreaks Mirco:bit Starter Kit Course Micro:bit Experiment 05: RGB LED —— Elecfreaks Mirco:bit Starter Kit Course Micro:bit Experiment 06: Self-lock Switch —— Elecfreaks Mirco:bit Starter Kit Course
About the Author


How to Send Micro:bit Data to ThingSpeak IoT Platform
January 11, 2018

VC0706 Camera Module DIY Guide
December 18, 2014

nRF24L01 Module Demo for Arduino
May 6, 2011


Children’s Programming Education is the Future Trend
March 20, 2024

ELECFREAKS AI Smart Lens Now Compatible with Gigo Building Blocks!
February 21, 2024


Comments