


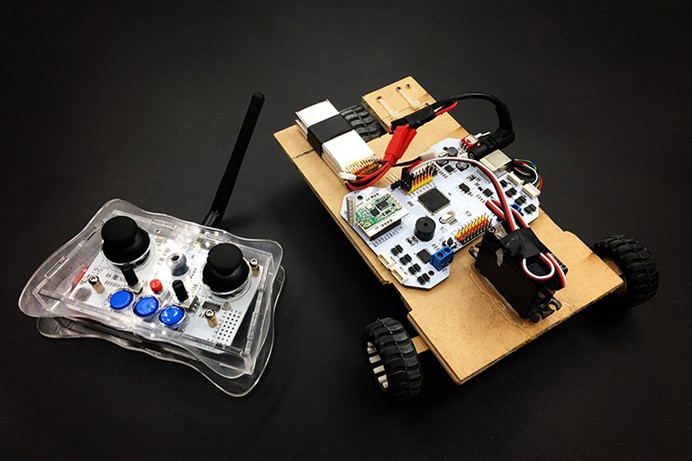
FreaksBot Bluetooth Car

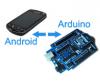
Today I am going to teach you how to use FreaksBot to make a car with remote control. The car adopts reverse tricycle design with the back wheel as a driving wheel and the front wheels to do gear control. With HC-11 433m communication module, it is easy to handle and can control at a long distance.
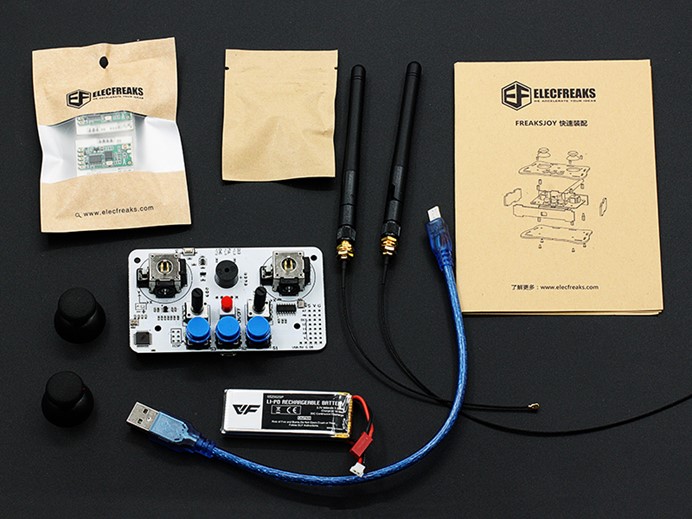
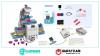
Tools&Material:
1 pcs Hot Melt Glue Gun
1 pcs Electric Drill
1 pcs 3mmDrill Head
1 pcs 13mmDrill Bits
1 pcs Fret Saw
2 pcs Ribbon(3x100mm)
1 pcs 370 Gear Motor
1 pcs FreaksBot
1 pcs FUTABA S3003
1 pcs Freaks Remote Acrylic With RF
3 pcs 42mm Wheel
1 pcs Wood Board (100*200mm)
1 pcs Batten (10*150mm)
2 pcs Wood Brick (10*10*5mm)
2 pcs 3mm*12mm Screw
1 pcs 401Glue
1 pcs Adhesive Tape
1 pcs Battery7.4V
Note:
- Other material can replace wood board if you don't have it.
-
The size of hand-made artwork is not fixed and has tolerance.
Procedure of Making:
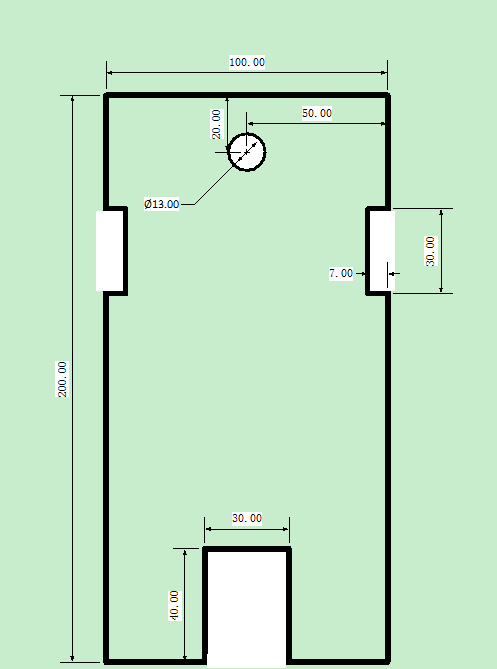
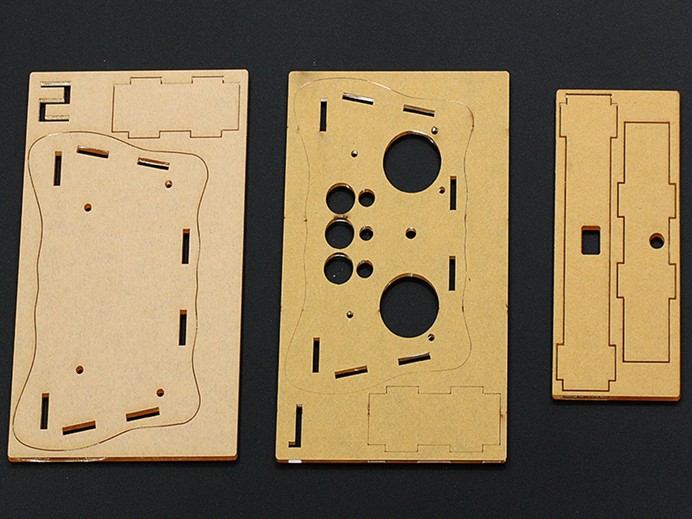
Step 1: Cut Wood Board Use fret saw to cut wood board according to the drawing below.
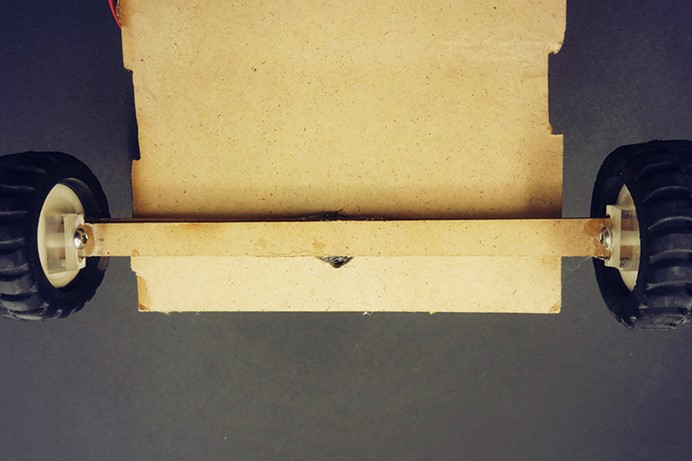
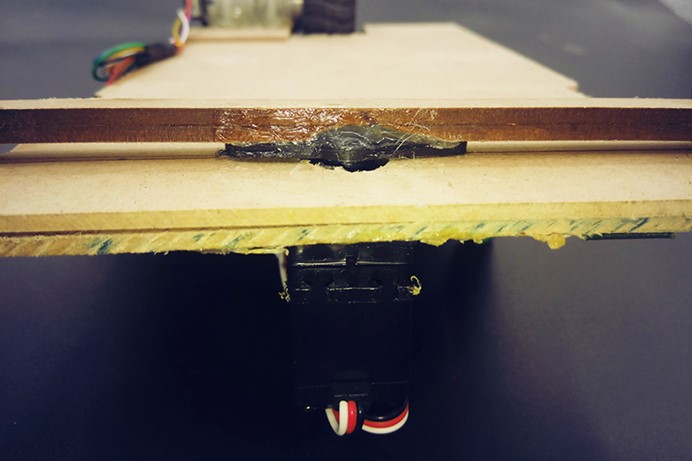
Step 2: Install Back Wheel (Driving Wheel) Front
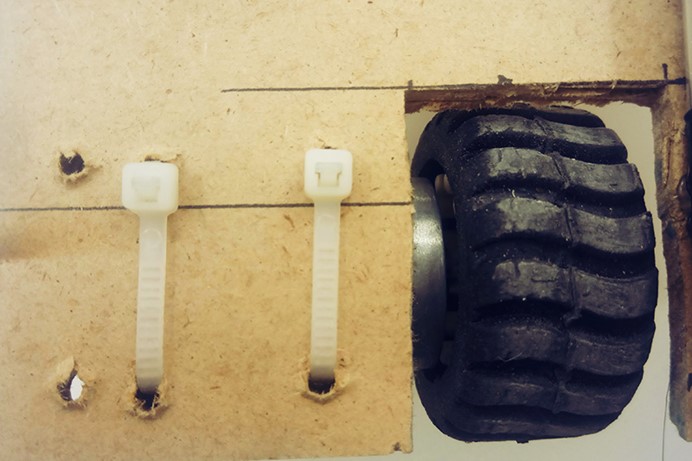
(Front)

(Back)
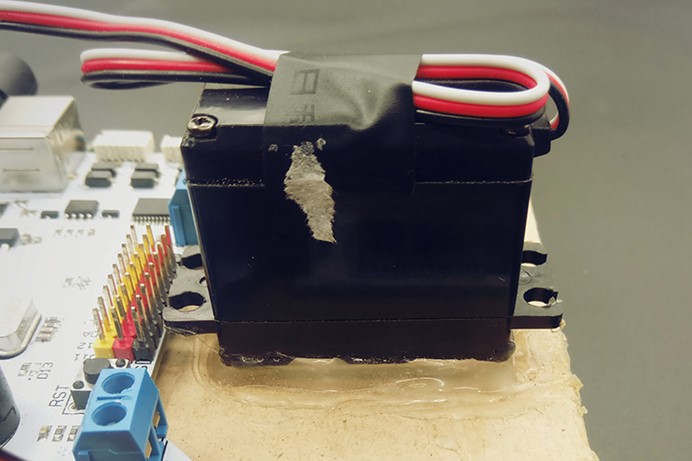
Step 3: Install Steering Engine It is used for front wheel gear and relative to 13mm hole in the picture below. Operating Voltage: 4.8V~6.0V Operating speed: 0.23sec/60 degree Output torque: 3.2kg/cm 4.8V We use hot melt glue gun to fix the whole shaft of front wheel onto the steering engine to realize the turning function.
Step 4: Install Front Wheel You can install front wheels according to the picture below. And the acrylic board is the picture is 10*10*5 wood brick in the material list.
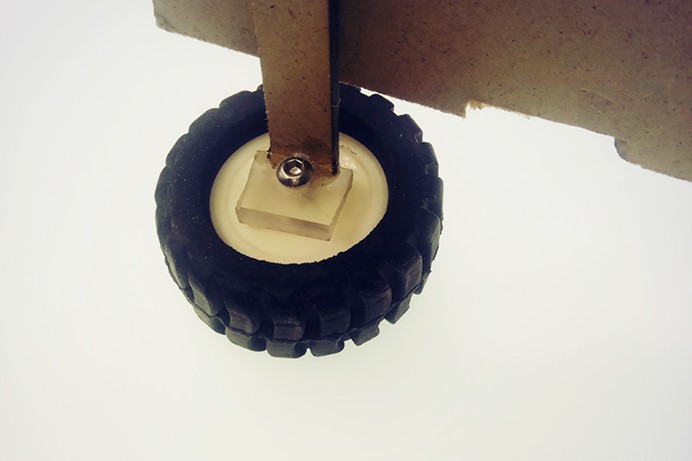
Fix front wheels on the turntable of the steering engine.
Step 5: Hardware Connection Motor connect M1. Steering engine connect D10.
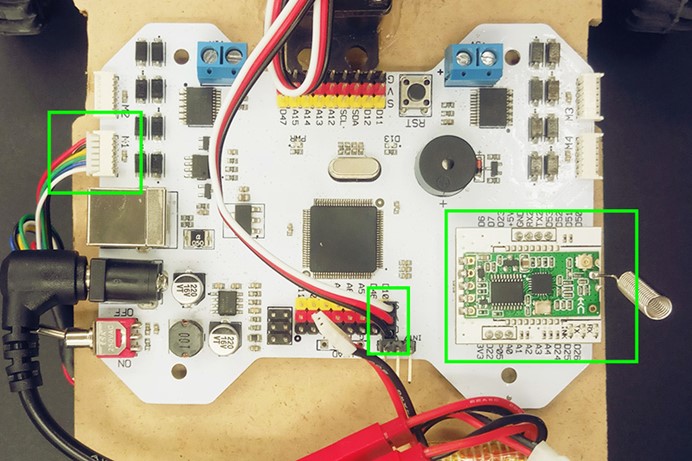
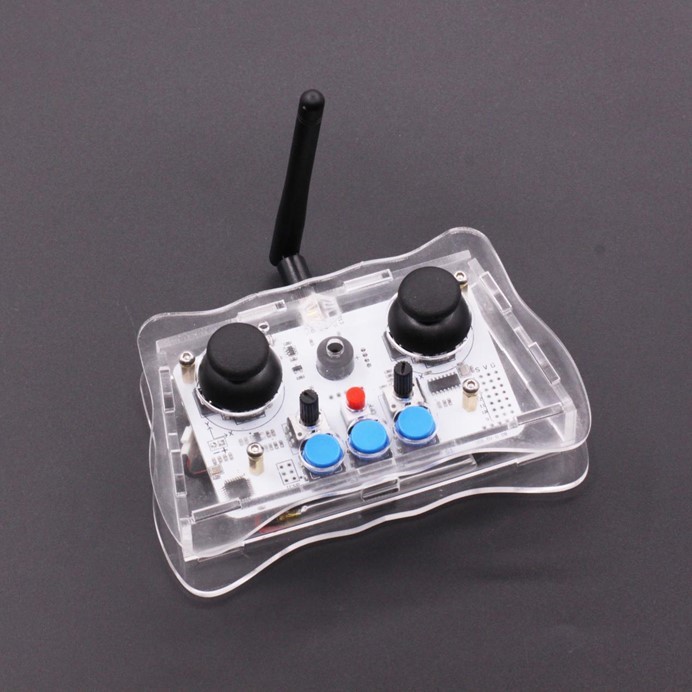
Step 6: Install Remote Controller Freaks Remote Acrylic With RF is a wireless remote controller, which is compatible with HC11 433MHZ RF module.You have to add an adaptor for HC11 433MHZ RF .The communication distance of remote controller depends on RF module configured. Our HC11 433MHZ RF adaptor module can reach 40 meters max. It can be applied to toy cars, toy planes and game machines, etc.. So this remote controller is suitable for the car we make today. You can find the assembly drawing in the link below: https://www.elecfreaks.com/9333.html
Step 7: Programming Our requirement: left joystick controls front or back movement, right joystick controls direction turning. We can revise the code in the program to meet our requirements. And the following is the code i made for the car.
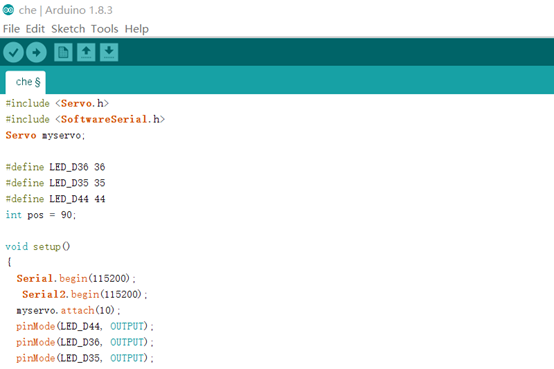
[cce_cpp theme="blackboard"]
#include <Servo.h>
#include <SoftwareSerial.h>
Servo myservo;//Build an object for steering engine
// It can control 8 steering engines at max with Servo.
#define LED_D36 36
#define LED_D35 35
#define LED_D44 44
int pos = 90;

void setup()
{
  Serial.begin(115200);
  Serial2.begin(115200);
  myservo.attach(10);  // The steering engine is controlled by pin 10.
  pinMode(LED_D44, OUTPUT);
  pinMode(LED_D36, OUTPUT);
  pinMode(LED_D35, OUTPUT);
}

void loop()
{
  char lan;
  if(Serial2.available())
  {
    lan=Serial2.read();
    Serial.println(lan);
  }

  if(lan==4)
  {
    digitalWrite(LED_D36, HIGH);
    digitalWrite(LED_D35, LOW);
    digitalWrite(LED_D44, HIGH);
    Serial.println("hou");
  }
  if(lan==3)
  {
    digitalWrite(LED_D36, LOW);
    digitalWrite(LED_D35, LOW);
    digitalWrite(LED_D44, HIGH);
    Serial.println("ting");
  }
  if(lan==5)
  {
    digitalWrite(LED_D36, LOW);
    digitalWrite(LED_D35, HIGH);
    digitalWrite(LED_D44, HIGH);
    Serial.println("qian");
  }
  if(lan==9)
  {
    pos = 90;                     // Move directly
    myservo.write(pos);        //Set steering engine rotate angle.
    delay(1);                       // Wait 1ms for steering engine arrives the designated area.
    Serial.println("zhi");
  }

  if(lan==8)
  {
    pos = 70;                   //Turn left
    myservo.write(pos);        // Set steering engine rotate angle.
    delay(1);                       // Wait 1ms for steering engine arrives the designated area.
    Serial.println("zuo");
  }

  if(lan==7)
  {
    pos = 110;                   //Turn right
    myservo.write(pos);        // Set steering engine rotate angle.
    delay(1);                       //  Wait 1ms for steering engine arrives the designated area.
    Serial.println("you");
  }
}


[/cce_cpp]
The code below is the program for the remote controller.
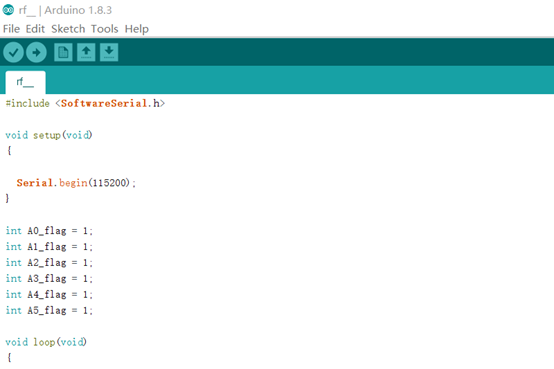
[cce_cpp theme="blackboard"]
#include <SoftwareSerial.h>

void setup(void)
{

  Serial.begin(115200);
}

int A0_flag = 1;
int A1_flag = 1;
int A2_flag = 1;
int A3_flag = 1;
int A4_flag = 1;
int A5_flag = 1;

void loop(void)
{
  unsigned char shu;
  uint16_t A0_value = analogRead(A0);
  uint16_t A1_value = analogRead(A1);
  uint16_t A2_value = analogRead(A2);
  uint16_t A3_value = analogRead(A3);
  uint16_t A4_value = analogRead(A4);
  uint16_t A5_value = analogRead(A5);

  if(A0_value<200)
    shu=1;
  if(A0_value>824)
    shu=2;
  if(A0_value>200 && A0_value<824)
    shu=3;
  Serial.write(shu);
  delay(10);

  if(A1_value<200)
    shu=4;
  if(A1_value>824)
    shu=5;
  if(A1_value>200 && A1_value<824)
    shu=6;
  Serial.write(shu);
  delay(10);

  if(A2_value<200)
    shu=7;
  if(A2_value>824)
    shu=8;
  if(A2_value>200 && A2_value<824)
    shu=9;
  Serial.write(shu);
  delay(10);

  if(A3_value<200)
    shu=10;
  if(A3_value>824)
    shu=11;
  if(A3_value>200 && A3_value<824)
    shu=12;
  Serial.write(shu);
}
[/cce_cpp]
By reading the joystick value to make judgement, serial port will send out the relative signal. Step 8: Download program After we finished our programming, we have to download the 2 programs into the car and remote controller separately.
Completed
The remote controller and the car looks a wonderful match. After you download the program, you can try it and see what will happen. It moves very fast and flexible, right? You can show your artwork to your friends and family members, i guess they must be very proud of you. Or you can wrap it with a beautiful gift box to send to someone like your closest friends or your brothers during Christmas or other festivals. It is really a good gift. Don't you think so?
About the Author


How to Send Micro:bit Data to ThingSpeak IoT Platform
January 11, 2018

VC0706 Camera Module DIY Guide
December 18, 2014

nRF24L01 Module Demo for Arduino
May 6, 2011


Children’s Programming Education is the Future Trend
March 20, 2024

ELECFREAKS AI Smart Lens Now Compatible with Gigo Building Blocks!
February 21, 2024


Comments