


Micro:bit Experiment 02: Button —Elecfreaks Mirco: bit Starter Kit Course


Introduction:
In our previous Experiment 1 , we have learned how to use Micro:bit to control 2 LED beads and make them twinkle alternatively. This time we are going to use a button to control LED flash. That means when we press down the button, 2 LED beads flash in turns; release the button, LED beads stop flashing.
Components:
Hardware:
1 x Micro:bit Board
1 x Micro-B USB Cable
1 x Microbit Breadboard Adapter
1 x Transparent Breadboard - 83 * 55 mm
2 x LED
2 x 100 Ohm Resistors
1 x Momentary Pushbutton Switch
1 x Breadborad jumper wire 65pcs pack
Tips: If you want to buy all components above, you may need Elecfreaks Micro:bit Starter Kit.
Software:
Microsoft Makecode Online Editor
Major Components Introduction
Momentary Pushbutton Switch
This is a common component for controlling electronic devices. It is mostly used to connect or cut off control circuit so that it can achieve motor or other electronic equipment control. Momentary Pushbutton Switch usually stays open. When it is pressed down, circuit connected; when it is released, it will bounce back to the status of disconnection. 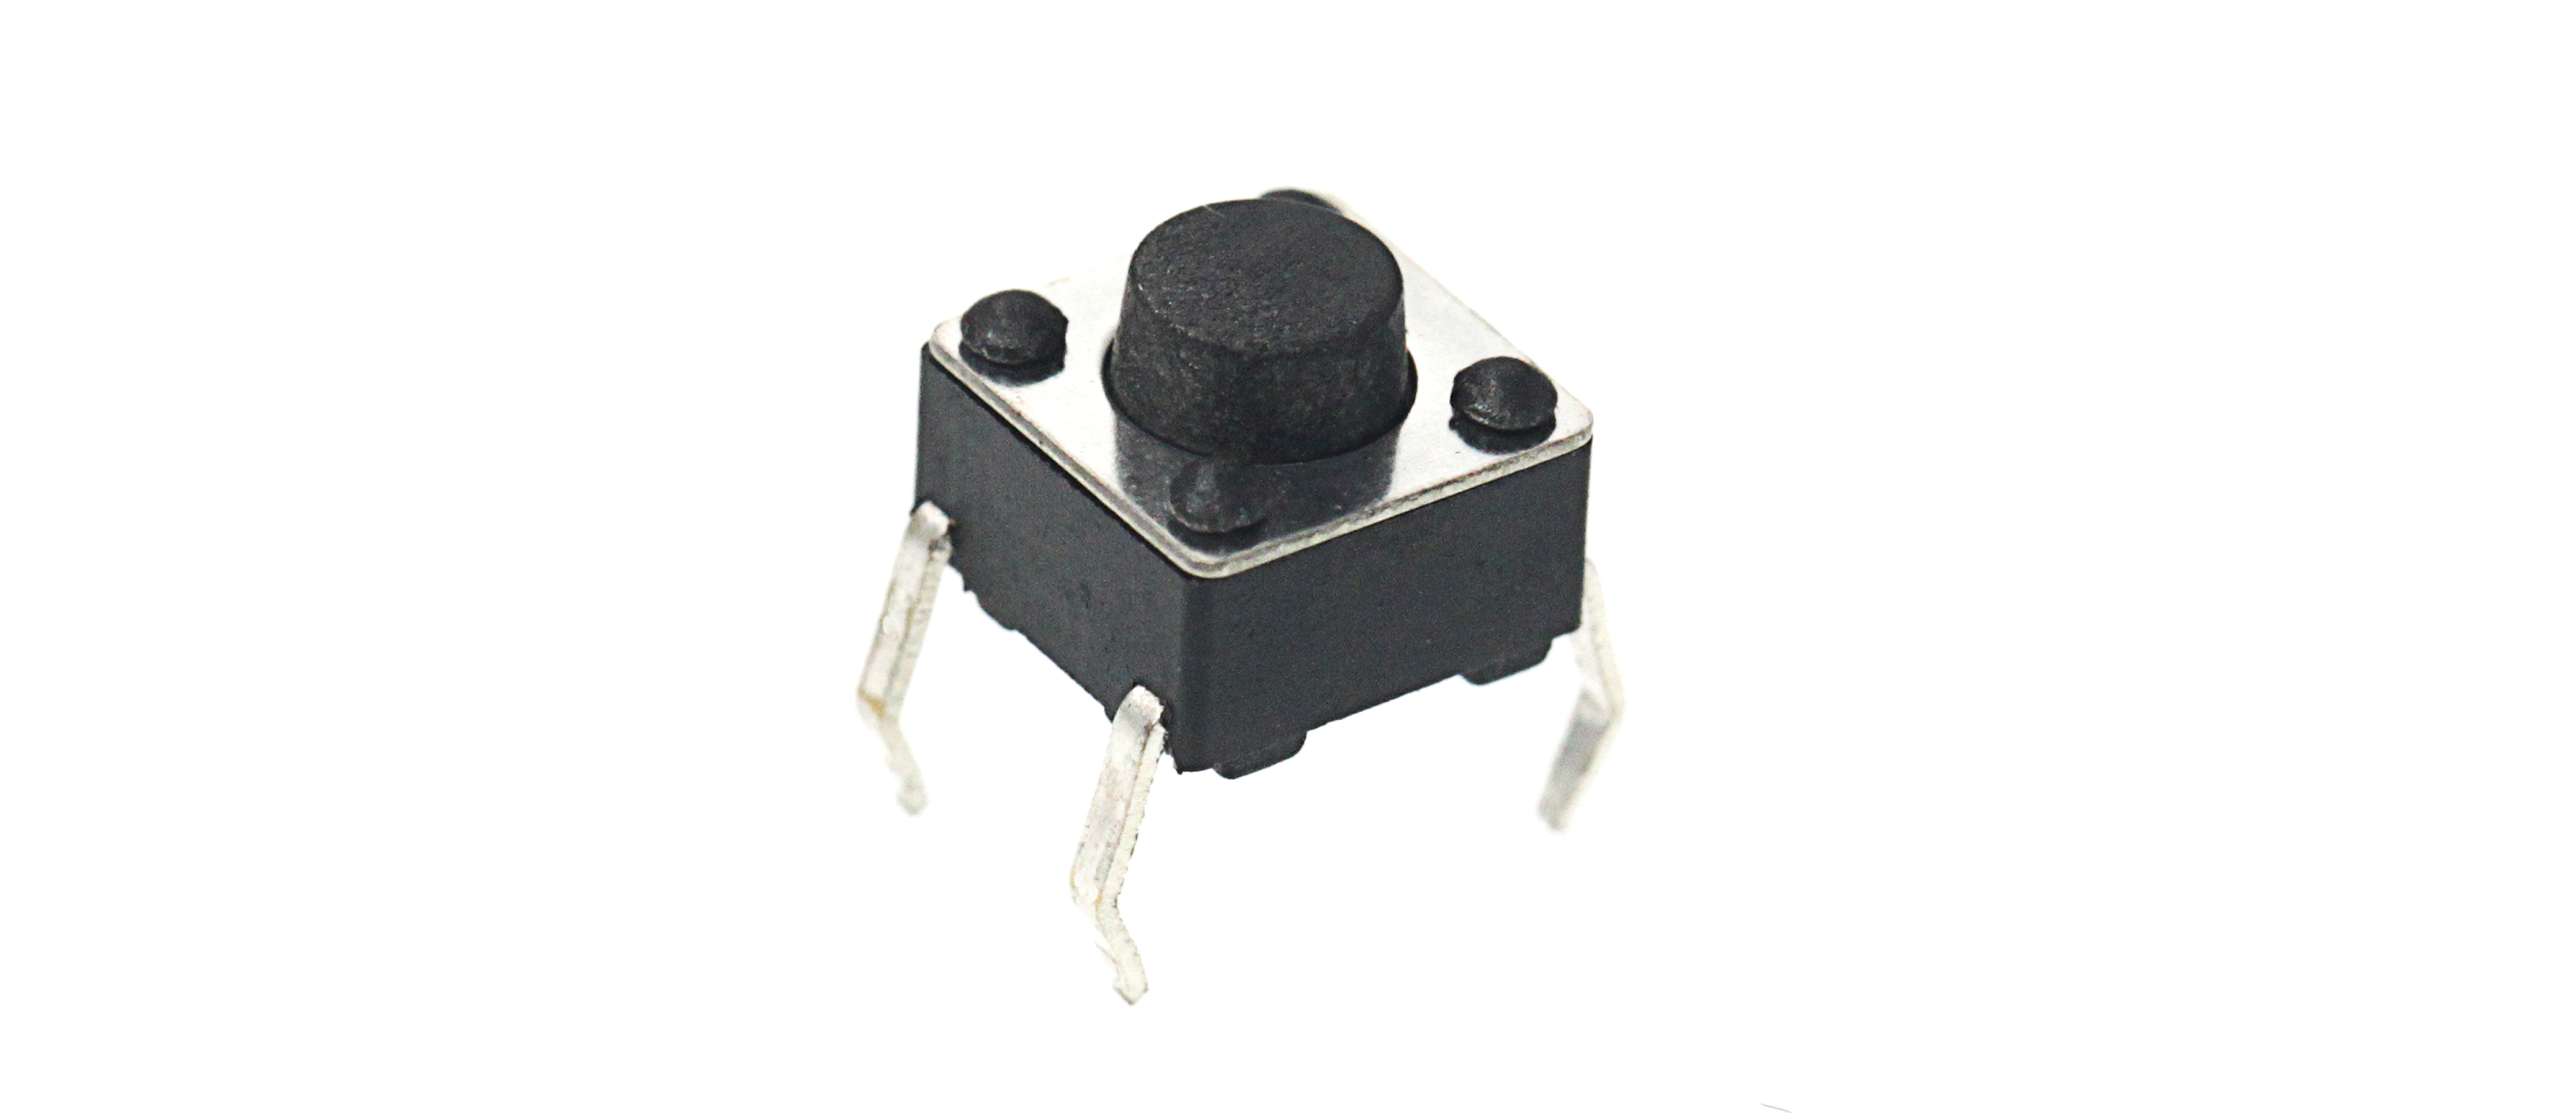 Momentary Pushbutton Switch has 4 footers which can be divided into 2 groups: footer 1 short connected with footer 2, footer 3 short connected with footer 4.
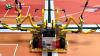
Hardware Connection
Connect your components according to the picture below: 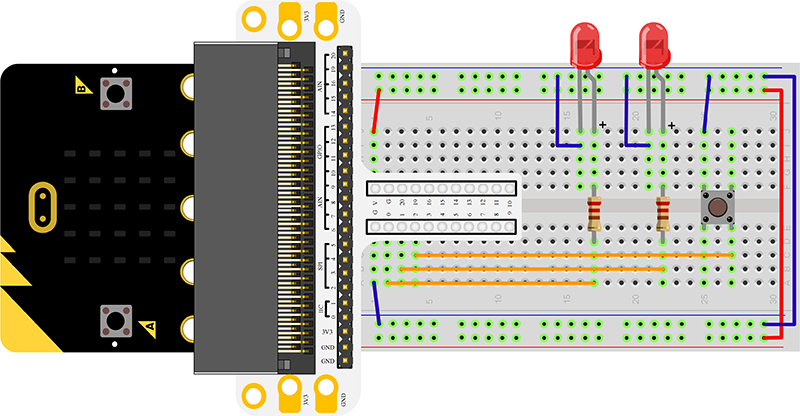 After connection, you will see:
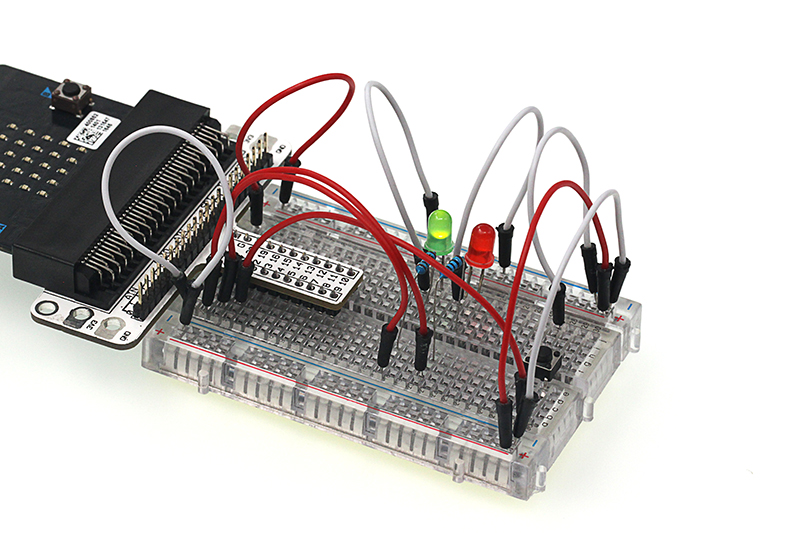
Programming
Click to openMicrosoft Makecode, write your code in the edit area. We would like to suggest you to write code by yourself first. Of course, you can see the whole program in the link below. Just click the Edit on the right top corner , and then click Download on the right bottom corner to download code into Micro:bit.
Code Explain:
on start An event that runs when the program starts. The on start is a special event that runs when the program starts, before any other event. Use this event to initialize your program. set pull Configure the electrical pull of the specified pin. Many micro:bit pins can be configured as pull-ups. For example, a pull-up can set a pin’s voltage to high (3.3 volts, or 1 when calling digital read pin). If one end of a button is connected to P0 (set to high) and the other end is connected to GND (0 volts), then when you press the button, P0 is driven to 0 volts, and the micro:bit software can detect a button press. if If starts a condition judgement sentence. When the expression behind if is true (or 1), then operate program in than. When the expression behind if is false (or 0), it will jump out of the program circulation. Here is If sentence structure:  digital readDigital read to read the voltage of pin. When read out high voltage, it shows 1. When read out low voltage, it presents 0.
Experiment Result:
When you press down the button, you can see 2 LED beads twinkle by turns; release the button, they stop flashing. 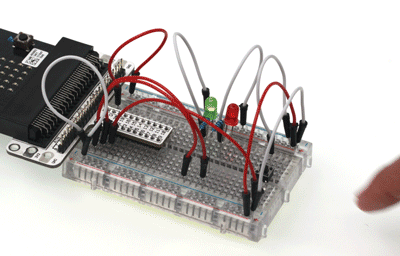
Think
If we want to light red LED when press down the button and light green LED when release the button, then how to program? We would like to see your comments or further discussions with us.
Relative Readings:
Start Your Micro:bit Programming Trip ELECFREAKS Micro:bit Starter Kit Experiment 01:LED ELECFREAKS Micro:bit Starter Kit Experiment 03:Trimpot ELECFREAKS Micro:bit Starter Kit Experiment 04:Photocell ELECFREAKS Micro:bit Starter Kit Experiment 05:RGB LED ELECFREAKS Micro:bit Starter Kit Experiment 06:Self-lock Switch ELECFREAKS Micro:bit Starter Kit Experiment 07:Temperature Sensor ELECFREAKS Micro:bit Starter Kit Experiment 08:Servo ELECFREAKS Micro:bit Starter Kit Experiment 09:Buzzer ELECFREAKS Micro:bit Starter Kit Experiment 10:Motor ELECFREAKS Micro:bit Starter Kit Experiment 11:Rainbow ELECFREAKS Micro:bit Starter Kit Experiment 12:Accelerometer ELECFREAKS Micro:bit Starter Kit Experiment 13:Compass ELECFREAKS Micro:bit Starter Kit Experiment 14:ambient light
About the Author


How to Send Micro:bit Data to ThingSpeak IoT Platform
January 11, 2018

VC0706 Camera Module DIY Guide
December 18, 2014

nRF24L01 Module Demo for Arduino
May 6, 2011


Children’s Programming Education is the Future Trend
March 20, 2024
ELECFREAKS AI Smart Lens Now Compatible with Gigo Building Blocks!
February 21, 2024


Comments