


BBC MICROBIT BOT USING THE L9110 MOTOR CONTROLLER

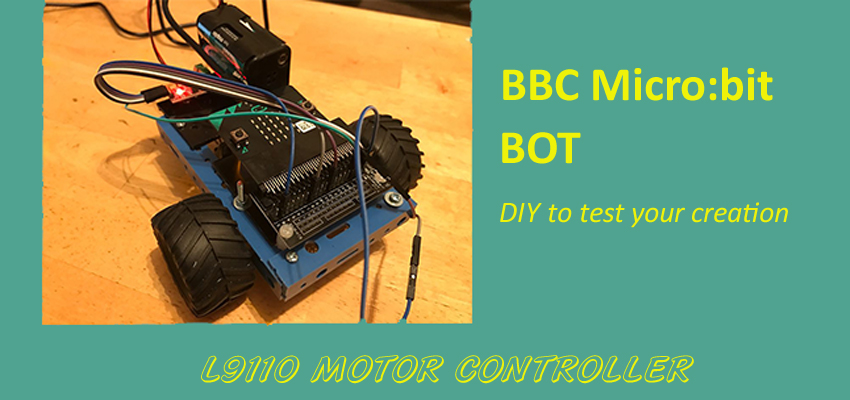
I wanted to connect the BBC Microbit to a standard motor driver board like the L9110 or the L298N. The Micro Bit (also referred to as BBC Micro Bit, stylized as micro:bit) is an ARM-based embedded system designed by the BBC for use in computer education in the UK. This little device is a very compact microprocessor with Bluetooth and an accelerometer built in, and a 5 x 5 led matrix for simple messaging. more info on tis micro controller can be found at microbit.org. There are a number of motor boards available for the microbit, but I had a number of others lying around which are cheap and it gave me a chance to see how to use the extra connections available on the microbit. I wanted to make a bot that I could add extra sensors and using the L9110 would drive 2 motors so my bot could drive around. This instructable is only going to detail using the L9110 and adding the motors a simple chassis. The same process could be used to add an L298N instead.
Step 1: Required Hardware
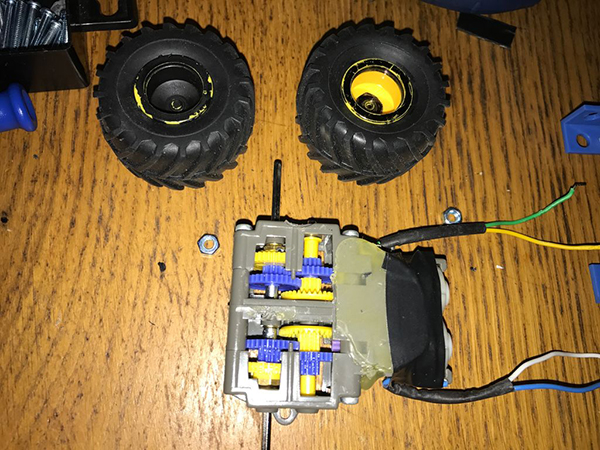
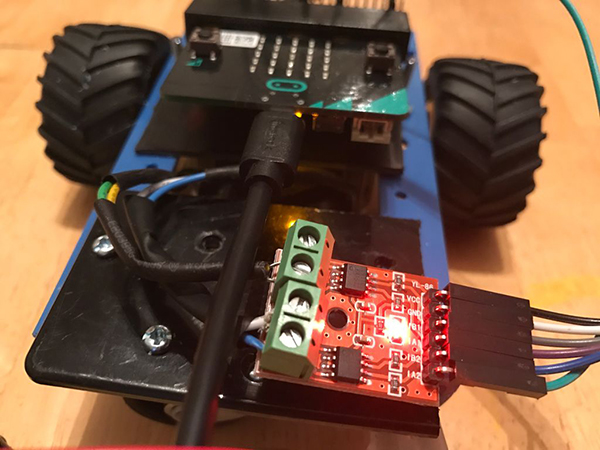
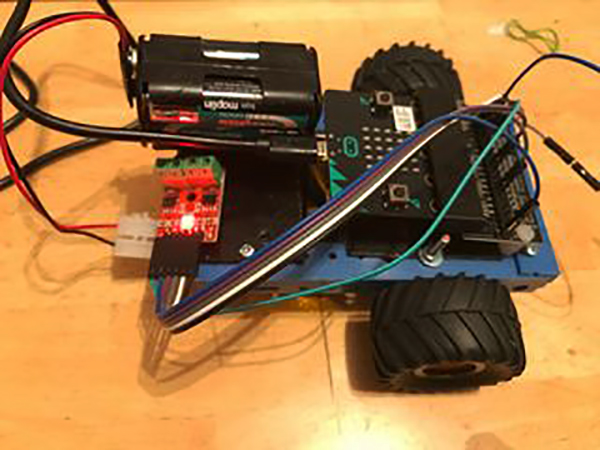
BBC Microbit Microbit edge connector 2 x motors and wheels of your choice, I used Tamiya motors with gearboxes. 4 x AA battery box for the motors, rechargable batteries or a power supply of your choice Some plastic strips or other to make a chassis out of. I used a couple of these L9110 Motor driver board female to female leads to connect microbit edge connector to L9110 1 x caster wheel from DIY shop / store Some plastic sheet, I used some A4 sheet plastic sheets 1.5mm thick, which you can score with a knife and snap, or can cut with scissors. This is great for panels on your chassis to to build sides later on and enclose all the elecronics. Wheels for your bot
Step 2: Build Chassis
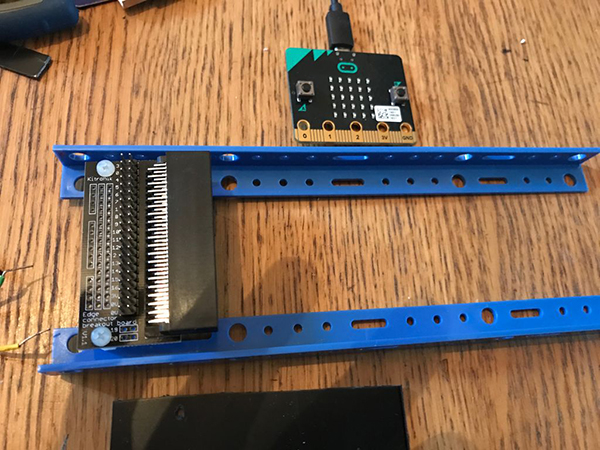
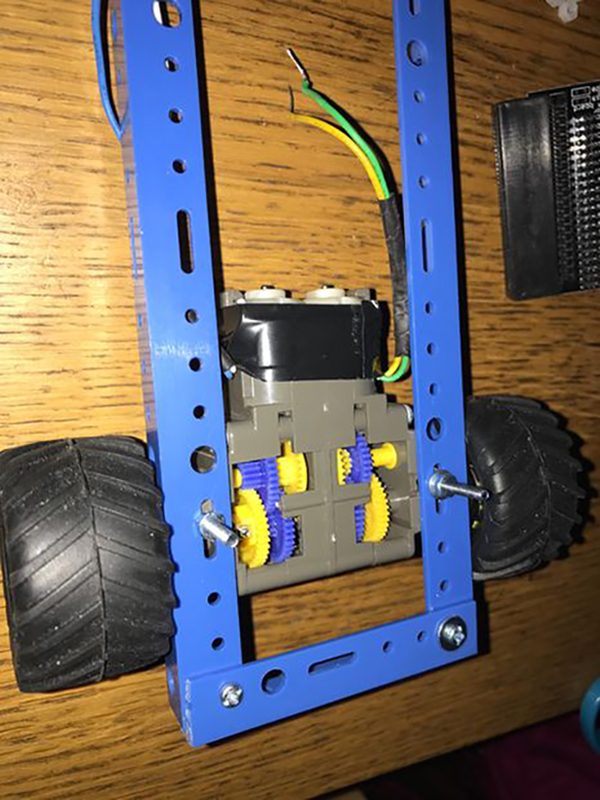
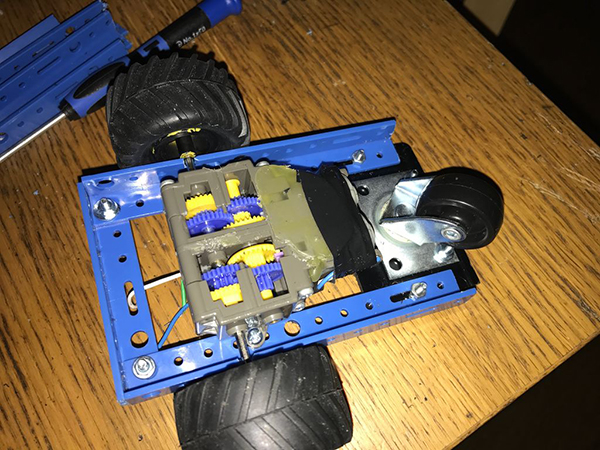
Cut 2 of the plastic strips so you can attach the microbit edge connector I found this was a same width required to fit the Tamiya motor and gearboxes. Fit the motors which are about the same width as the Tamiya motors and have a single mounting hole. Fit caster wheel This will then give you a basic chassis for your bot, that you can use with the microbit.
Step 3: Connecting Things Up
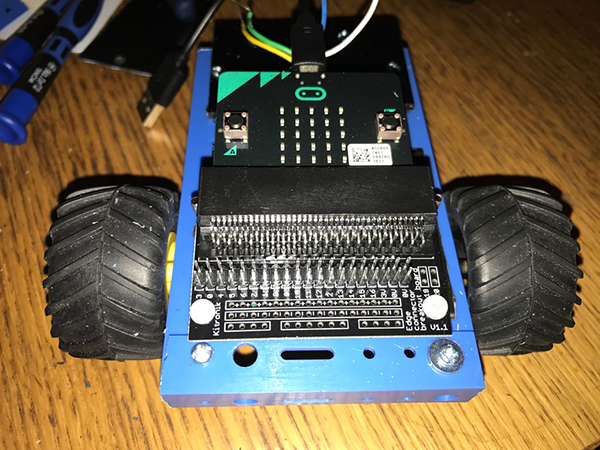
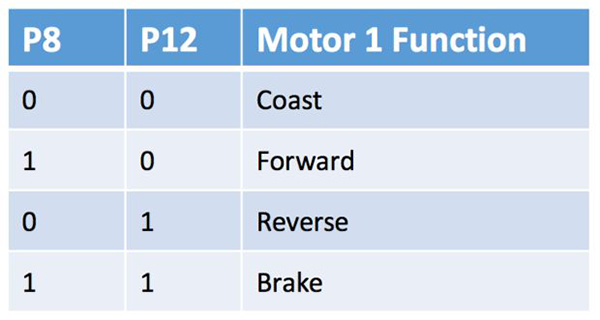
At this stage you can slot in the microbit to the edge connector, it can go either way up as the edge connector works both ways. Full details of the pin outs of the bbc microbit can be found here. I didnt know which were the best pins to use then I looked at a link to a manual on a ready made driver board from Kitronik designed for the microbit which I found here. This showed me which pins this ready made board used, and also gave a code sample I could adapt for use. Motor 1 uses Pin 8 and Pin 12 on the microbit Motor 2 uses Pin 0 and Pin 16 on the microbit For an explanation how to use the L9110 controller you can read more detail here but below is how I connected it up. detailed L9110 description Connections L9110 ---> Microbit A-IAMotor A Input A (IA) ---> Pin 8 A-IBMotor A Input B (IB) ---> Pin 12 B-IAMotor B Input A (IA) ---> Pin 0 B-IBMotor B Input B (IB) ---> Pin 16 VCC ---> AA Battery Pack + GND Ground ---> AA Battery Pack - You also need to connect the GND from the L9110 to the GND on the Microbit edge connector.
Step 4: Testing With Code
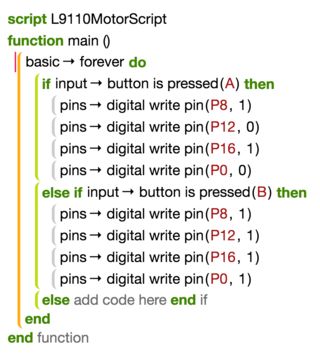
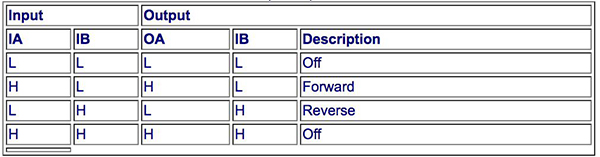
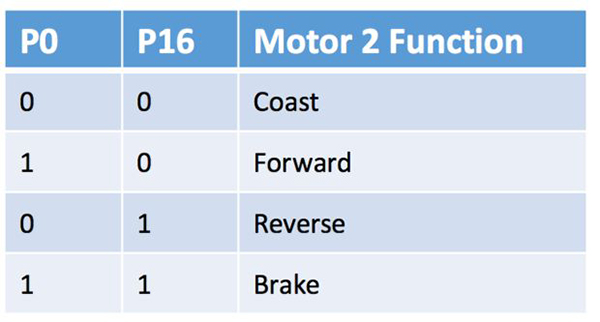
To prove the connections worked I modified the example shown for the Kitronik motor controller document. The microbit has a number of language options which means you can try this a number of different ways. This example uses the Microsoft touch development environment which can be found and used online here https://www.microbit.co.uk/. The code example attached just drives the motors forwarded when you press button A, and stops when you press button B. Use the truth table image to work out the combinations required to make the motors do what you want, and then edit your code. For my testing I used a separate power supply for my microbit, if you purchase a ready made motor driver board for the microbit, they can power the microbit and motors from the battery power pack or your preferred power source. I have purchased a couple of these ready made boards so I write future updates using the microbit. This article is written by otterbot and forwarded from Instructable.
About the Author


How to Send Micro:bit Data to ThingSpeak IoT Platform
January 11, 2018

VC0706 Camera Module DIY Guide
December 18, 2014

nRF24L01 Module Demo for Arduino
May 6, 2011


Children’s Programming Education is the Future Trend
March 20, 2024
ELECFREAKS AI Smart Lens Now Compatible with Gigo Building Blocks!
February 21, 2024


Comments