Micro:bit Experiment 13: Compass —???Elecfreaks Mirco: bit Starter Kit Course
January 8, 2019
Micro:bit Experiment 12: Accelerometer —???Elecfreaks Mirco: bit Starter Kit Course
January 8, 2019Introduction:
In our latest blog Light the First Bead on 8*8 Rainbow Matrix with Arduino, we have learned how to light the first LED bead on Flexible Rainbow 64 RGB 8*8 LED Matrix. In this article, we are going to learn how to display a heart pattern on the LED matrix screen. The method I am going to show you is for displaying fixed patterns only.
Our goal:
To display a heart pattern on Flexible Rainbow 64 RGB 8*8 LED Matrix and make its color change for every second.
Components List: Hardware:
1 X Freaduino UNO Rev2.2 MB_EFUNO
1 X Flexible Rainbow 64 RGB 8*8 LED Matrix
3 X Jumper Cables
Software:
Arduino IDE
Hardware Connection
Connect Flexible Rainbow 64 RGB 8*8 LED Matrix to port D2
Programming
Step 1: Cleaning the screen
Every time to display the pattern, we must clean the screen for once because the LED matrix screen will remain the last data, which will lead to wrong display. To clean the screen means not illuminating every pixel on the screen. Therefore, We have to assign each pixel a value “0” .
Code Example:
[cce]
for (number = 0; number < 64; number++)

strip.setPixelColor(number, 0);

strip.show();//Send wrong data
[/cce]
Step 2: Produce color randomly
Array Colour[3] is separately corresponding to red, green and blue. Color value range: 0-255. 0 means minimum brightness, and 255 means maximum brightness.
Code Example:
[cce]
Colour[0] = random(MIN , MAX);

Colour[1] = random(MIN, MAX);

Colour[2] = random(MIN, MAX);

LEDColour = strip.Color(Colour[1], Colour[0], Colour[2]);
[/cce]
Step 3: Make a pattern model
To make a pattern model is to calculate which pixel on the screen has to be illuminated and then design an array to record the serial number of the pixel to be illuminated.
Note: Flexible Rainbow 64 RGB 8*8 LED Matrix presents “s” format connection.
Let’s take a look at the pixel position of the heart pattern in the following picture.
Code Example:
unsigned char heart[10]={12,13,17,20,26,29,33,36,44,45};
Within array, every pixel stands for the pixel to be illuminated. Illuminate the corresponding pixel point of each element in the array, then you will see a heart pattern.
[cce]
#include <Adafruit_NeoPixel.h>
#define PIN 2
#define MAX_LED 64
uint32_t  LEDColour;
unsigned char x = 0;
unsigned char Colour[3];
unsigned char heart[10] = {12, 13, 17, 20, 26, 29, 33, 36, 44, 45};
Adafruit_NeoPixel strip = Adafruit_NeoPixel( MAX_LED, PIN, NEO_RGB + NEO_KHZ800 );
void setup() {
  // put your setup code here, to run once:
  strip.begin();
  //
  strip.show();
}

void loop() {

  for (char number = 0; number < 64; number++)  //
    strip.setPixelColor(number,  0);
  strip.show();//

  Colour[0] = random(10 , 20); //
  Colour[1] = random(0, 20);
  Colour[2] = random(0, 20);
  LEDColour = strip.Color(Colour[1], Colour[0], Colour[2]);
  for (char number = 0; number < 10; number++)  //
    strip.setPixelColor(heart[number],  LEDColour);
  strip.show();//
  delay(1000);
}

[/cce]
Experiment Result
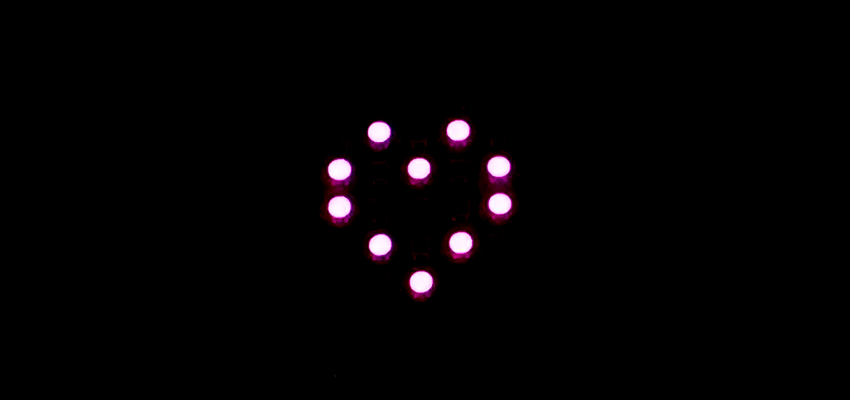
We can see a beautiful heart sign twinkling on the Flexible Rainbow 64 RGB 8*8 LED Matrix. Every second goes, the heart color will change for once. Very beautiful, right?


