


As typical input device, keyboards have special advantages when used for interactions. To give a case for example, passing push-key events to flash via keyboard spares the entire process of going through cumbersome interfaces. Although it’s easily for us to come up with the idea of disassembling the keyboard to lead out the keys. But this method has the disadvantage that the key value cannot be changed dynamically. But if only we use a simulation computer keyboard, we can set the push-key time and key value freely. This tutorial, shows how to press a key to trigger an input “HELLO WORLD” into your computer screen via the simulation computer keyboard.
1. Preparation
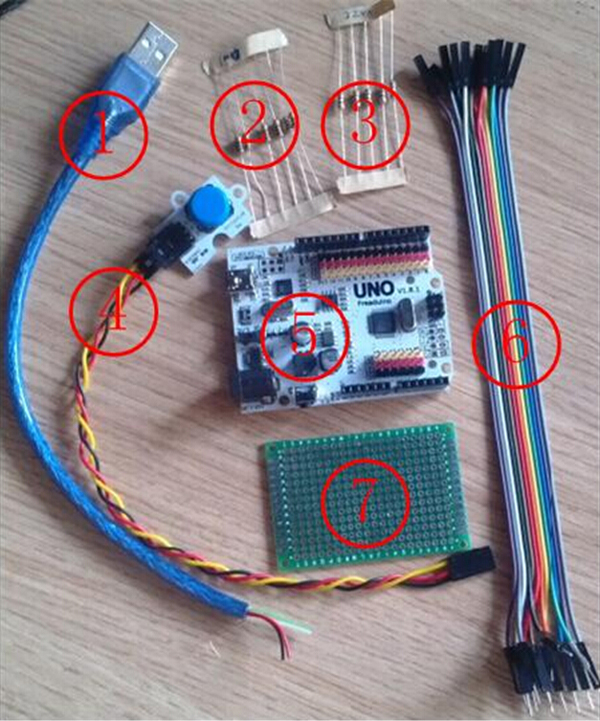
USB cable 100 ohm resistor 2.2k resistor Number keypad Freaduino UNO Dupont Line 2.2k universal board
2. Building Process
(1) Follow the below circuit diagram to solder the resistor, USB cable and Dupont line onto the universal board
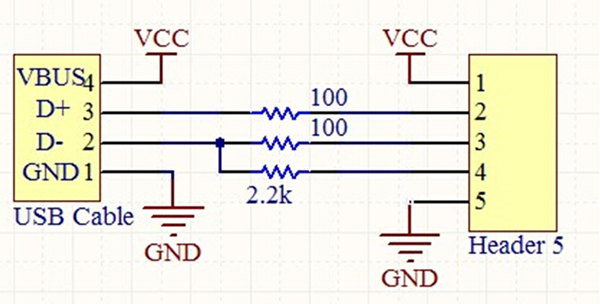
Note: please refer to the table to find out what each color stands for.
|
COLOR |
STAND FOR |
|
red |
VDD |
|
white |
D- |
|
green |
D+ |
|
black |
GND |
After welding, the circuit should be like this:

(2) Connect the Dupont line welded as the upper picture displays to UNO by referring to the table.
|
UNIVERSAL BOARD |
UNO |
|
VBUS |
5V |
|
UP |
D5 |
|
D- |
D4 |
|
D+ |
D2 |
|
GND |
GND |
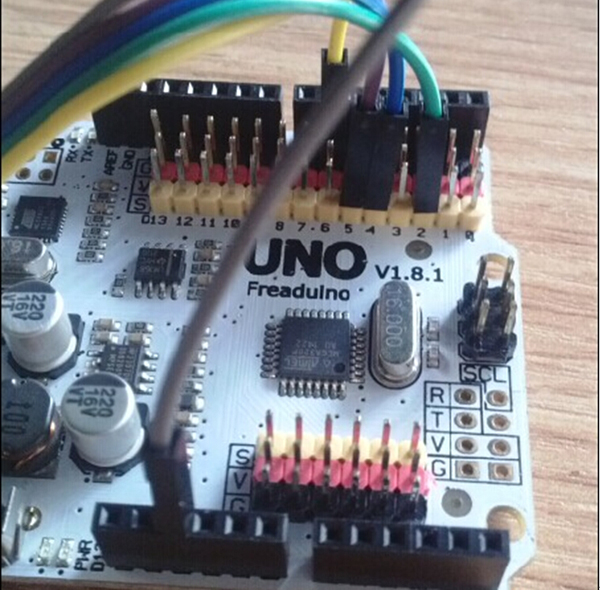
NOTE: the wiring method in the second step is not fixed. If readers need to use other pins, it can be achieved by modifying the wiring definition of the USB pin in usbconfig.h in UsbKeyboard library.
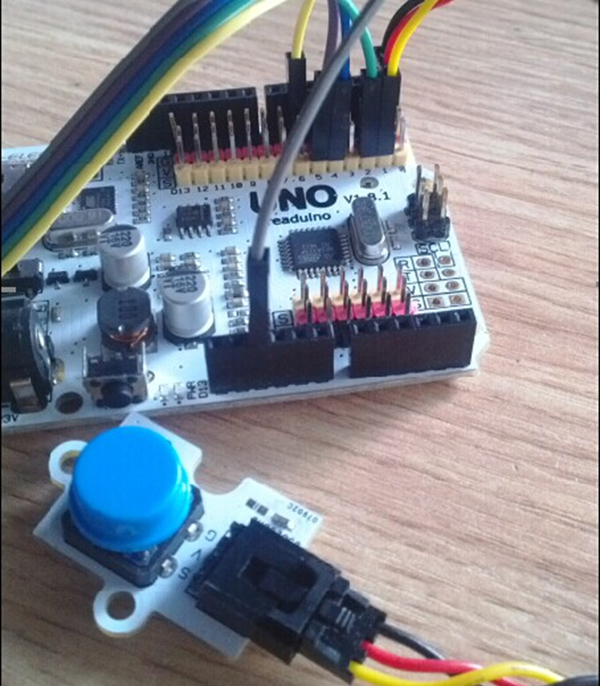
(3) connect the number key to D1 pin on UNO
(4) Download the USBKEY code to UNO. You need to note that for a successful compilation of USBKEY, it’s necessary to put UsbKeyboard files into the folder “Arduino IDE libraries” in advance.
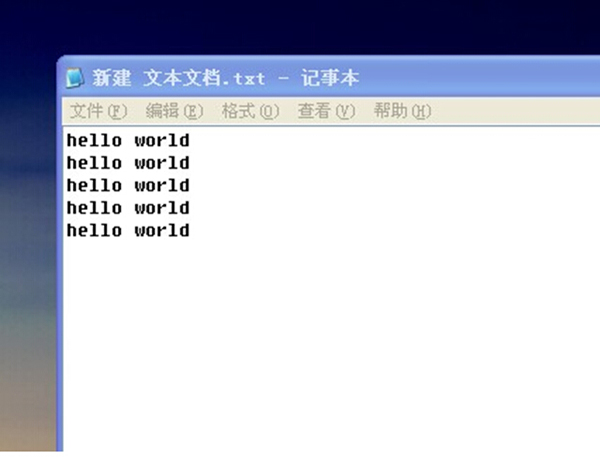
(5) After downloading the code, unplug the UNO code to download USB, plug in this simulation USB keyboard and then open a text on the PC end. Press the number keys on the UNO, the word “HELLO WORLD” will appear in the text, as shown below:
So far, the building of Arduino simulaltion keyboards comes to the end. Readers can extend more complex, more interesting USB tools for interaction with PS from gaining a little bit inspiration from this simple enough USBkey.
Download codes here: USB Code USB Keyboard


