

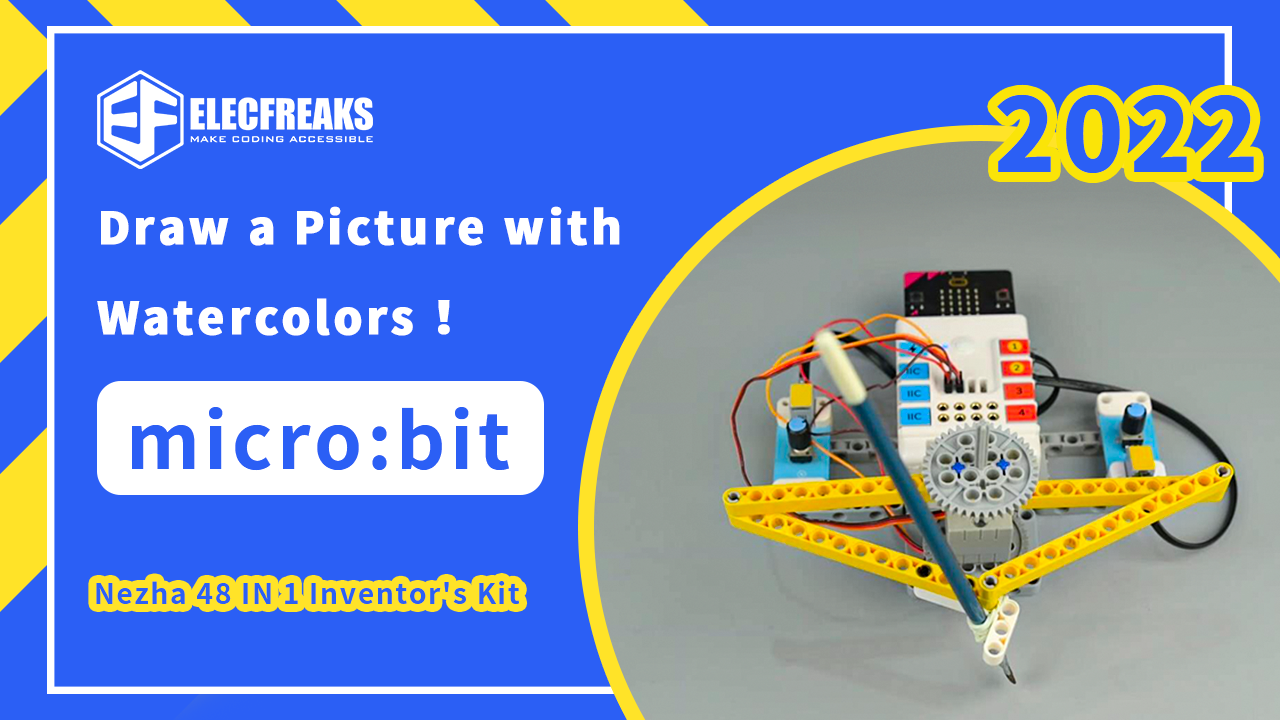
The advanced technology in modern societies helps a lot in the technical development in improving the working efficiency and the safety for dangerous works, and we’ve also prevailed a lot of works for our blogs with the emphasis on the combination of the technology with the construction, the health data monitoring, the vehicles assembly and etc., but seldom have we considered the possibility of combining the technology with arts. Here in this blog, we’d like to have a try on doing a robot project which could be applied to draw a picture with watercolors, and definitely, this robot could be assembled from our Nezha Inventor’s Kit. Here we go!
The ‘STEAM’ education stands for the specific educational field for kids in science, technology, engineering, arts, and mathematics.
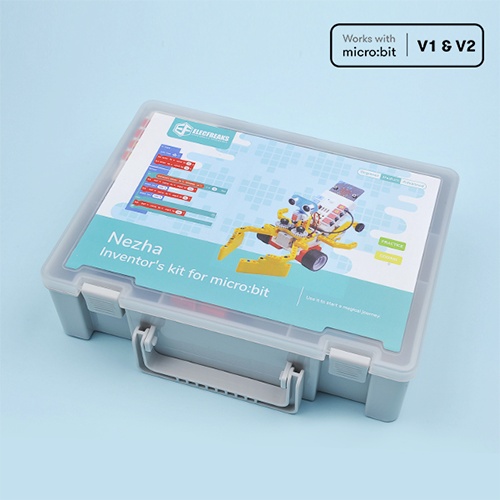
In this blog, we will put up with a project which is using our Nezha Inventor’s kit and some peripheral materials to build a robot that is able to draw a picture with watercolors. To be more precise, we will use two trimpots to control the movements of the arms that are connecting with the pen.
1* Rubber band
1* Watercolor pen, paper and pigment materials
Hardware Parts Diagram
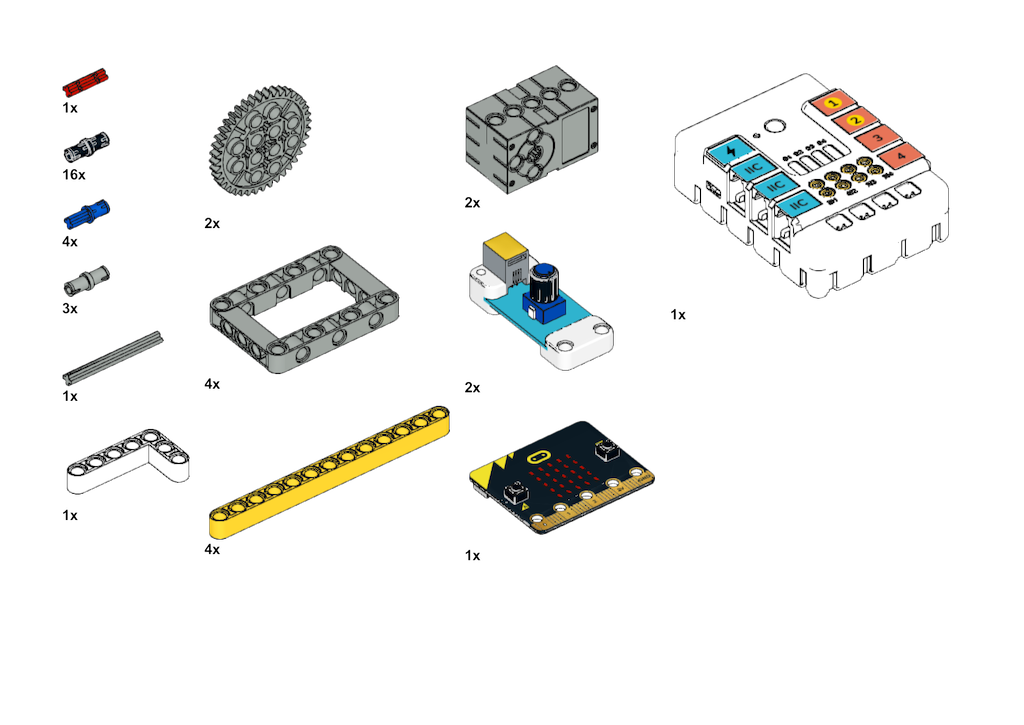
After preparing the above components well, please follow the 15 steps below to complete the robot by yourself.
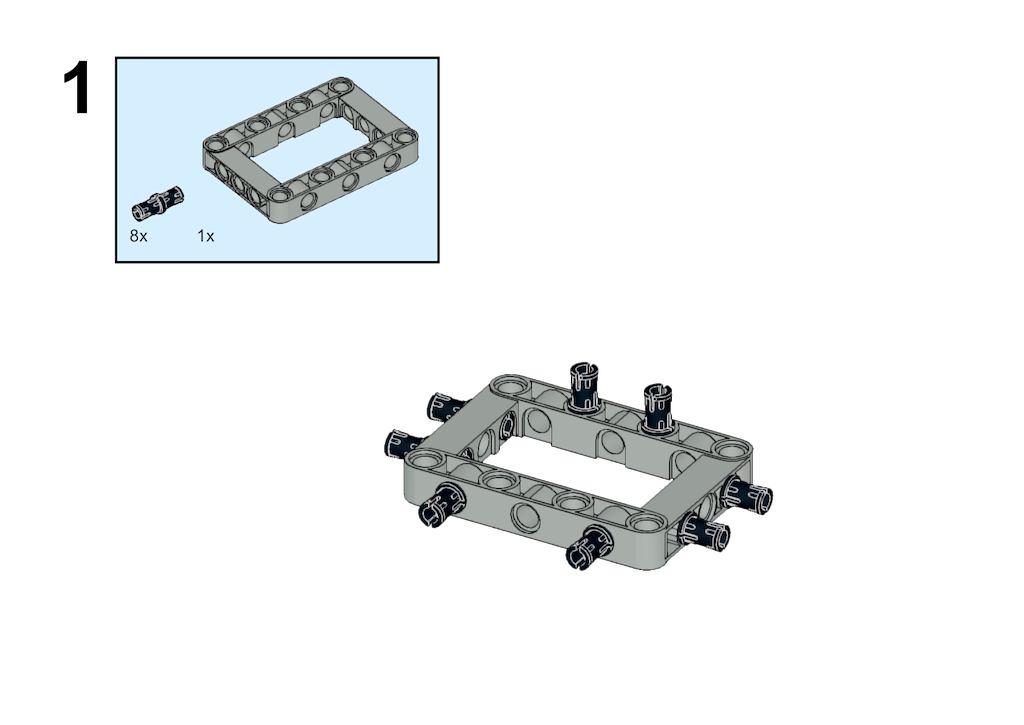
STEP 1
Prepare 8 units of the black pins and have them connected with a square box as the posited place displayed in the below diagram. Note the sequence of the specific position of the holes to be connected.
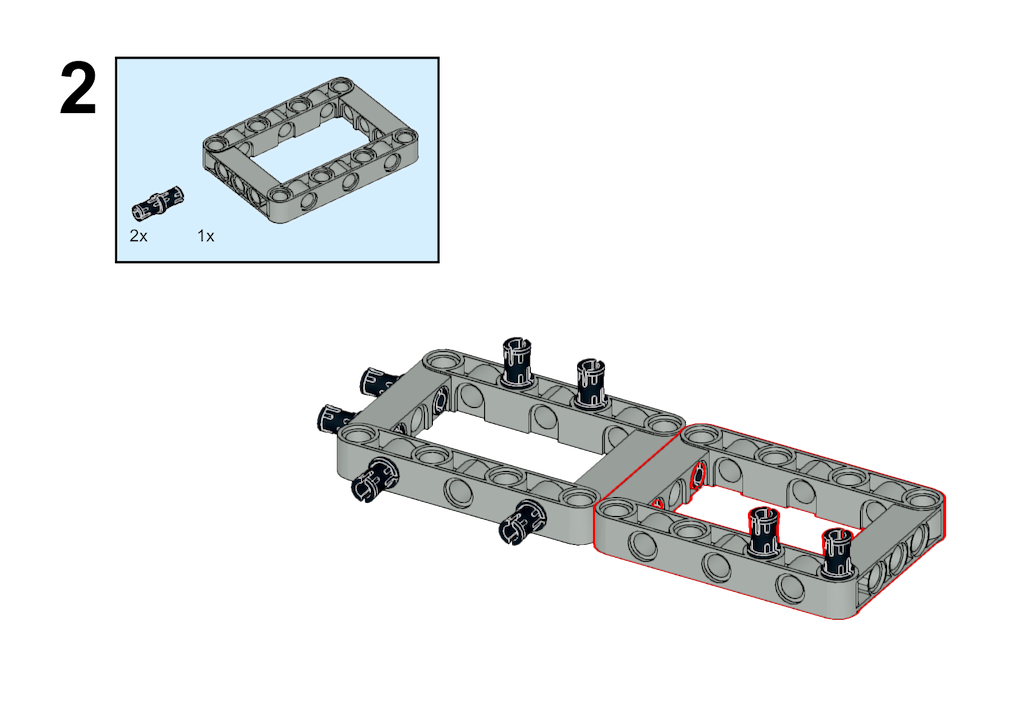
STEP 2
Take another square box and two black pins, get it connected with the first square box, and note the positions of the following 2 black pins to be connected as the diagram suggests.
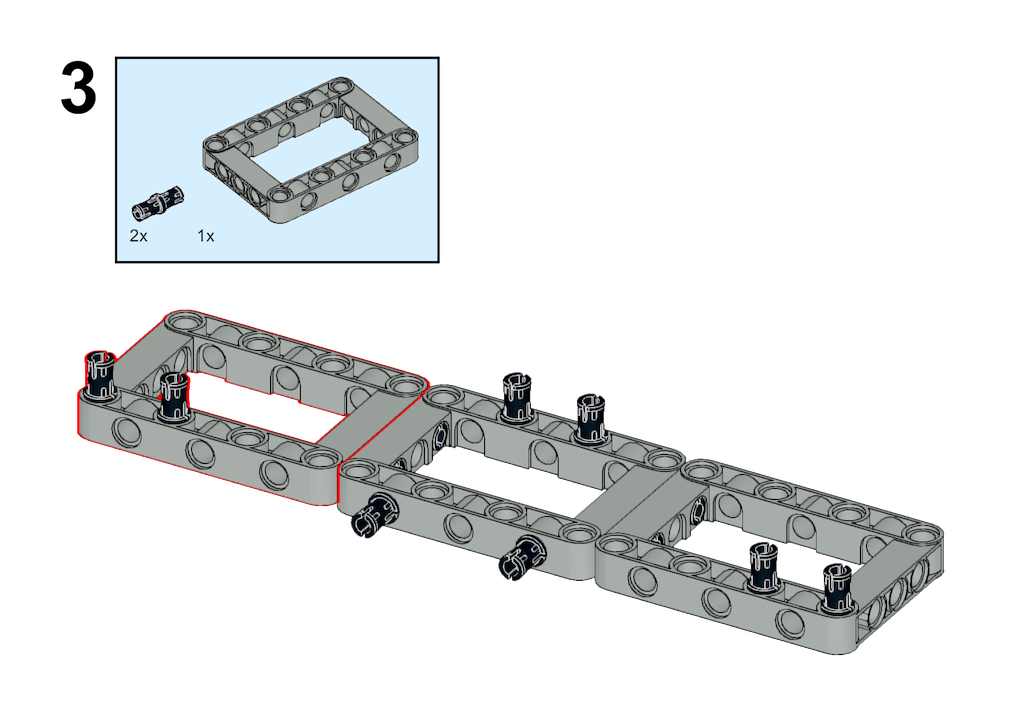
STEP 3
Prepare another square box and have it connected to the right side of the same device, take another 2 black pins and have them connected with the holes stated in the diagram below circled in red.
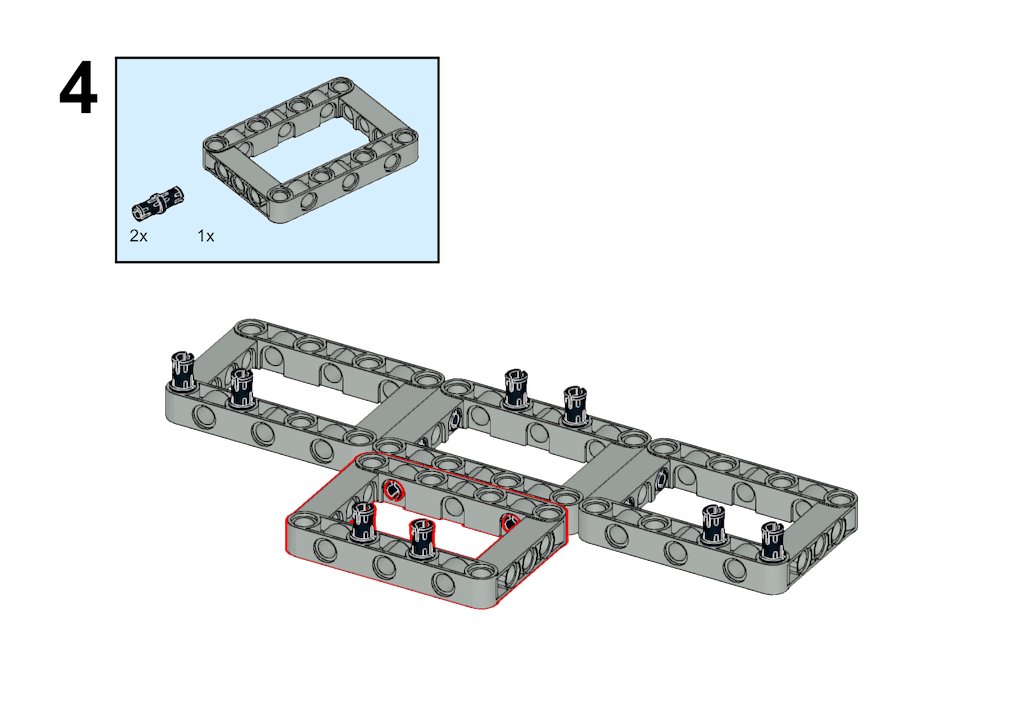
STEP 4
Still the same, take another square box and 2 black holes and have them connected to the black pins pointed out in the middle square box.
STEP 5
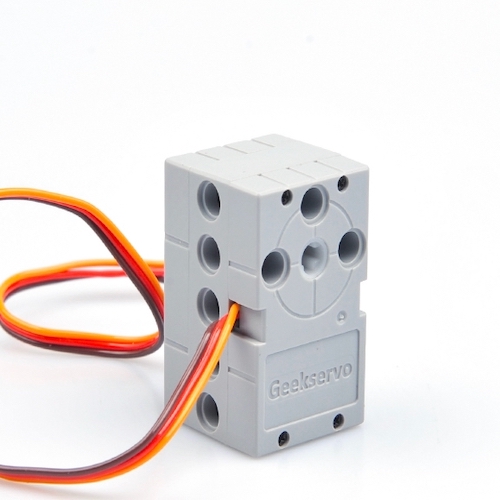
Here comes the assembly of the gray motors, we need to prepare a red axle and get it connected with the motor on the top side, then we connect the motor on the base part made of the three square boxes as the diagram suggests.

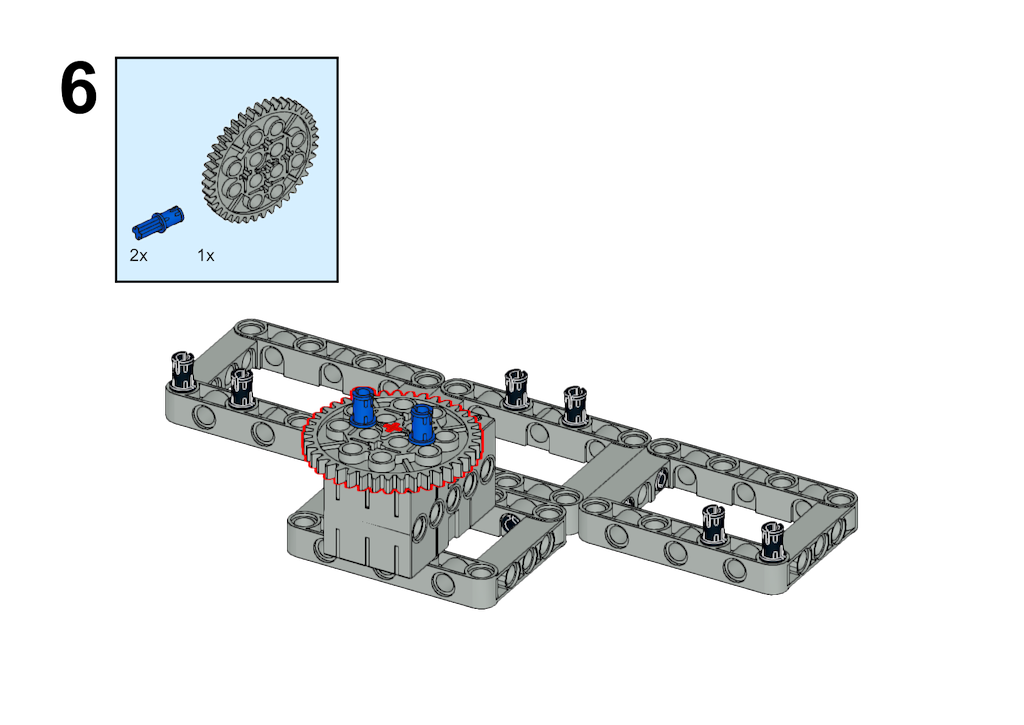
STEP 6
Find a gear wheel and two blue pins and have them connected with the motors as the diagram suggests.
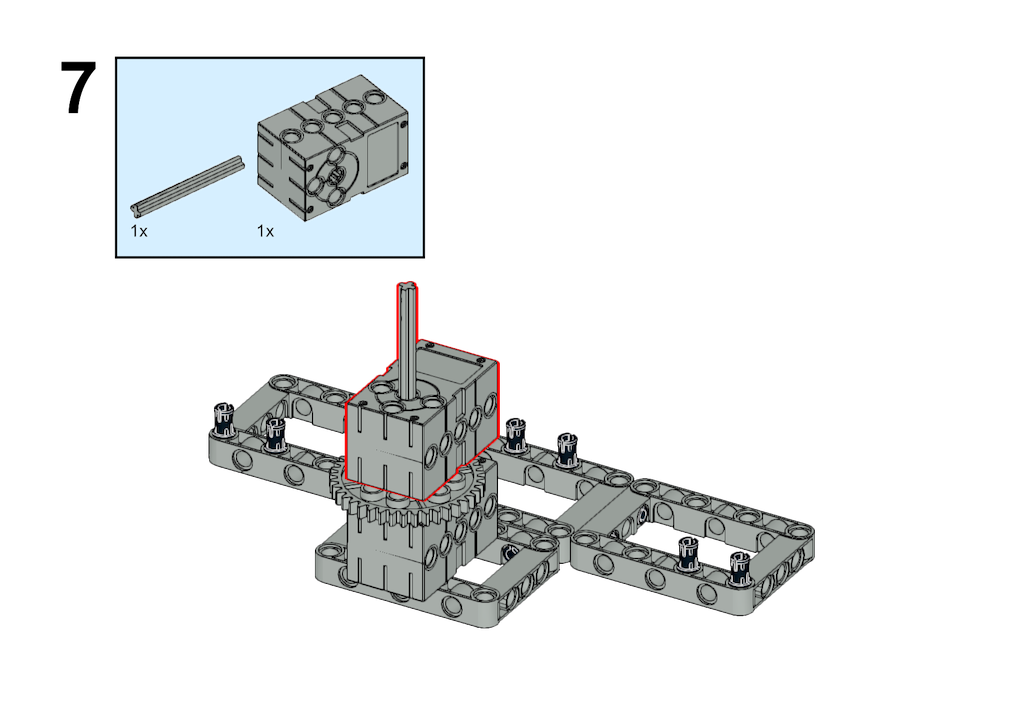
STEP 7
Here goes another step in assembling the motor, take another gray motor and axel and have them connected as the diagram suggests.
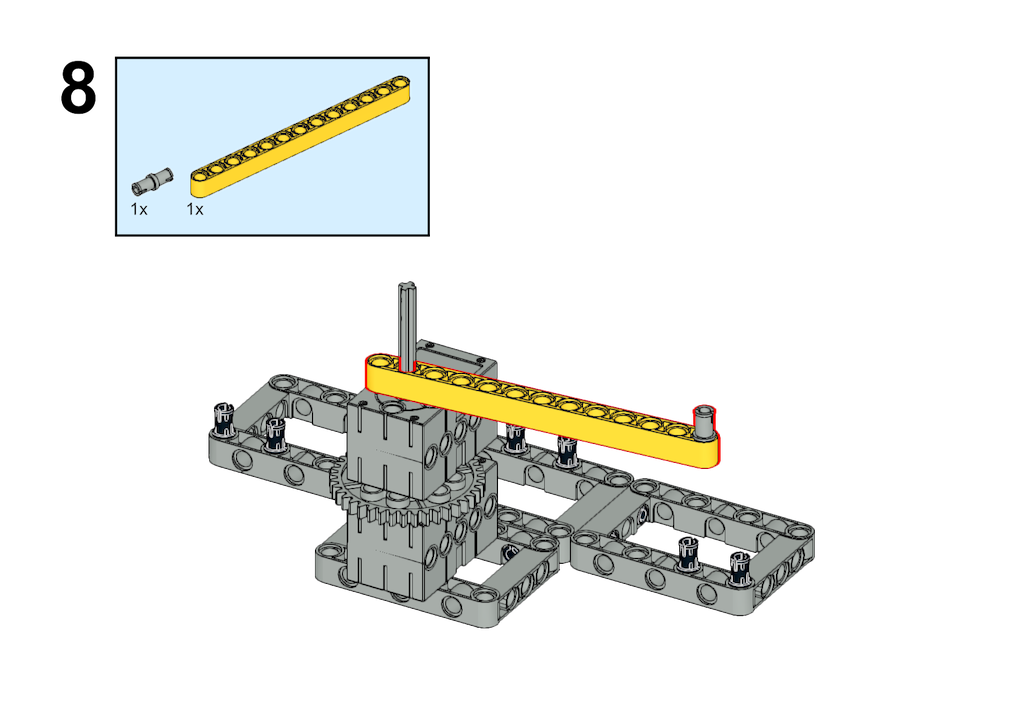
STEP 8
Then let’s come to assemble the arm which will be used to drive the pen. Take a 13-hole yellow block and a gray pin. Get the gray pin connected to the first hole on the yellow block and the last but one connected to the device.
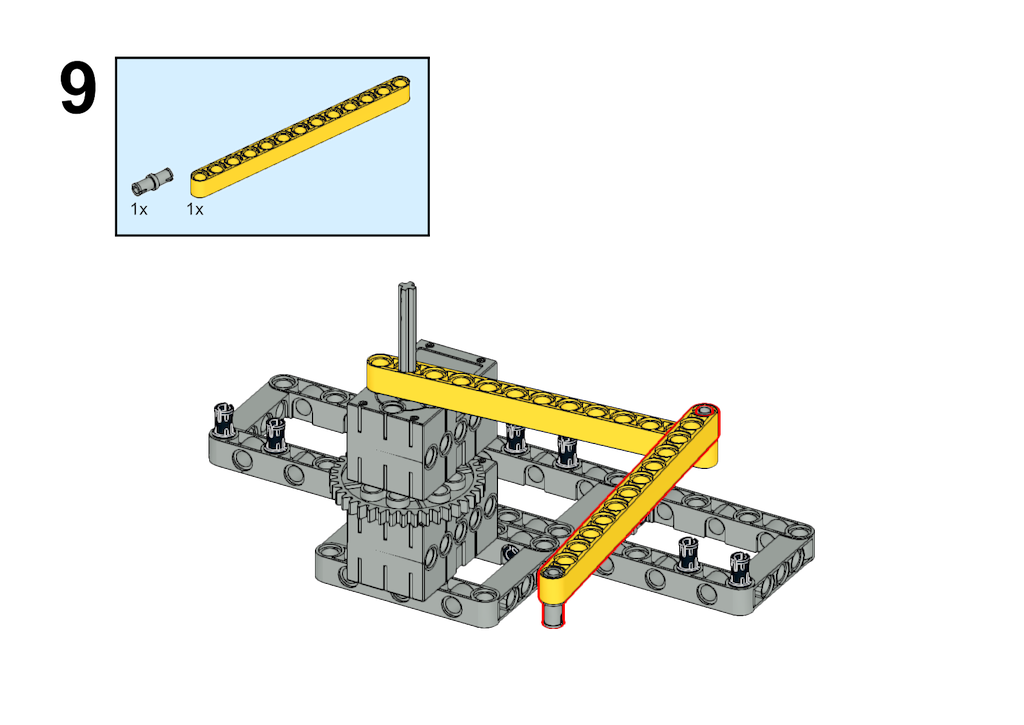
STEP 9
In the same way, take another yellow block and assemble it in the same method as the diagram suggests.
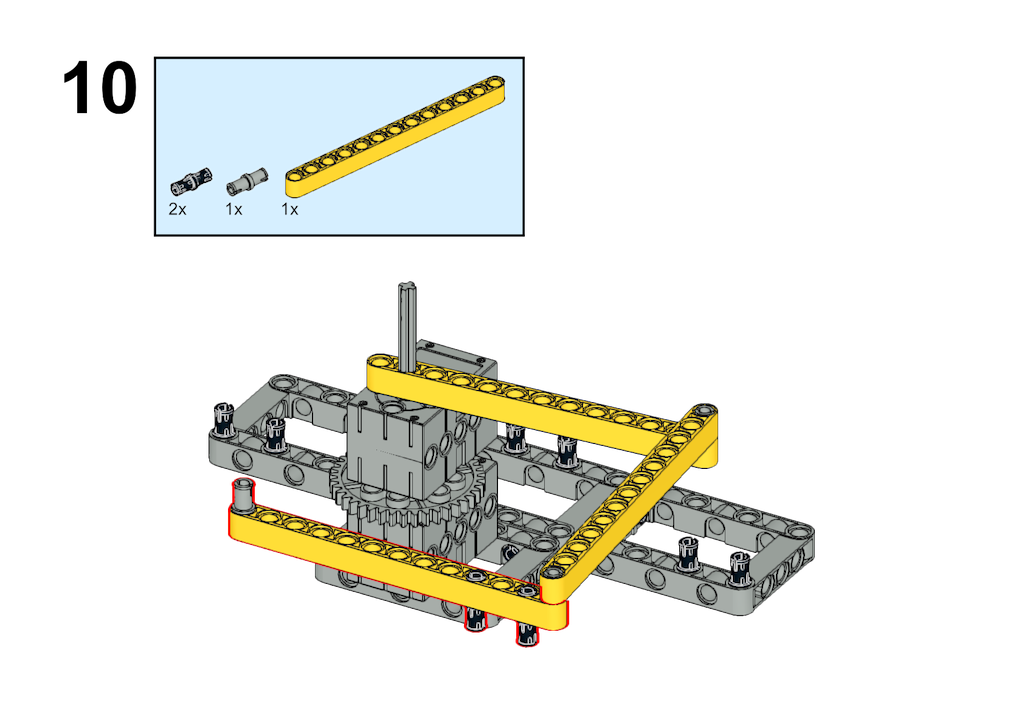
STEP 10
Similarly, find the third yellow block and three pin connectors as the diagram suggests, and get them connected following with the second yellow block.
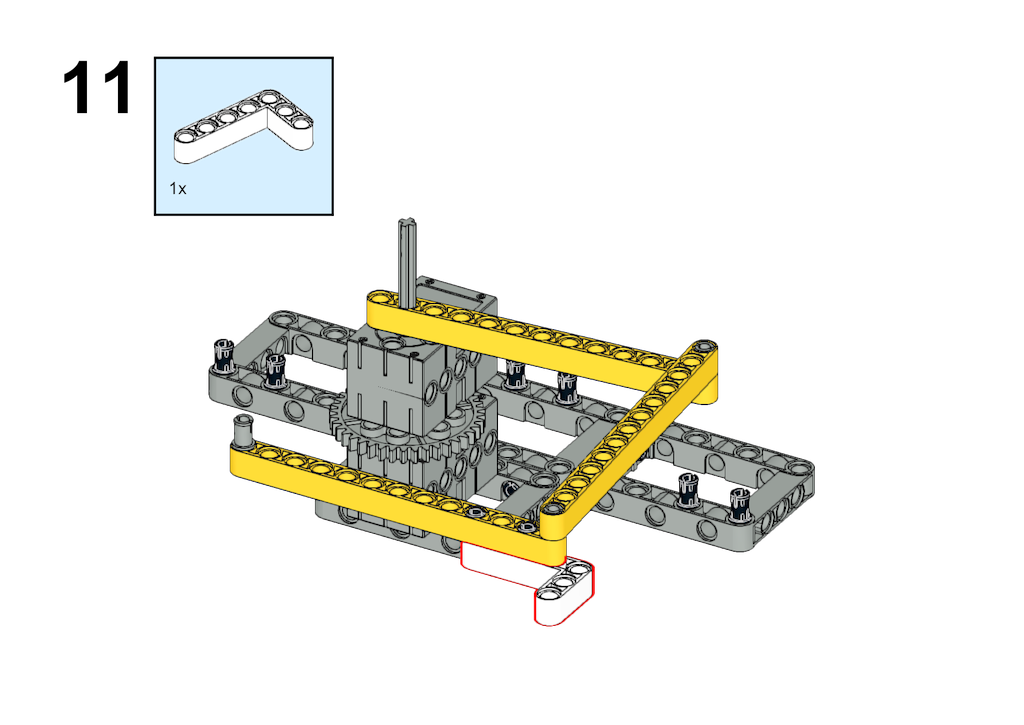
STEP 11
Here comes an important part which would be used to fix the pen for painting. Get a small white angle block as the diagram suggests and have it connected at the corner part.
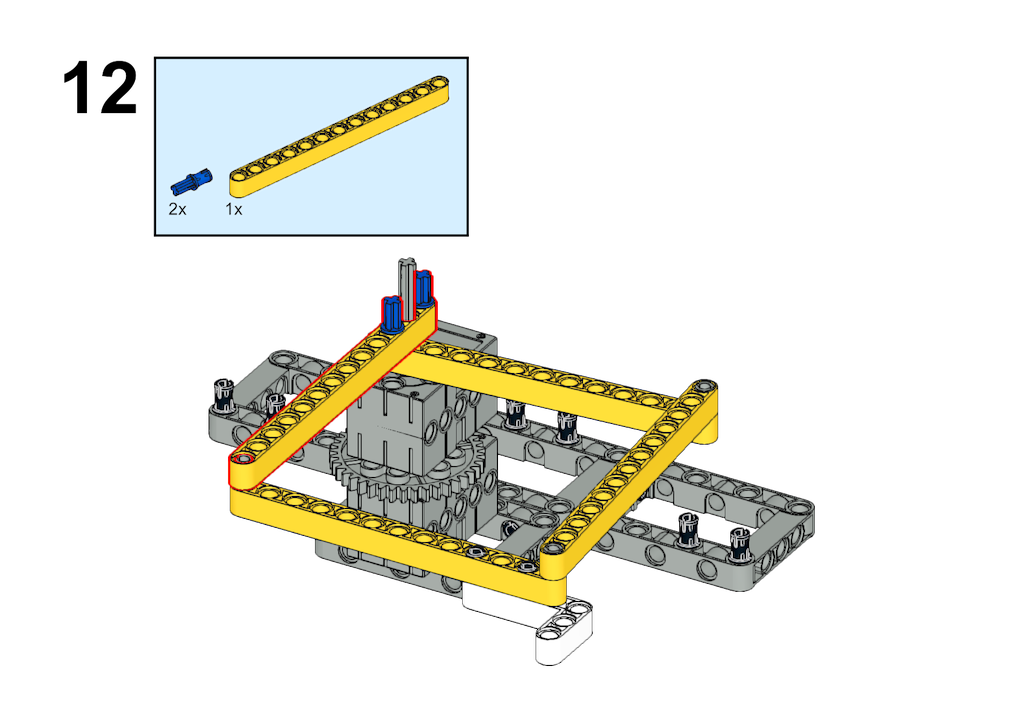
STEP 12
Complete the construction of the arm now! Take the fourth yellow block and get it connected to the very beginning of the first yellow block, here your pen is able to be moved from side to side!
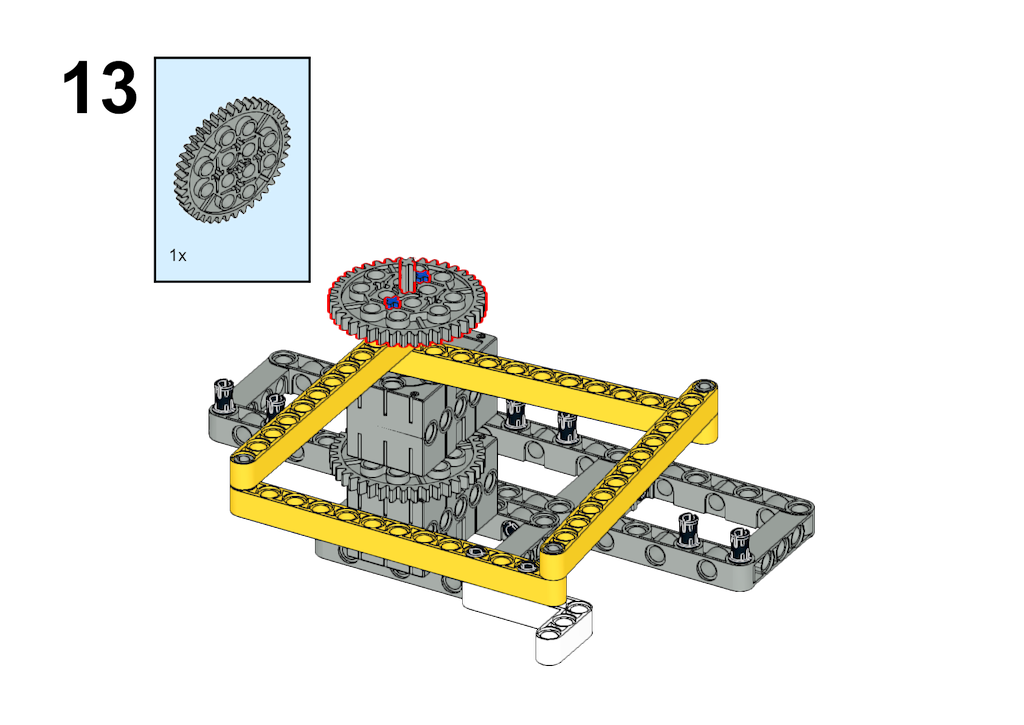
STEP 13
Wheel connected! Find a gray gear wheel and get it connected to the top part of the motor! Your arm is able to be driven by those small tiny gears!
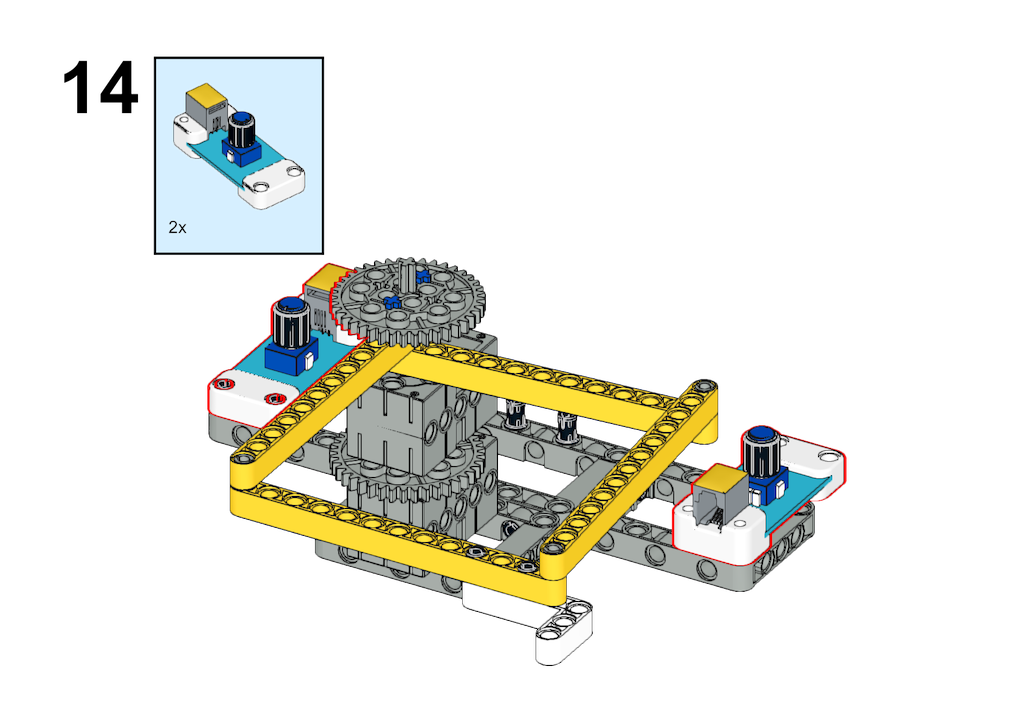
STEP 14
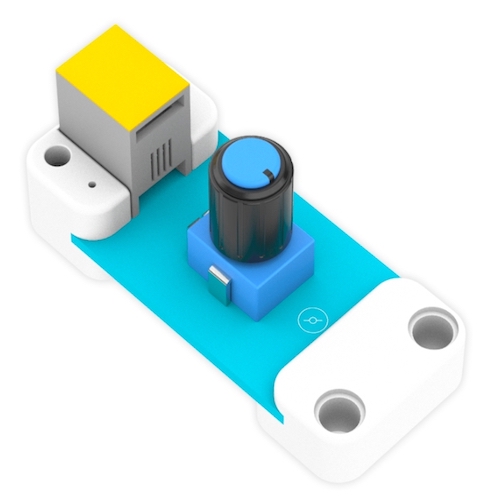
The block assembly is almost done, now we plan to use the potentiometer to control the movement of the arm. Take 2 trimpot sensors and have them connected on both sides.
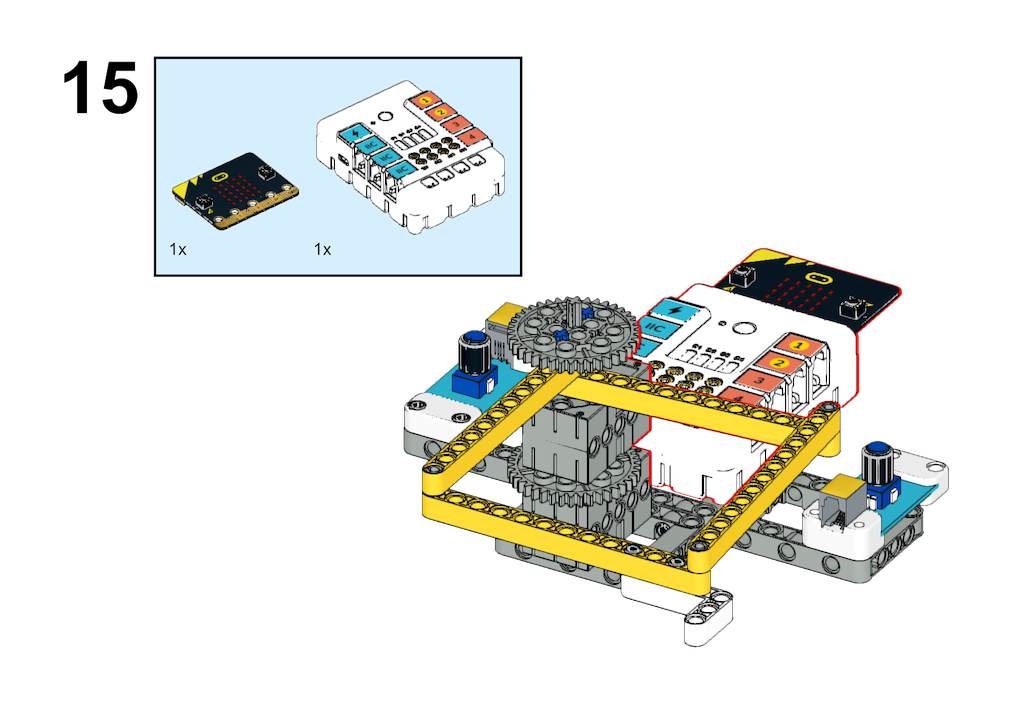
STEP 15
The final step is to have the Nezha Breakout Board with micro:bit connected to the device. We will program in the following software parts and we try controlling the movement of the arm by the two trimpot sensors.
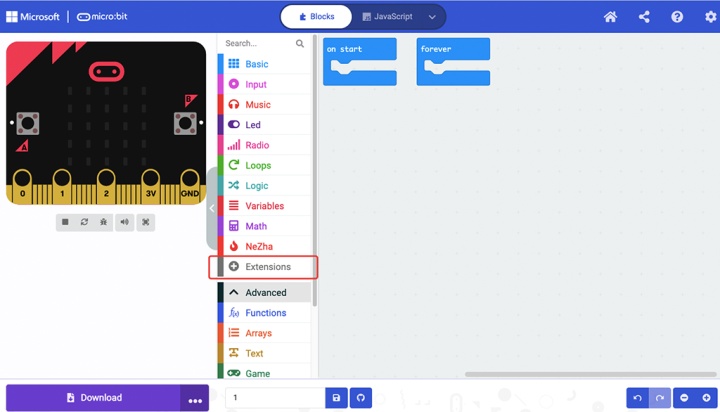
Here we use the MakeCode to do the program, go to MakeCode editor page, and please follow the steps below:
STEP 1
Click “Extensions” in the drawer to add the extensions that we need for this project.
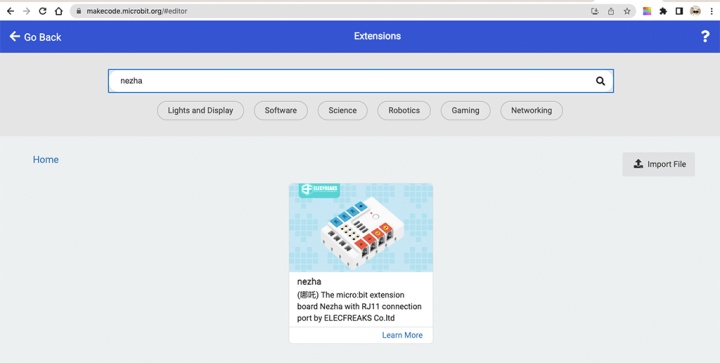
STEP 2
Search with “Nezha” in the dialogue box and click it to add it to the drawer.
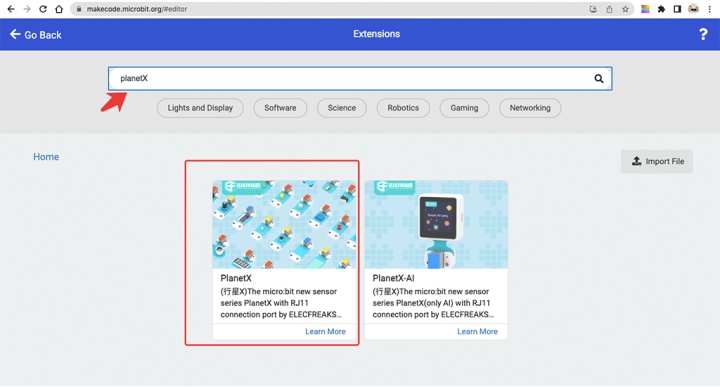
In the same way, search with “PlanetX” again there to add the extensions of PlanetX accordingly, see the circled parts in red below.
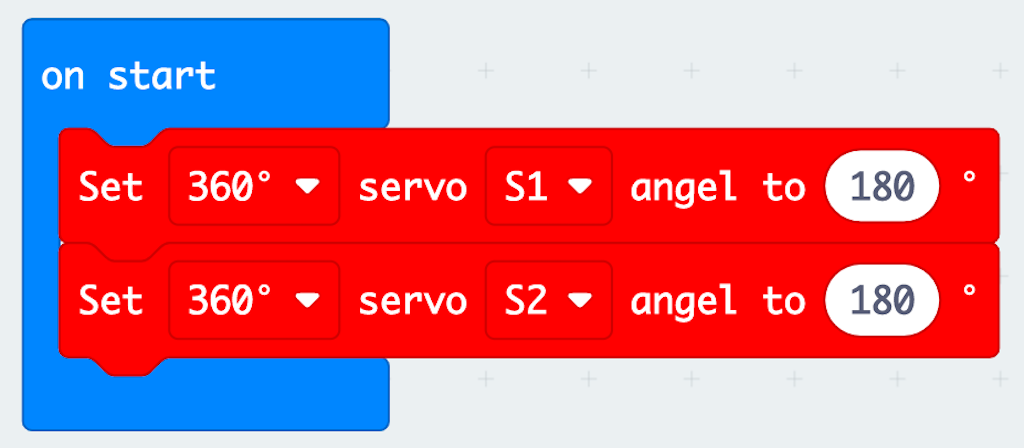
STEP 3
While on start, set the servo which connects to S1 at the angle to 180 degrees, and another servo which connects to S2 at the angle to 180 degrees.
In the forever block, mapping the value of the potentiometer to reflect the controlled command to the motors. Set the trimpot connecting to J1 from low 1023 high 0 to low 90 high 180, and reflect it by setting 360 servos connecting to S1; in the same way, programming the 360 motors connecting to S2.

You may download the whole program with the link below for your reference:
https://makecode.microbit.org/_11bArY5kHHWF
The quadrangle arm could be controlled by the two trimpots, fix the pen with the arm, and use the robot to draw the paintings.


