

One of the main problems encountered when using micro:bit is “How do I get my program to do more”. For example, a program may want to display a certain amount of time on the screen but also respond to button presses during that time. Or, perhaps it needs to remember to do something at some point in the future, but continue to do its main function until then.
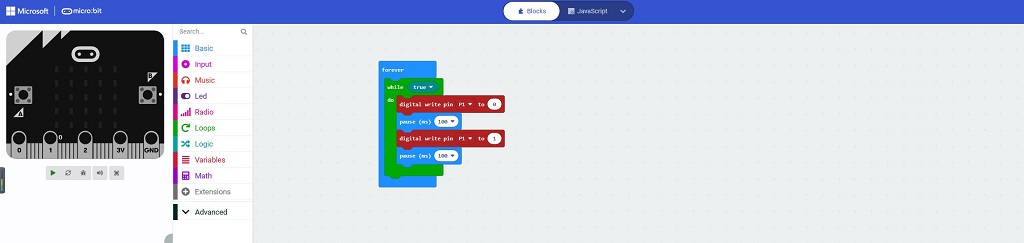
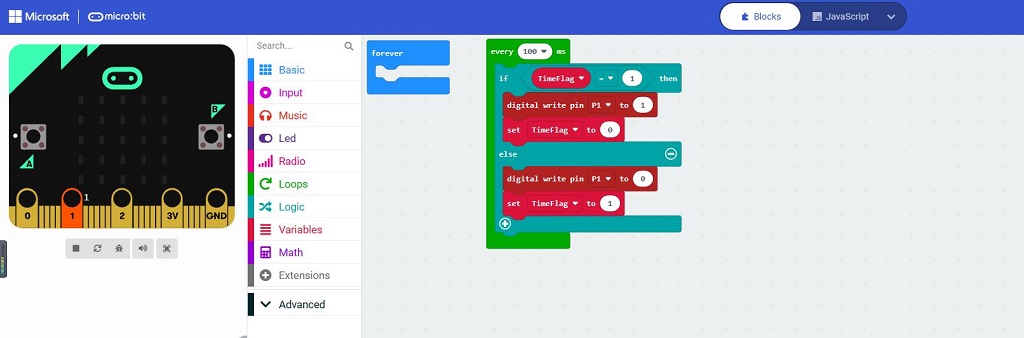
If P1 is set to invert the level at 100ms intervals, the program is as follows.

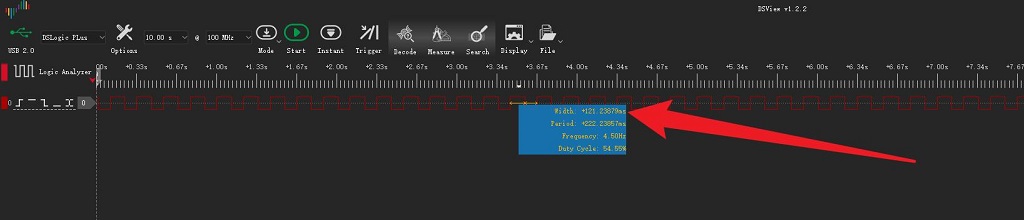
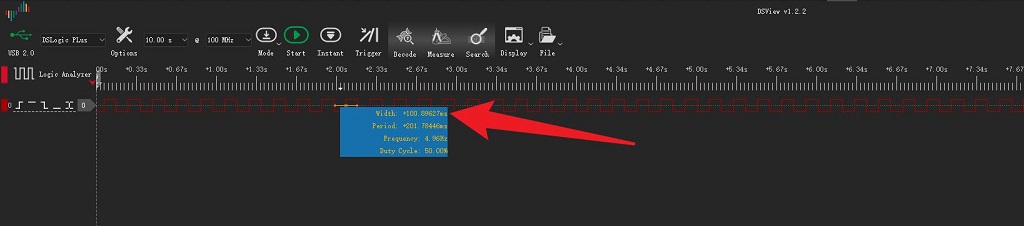
In the actual test situation, each reversal level time is 121ms, which does not match the programmed setting time, as shown in the figure, the program is as follows.
Because this exception arises because most of the functions that rely on delayed implementation do not do what is expected of them, there are two ways to deal with this exception, the first is to use a nested approach that avoids the micro:bit infinite loop that causes the delay.
Because this exception arises because most of the functions that rely on delayed implementation do not do what is expected of them, there are two ways to deal with this exception, the first is to use a nested approach that avoids the micro:bit infinite loop that causes the delay.Because this exception arises because most of the functions that rely on delayed implementation do not do what is expected of them, there are two ways to deal with this exception, the first is to use a nested approach that avoids the micro:bit infinite loop that causes the delay.
This means that the first method solves the exception and the second method uses the micro:bit external timing function to solve the exception.
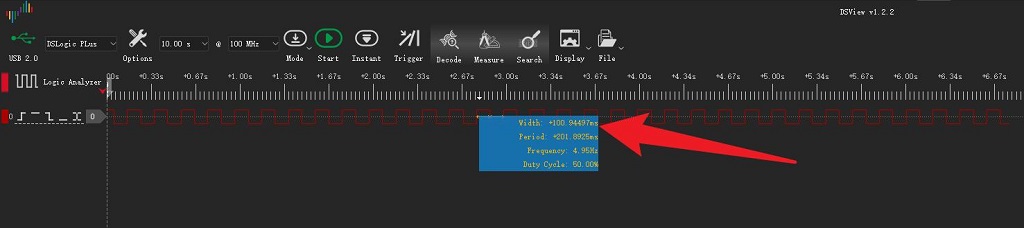
The actual test situation is that each reversal level time is 100ms, which corresponds to the programmed time, as shown in the figure.
It is possible to get the exact time for various procedures, followed by a guessing game using the exact time delay, using the Microbit Retro Arcade and Joystick:bit V2 for the guessing game.
In Guessing, players make hand gestures representing the elements of the game; Rock, Paper, Scissors and Cloth. The outcome of the game is determined by 3 simple rules: rock beats scissors; scissors beats cloth; cloth beats rock.
To ensure fair play the race signals have been agreed to ensure uniformity in every delivery. This ensures that there are no errors and that the signals need to be synchronized, requiring micro:bit precision delays and guaranteed delays.
Before programming, the instructions are standardized, assuming 1 for “scissors”, 2 for “rock” and 3 for “cloth”.
This is an example of how to use Microbit Retro Arcade. https://www.elecfreaks.com/learn/microbit/expansion-board/microbit-retro-arcade
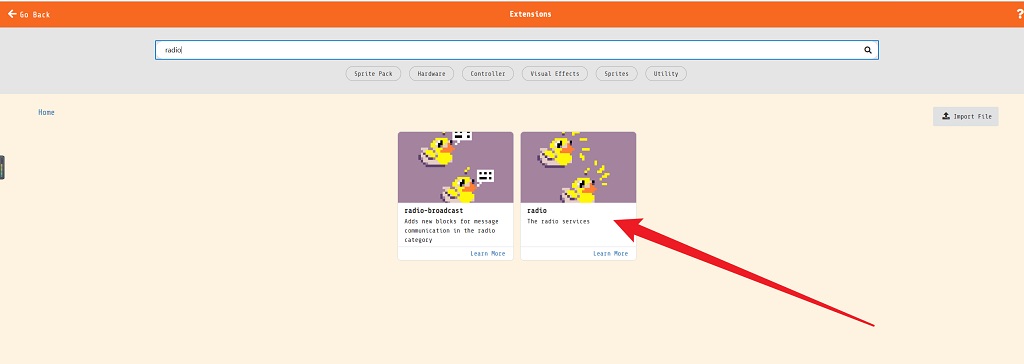
The guessing game is kept at a distance and hidden from view, and no wire-to-wire connections are used, so you need to add the “radio” expansion to synchronize information.
Write three scenarios for the outcome of the match: “Draw”, “Win” and “Lose”.
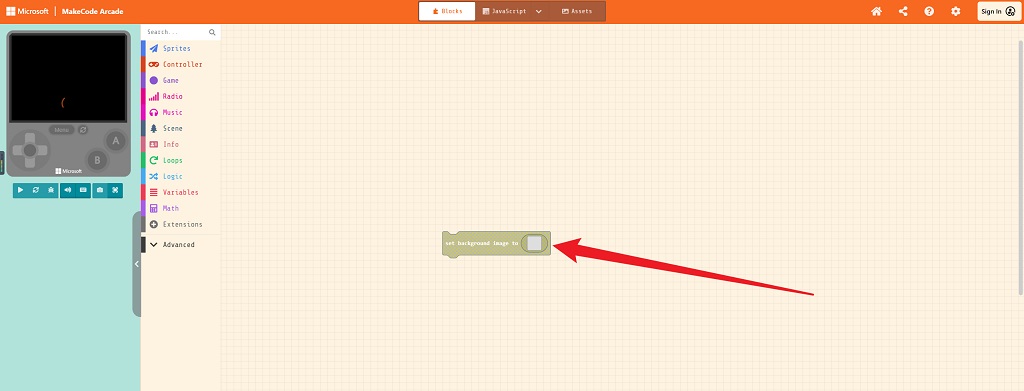
Here Microbit Retro Arcade can use the screen as an indicator to use the blocks.
The screen shows the result of the match “draw” with the background set to “black” and the predicted result written on it.
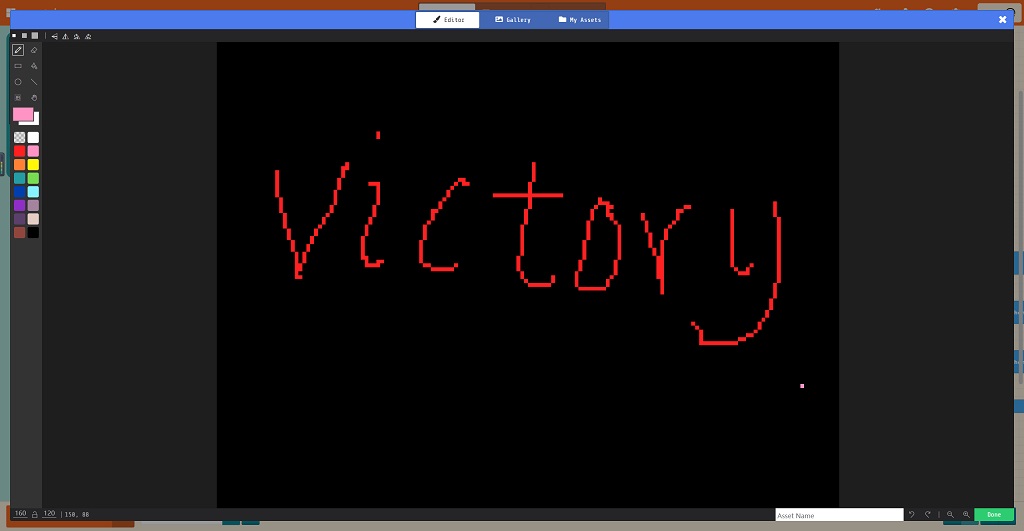
The screen shows the result of the match “Win” with the background set to “Black” and the predicted result written on it.
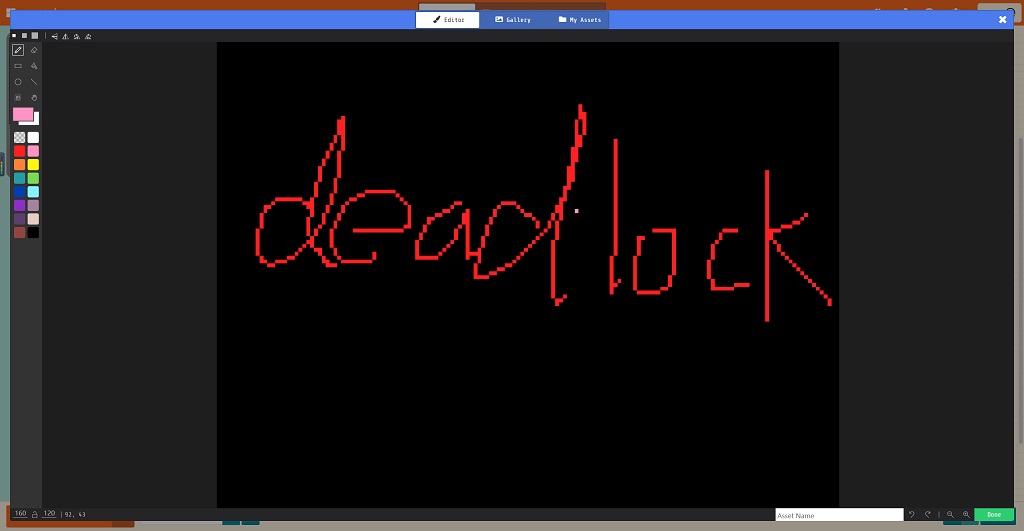
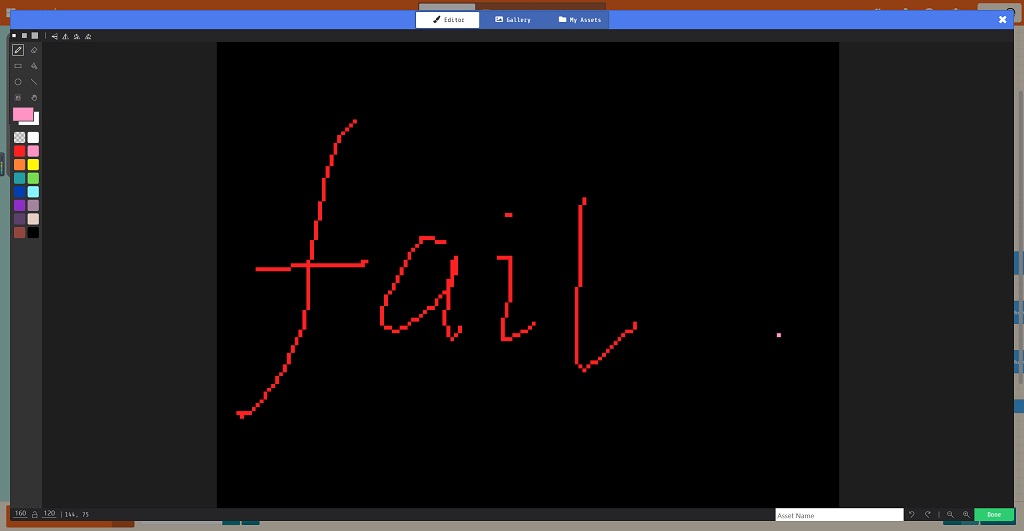
The screen shows the result of the match “Fail”, the background is set to “black” and the prediction is written.
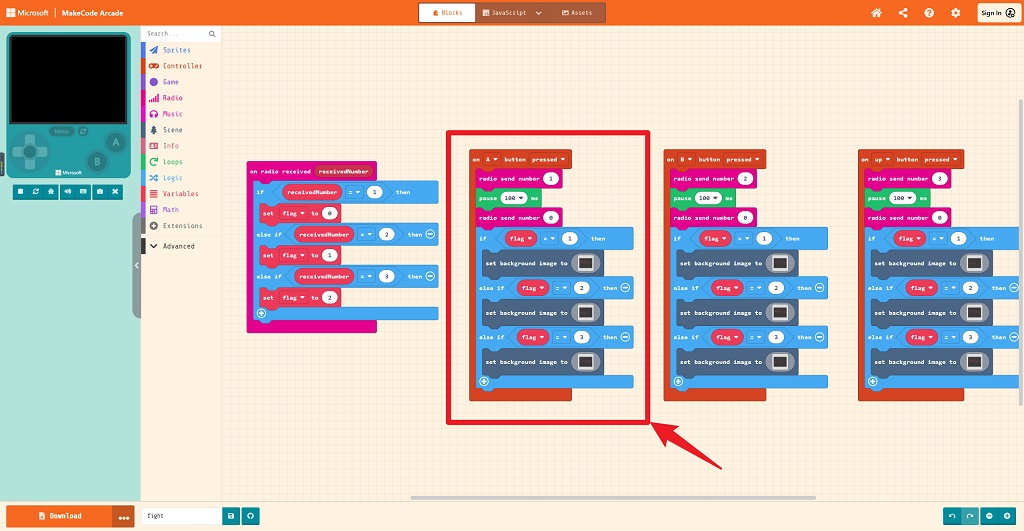
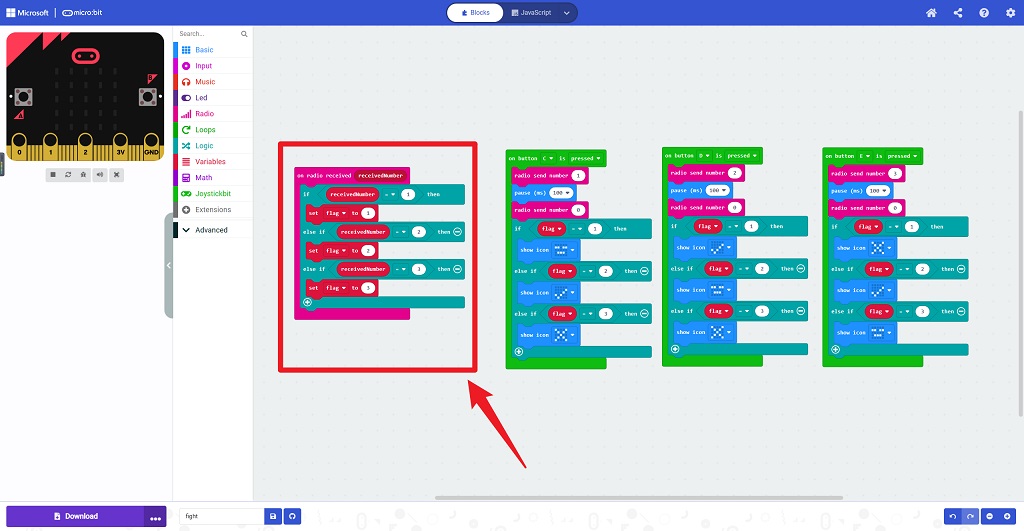
The value of the other party will be obtained wirelessly, stored in the flag, and given to the result processing, which will obtain three values 1 (scissors), 2 (rock), and 3 (cloth) respectively.

When the A button is pressed, it means that we are sending 1 (scissors), and comparing it with the value sent by our opponent, there are three results: a draw, a victory, or a defeat.
When the B key is pressed, it means that we are sending 2 (stones), and comparing it with the value sent by our opponent, there are three results: a draw, a victory, or a defeat.
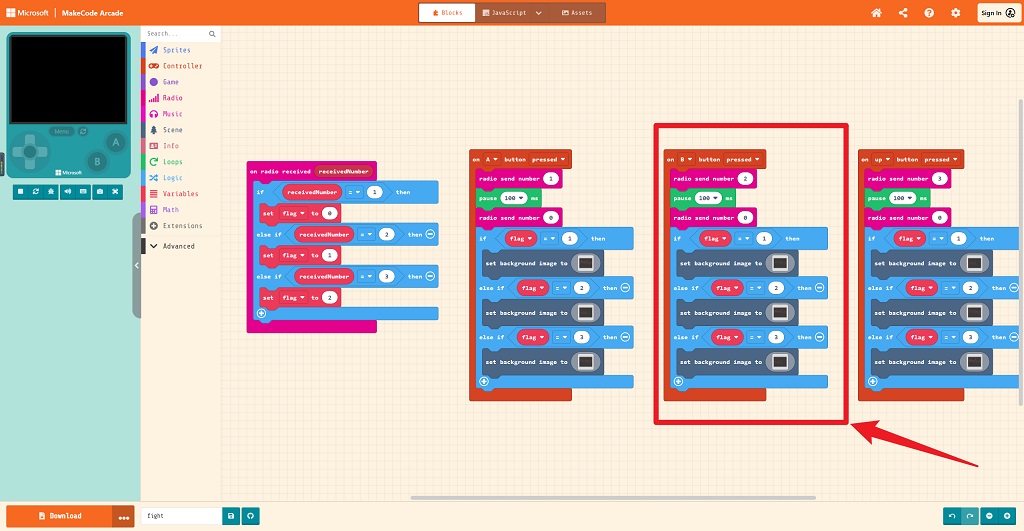
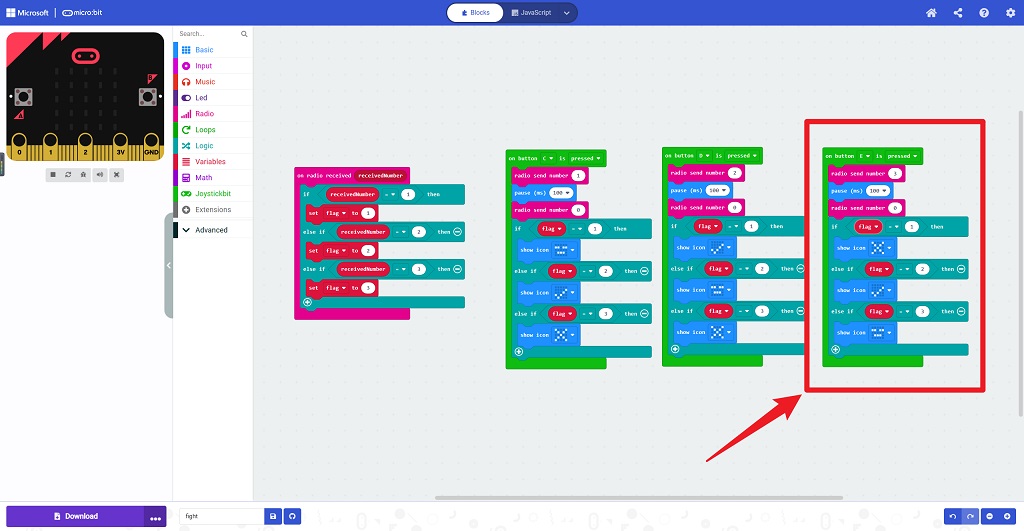
When the B key is pressed, it means that we are sending 3 (cloth), and comparing it with the value sent by our opponent, there are three results: draw, victory, or defeat.

At this point, the Microbit Retro Arcade program is ready to be written and the Joystick:bit V2 program will be written next.
This is an example of how to use Joystick:bit V2 https://www.elecfreaks.com/learn/microbit/expansion-board/joystick-bit-v2
To maintain a certain distance and concealment, and not use a wire-to-wire connection, you need to add the “radio” expansion and this device expansion to synchronize information.
Write three scenarios for the outcome of the match, namely ‘draw’, ‘win’ and ‘loss’.
Here is the Joystick:bit V2 can use the screen as an indicator to use the block.
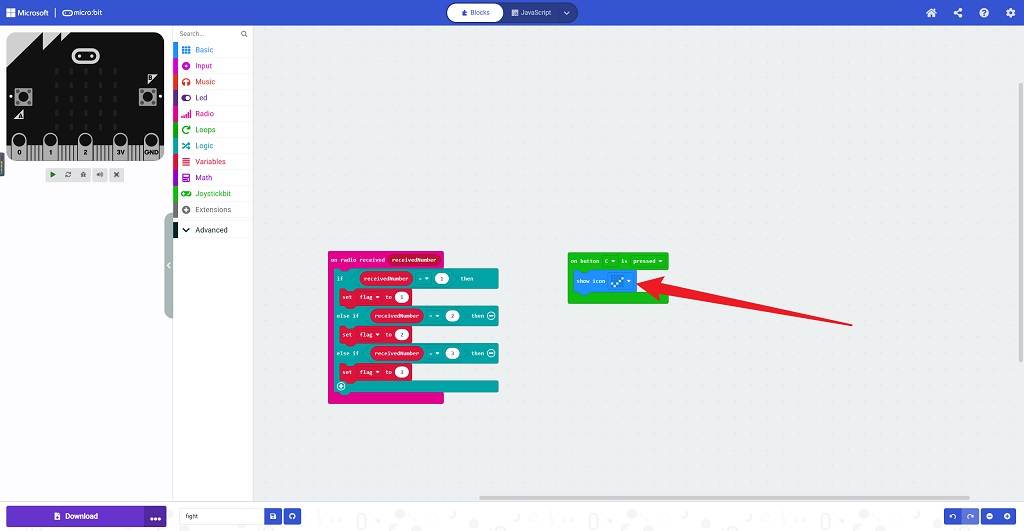
Wirelessly get each other’s values, stored in the flag, to the result processing, will get three values 1 (scissors), 2 (rock), 3 (cloth).
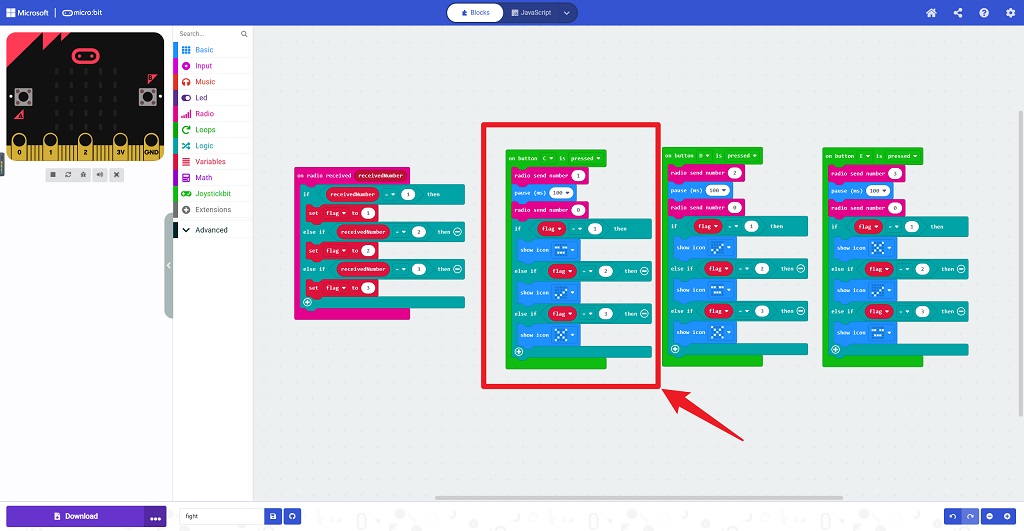
When the C key is pressed, it means that we are sending a 1 (scissors), and comparing it with the value sent by our opponent, there are three results: a draw, a victory, or a defeat.
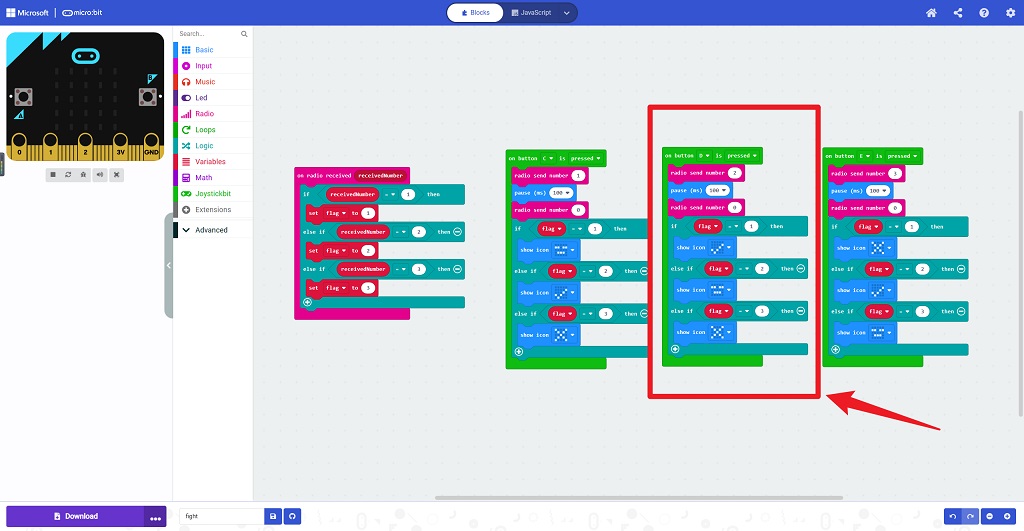
When the D key is pressed, it means that we are sending a 1 (scissors), and comparing it with the value sent by our opponent, there are three results: a draw, a victory, or a defeat.
Wirelessly get each other’s values, stored in the flag, to the result processing, will get three values 1 (scissors), 2 (rock), 3 (cloth).
This way you can get your friends to enjoy a fair and fun game!


