Story
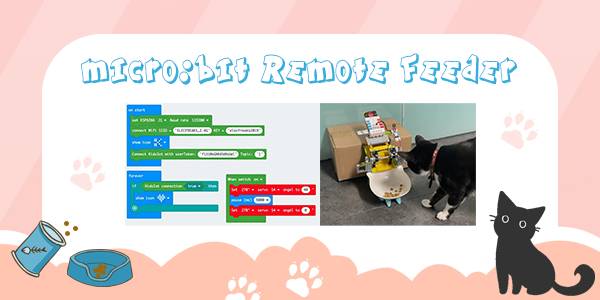
This blog introduces how to get the Nezha Breakout board and the PlanetX sensors working with KidsIoT, here we’ve made a project called the micro:bit remote feeder, which makes it possible to feed your pets at home or offices at any time. At the same time, we’d like to bring you with our KidsIoT from a simple IoT project.
What is KidsIoT?
Nowadays there are more and more open IoT platforms available. Most of them are developed for engineers, with powerful functions but complicated to use. However, to teach children, the ease of use outweighs a lot than the complex and powerful functions. KidsIoT is an IoT platform designed for children’s teaching. It has simple functions and easy to use, allowing you to complete the connection within 3 minutes. KidsIoT will help you build IoT applications in an easy way.
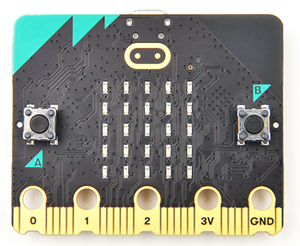
What are Nezha Breakout board and PlanetX sensors?
Nezha breakout board is a versatile expansion board for micro:bit. It is loaded with 4 servo drives, 4 motor drives, 3 IIC ports, 4 digital and 2 analog connections. It has a good compatibility with Lego and fischertechnik products, the fool-proof and color-labeling connections make it easy to connect, the graphical programming has a rather low threshold for programming and there are over 40 kinds of PlanetX sensors available to work with it. Now let’s see how could we build a feeder project with them:
Materials required:
Lego parts
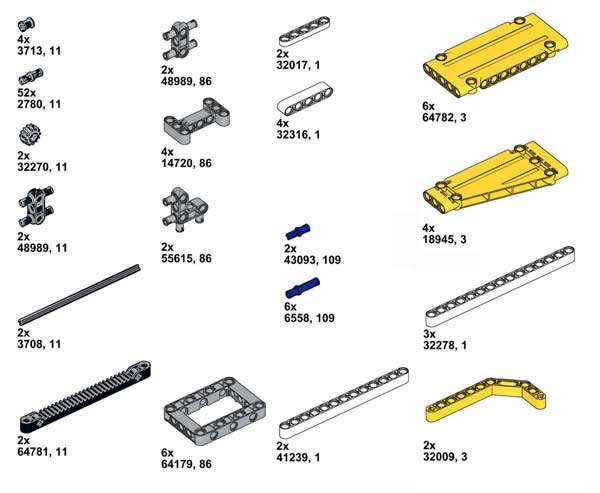
The feeder is mainly constructed by the barn part and the door. The barn is easy to assemble and the door is a little complicated with some patience required, here you can find the assembly steps:
Remote-Feeder-with-KidsIoT.pdf
Hardware Connections:
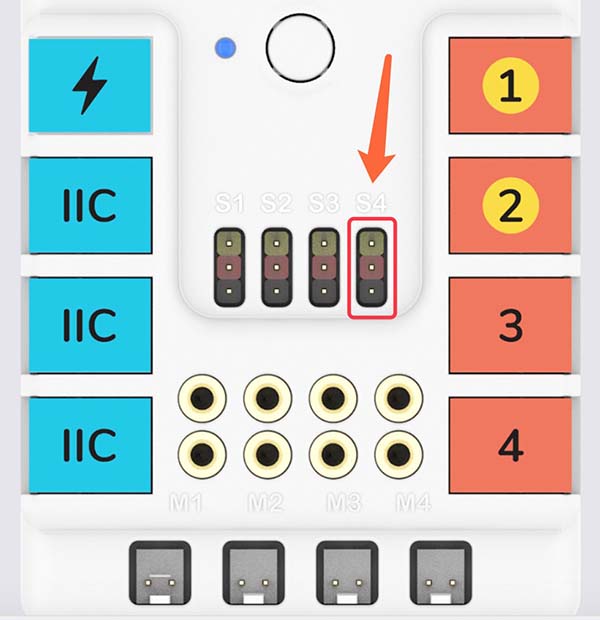
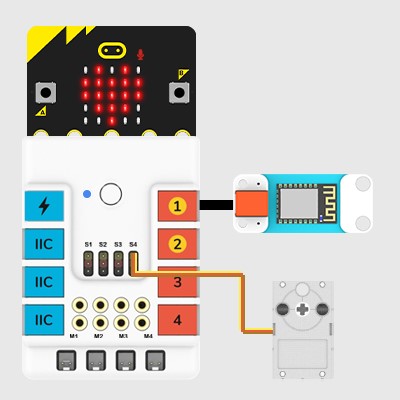
After assembly of the body, connect the cables as the following instructions. Connect the servo to S4, Wifi module to J1. While in connection, please make sure the color of the cable matches the color of the connections.
Cable Connection Diagram:
Program:https://makecode.microbit.org/#editor
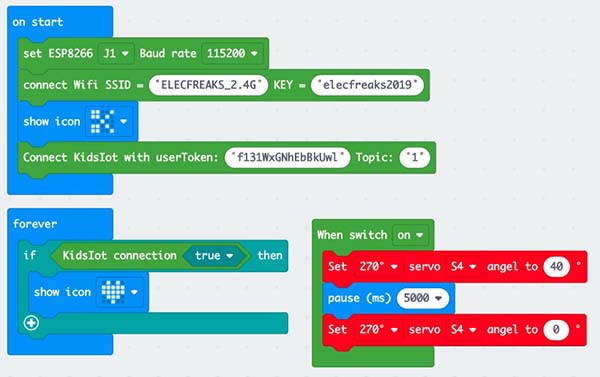
Explanation:
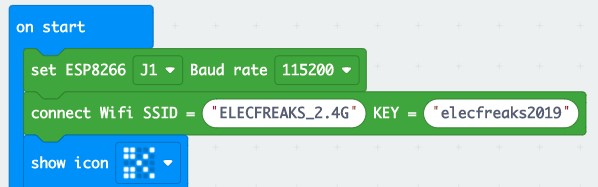
While On Start, connect the Wifi module to J1, set the Baud rate to 115200, get connected with Wifi(Revise the name and password of the WIFI as the fact), a scissor icon shall display on the micro:bit after connecting successfully.

Connect with KidsIoT, copy the userToken from the platform. For registration and more please visit here.
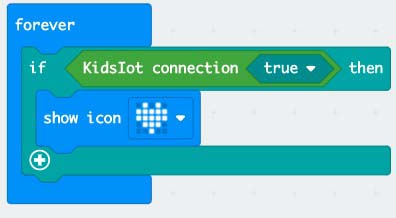
After connecting, an icon displays on the micro:bit.
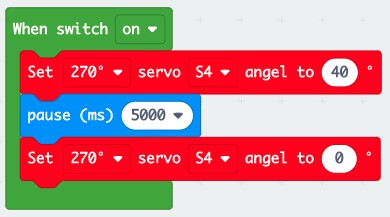
After receiving the signal from KidsIoT, the door closes after 5s.
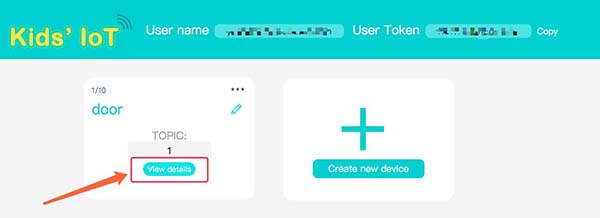
Now the program is completed, we can achieve the remote control on our phone or computer when we want to feed the pets. Log in with a phone or a computer, click “view details”.
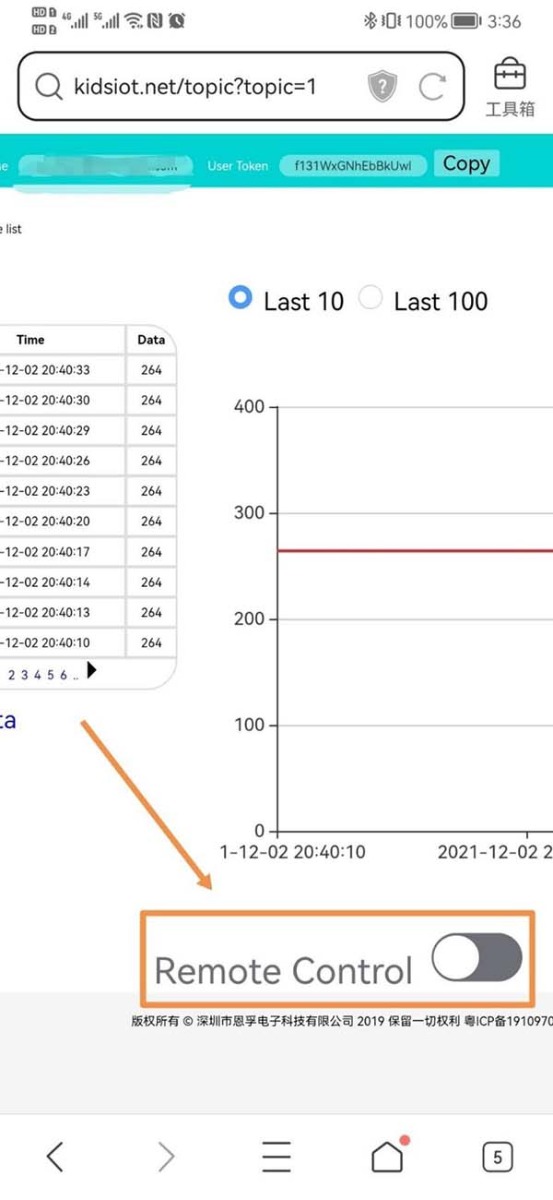
Click “remote control” button to complete the feed.
Congratulations! You’re done!
You’re pretty much set to go.
An adjustment to the time of opening/closing the doors and the size of the doors shall be made according to the actual condition if you’d like to customize the quantity of the food given out each time.
We would love to see your take on this project, feel free to share it and ask questions if something isn’t clear. Good luck!
Video: https://youtu.be/60tSes7LMaM