

When we have boarded airplane, we often encounter a situation like this: a beautiful stewardess carrying a small silver box keeps press it while passing by. She is murmuring:1,2,3, etc. You must guessed that she is counting the total number of the people sitting on the airplane. And the small box on her hand is a mechanical counter. Today, we are going to make an electronic one with BBC micro:bit. First, we have to know what function we want to realize with this electronic counter. I have a simple conclusion for it.
Basic Requirement:
Second, in order to make a counter, we have to know what kind of materials we will need. Here is the material we have to prepare:
micro:bit ×1
USB ×1
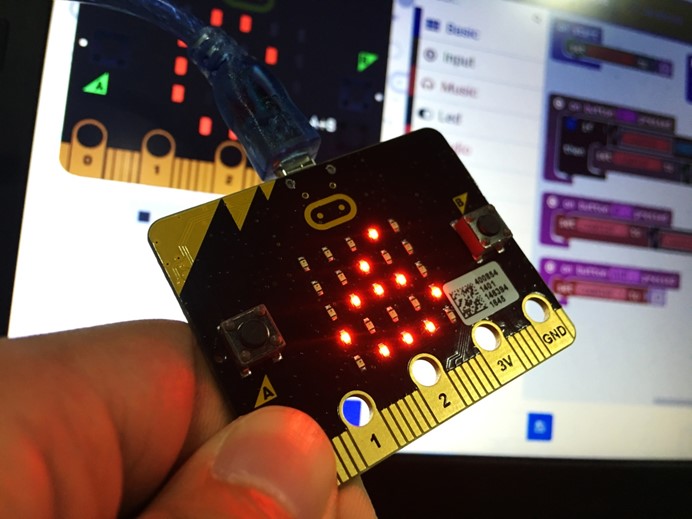
You might wondering how can we make an electronic counter with a micro:bit board and a USB cable only. Don’t worry! It is very easy and simple. You will learn it soon. After we gathered our materials, we have to program for it. Connect micro:bit board with your computer.
Then click this link: https://makecode.microbit.org
to open programming interface. We are going to use Block method to do programming. You can read the following steps to learn how to program.
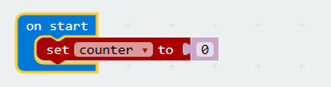
Step One:
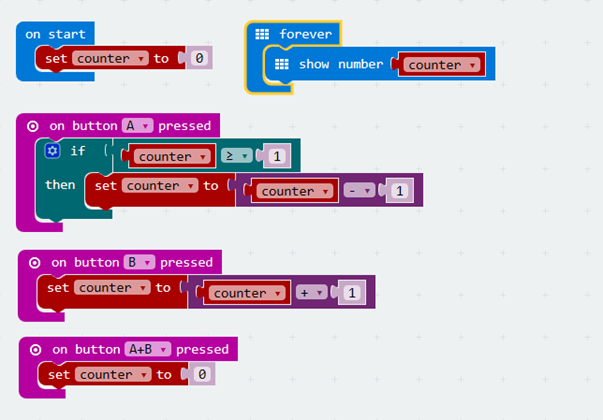
To start, we build a new variable named “counter” and set “0” as the initial value .
Step Two:
Write code for press button “A” “B” and “A+B” separately.
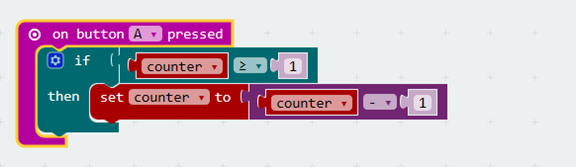
The function of button “A” is deduct count number. We all know that no matter what we count, the count number would not be under 0. If negative number appears, then there must be something wrong. In order to avoid this mistake, we have to set counter judgment “≥ 1” in our program. If “counter≥1”, then press button “A”, it will deduct 1 automatically.
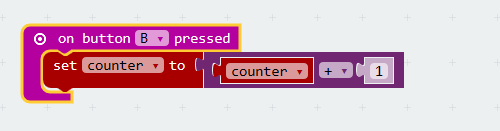
Every press increases 1 counter number.
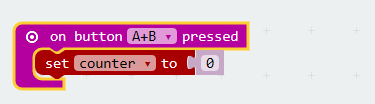
Press button “A” and “B” together, the counter number become 0. Then you can start a new count.
Step Three:
After we finished button code writing, we have to use 5*5LED screen to show the counter number.
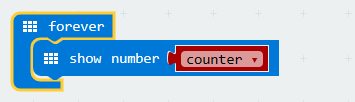
We can directly drag block “show number” under button code. Then the count number on screen will change according to the variable counter number. You can see the whole program code in the following picture:

You can rewrite code by yourself to enjoy programming by dragging different blocks within block editor. It is very simple and easy just like playing bricks.Or you can download code directly into your micro:bit through the link below: https://makecode.microbit.org/56075-79158-25961-33471
Now, let’s download the whole program code into micro:bit and see what will happen.


