

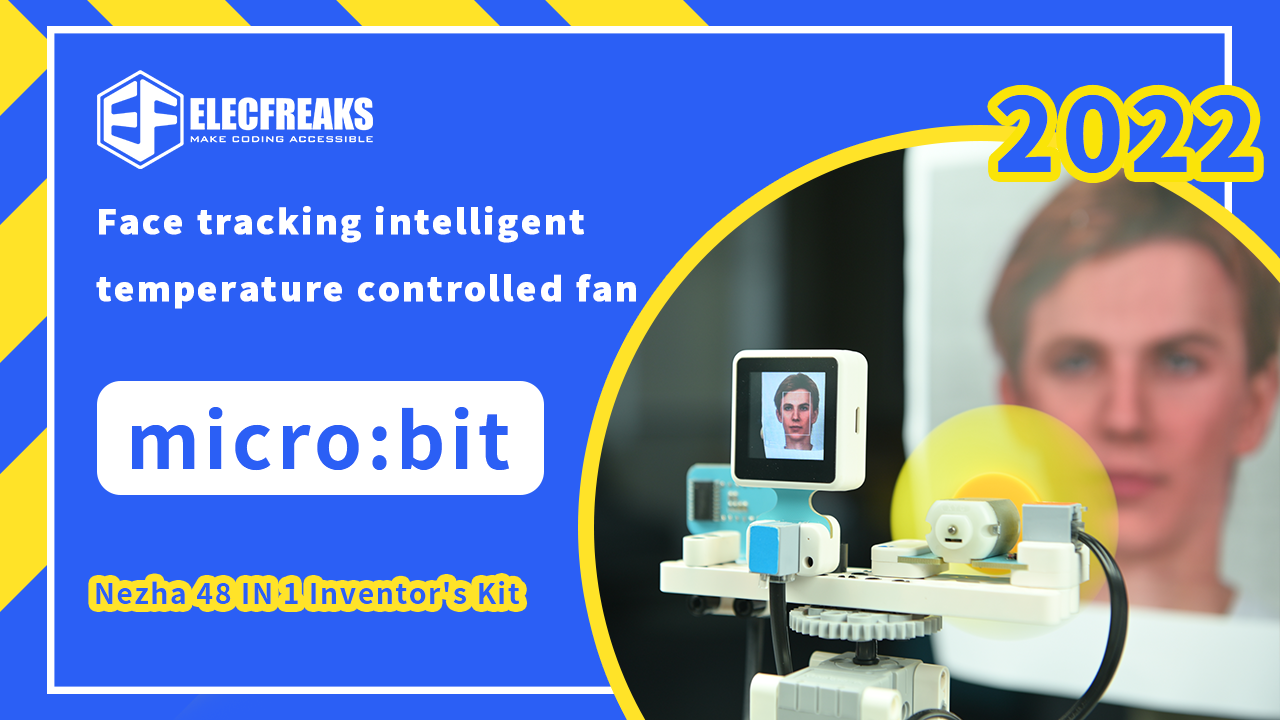
The heat of summer is unbearable. What can you think of when you think of summer? Chilled watermelon, the sea, ice cream, and air conditioning are the things that can make me feel a little bit cooler to soothe our hot mood. What if we walk outside without air conditioning? Does one thing flash in your mind at this moment? That is a fan! It may be easy for you to build a fan with blocks, but how to make an intelligent temperature-controlled fan that can achieve face tracking?


ELECFREAKS PlanetX Segment Sensor*1

ELECFREAKS PlanetX Motor Fan*1

ELECFREAKS PlanetX DHT11 Sensor*1

ELECFREAKS Nezha Breakout Board*1

ELECFREAKS 360 Degrees Building Blocks Servo*1

ELECFREAKS RJ11 4P4C 600mm Cable*1
Building block pellets
To complete this device, you first need to prepare some of the sensors and parts that I showed above. This includes the AI camera for face recognition, the DHT11 temperature and humidity sensor for sensing the current temperature, a digital tube for displaying the temperature, a fan module, the Whichcha multi-function expansion box, and other accessories. Next, follow my steps and get your hands dirty!
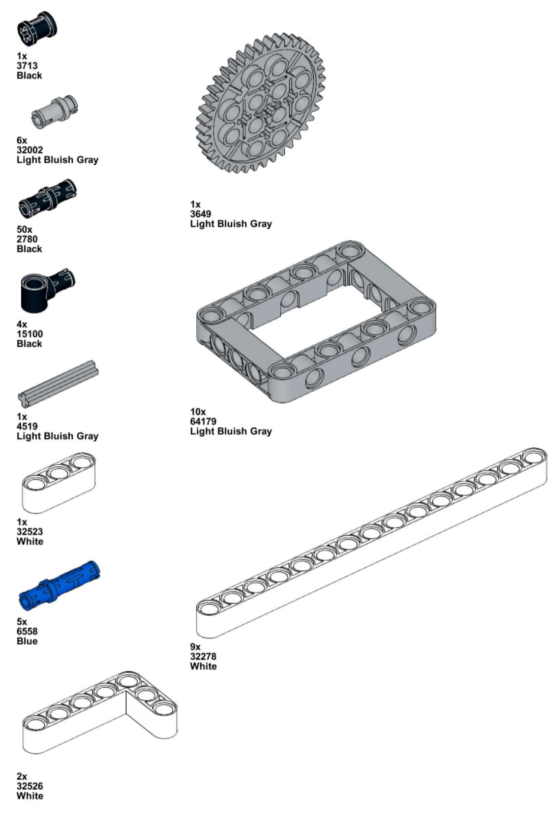
1. Build a base with 3 square frames and 4 short black pins.
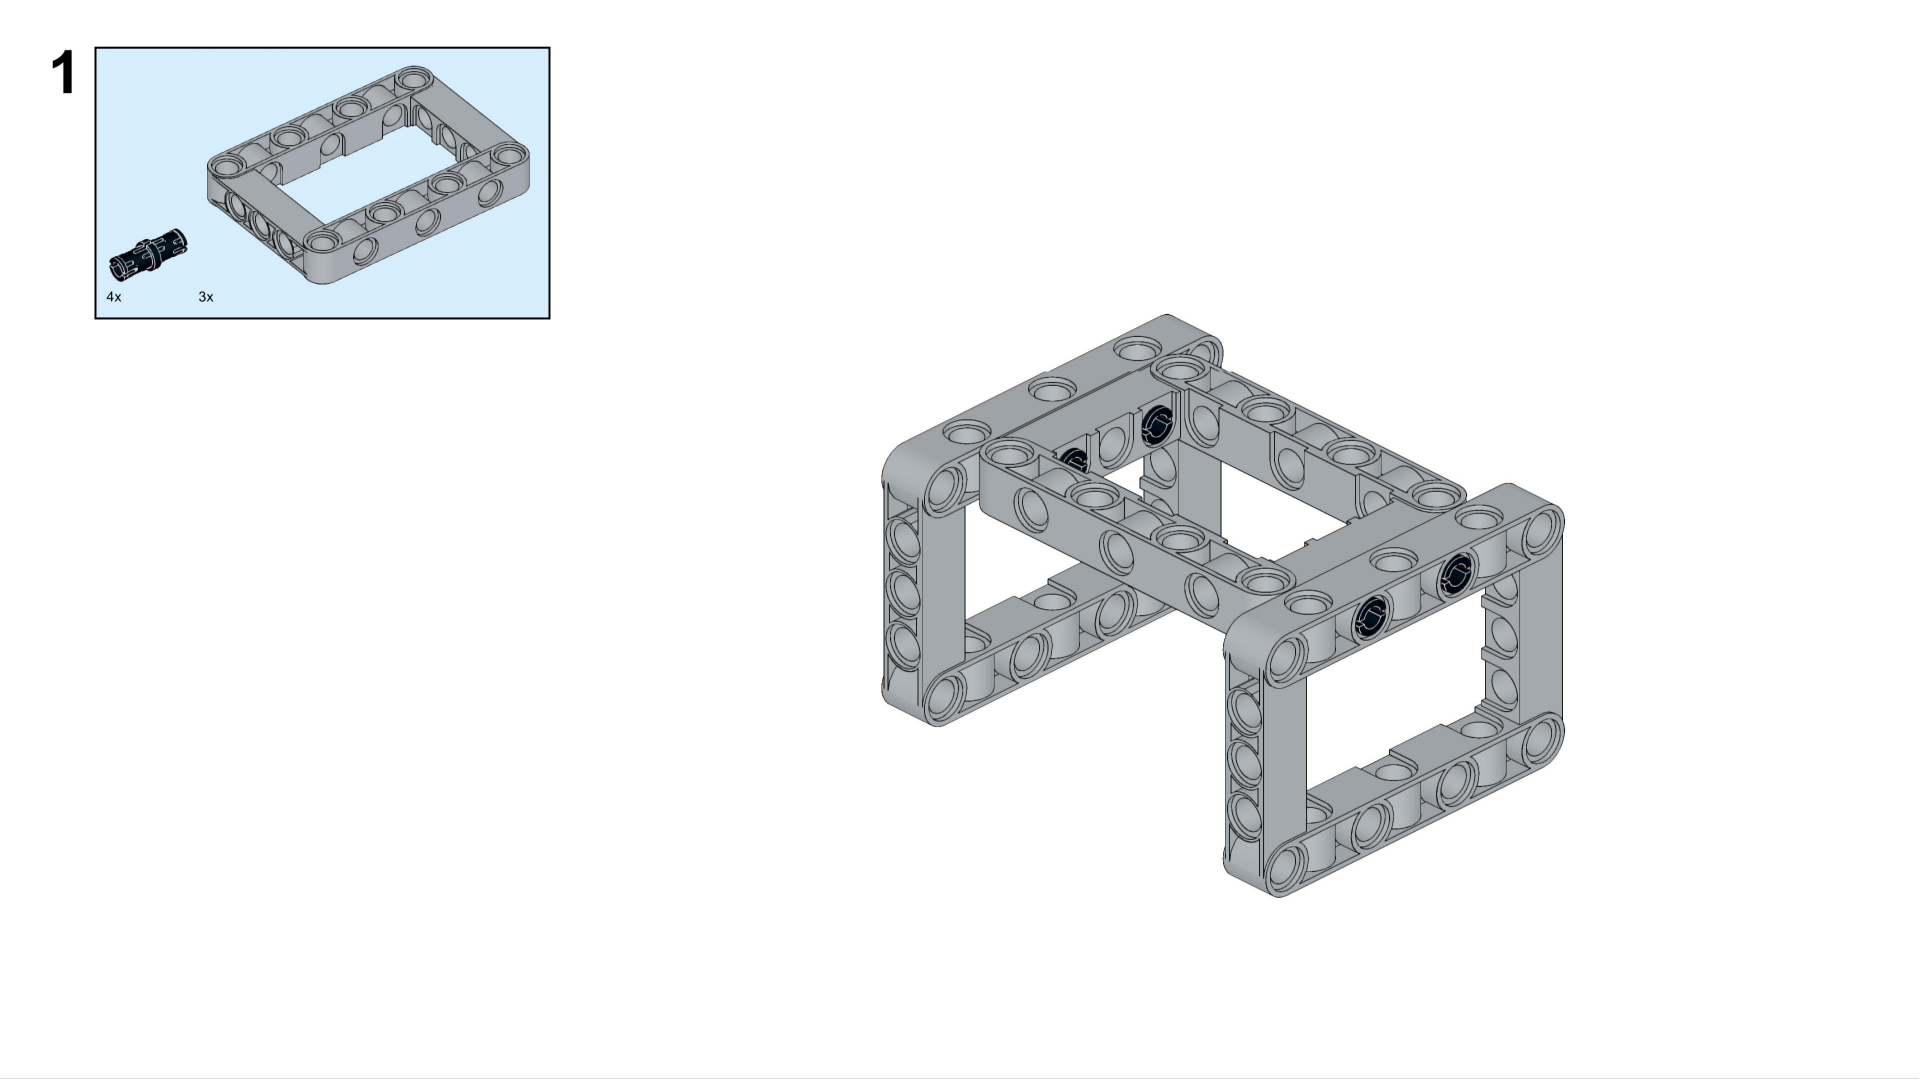
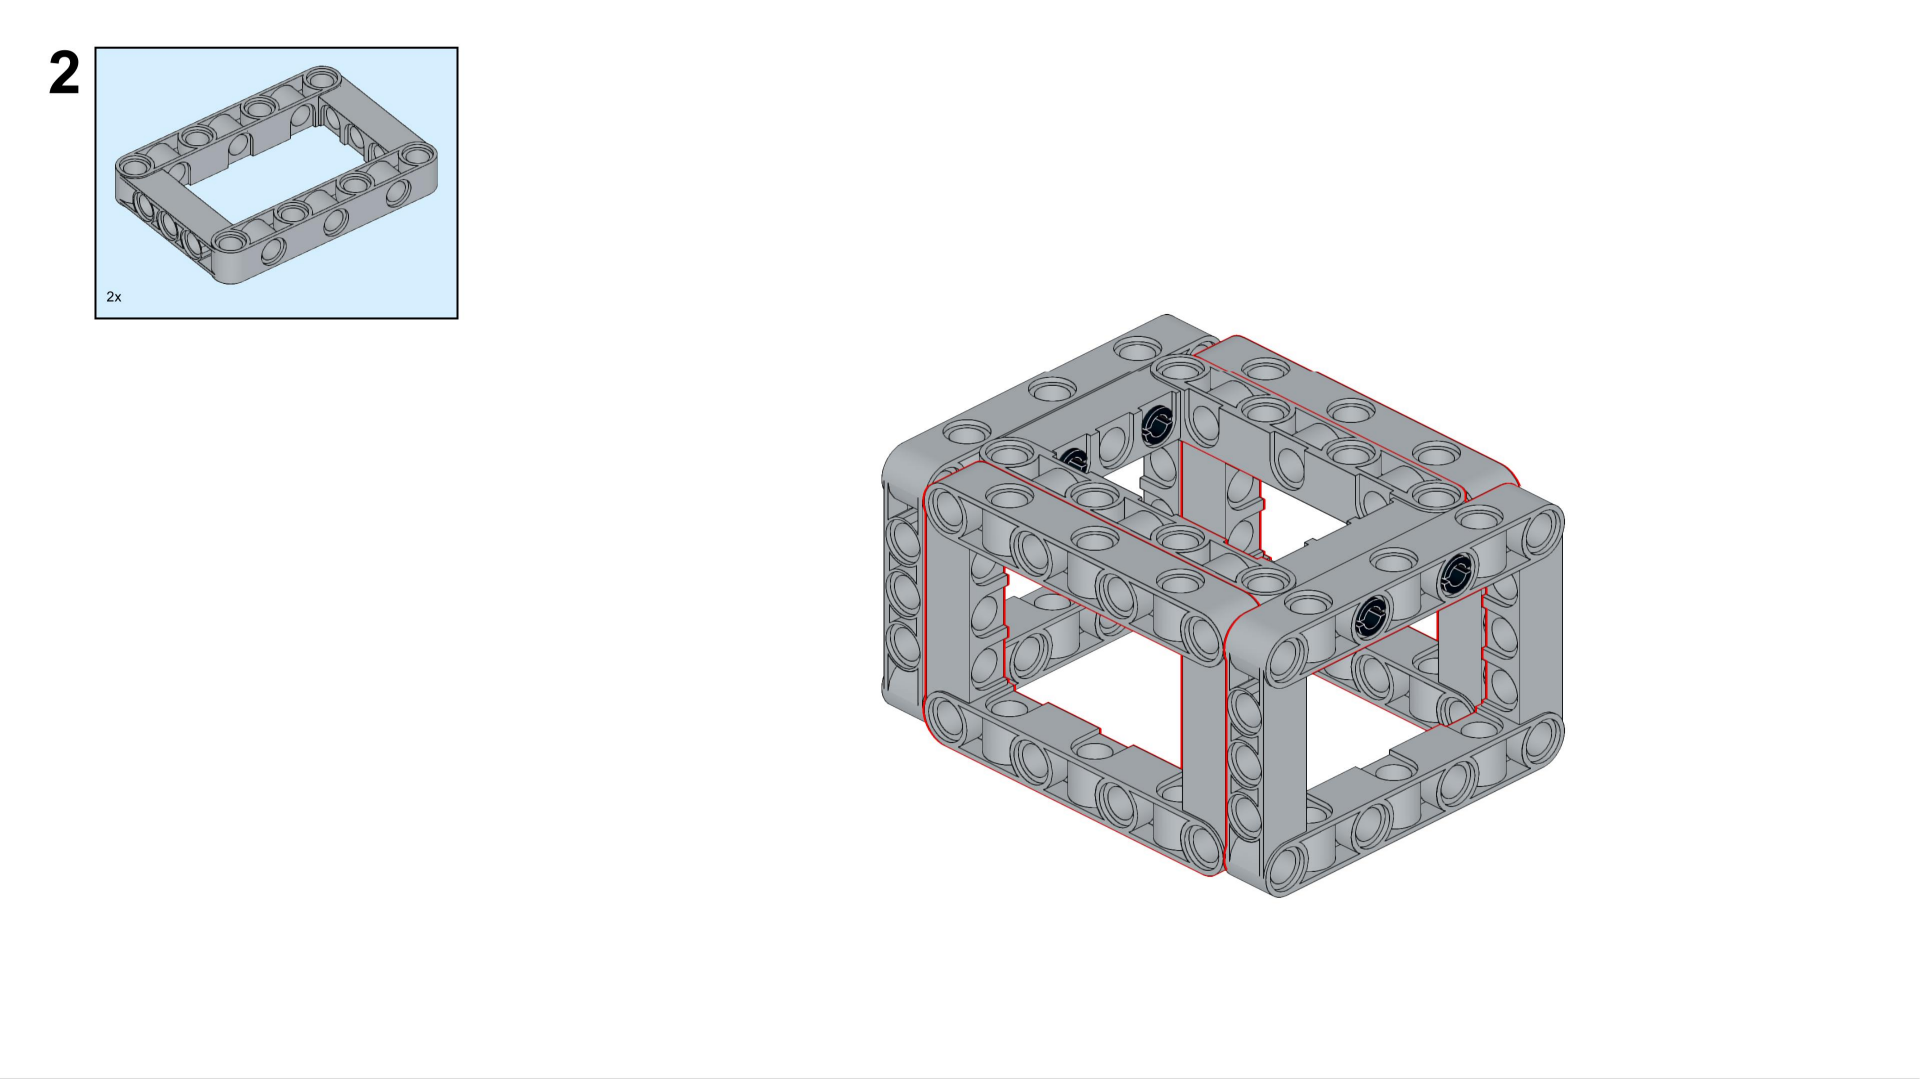
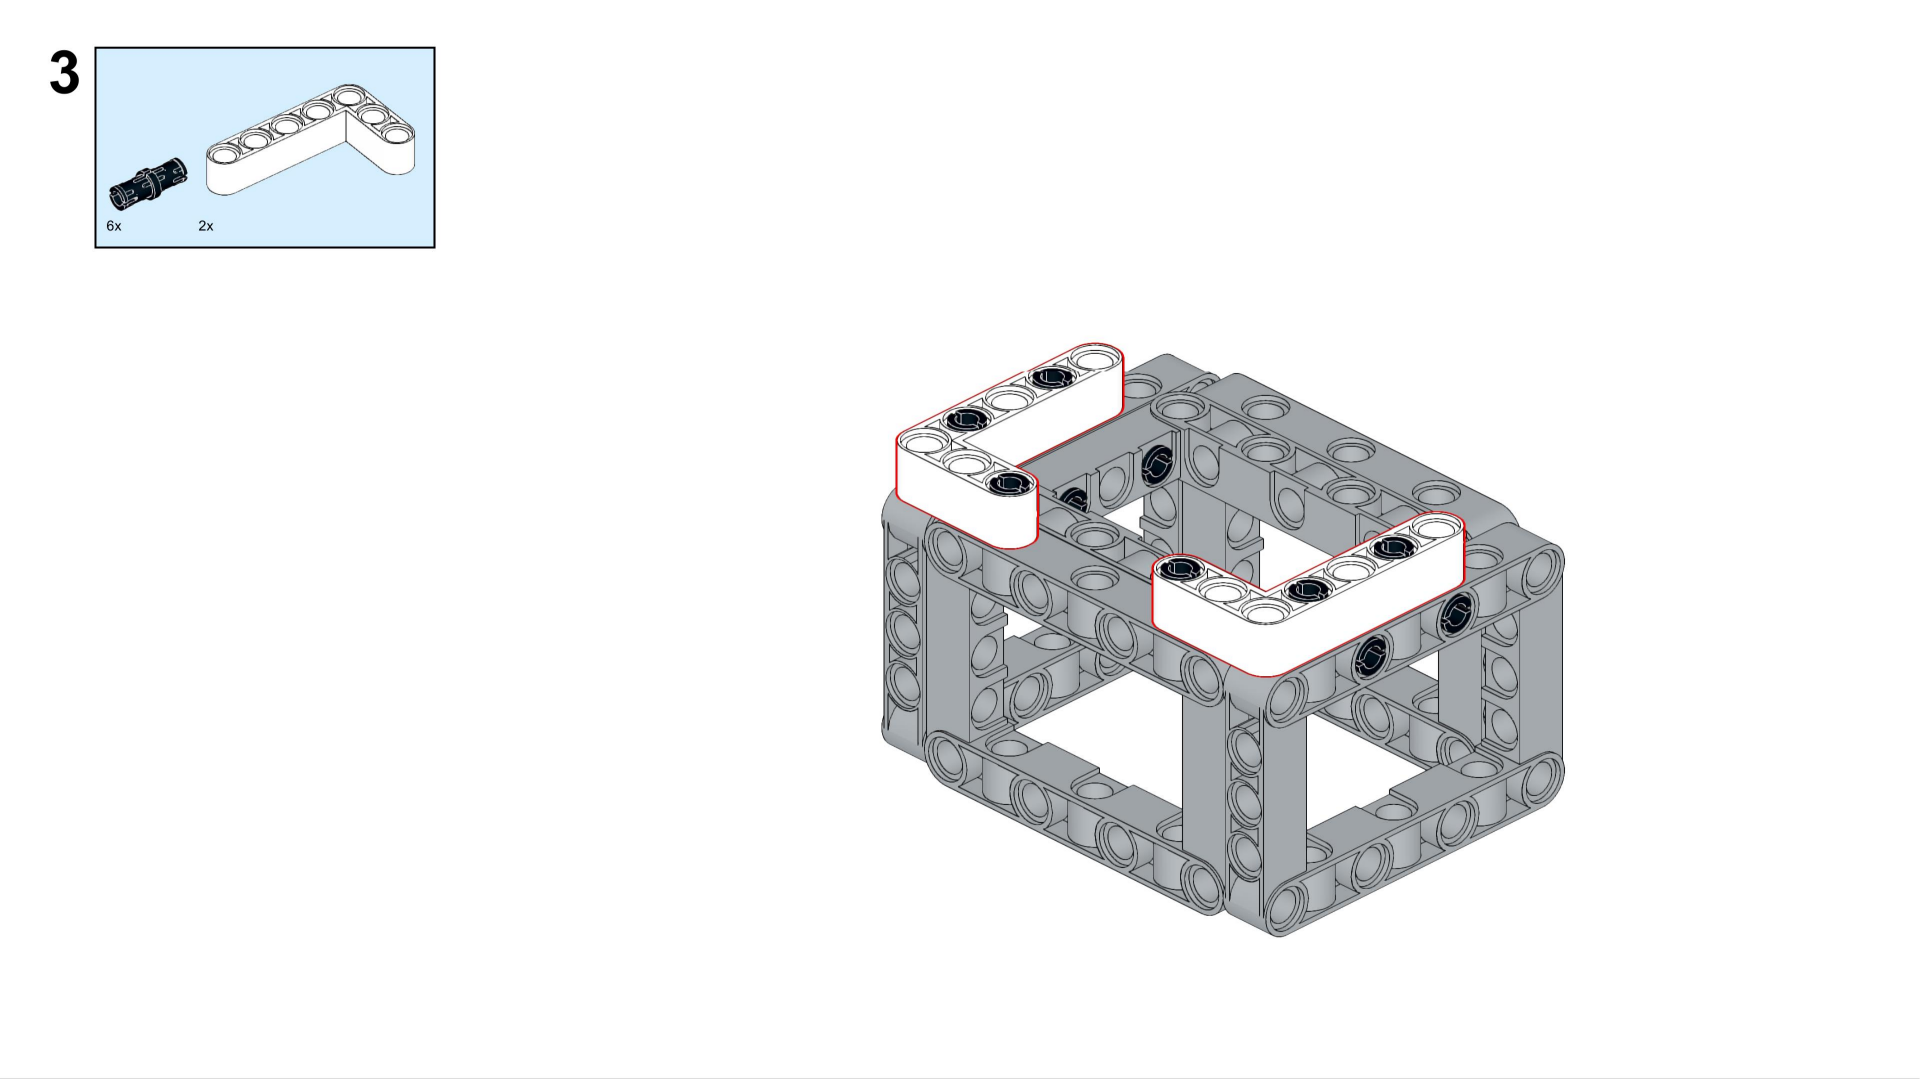
2-3. Complete the base with two more square frames and hold it in place with two L-shaped building block pieces and six black pins.
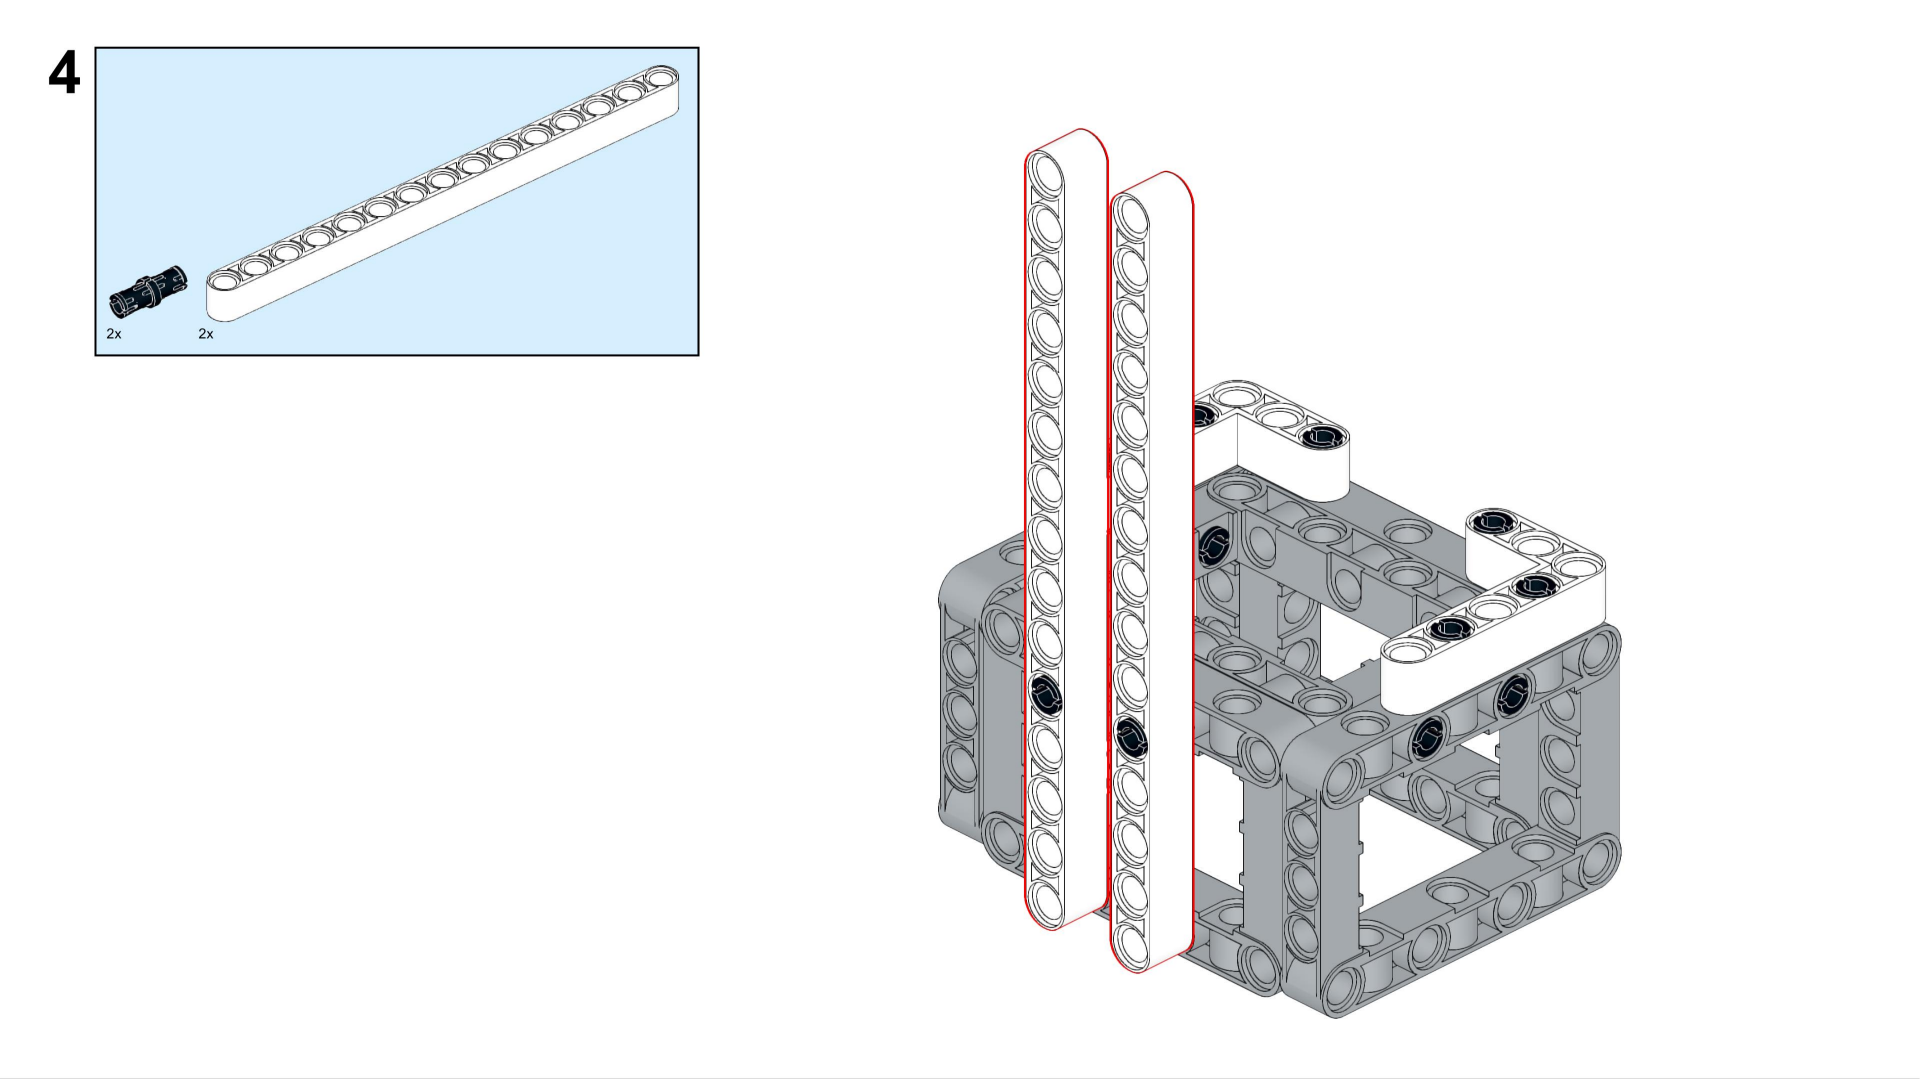
4. Reverse 180 degrees, and find two 15-hole block pieces vertically fixed on the base.
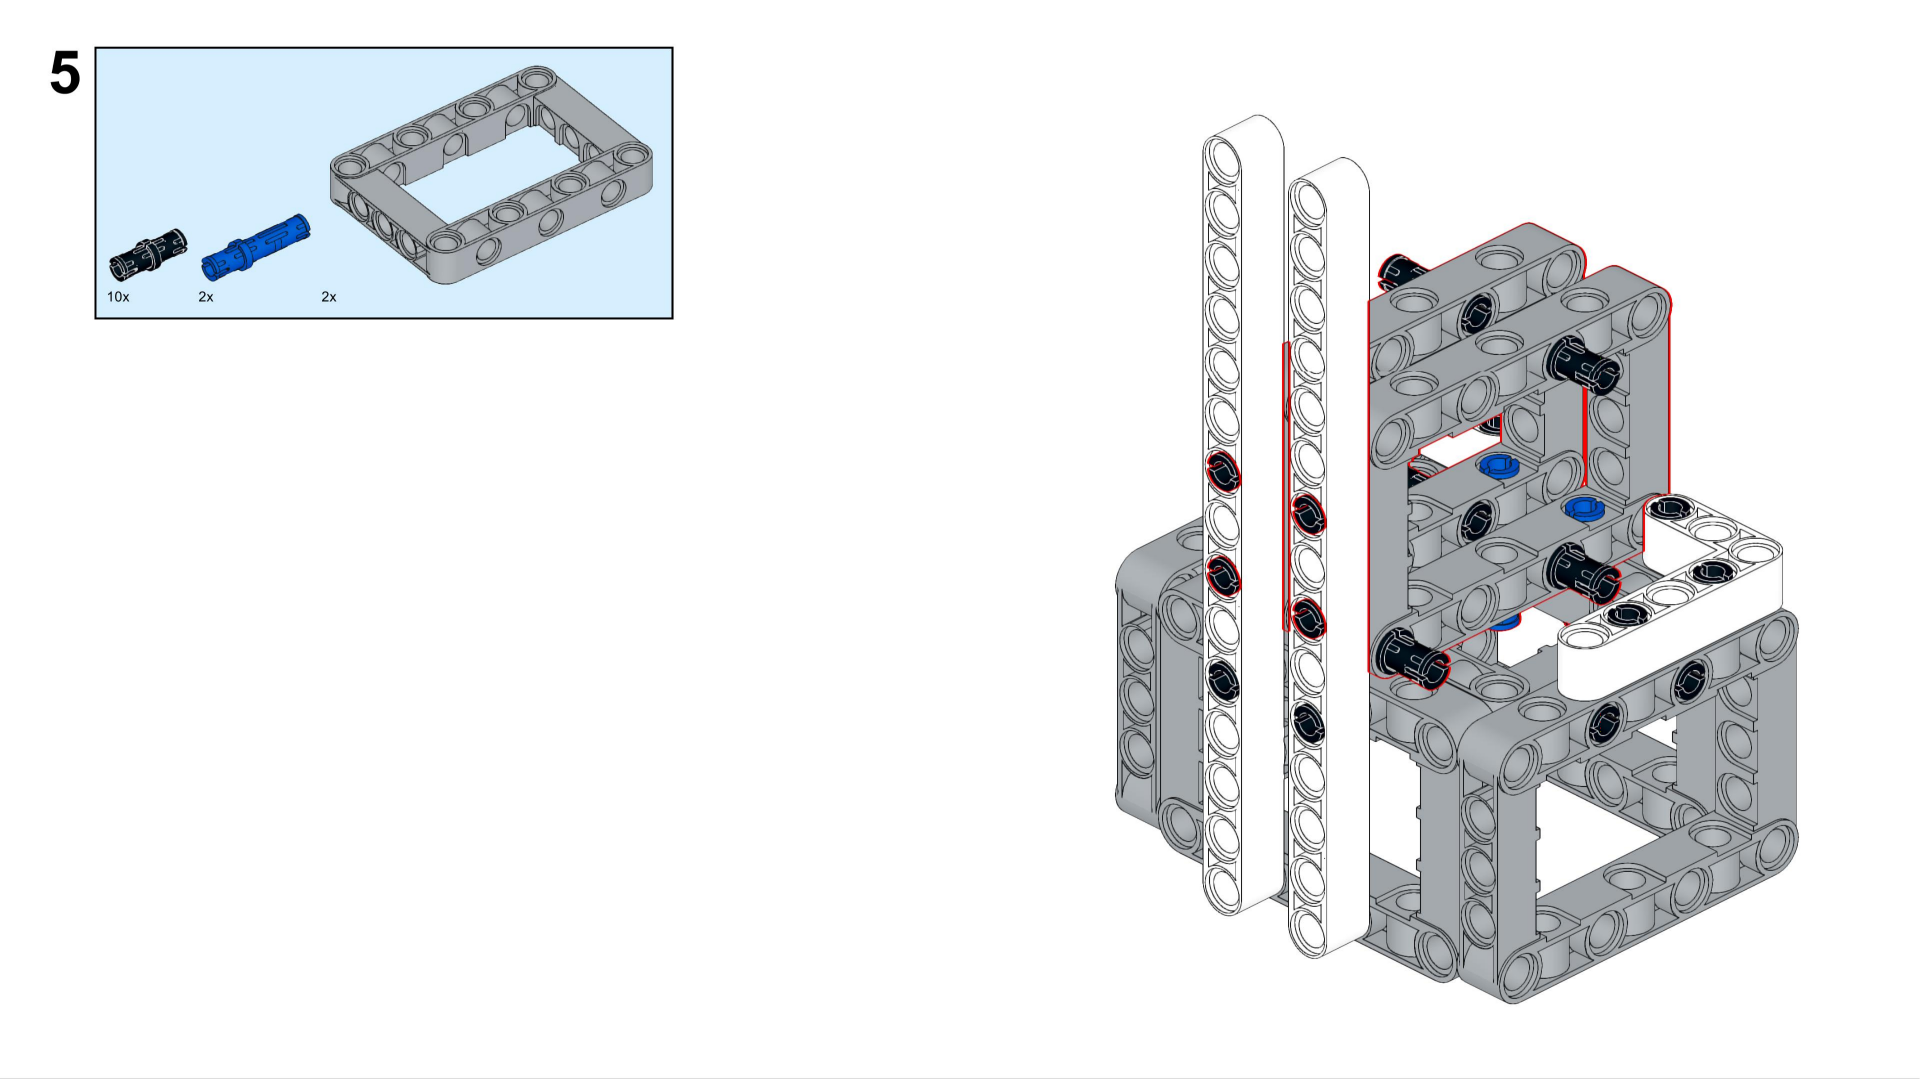
5. The two square boxes with a long bottom, with short black pins and long blue pins to fix the boxes on the base and 15-hole blocks long.
6. With the width as the bottom, continue to build the 3 square frames upwards. Remember to fix the 3 frames with long pins.

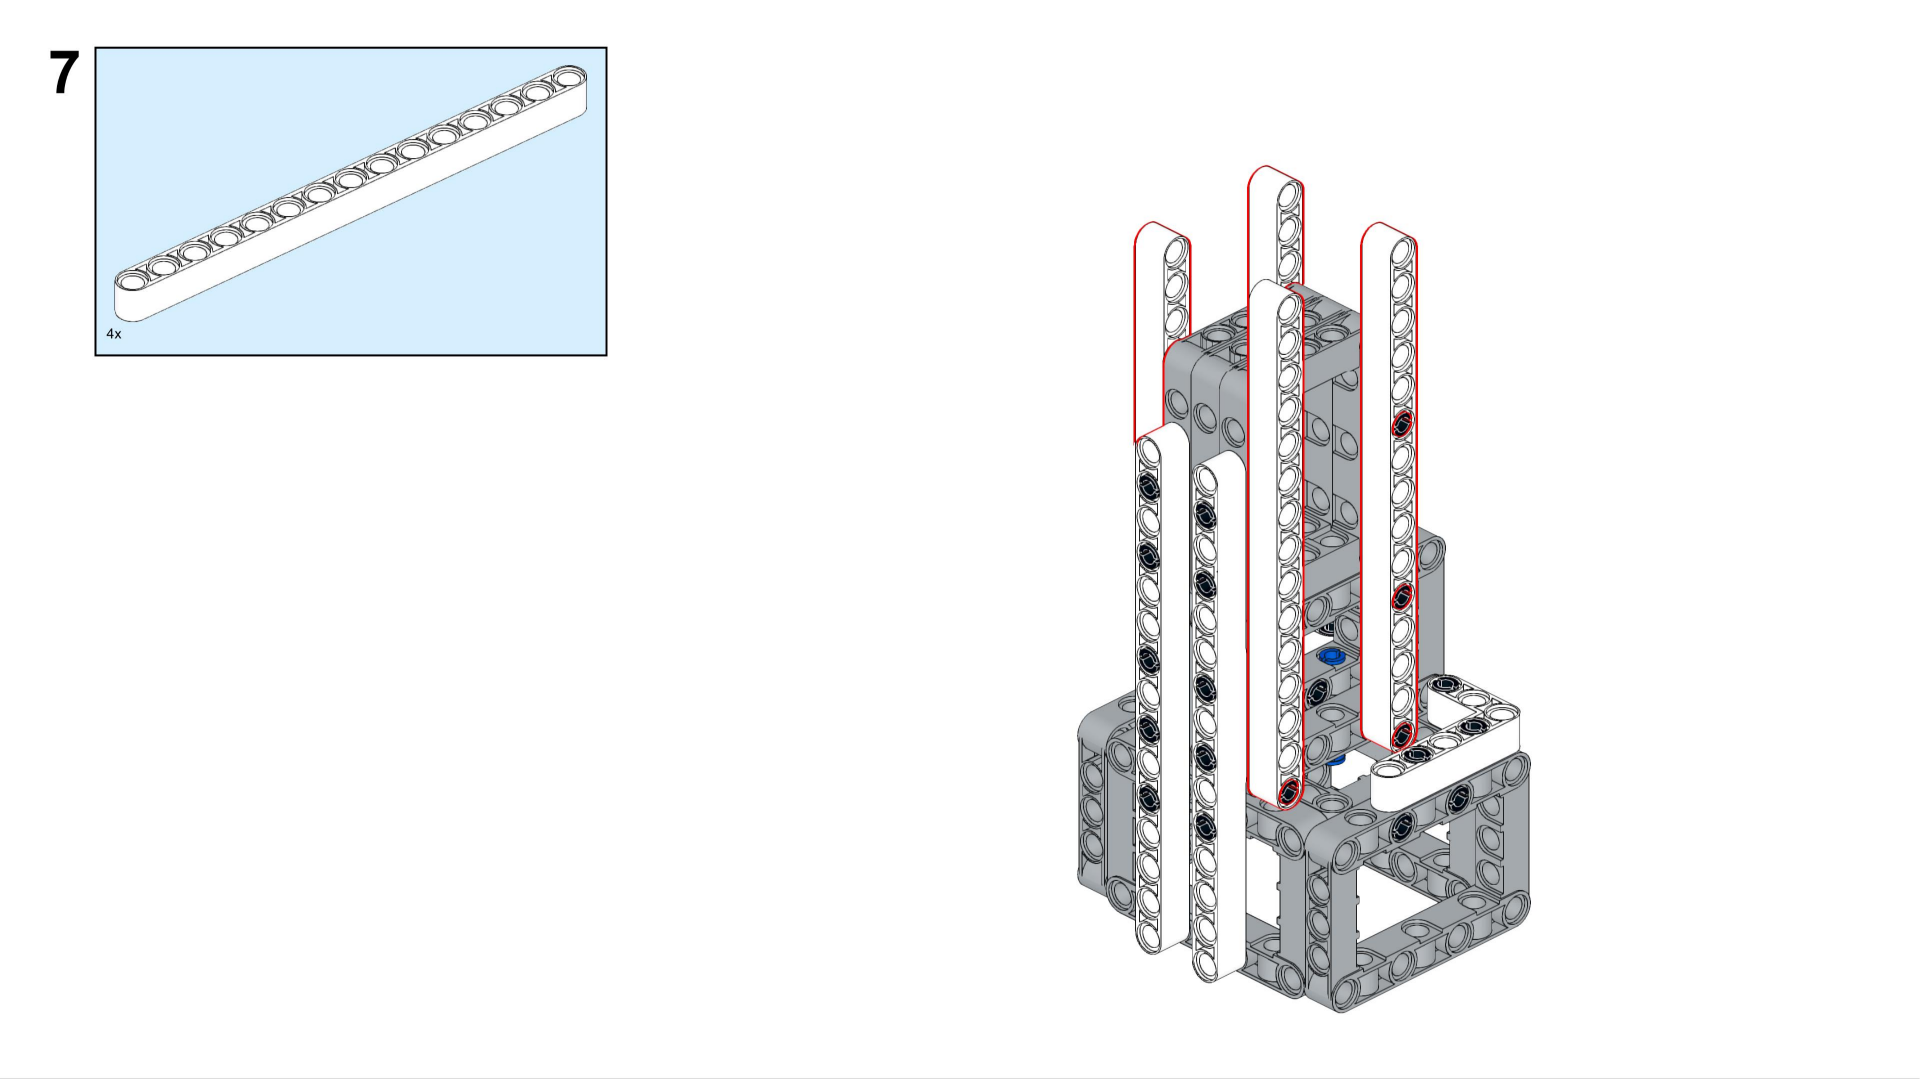
7. Find four 15-hole long pieces of blocks, as shown in the picture above, respectively fixed in four directions.
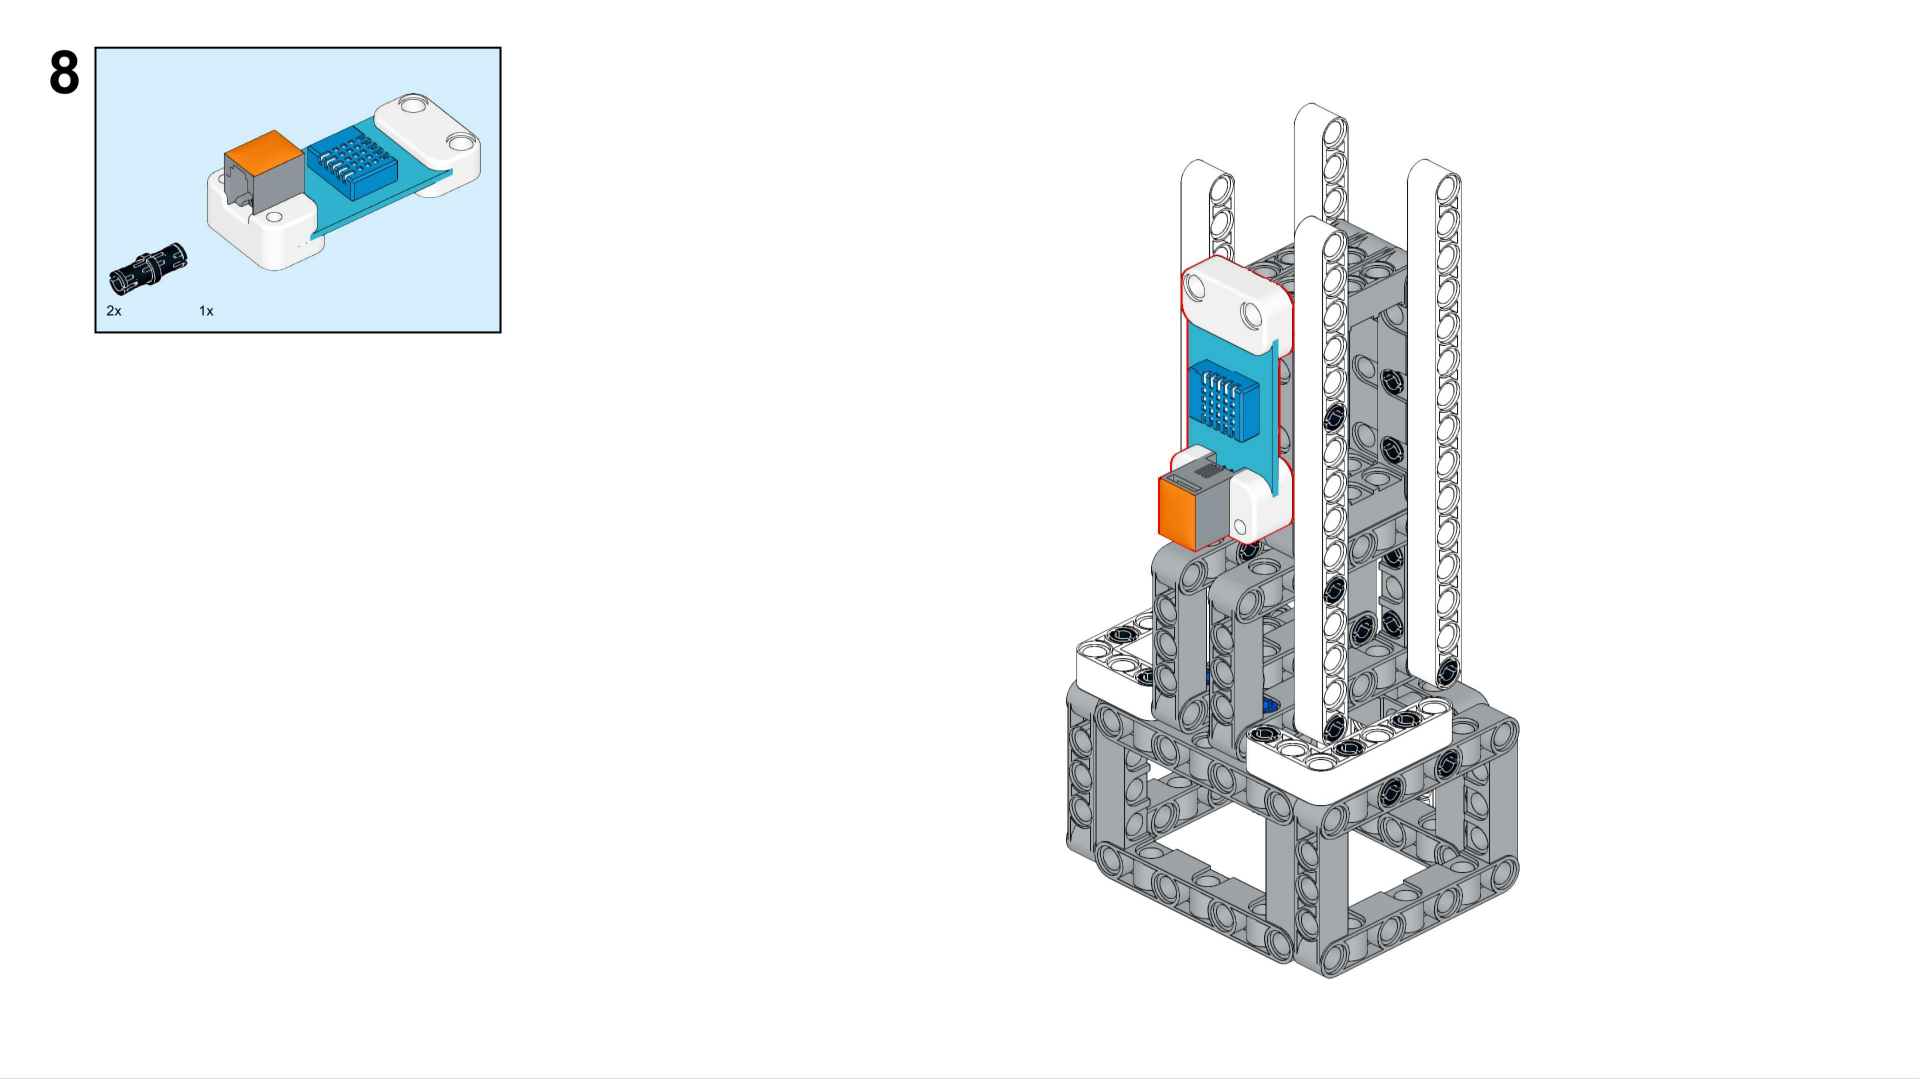
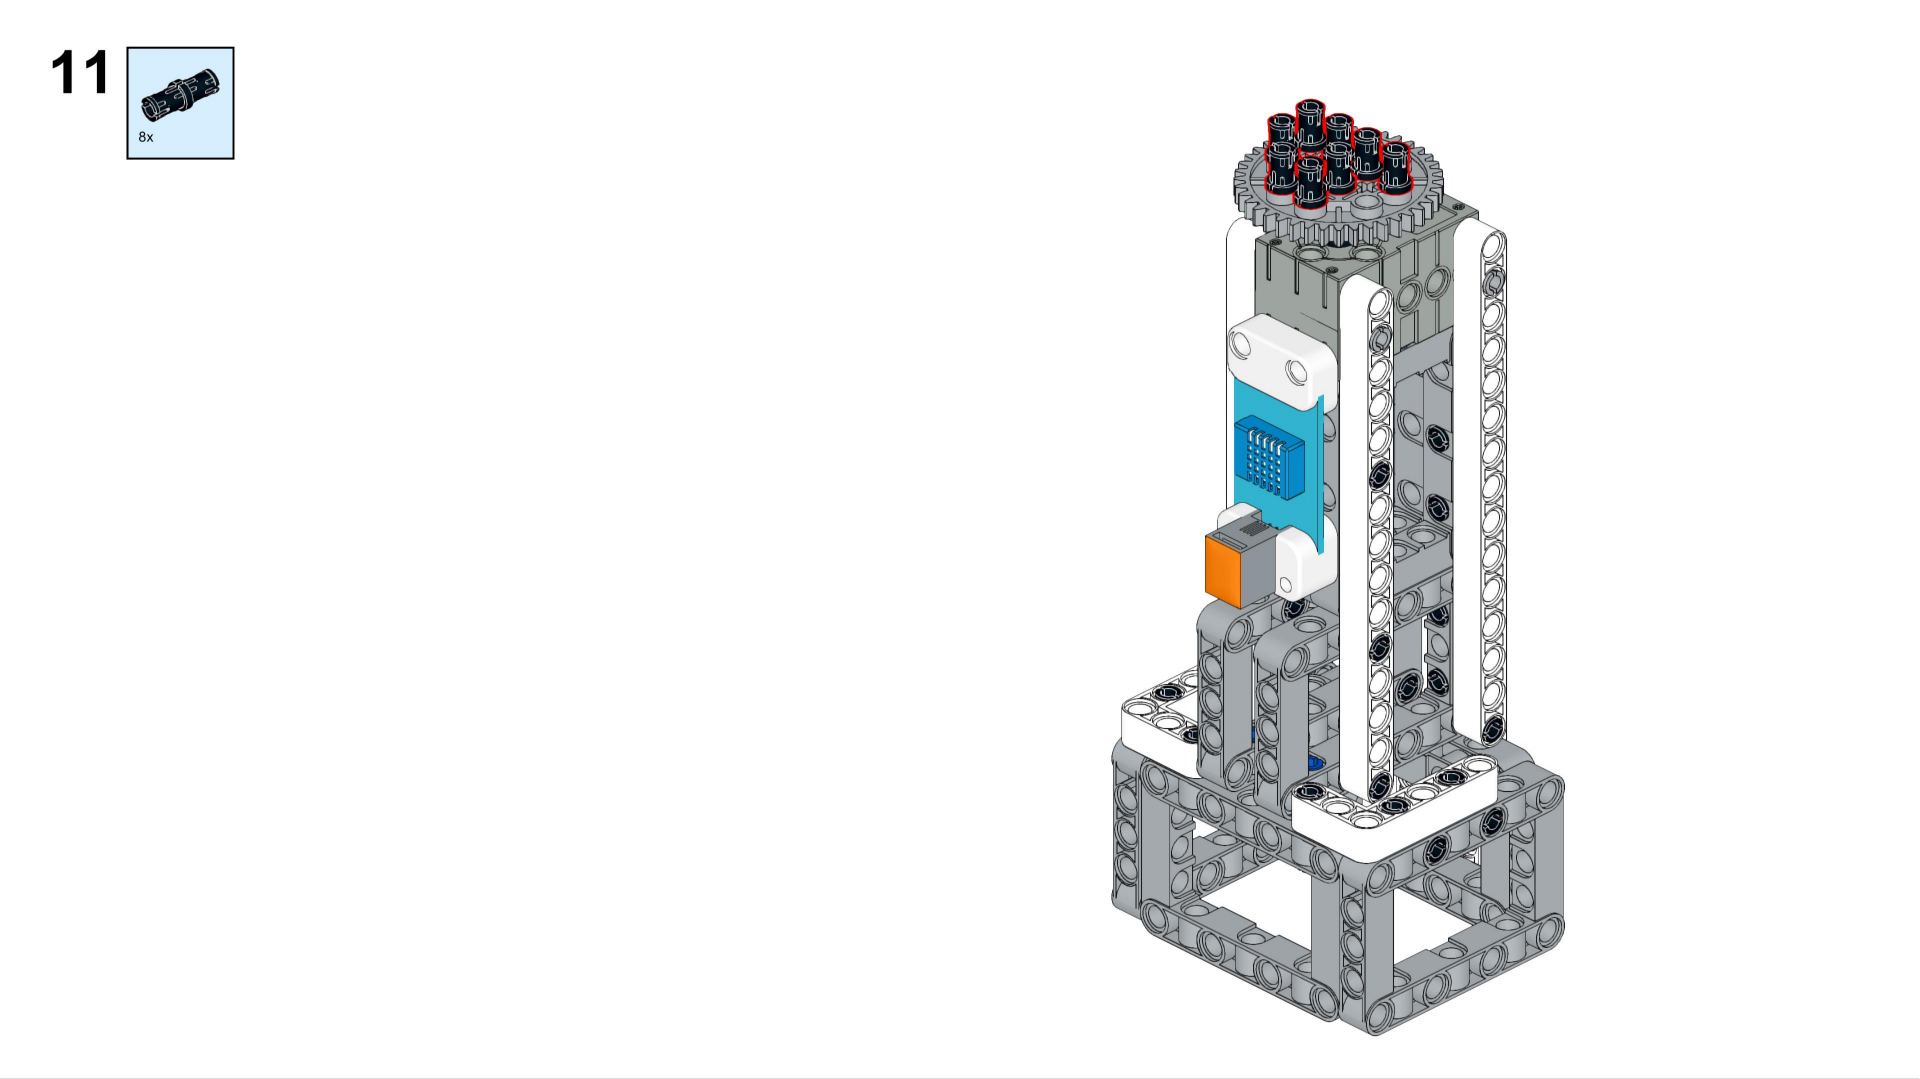
8. Reverse 180 degrees to find the DHT11 temperature and humidity sensor and insert it into the edge of the 3 merged square frames.
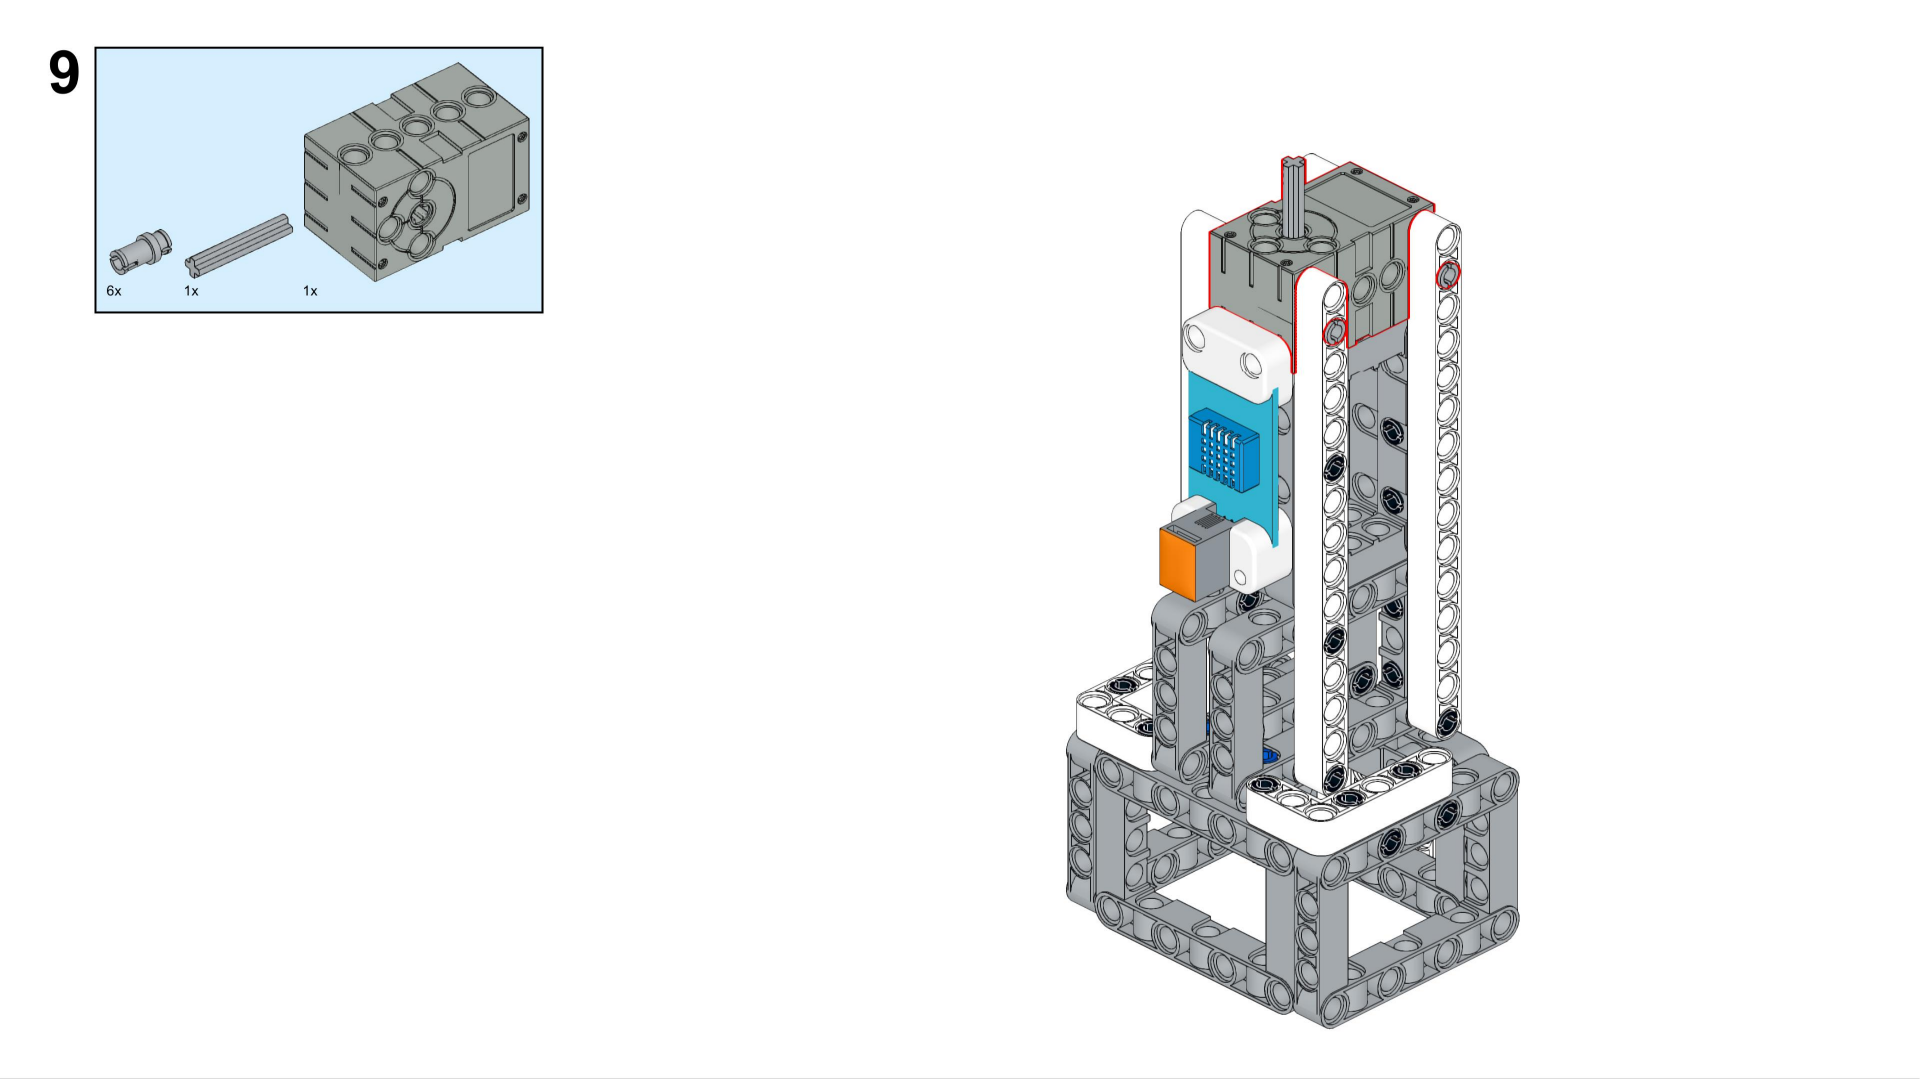
9. Next, fix the servo at the top and insert a short shaft in the middle of the servo.
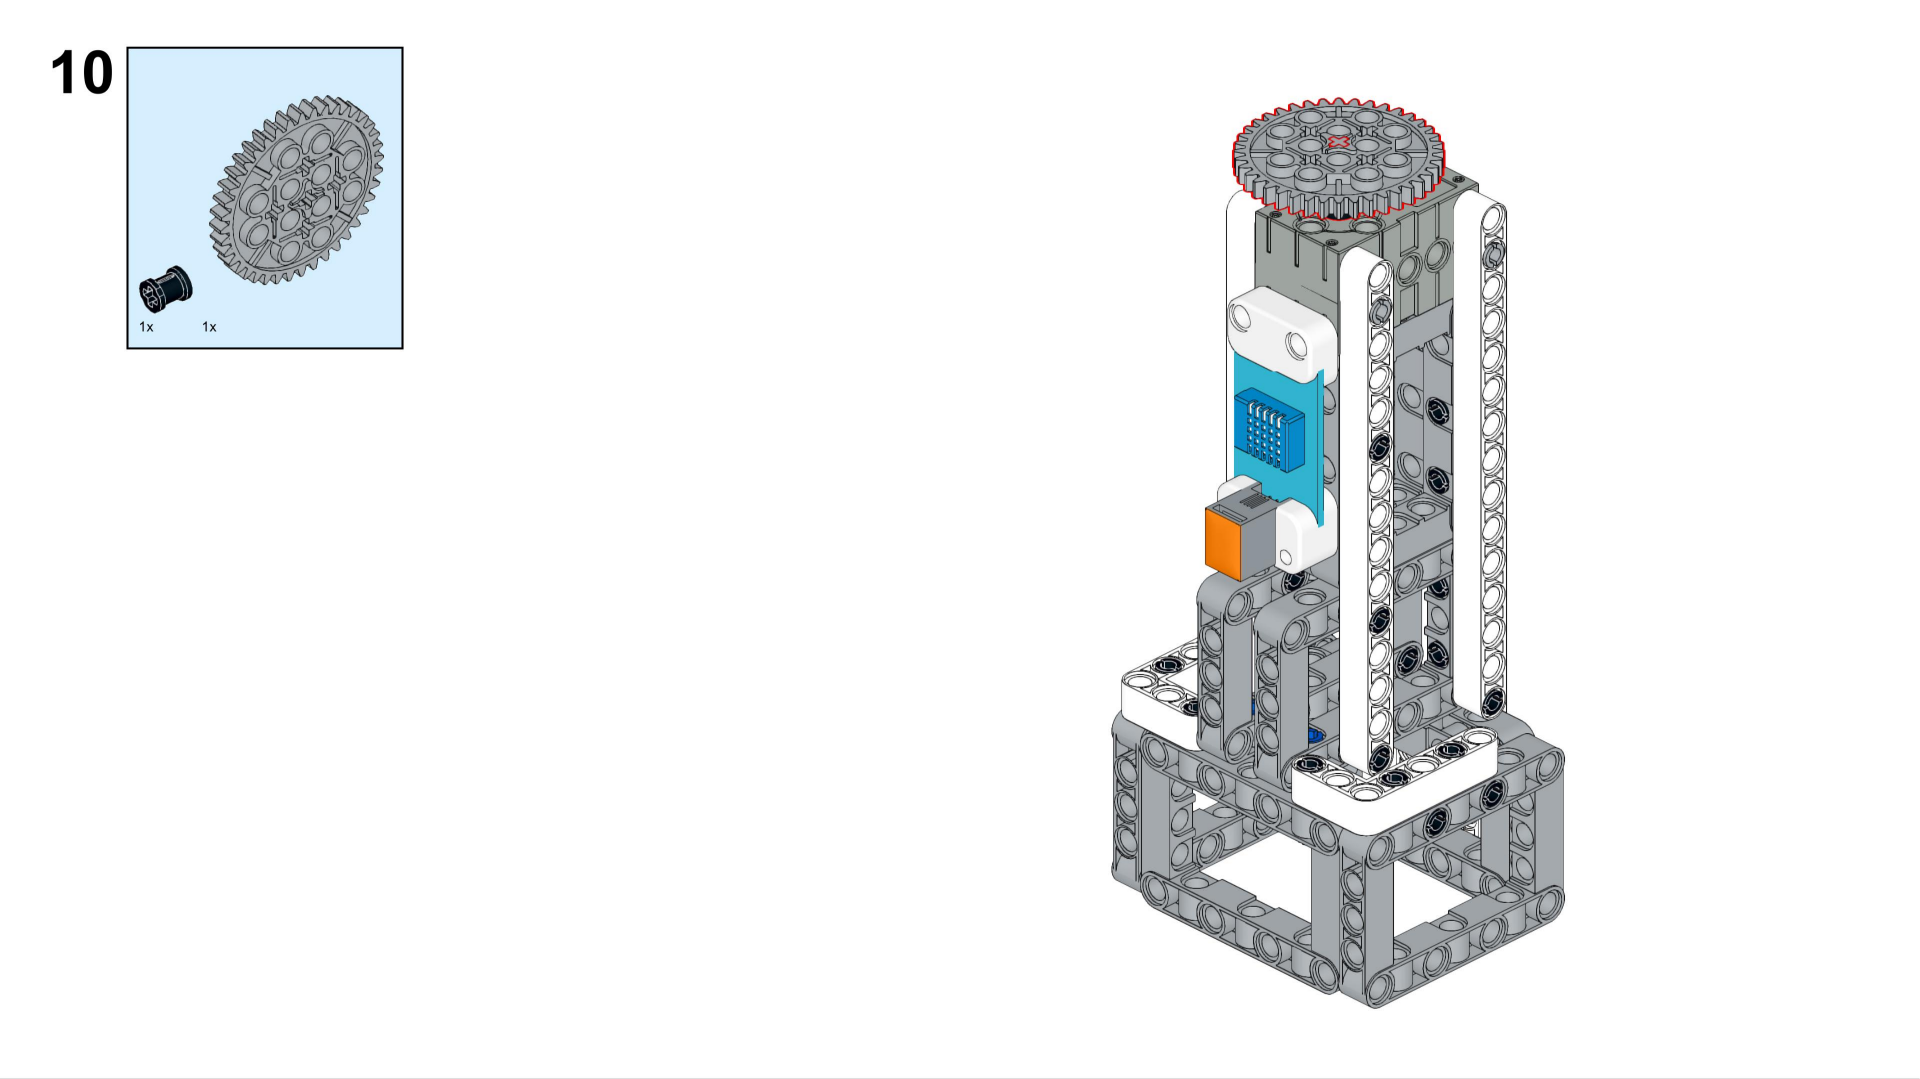
10. Gear inserted into the short shaft.
11. Use 8 black pins as shown above to insert into each of the 8 holes in the middle of the gear.
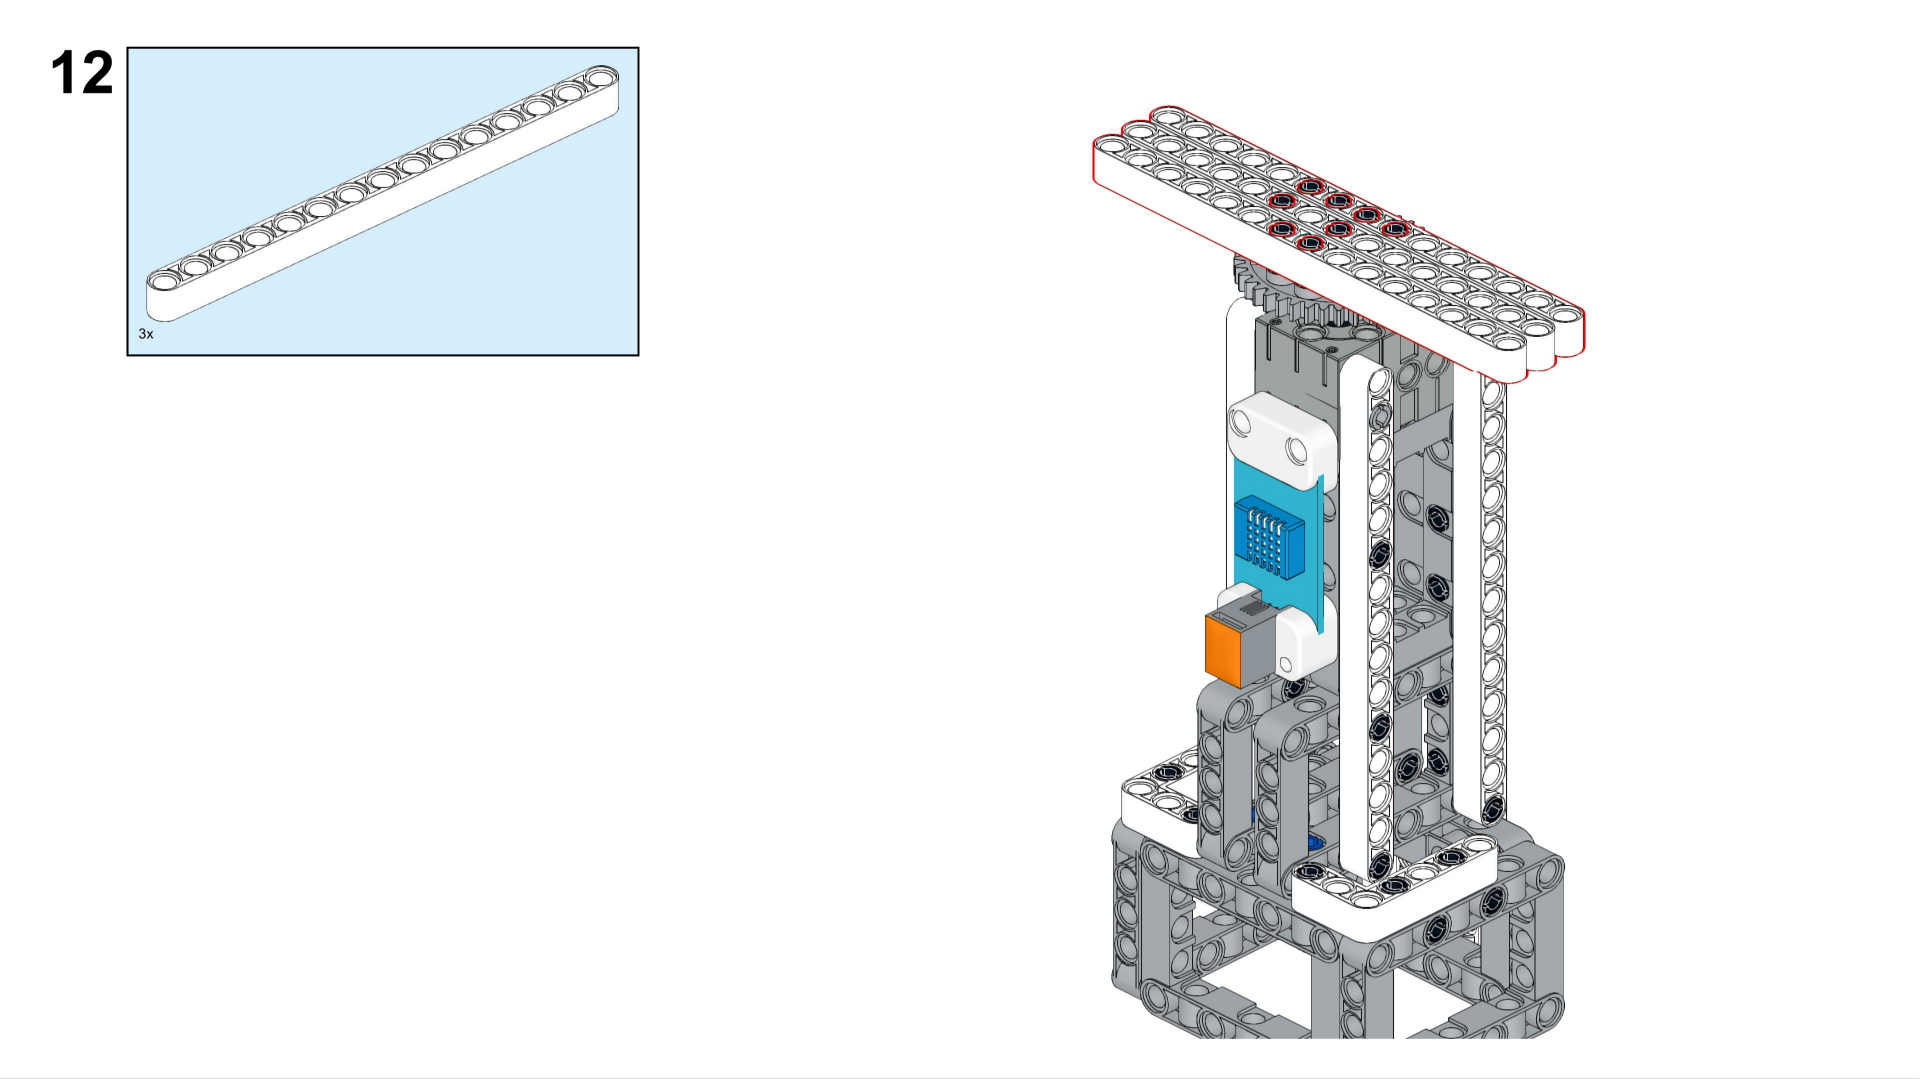
12. Insert 3 long 15-hole building blocks and insert them into the black pins just now.
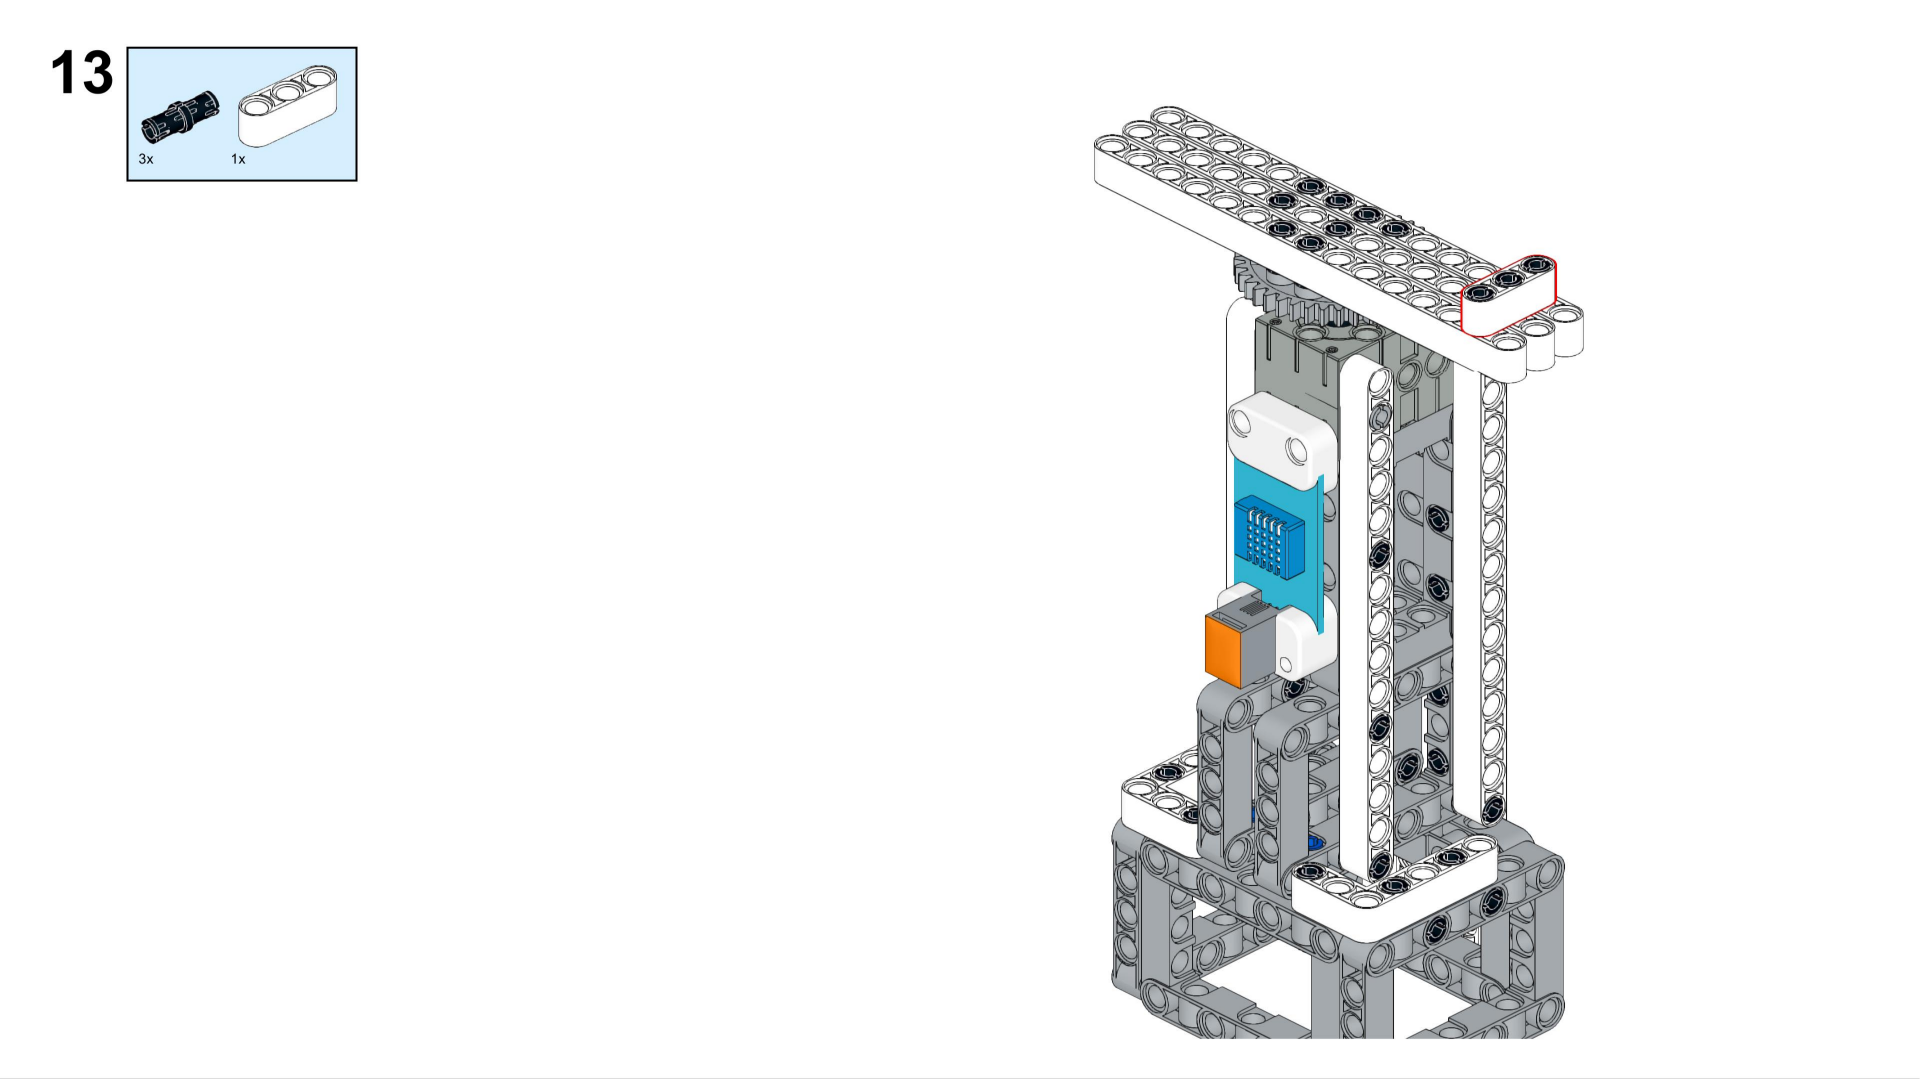
13. Insert the 3-hole block pieces into the second hole on the left on the 15-hole long strip.
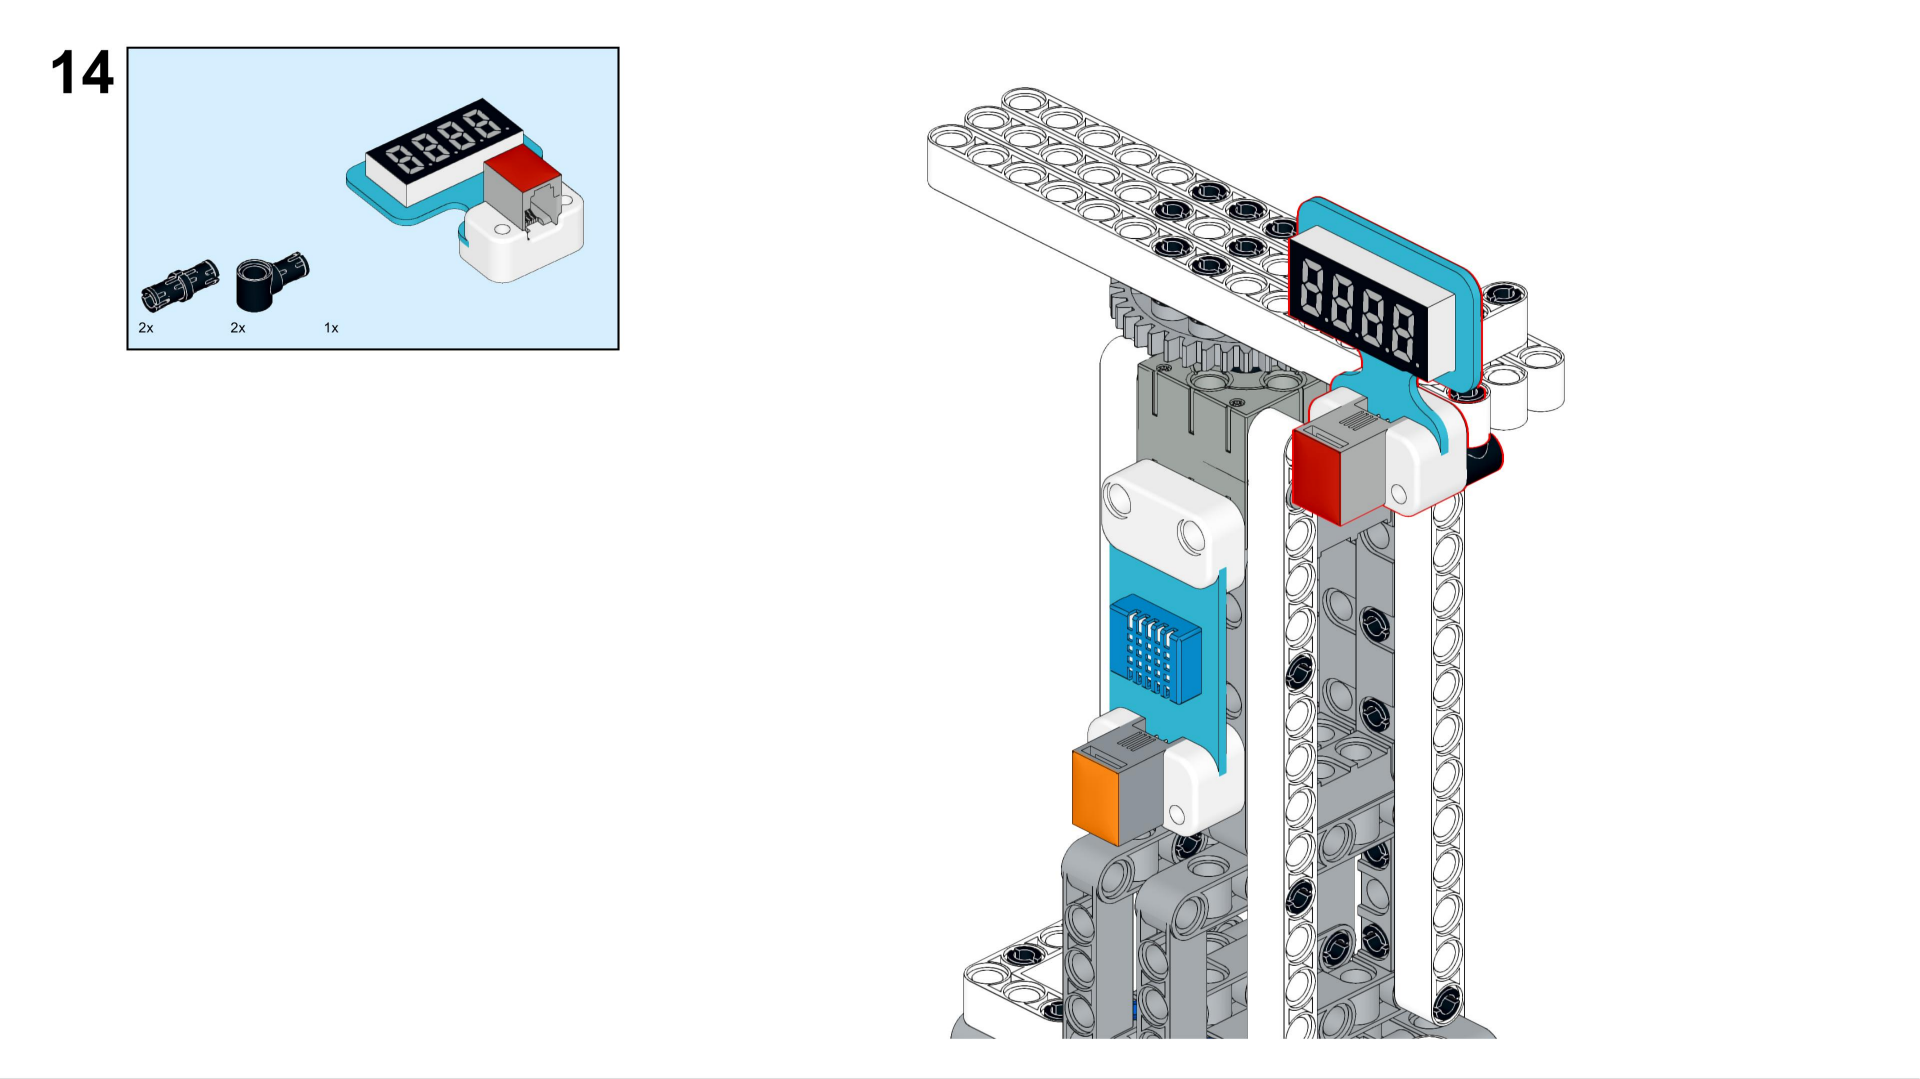
14. Install the 7-segment 4-digit digital tube module at the leftmost position.
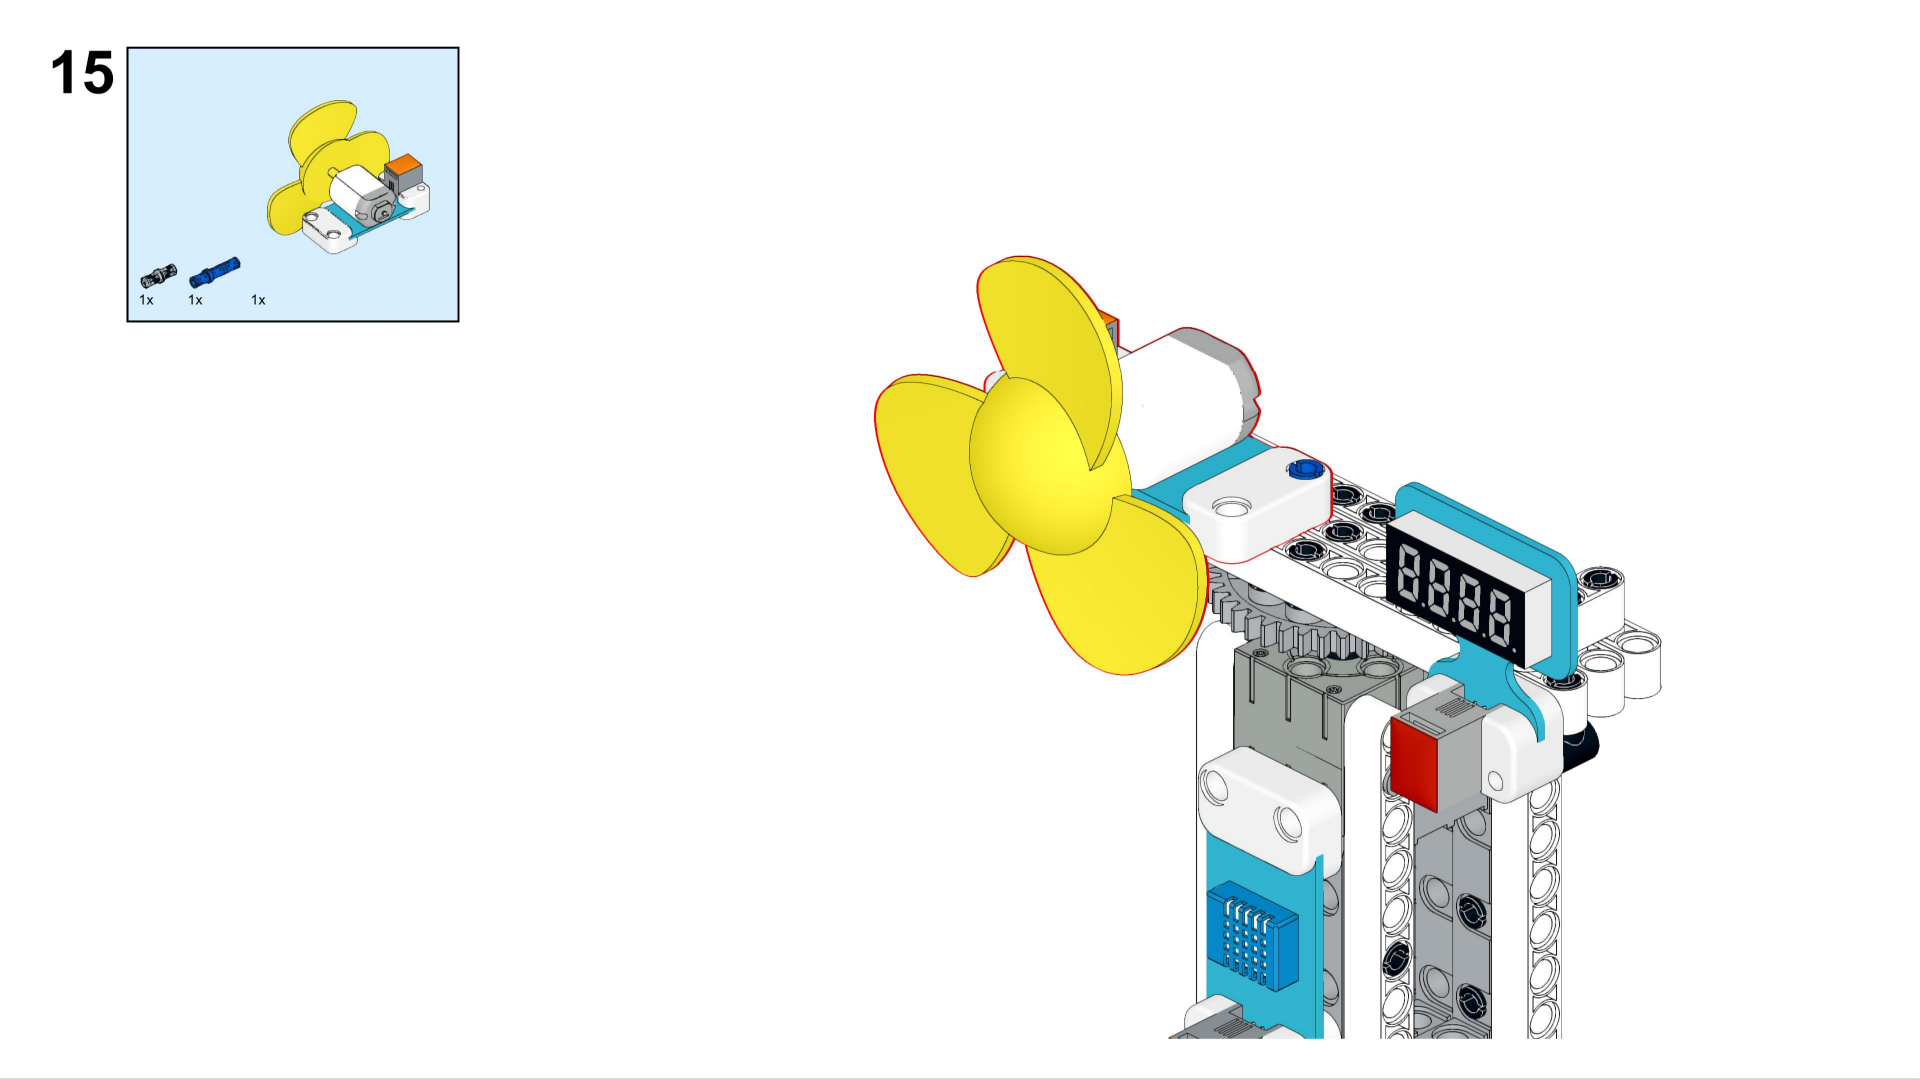
15. The fan module is installed at the rightmost position.
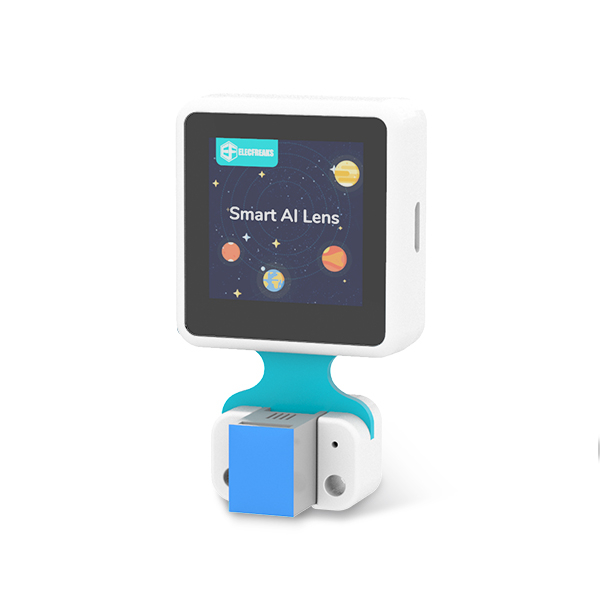
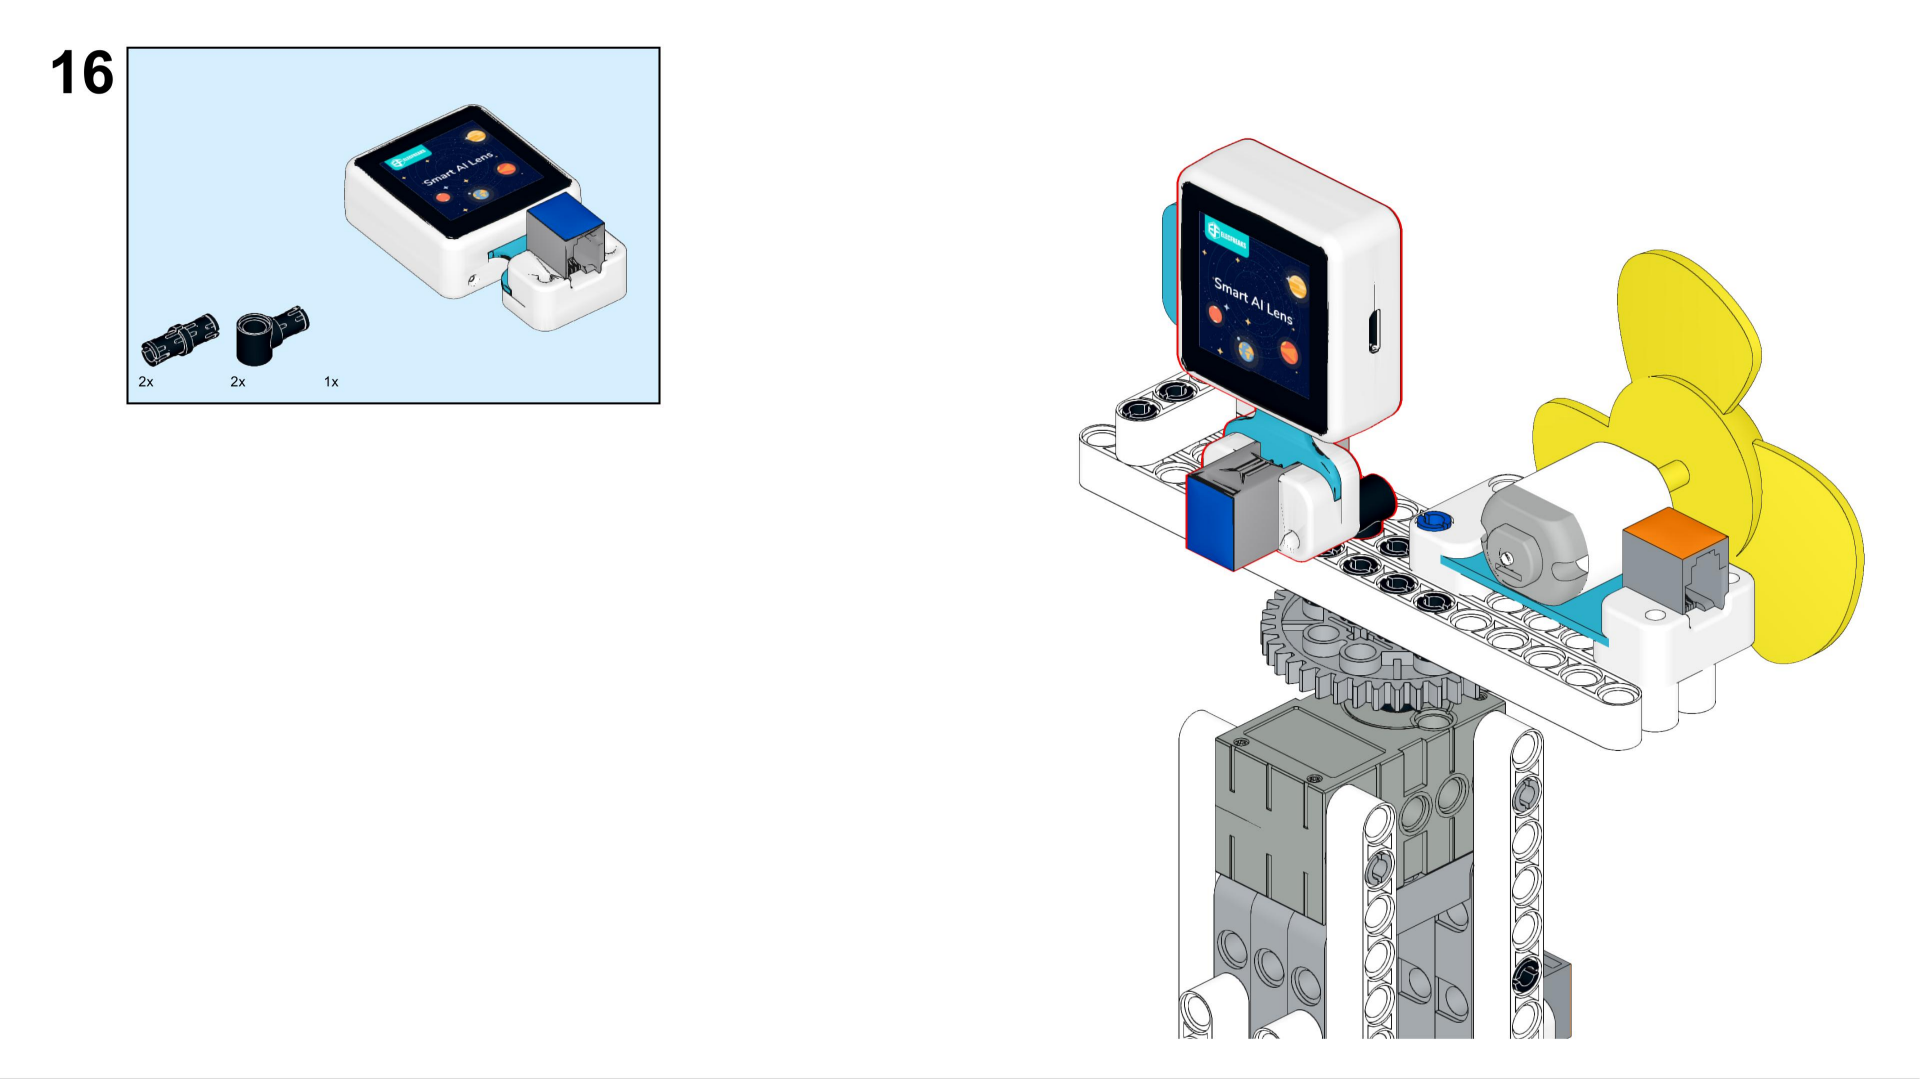
16. Install the Smart AI Lens on the back, and remember not to block the location of the lens.
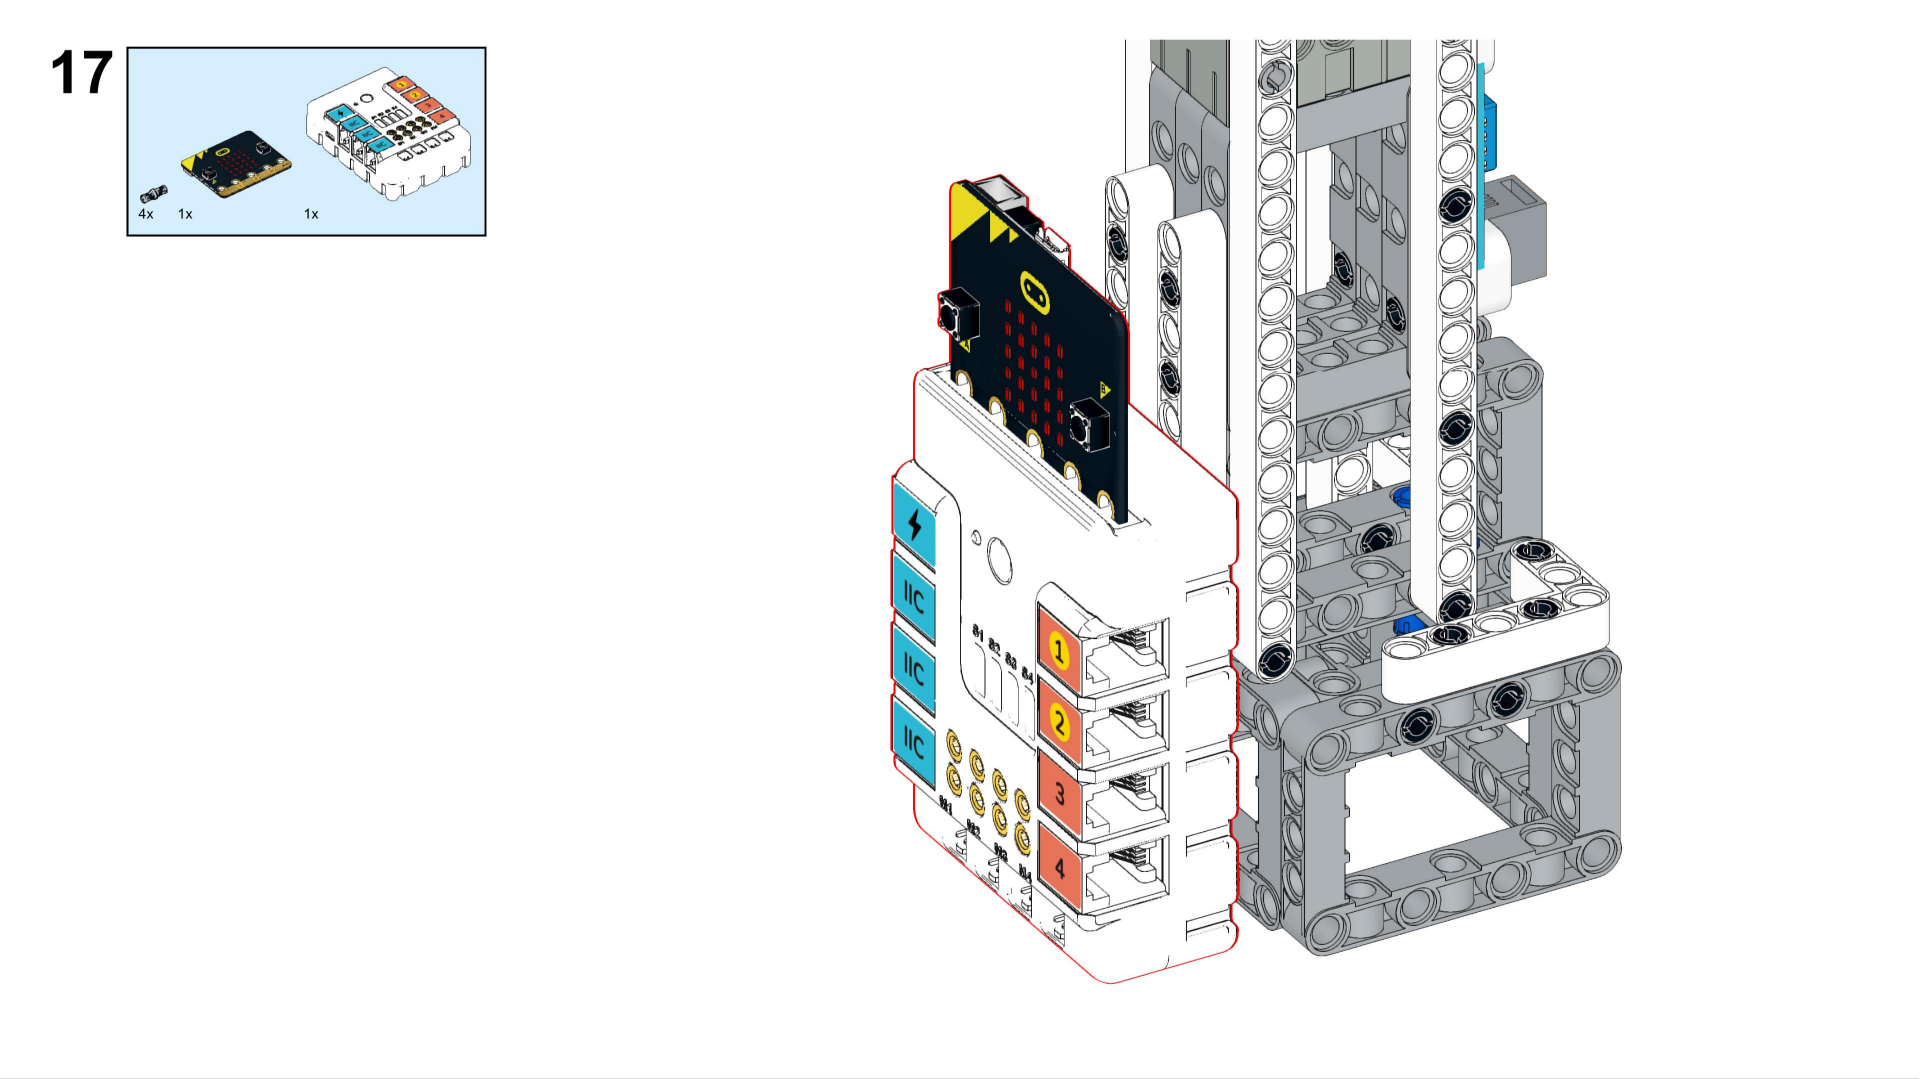
17. Finally, fix the Nezha Breakout Board below.
18-19. So a smart temperature control fan with a face tracking function is built!

STEP 1
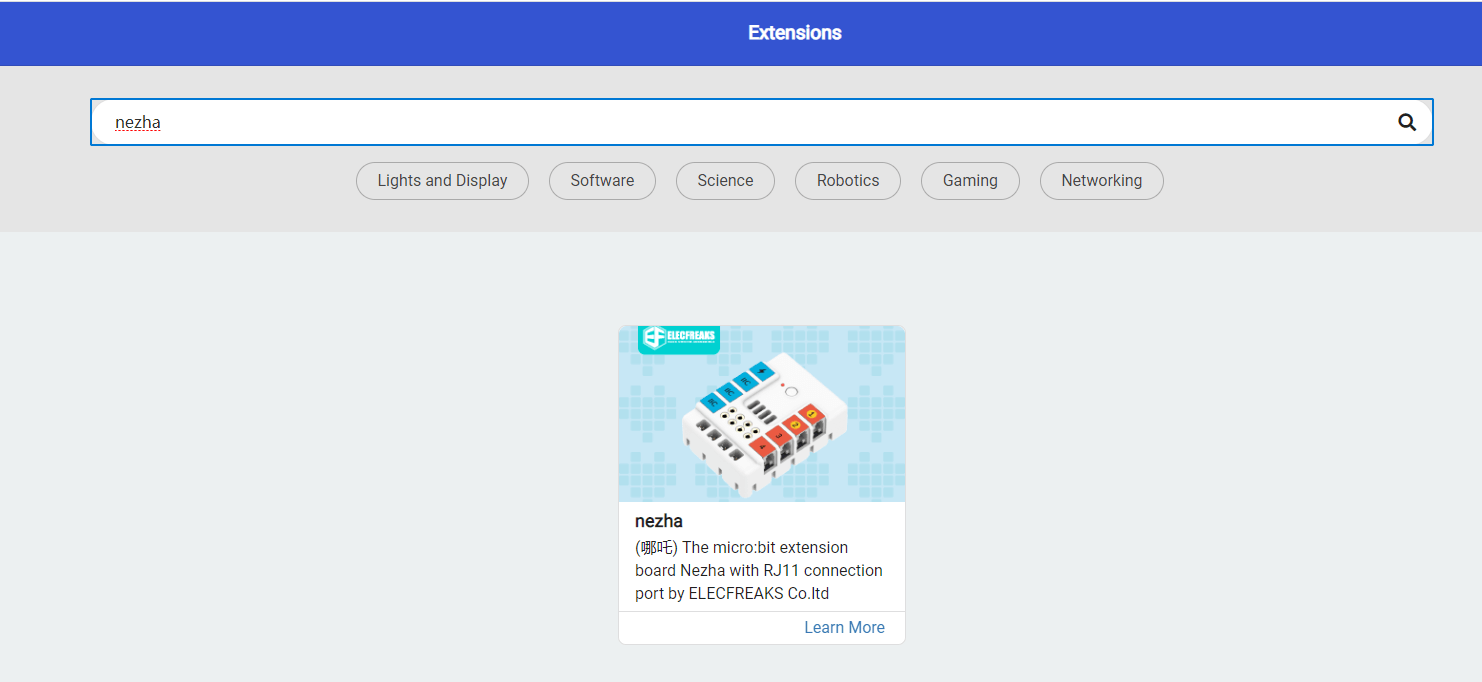
Add “Nezha” and “Planet” extensions respectively.
STEP 2
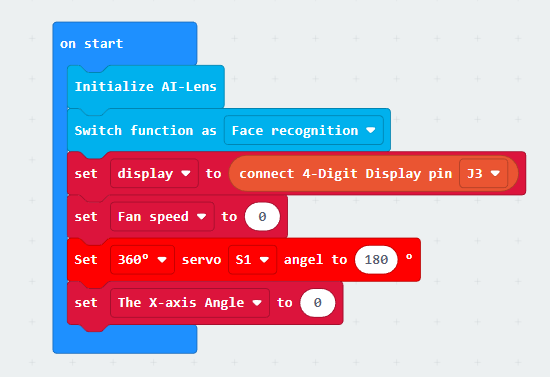
After power on, the initialization status program is as follows.
STEP 3
Next, we need to set up the connection between the DHT11 temperature and humidity sensor and the fan module. The following diagram shows.
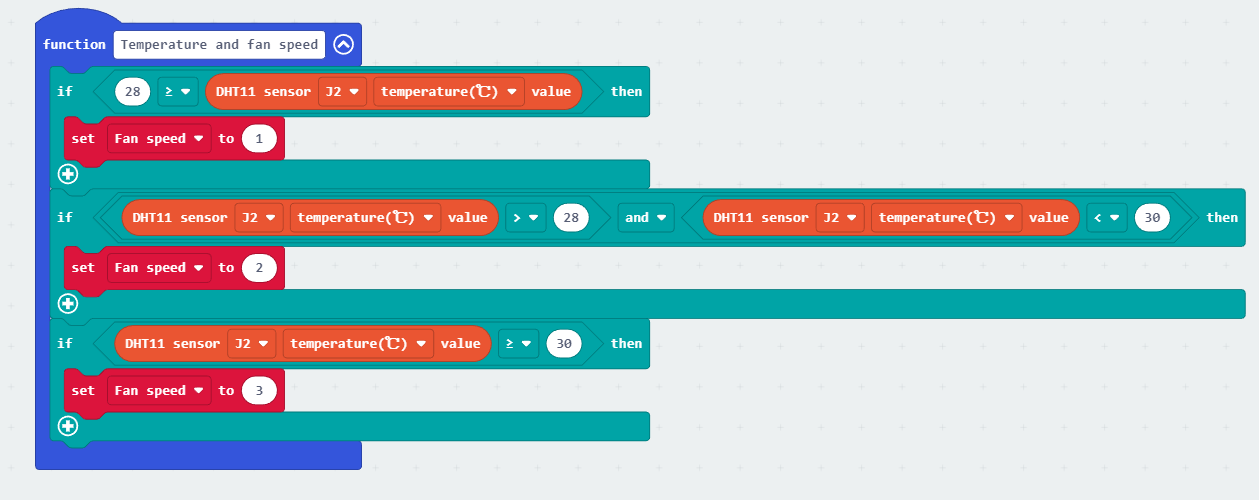
We set the temperature and wind speed to 3 levels, the fan speed will become faster as the temperature rises. When the temperature sensor senses the current temperature = < 28 ℃, the number of fan gear is 1, that is, the minimum wind; when 28 ℃ < temperature < 30 ℃, the number of fan gear is 2, the wind is medium; when 30 ℃ <= temperature, the number of fan gear is 3, when the wind reaches its maximum. Finally, it is recommended to use the function program to encapsulate it, so that it is convenient for our subsequent use.
STEP 4
The fourth step is to write the program for fan speed.
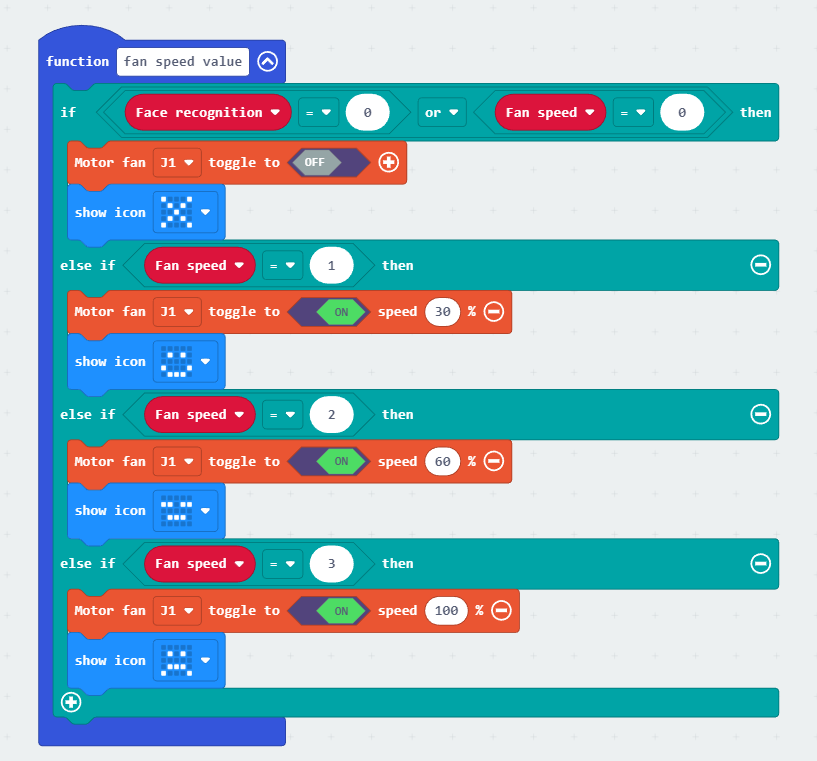
When the fan is in the off state, there are two conditions, that is, the face recognition data is 0 or the number of fan gear is 0, at this time the motherboard display “X”. The remaining 3 gears of the fan have their speed set to 30%, 60%, and 100% respectively. Again, we recommend using a function program for wrapping.
STEP 5
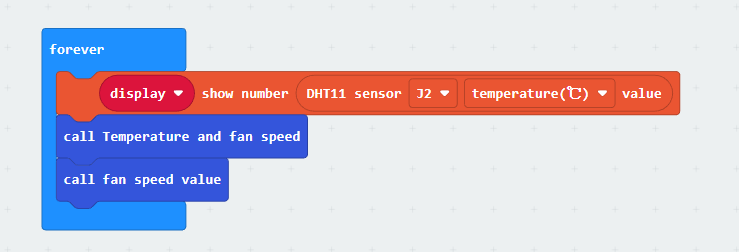
The two function programs are just written are written into an infinite loop. In addition, the digital tube needs to display the temperature value all the time.
STEP 6
Write the program for the AI camera, this step will implement the function of face tracking.

Repeatedly acquire a frame from the AI camera and set the variable “face recognition” to 1 if the image contains a human face.
The x-axis value of the AI camera display is 0-224 (from left to right). If the acquired face x coordinate value is less than 90, i.e. the AI camera display is to the left of the screen, the x-axis angle value is adjusted by -2, i.e. the camera will turn to the left. Conversely, if the face x-coordinate value is greater than 150, the x-axis angle value is adjusted by 2 magnitudes and the camera turns to the right. If the face is not recognized, then the “face recognition” variable is set to 0. If you want the program to keep executing, remember to add “infinite loop”.
https://makecode.microbit.org/_DmeWxA8Y9eHf
Well, this is the whole process of making a face-tracking intelligent temperature control fan! It may be a little bit complicated, but it’s okay, follow my steps step by step! If you also do it, and even upgrade on my basis, be sure to share it on social media platforms and tag us, share together, progress together, and look forward to your work!


