

Control your Lego® Power Functions motors using your micro:bit, an infrared LED, and MakeCode.
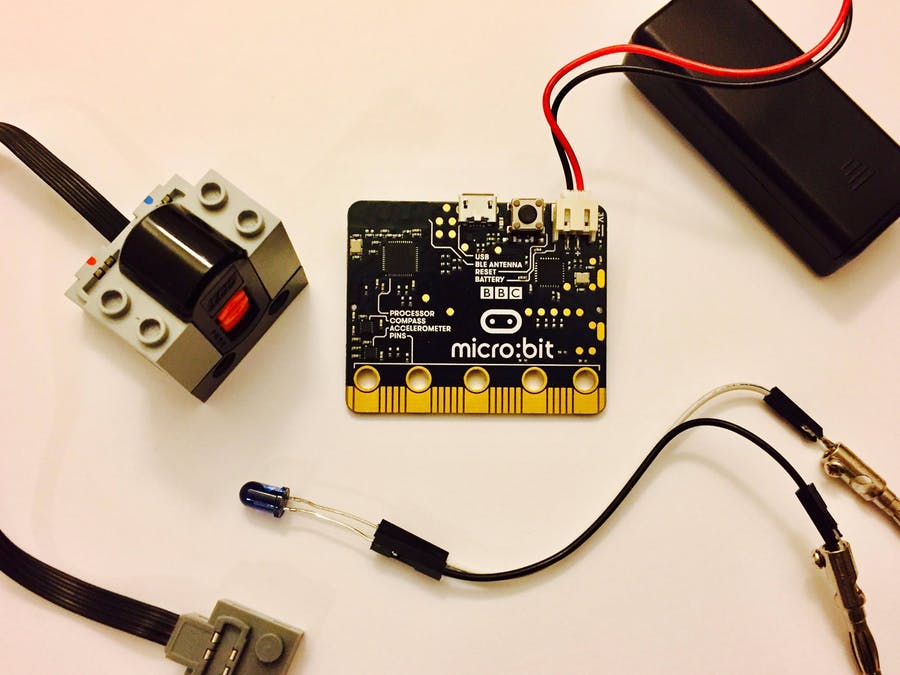
BBC micro:bit board Infrared LED LEGO® 8884 – Power Function IR Receiver
Microsoft MakeCode pxt-power functions MakeCode Project
LEGO® is a trademark of the LEGO Group of companies that does not sponsor, authorize or endorse this project.
We experimented with visual programming languages, and we love colorful interlocking plastic bricks. The desire to control a LEGO® train using a web-based, the visual development environment was born.
We started with a Scratch and Arduino-based solution. We had a working prototype that proved to be error-prone and complicated in the setup. In our second approach, we used the German sibling of the micro:bit. The Calliopeboard comes with a motor driver which reduced the required hardware to the board itself and some homemade connection cables. Our first field test with a LEGO® model failed tremendously. The analysis revealed that we want to control at least two engines and lights fully. The more, the better. The Calliope is limited to one motor.
Finally, we built a custom package for MakeCode that enables a micro:bit with an attached infrared LED to send commands to a Power Functions IR receiver – like a remote control. Now we were able to control multiple devices with minimal hardware requirements and provide easy-to-use programming blocks additionally. We published our package on GitHub at https://github.com/philipphenkel/pxt-powerfunctions. Please raise an issue there if you have any problems.
You need mainly two things: a micro:bit board and an infrared LED that emits IR light at a wavelength of 940 nm. Any IR LED from an old remote control will probably do the job. We tested with SFH 4546 and TSAL 6200. We attached the LED with banana connectors and female jumper cables. Connect the long leg of the LED to an analog pin. We recommend pin 0 because this one is configured by default in the MakeCode package. Plug the LED’s short leg into GND.
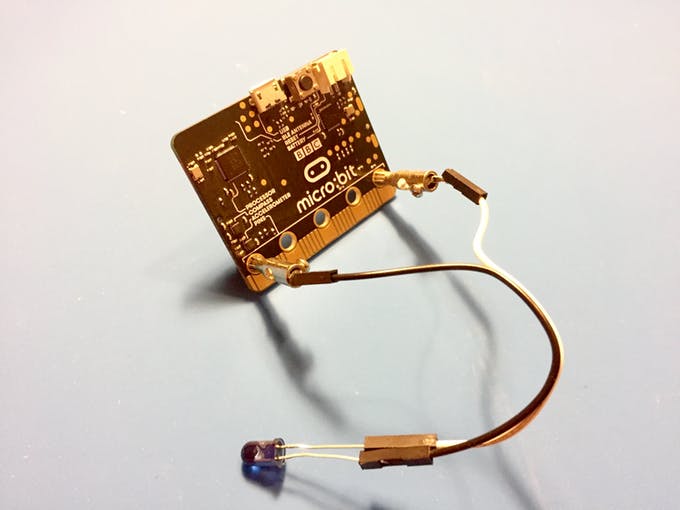
Connect the LED to pin0 and GND With only a few bricks you can fasten the micro:bit tightly to your LEGO creation.
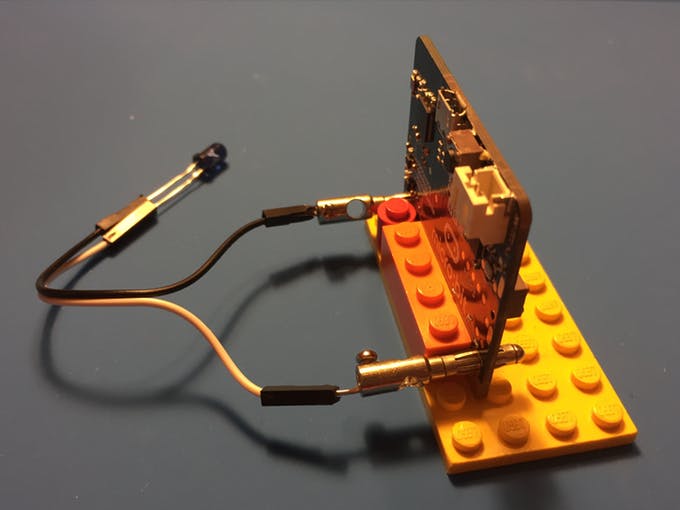
Micro:bit fits well with LEGO bricks
Open MakeCode and add our power-functions package via Add Package in the Advanced menu. You need to enter our project URL https://github.com/philipphenkel/pxt-powerfunctions, hit return, and then select the power-functions package.
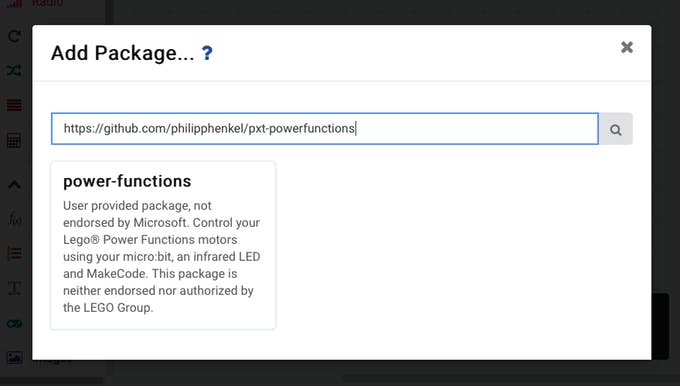
The repository URL is required to add the package New blocks will be available via the Power Functions menu and documentation will show up when you hover over the blocks.
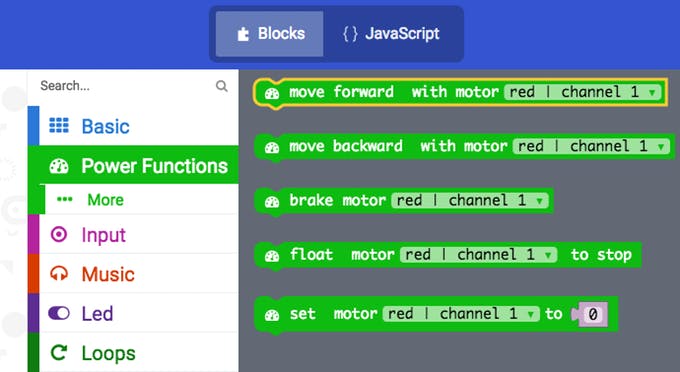
Power Functions blocks in Makecode
Let us plug together our first Power Functions program. First of all, we need to configure the pin of the IR LED. You can skip this step if you use pin 0 because it is the default anyway. Reconfigure the direction of motors if needed. It is like switching the direction toggle on LEGO remote controls.
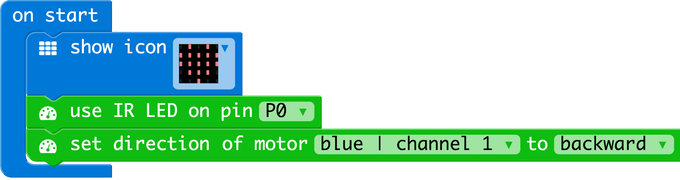 Configure IR LED and motors
Now it is time to start and stop the engine that we attached to the blue output on a LEGO IR receiver. Do not forget to set the receiver’s channel appropriately.
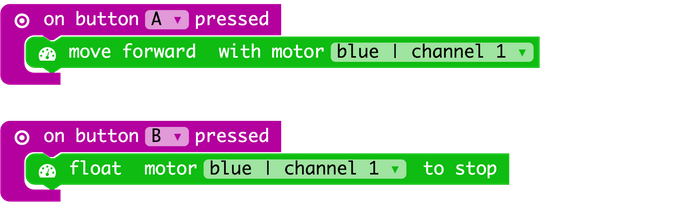 Control a motor using the buttons
And, by the way, you can use a LEGO® Power Functions remote control to send additional commands at any time.
How to make a train stop at a specific location? We decided to use the micro:bit’s capability to measure the light level and designed a light barrier. We installed the board on a train wagon and build a ‘lighthouse’ using two pairs of LEGO Power Functions LEDs.
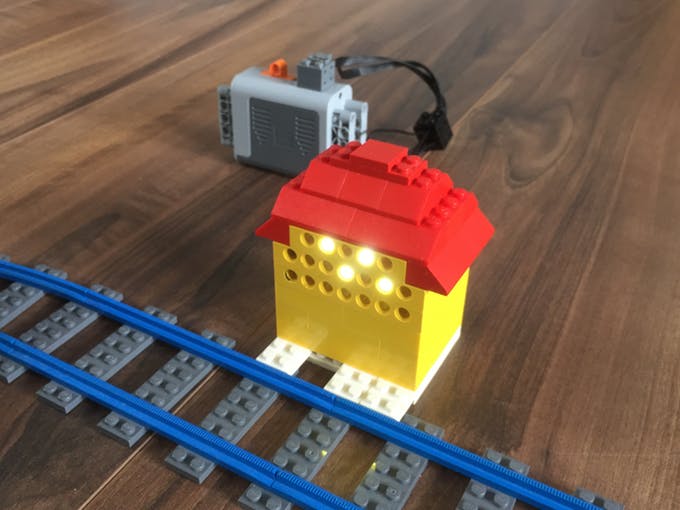
The lighthouse

Our train
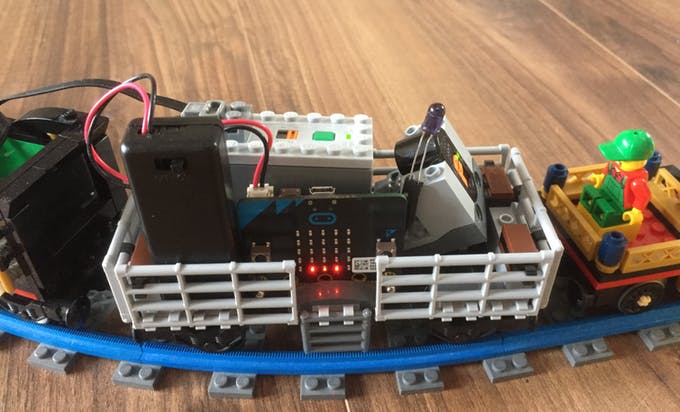
The brain of the train
Our program was the following:
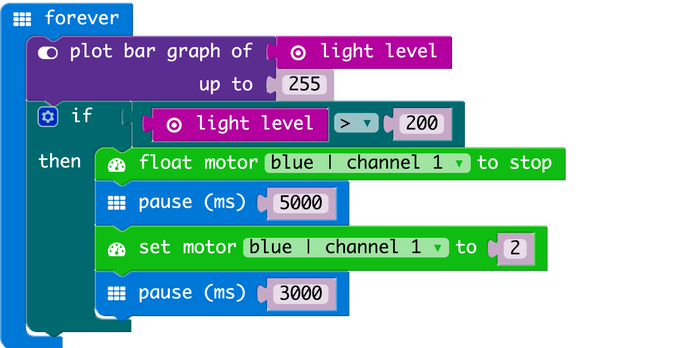
Pause some seconds when passing a light barrier
The train stops at light barrier
Please let us know your ideas. We are looking forward to your comments. Have fun! Johan & Philipp
Use IR LED on P0. Change the direction of the motor on output blue on channel 1. Plot light level Stop the train for 5 seconds if the light level is above a threshold. Move forward for 3 seconds till next light level check.
powerfunctions.useIrLedPin(AnalogPin.P0) powerfunctions.setMotorDirection( PowerFunctionsMotor.Blue1, PowerFunctionsDirection.Backward ) input.onButtonPressed(Button.A, () => { powerfunctions.moveForward(PowerFunctionsMotor.Blue1) }) input.onButtonPressed(Button.B, () => { powerfunctions.float(PowerFunctionsMotor.Blue1) }) basic.forever(() => { led.plotBarGraph(input.lightLevel(), 255)
if (input.lightLevel() > 180) { powerfunctions.float(PowerFunctionsMotor.Blue1) basic.pause(5000) powerfunctions.setSpeed(PowerFunctionsMotor.Blue1, 2) basic.pause(3000) } }) This article is written by Philipp Henkel and forwarded from Hackster.io.


