

With the development of modern society, sky buildings are one of the most obvious characteristics of civilization. Thus, there are so many mechanical machines invented to help people fulfill the demands of making such big building projects to save both time and labor force.
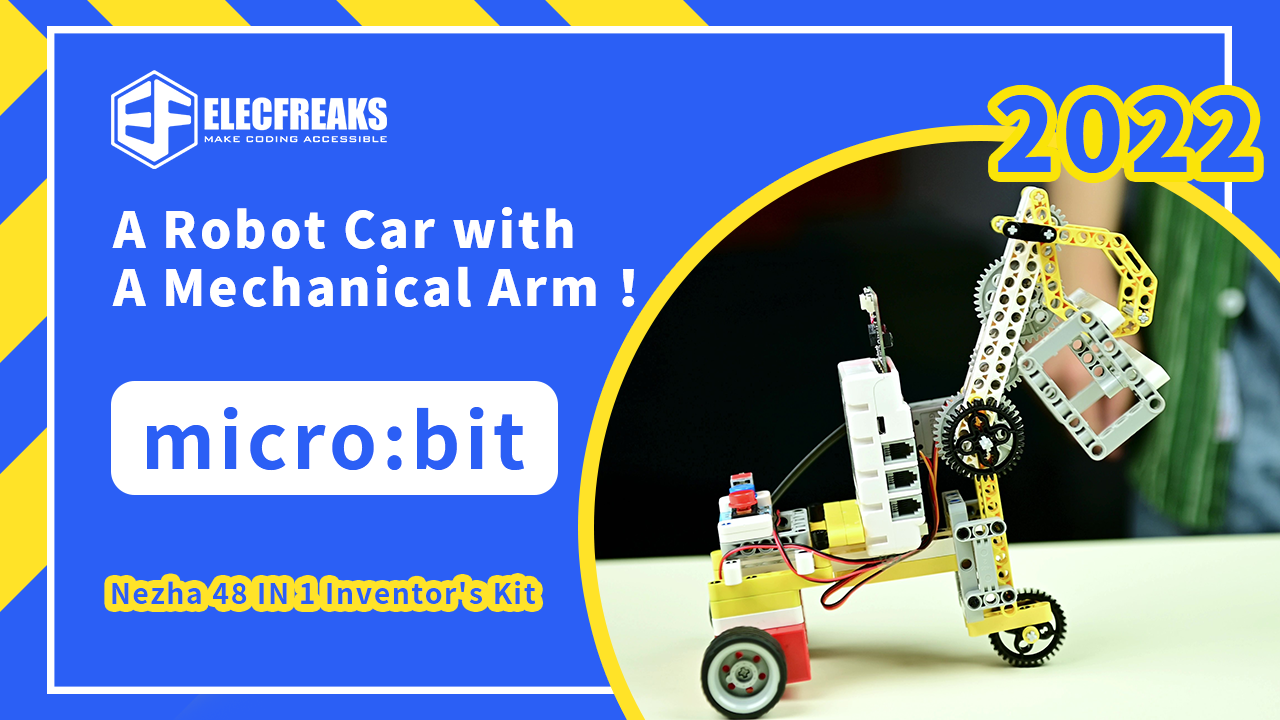
It’s important for the new generations to understand how these machines could work by the working principles and the combination of advanced technology. Here in this blog, we are going to build the robot car with a mechanical arm with ELECFREAKS micro:bit Nezha 48 IN 1 Inventor’s Kit.
In order to fulfill the similar functions of a robot car with the mechanical arm, here in this project we’ve programmed to do the operations of simply driving forward, reversing, lifting the arms, grasping, and releasing the goods.
Definitely, you can create your own robots with the functions that you are interested in.
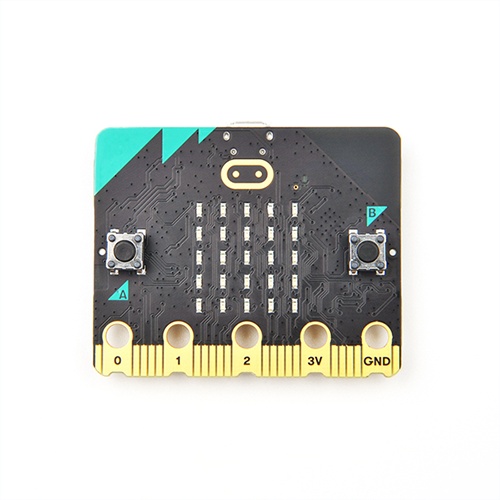
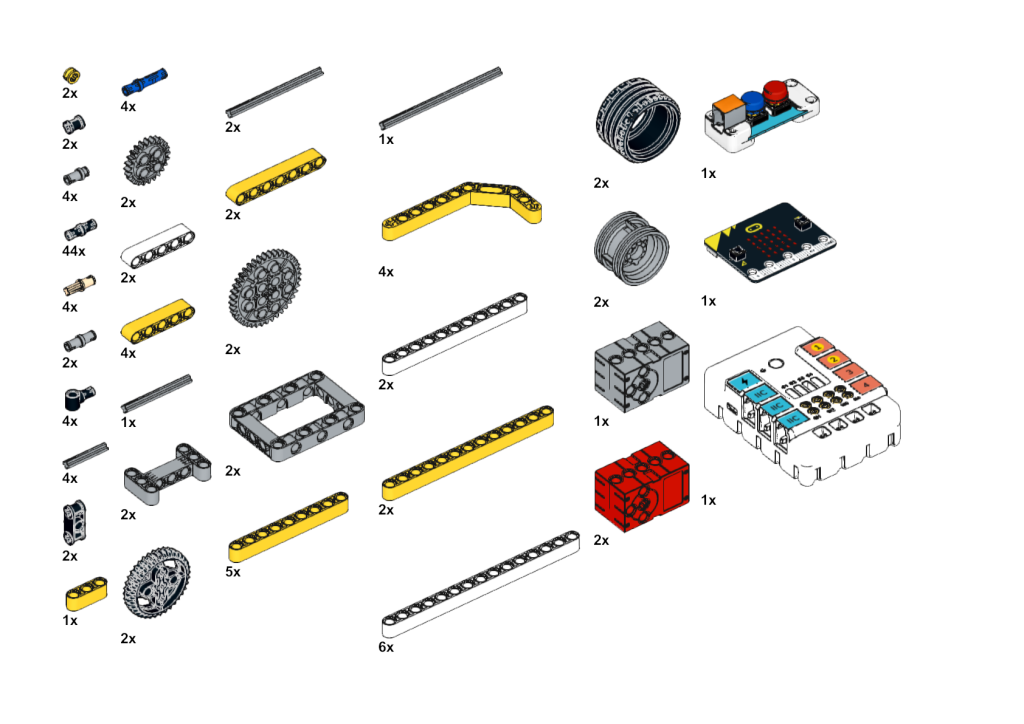
1 X BBC micro:bit
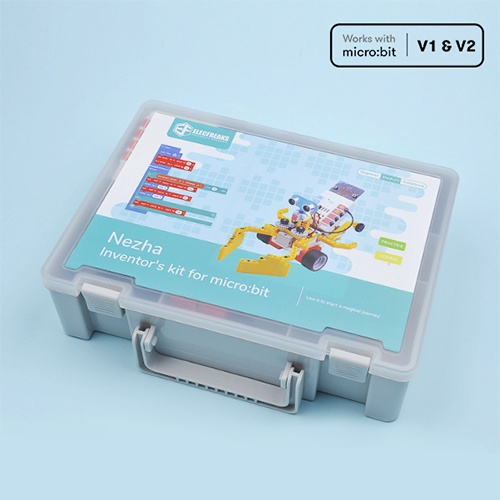
1 X ELECFREAKS micro:bit Nezha 48 IN 1 Inventor’s Kit
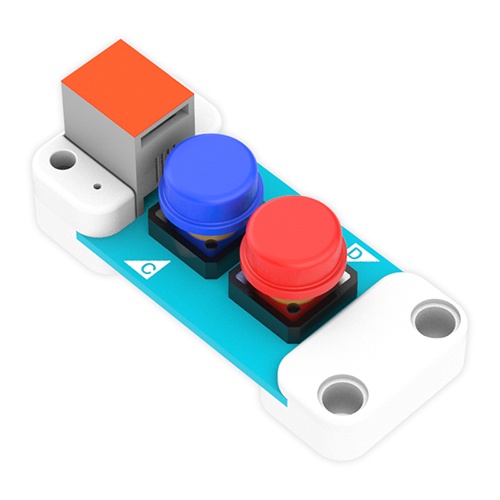
1 X ELECFREAKS PlanetX Button Sensor
Hardware Parts Diagram
After preparing the above components well, please follow the 38 steps below to complete the robot yourself.
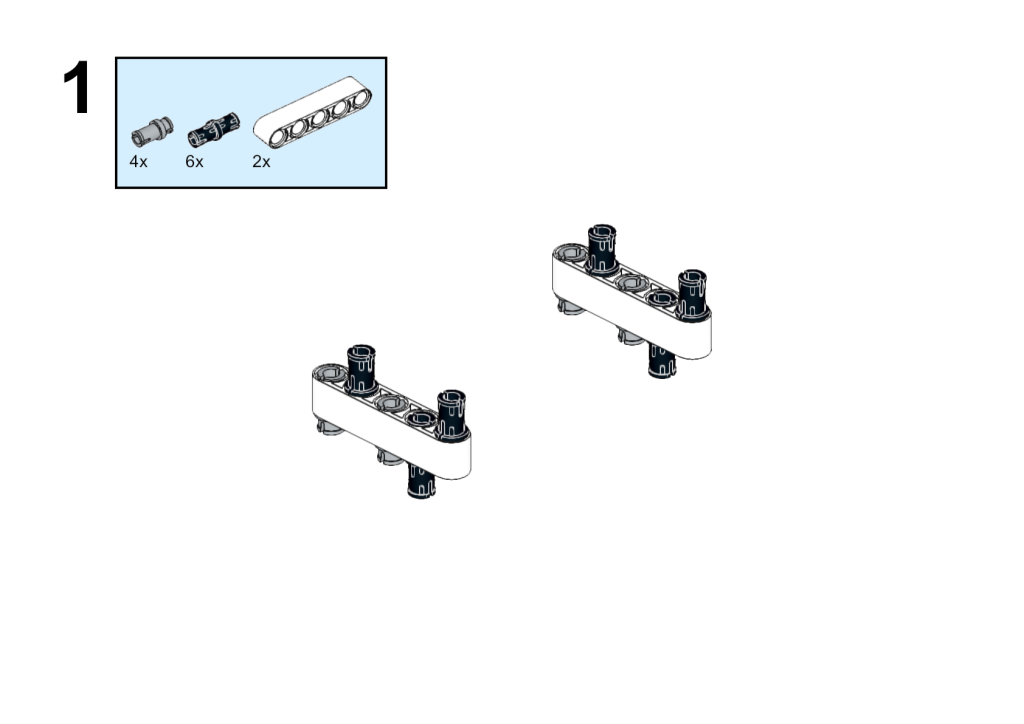
1. Prepare 10 pins and 2 axles and get them connected as the picture displays.
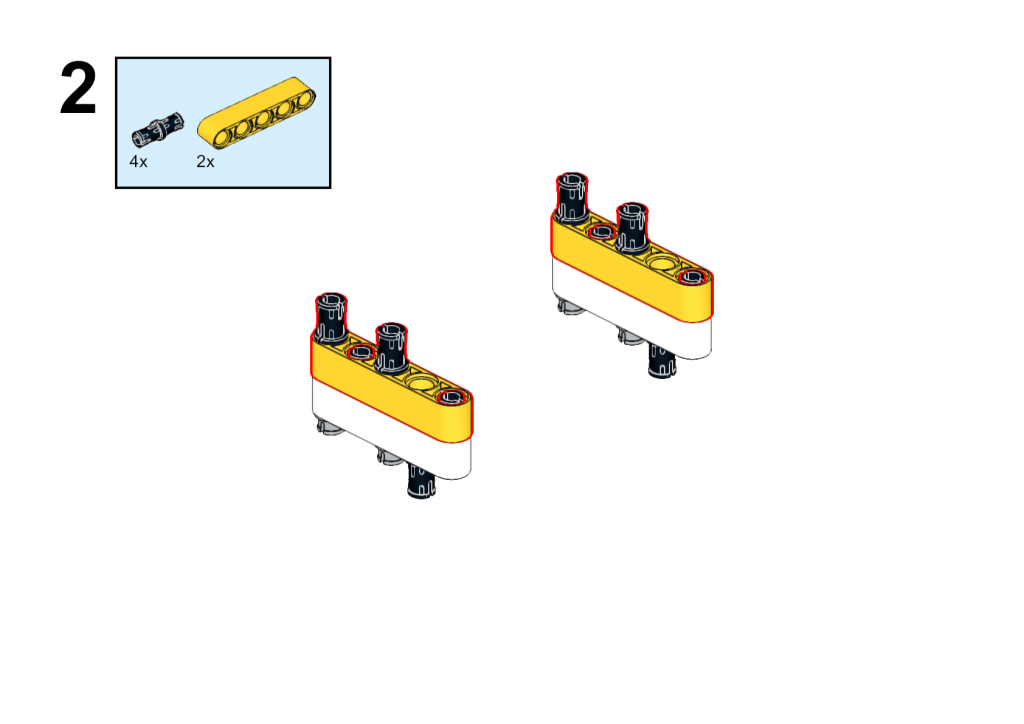
2. Get the two yellow axles and 4 pins to be connected, note the position for each part as we will do other connections in the following steps with the blank holes.
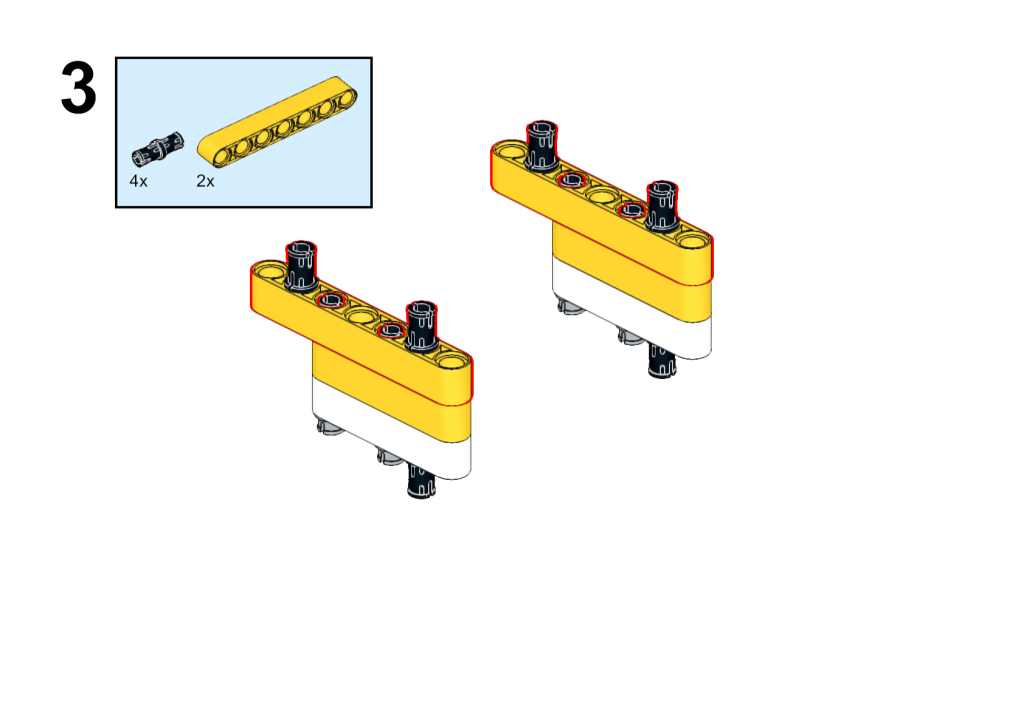
3. Get connected with the longer yellow axles and also with the black pins as the picture displays.
4. Get connected with the white axles and the pins as the base part, we will need this to get the servo motors supported as the engine part for this project.
5. Get the white axles and the pins again connected with the base part, this works for fastening the structure and connecting with the following square parts.
6. Fasten with the square parts as the picture displays and note to connect with the blue axles as the positions displayed in the below picture. The square parts make the whole structure more solid for the robot car to drive.
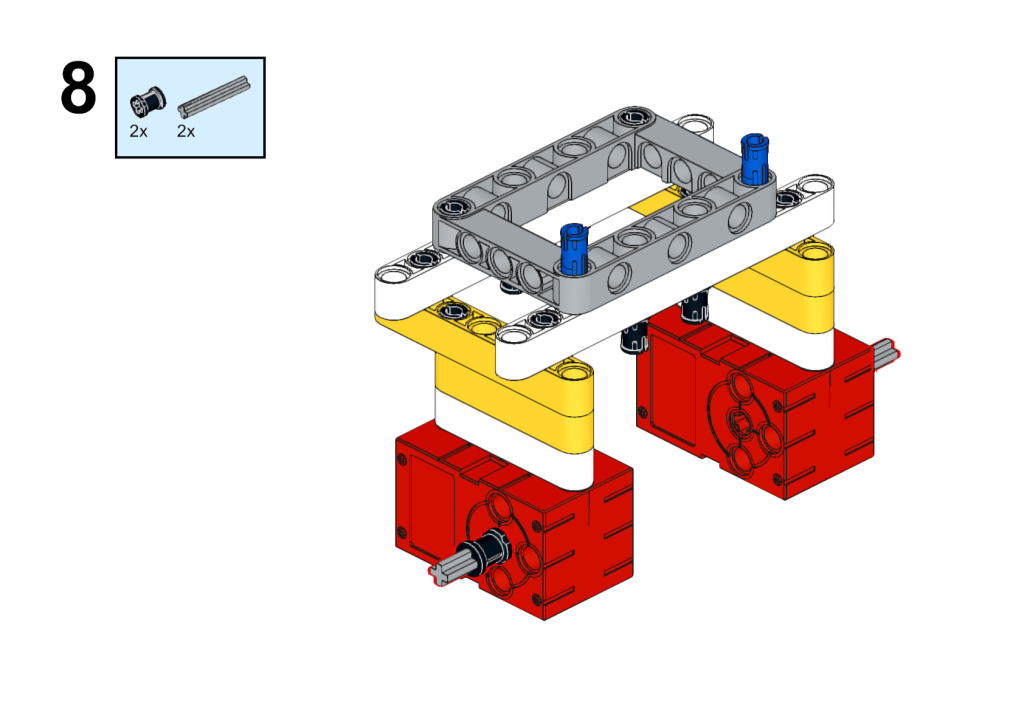
7. Install the servo motors for driving the wheels as the picture displays, here we use the 360 degrees dual output axles to fulfill the driving demands of the robot car.
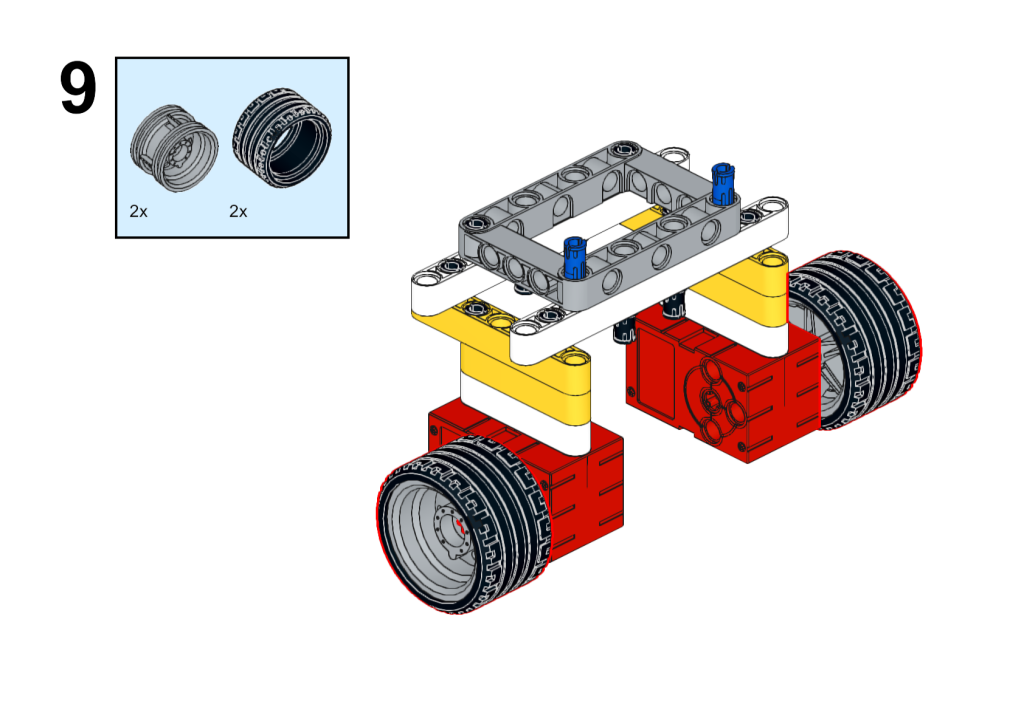
8. Connect the axles and covers with the servos for connecting the wheels.
9. Make the wheels and have them installed with the axles, note we need to attach the tires with the wheels hubs for a more smoothly driving of the robot car.
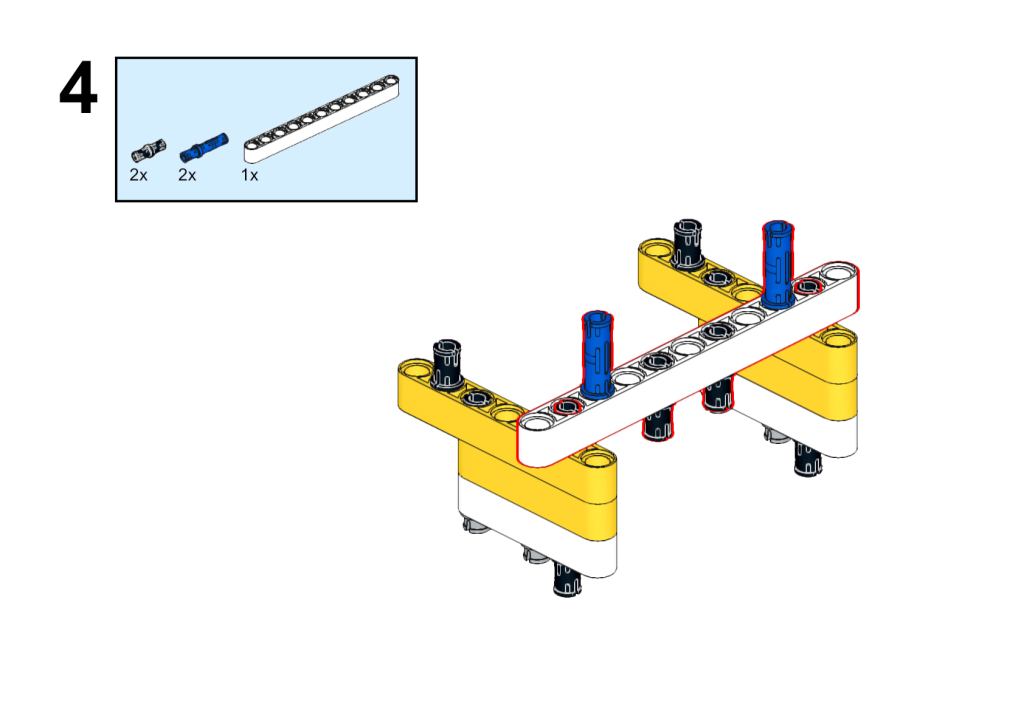
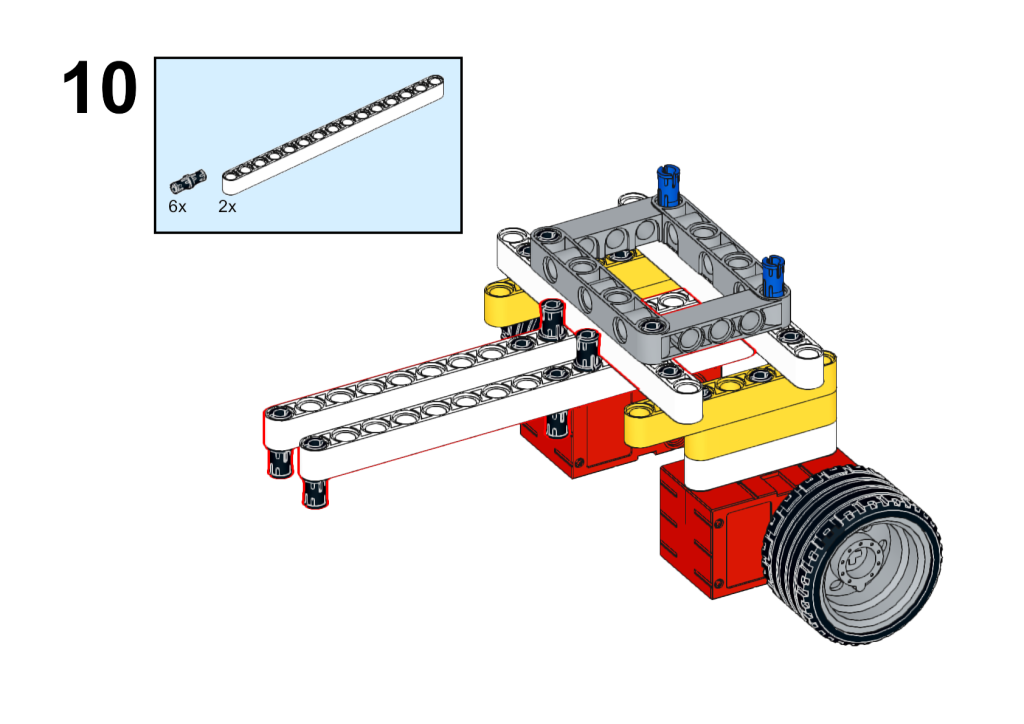
10. Connect the 2 longer axles with the base part as well as the pins, we will use this prolonged structure to be worked as the connections with the robot arms, note to connect with the black pins at the very end white axles.
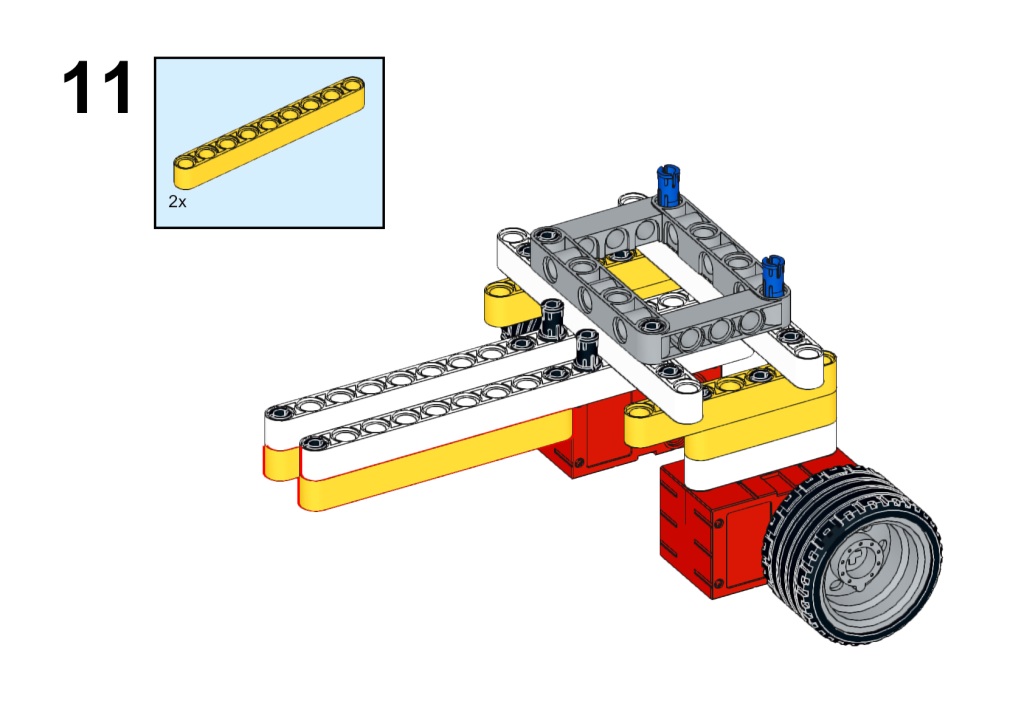
11. Fasten with the yellow axles and we are using these two axles as the fastening part and also the decorations.
12. Fix with the shorter yellow axles and the blue pins for getting connected with the robot arms.
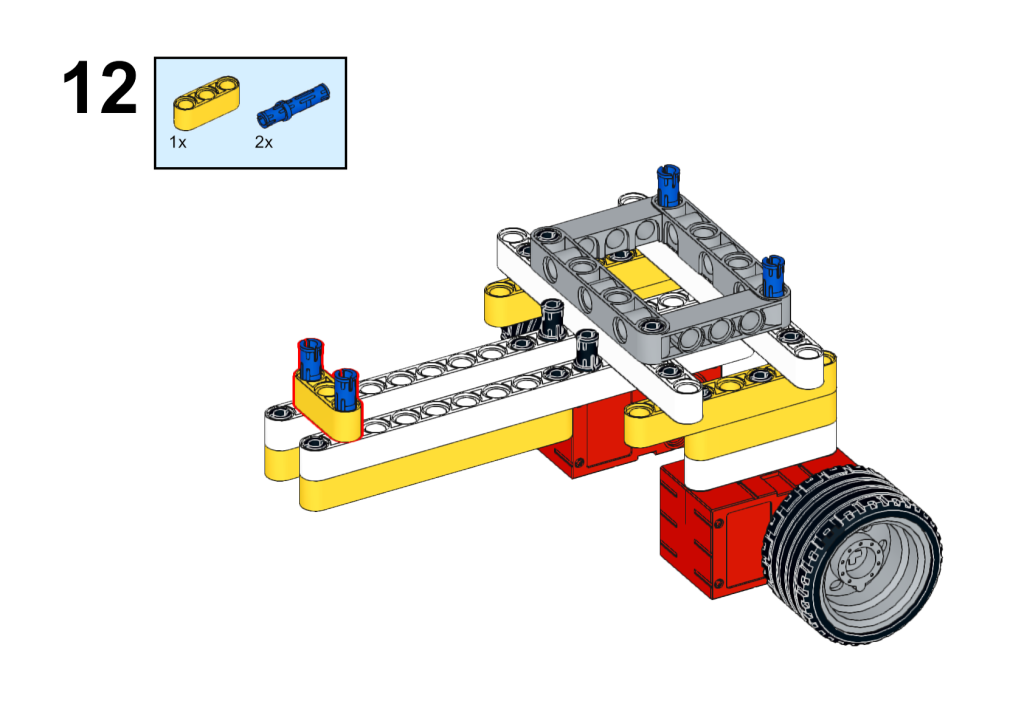
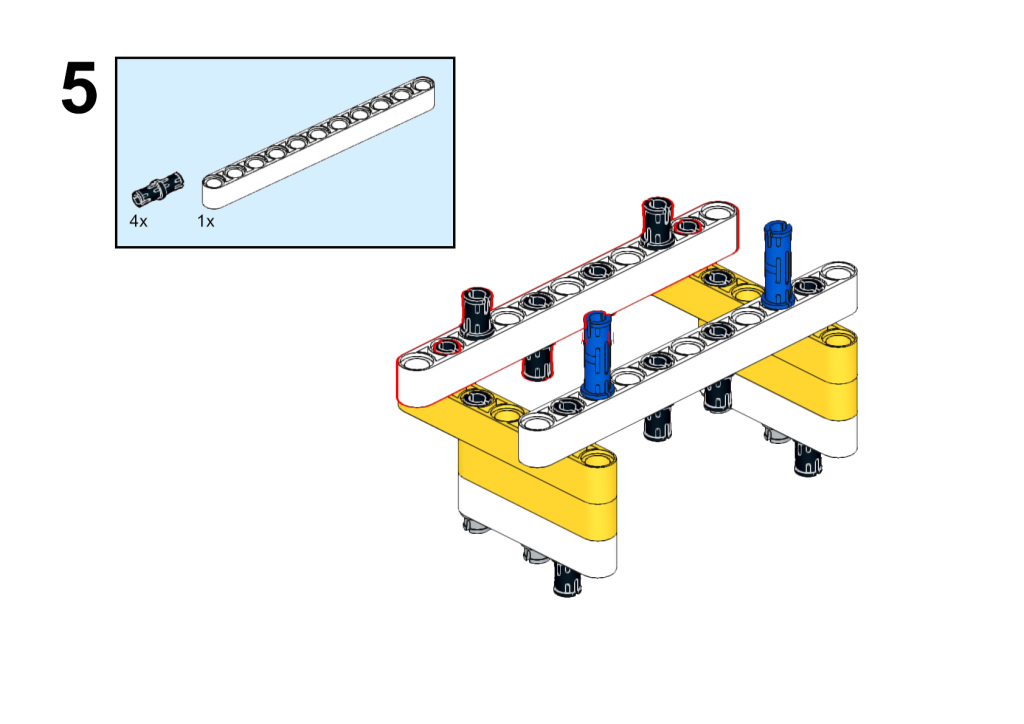
13. Install with the square parts and also with the black pins, note we need to have this square part connected with the structure we just built in step 12, in the following we will get the arm part to be installed on the basis of the current structure.

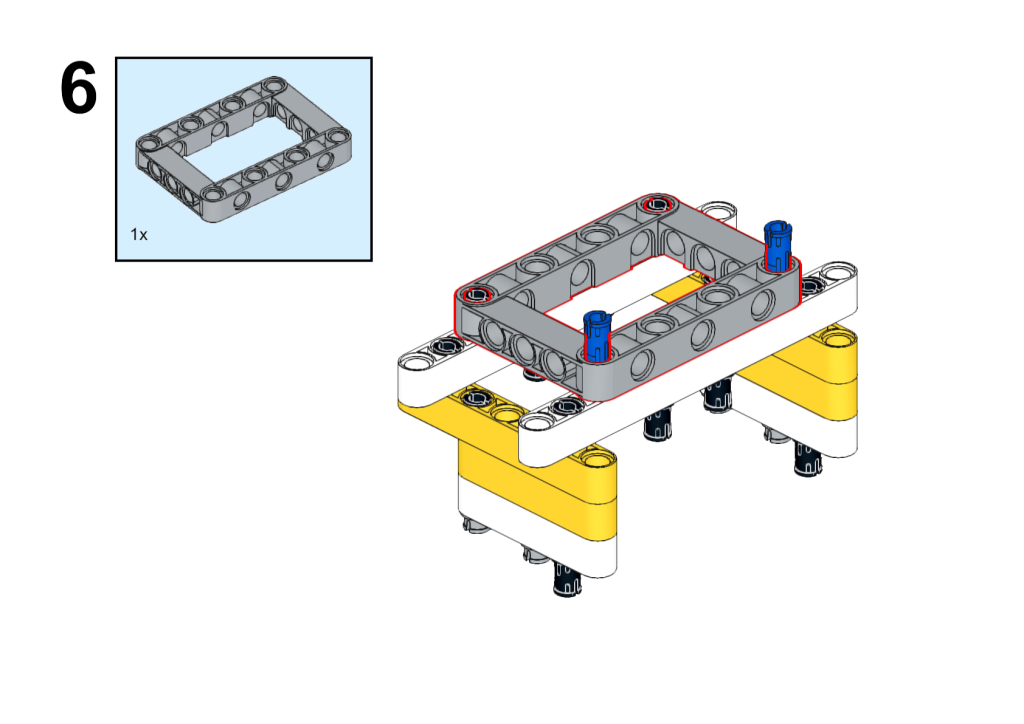
14. Fix with the yellow axles and the black converters, here we can use these two axles as the holding structure for the front wheel.
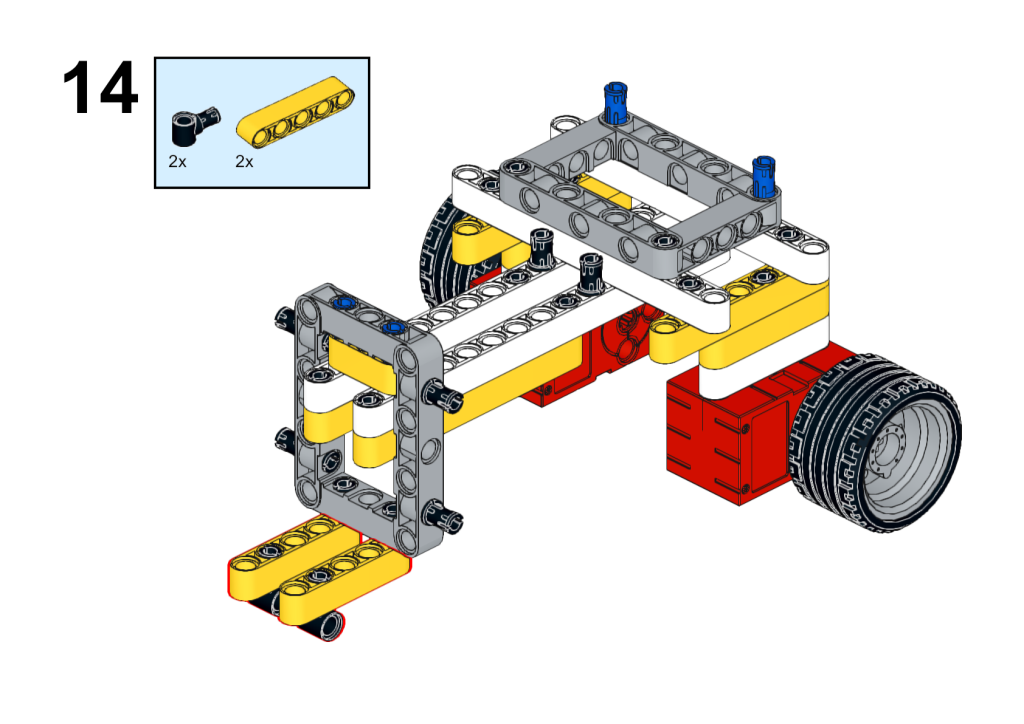
15. Connect the front wheel below the parts we just built and make sure it is able to move freely.
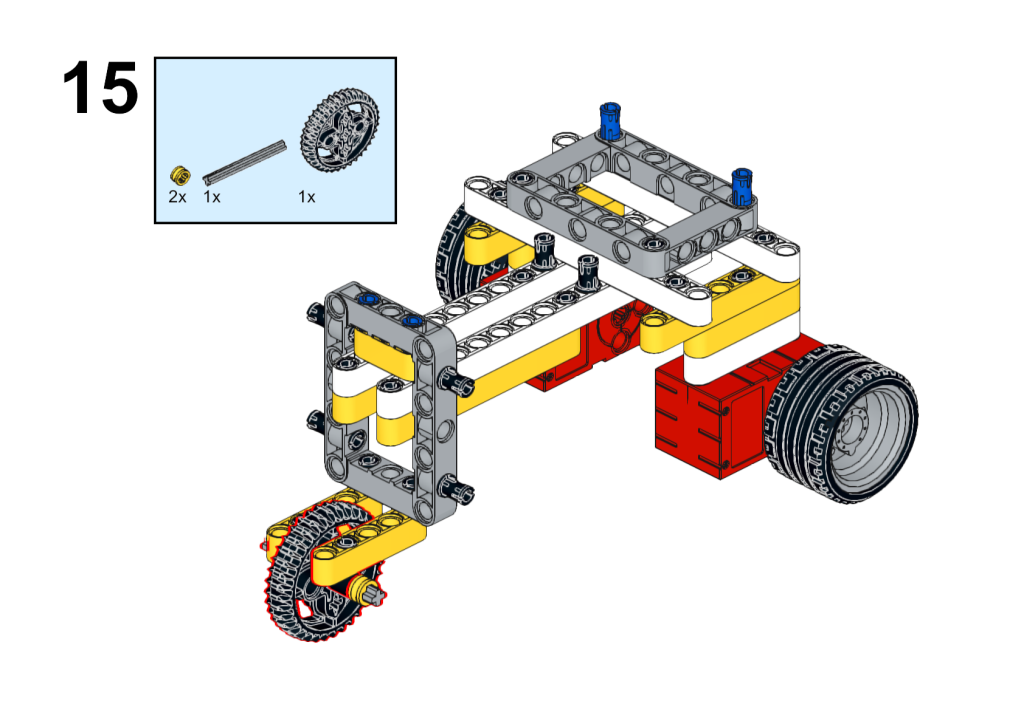
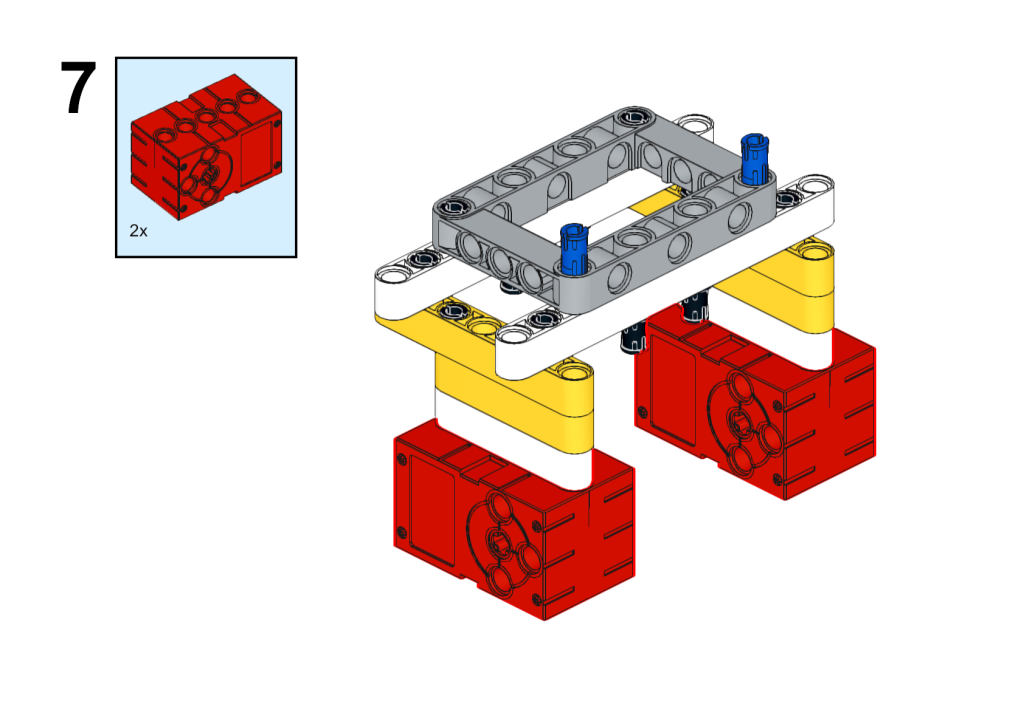
16. Install the yellow axles on the top part, we are going to make a solid structure as the foundation to be connected with our Nezha breakout board here.

17. Install the two black converters for the same purpose as step 16.
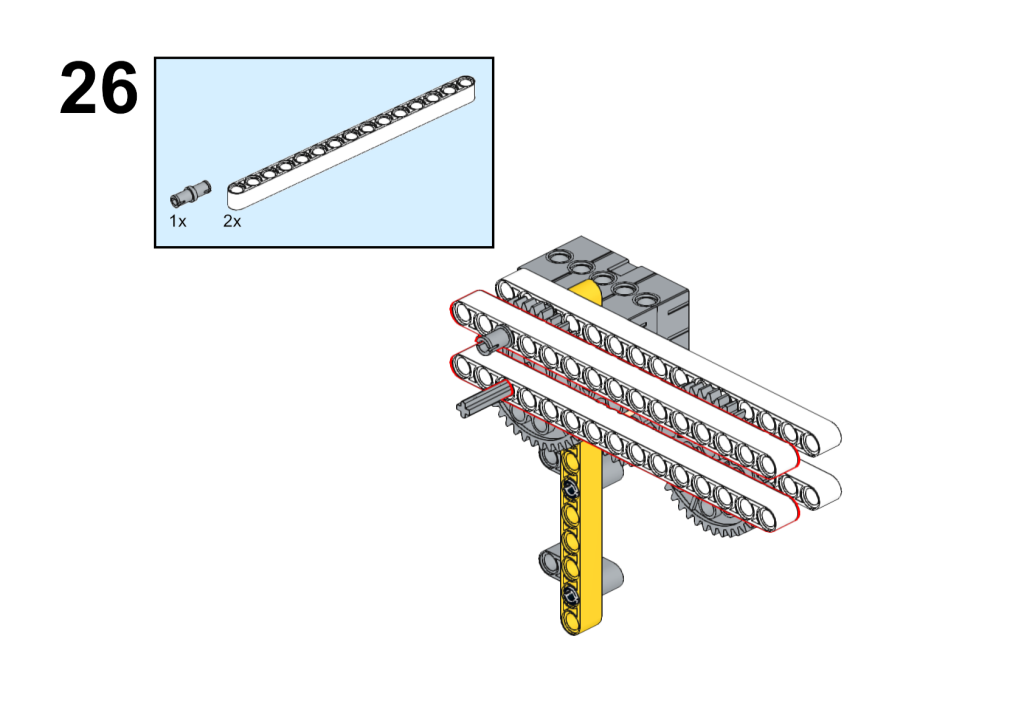
18. Connect with the yellow axles on the top side part, note to connect these parts in the correct position as the diagram suggests.
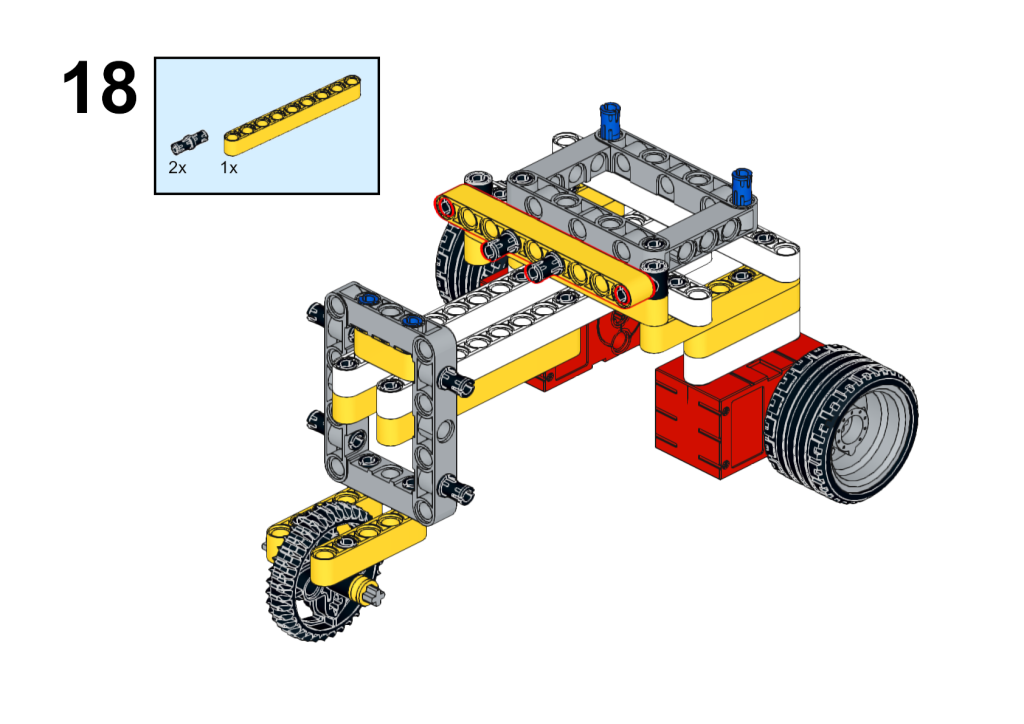
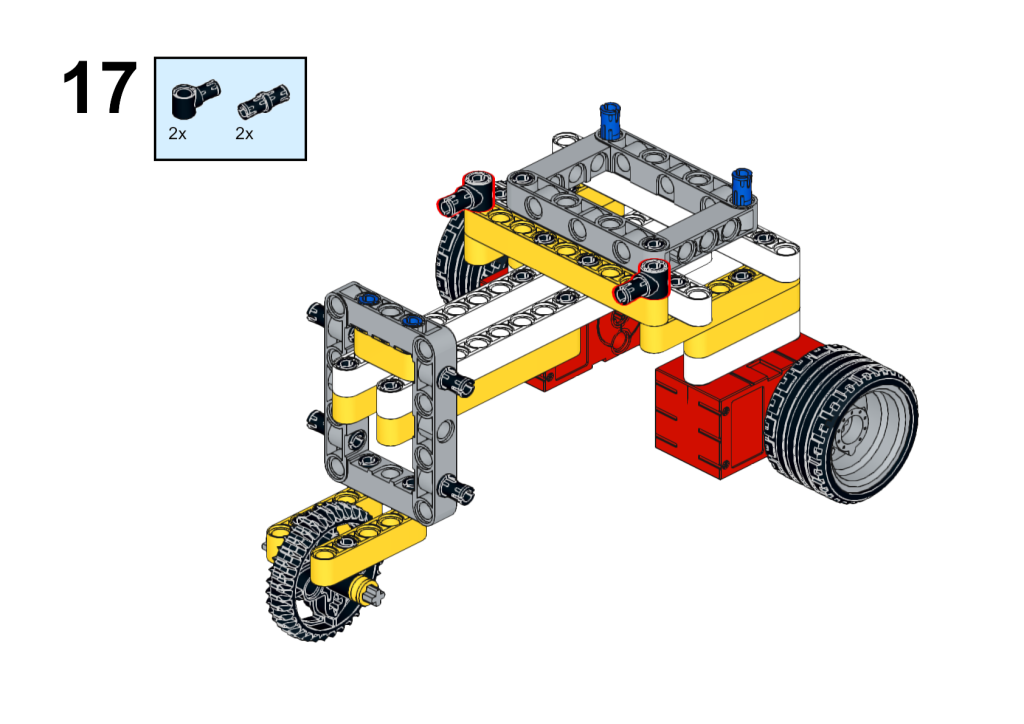
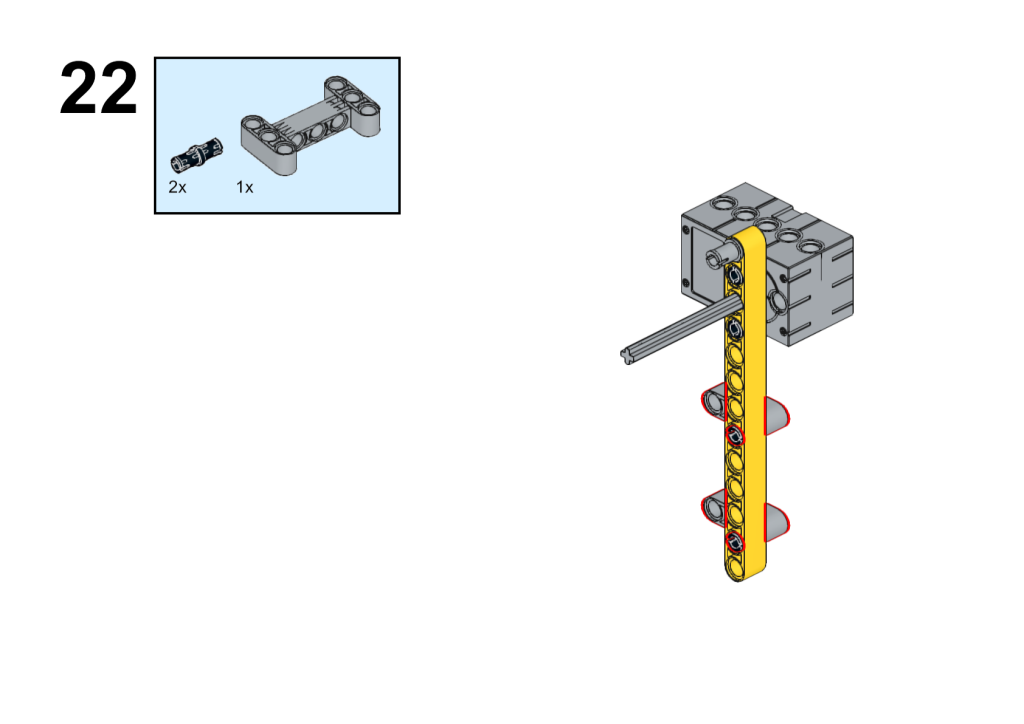
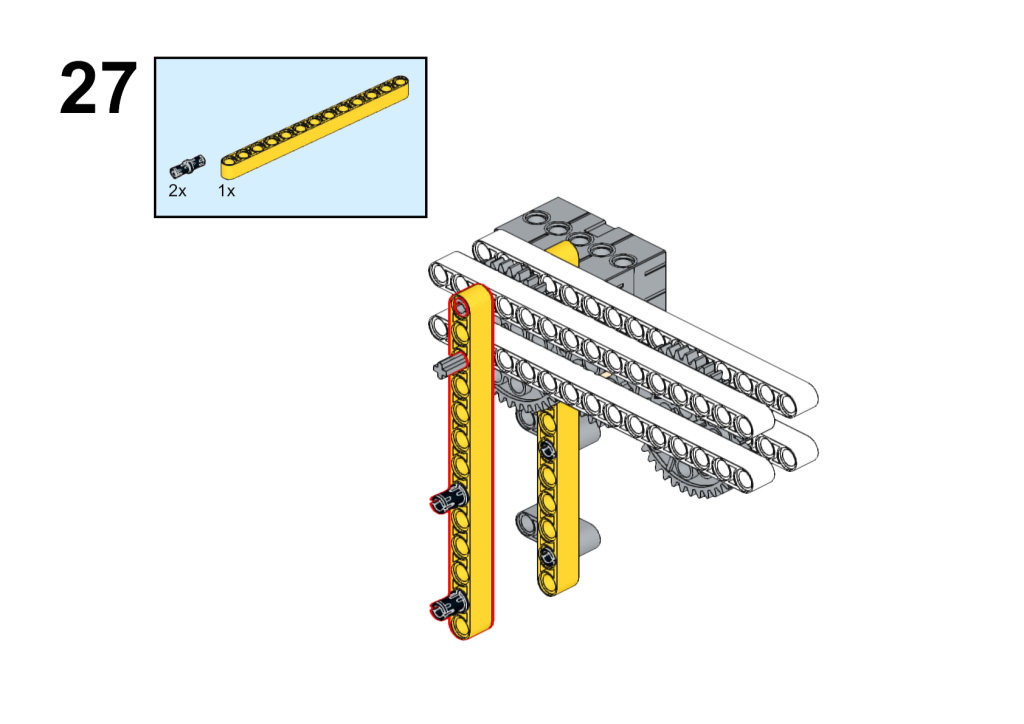
19. Install with the yellow axles again and also with the black pins for connecting with the breakout board.
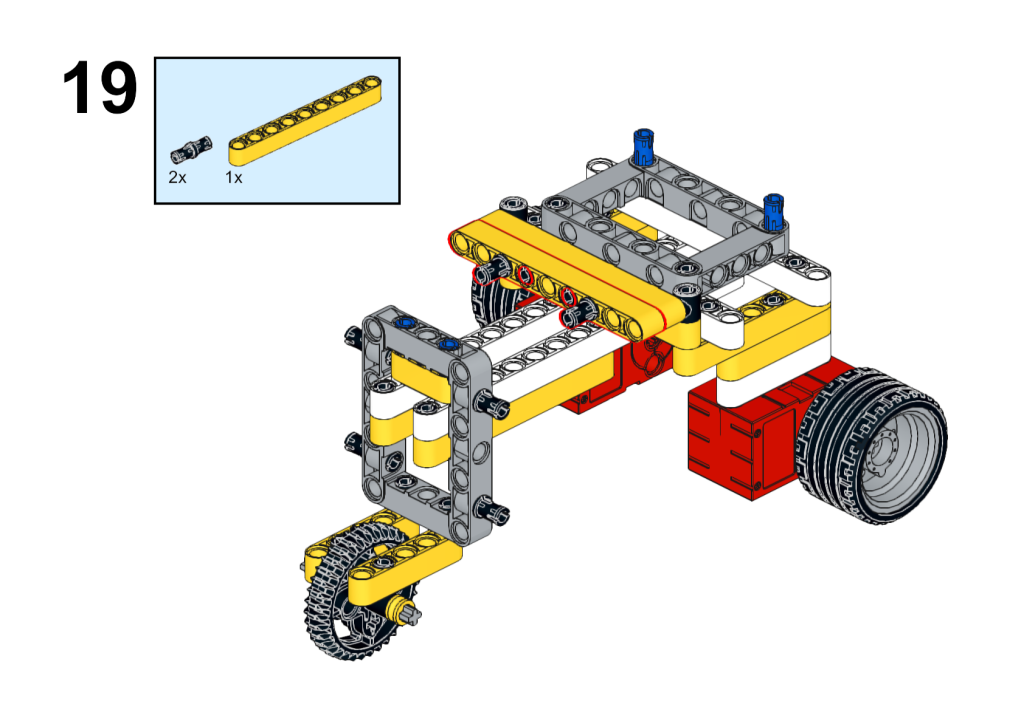
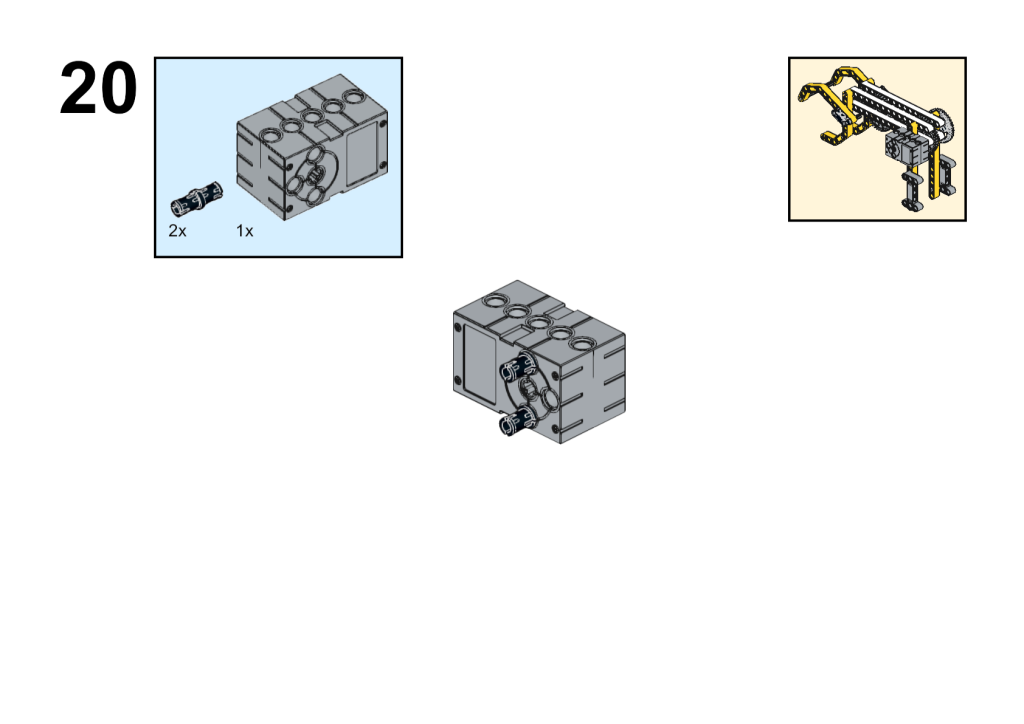
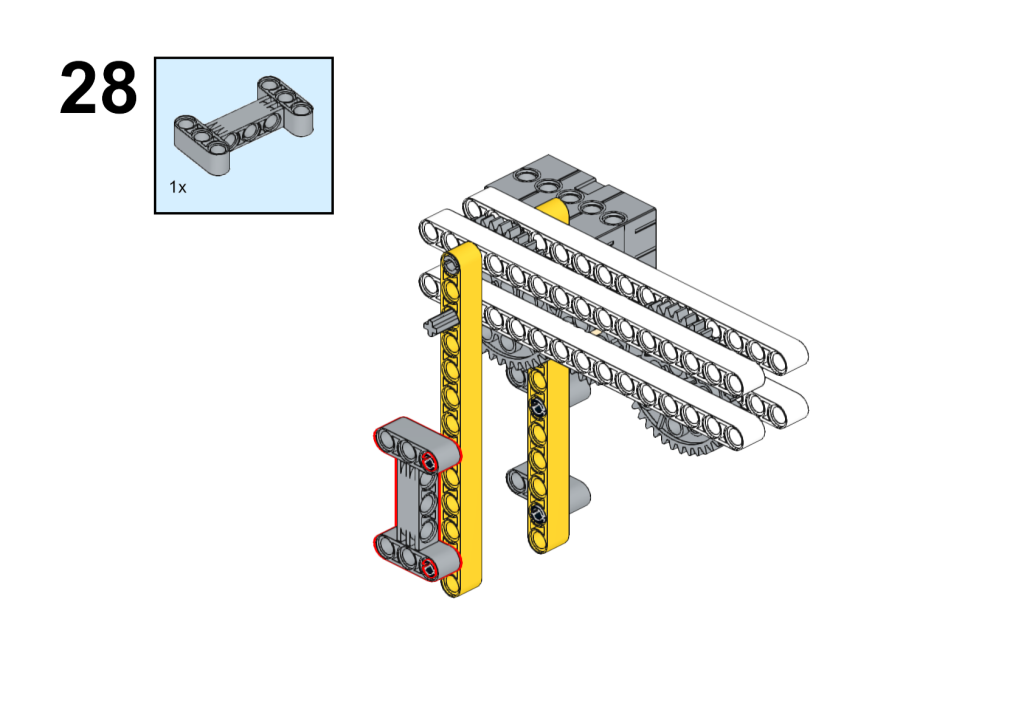
20. Install the gray geek servos as the engine for driving the robot arm, note to connect with two pins as the diagram suggests.
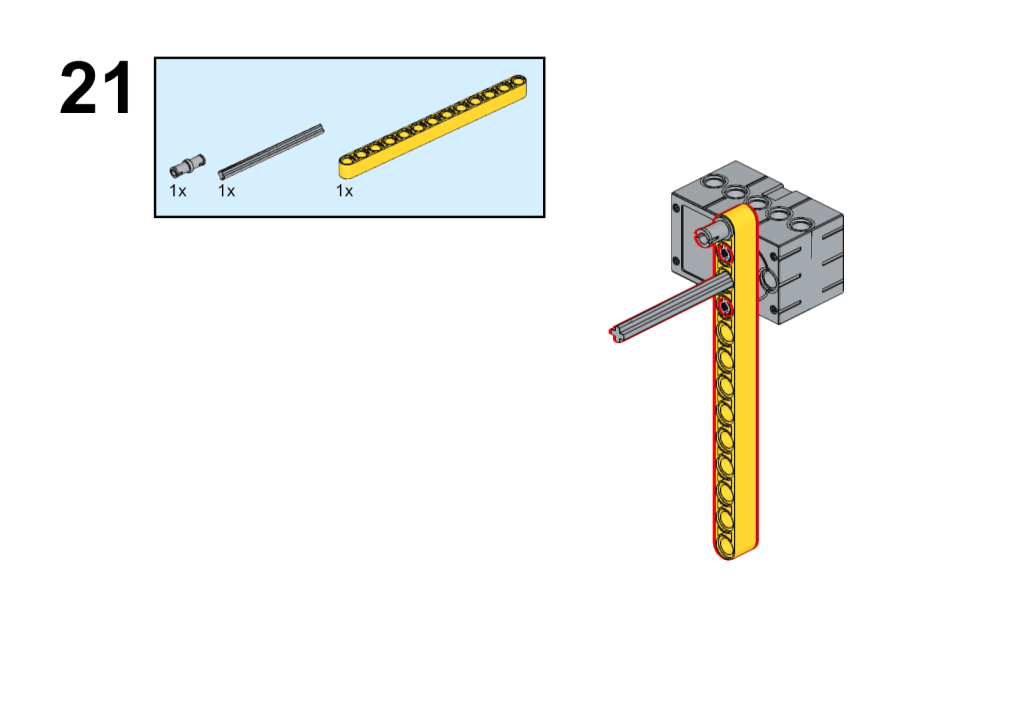
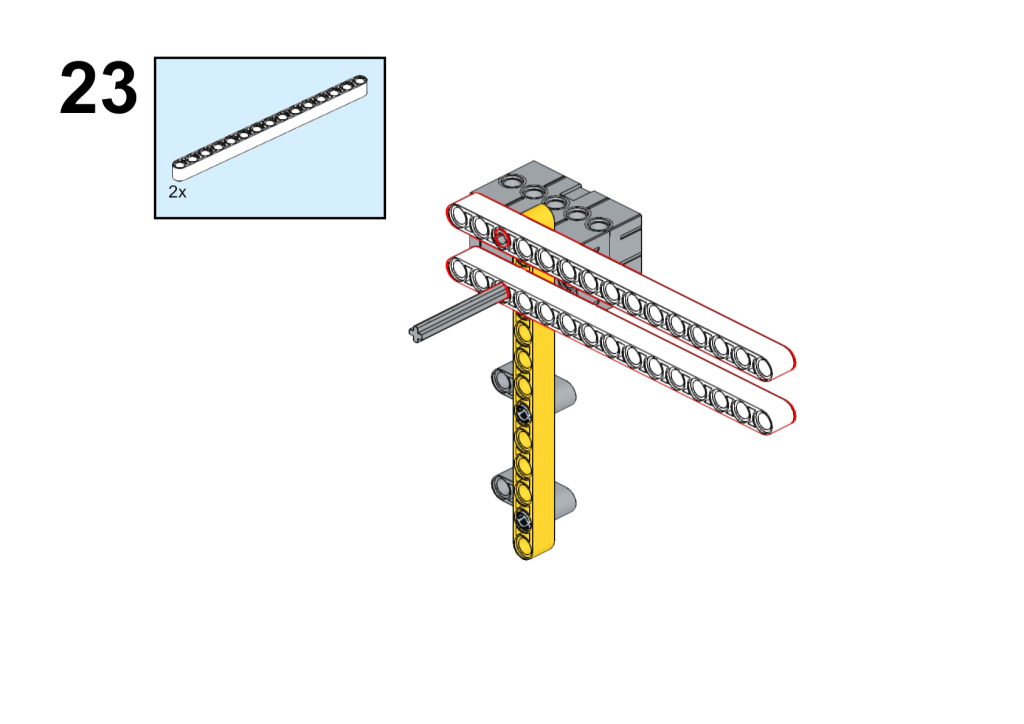
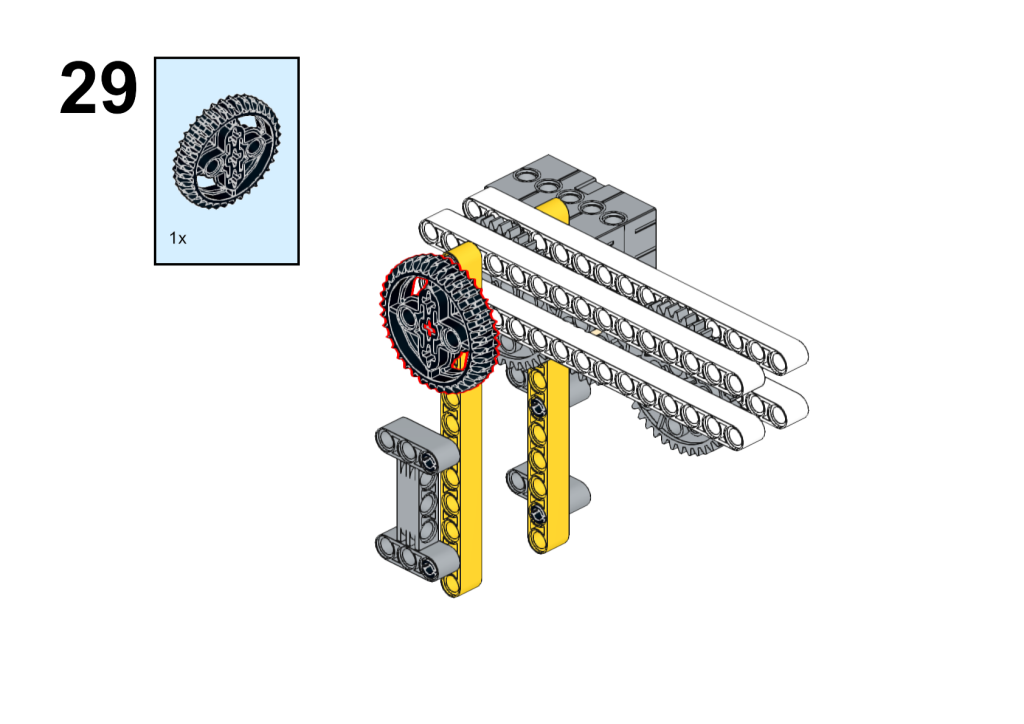
21. Connect the yellow axles and the pins with the geek servos, we will connect this part with the square structure that we just build which aims to work as the driving engine of the robot arm.
22. Connect the pins and the axles with the yellow one as the picture displays.
23. Connect the white axles with the geek servos, these two will be the longer arms for controlling the claws.
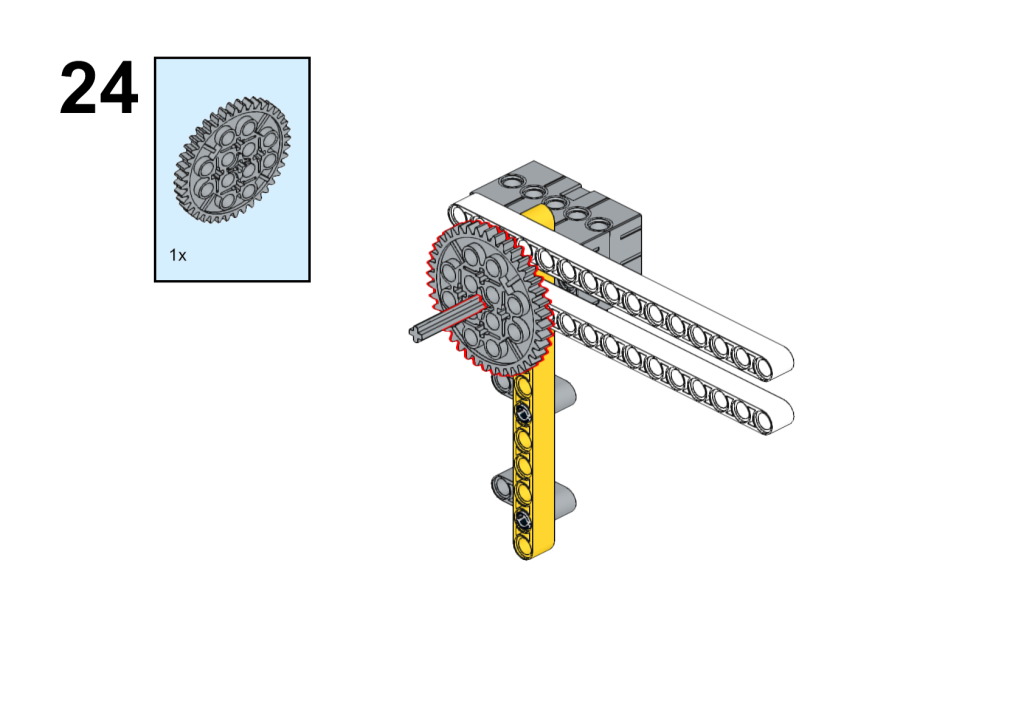
24. Connect the gear wheel with the servo as we need to get the engine power to be transited by this gear structure.
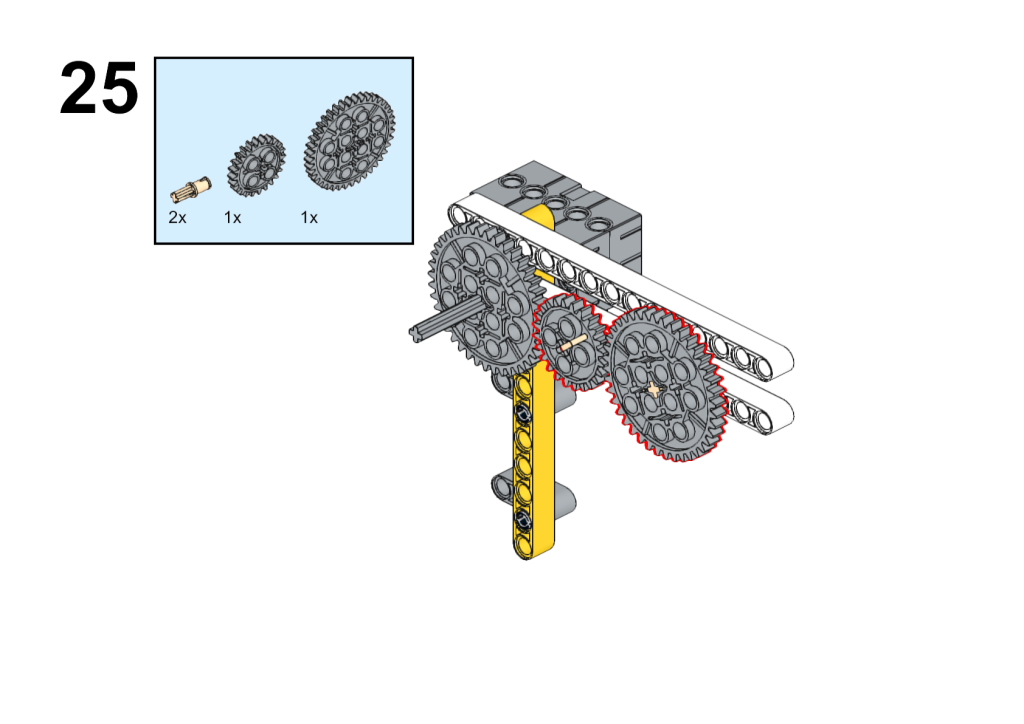
25. Connect the smaller gear wheels beside the bigger one that we just installed and note to put the smaller ones in the middle position.
26. Connect the white axles with the servo device again as the long arm part.
27. Connect the yellow axles with the devices as the shorter arms for holding the longer parts and the claws.
28. Install the axles with the yellow one, here we are using this part to get connected with the square column part for getting the whole robot arm connected with the body part of the robot car.
29. Connect the black gear wheel as the picture displays.
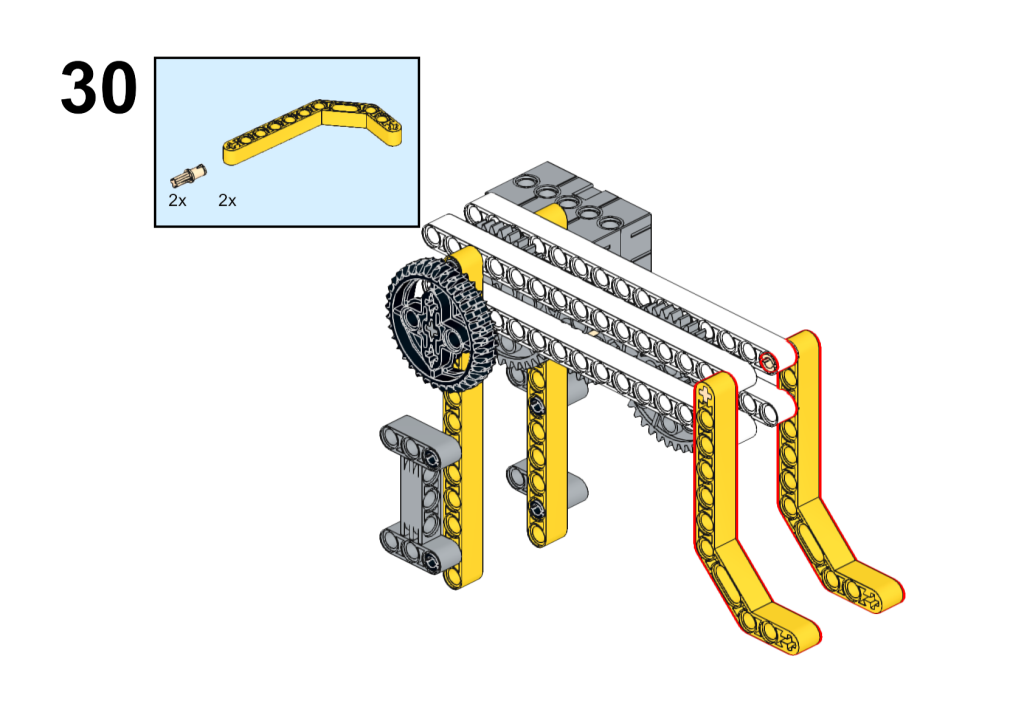
30. Install the yellow axles on the right side, we are going to build the claws of the robot arm here.
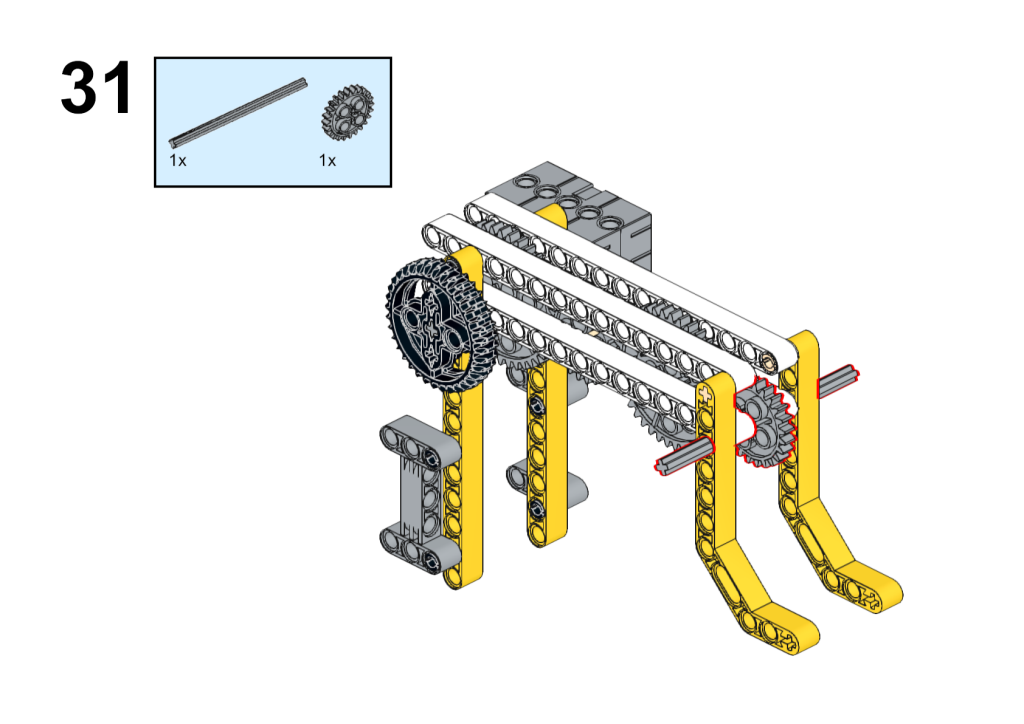
31. Connect the small gear wheel in the middle part and the grasping and releasing of the claw can be controlled by this small gear.
32. Connect the yellow axles again as the arm part of the robot.

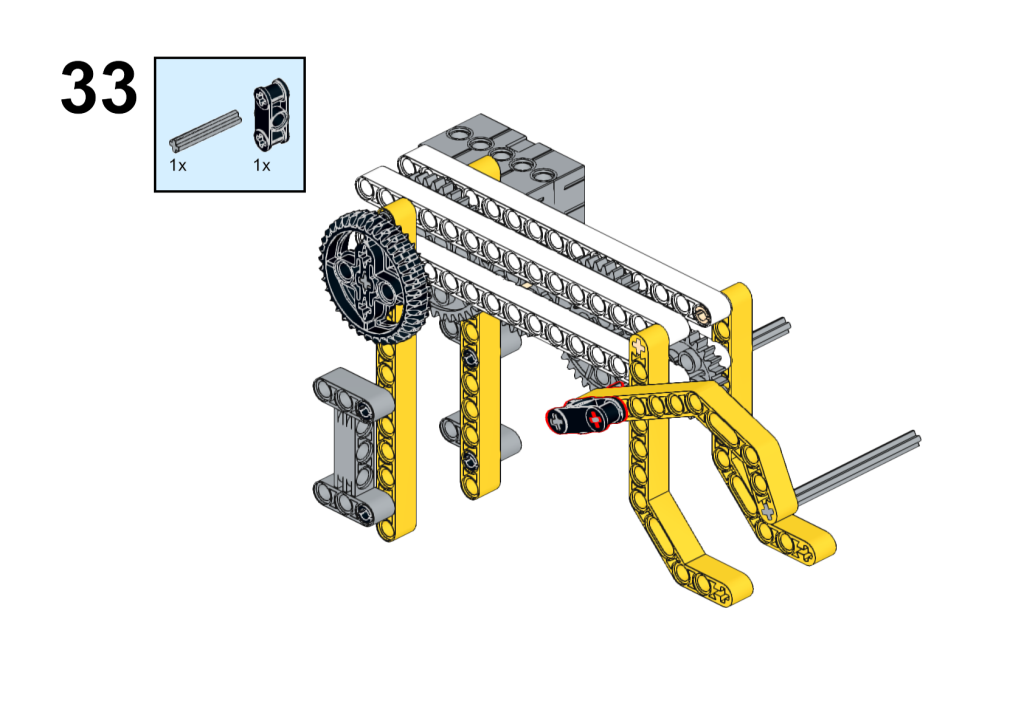
33. Connect the black parts for fixing the claws in a sold state.
34. Install another yellow axle and now the robot arm is almost coming into being.
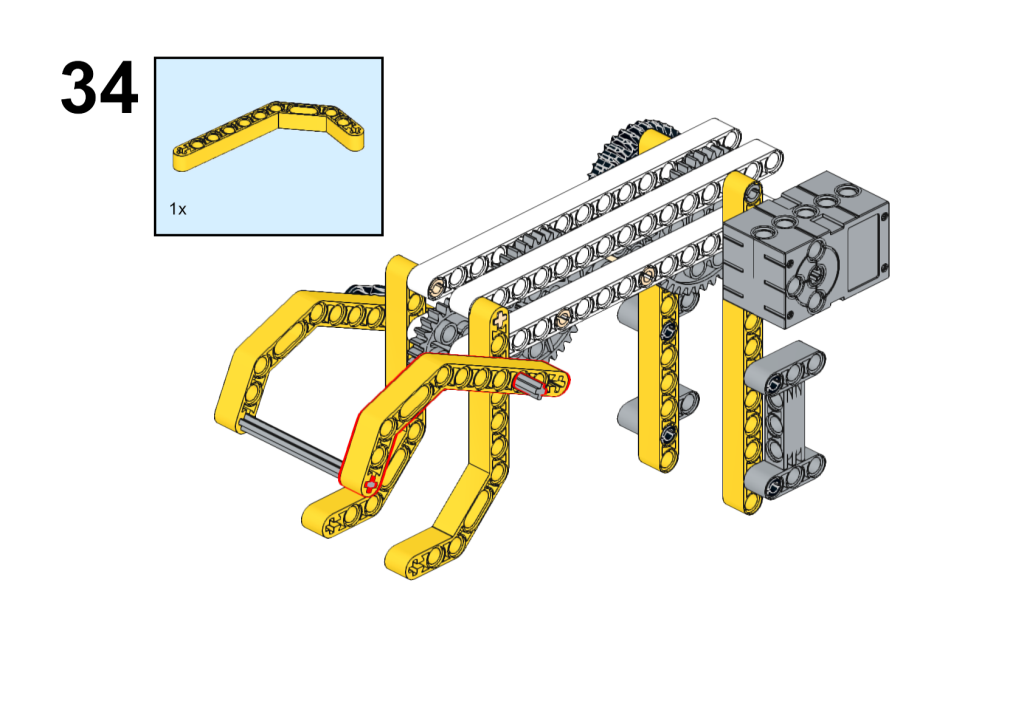
35. Connect the black pins again to complete the building of the claws.
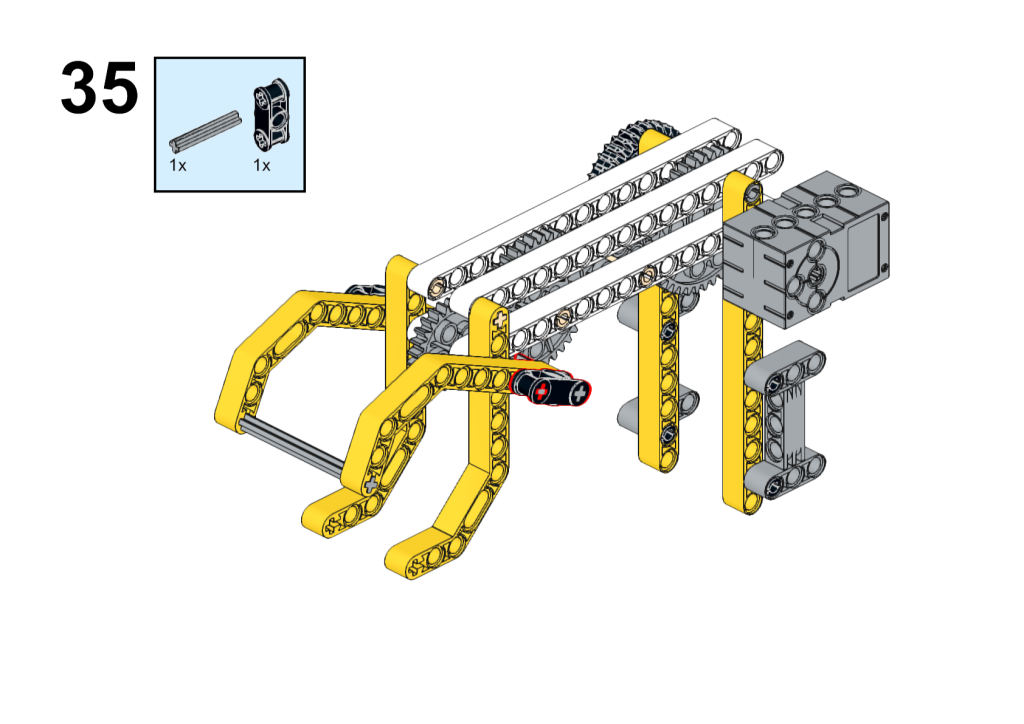
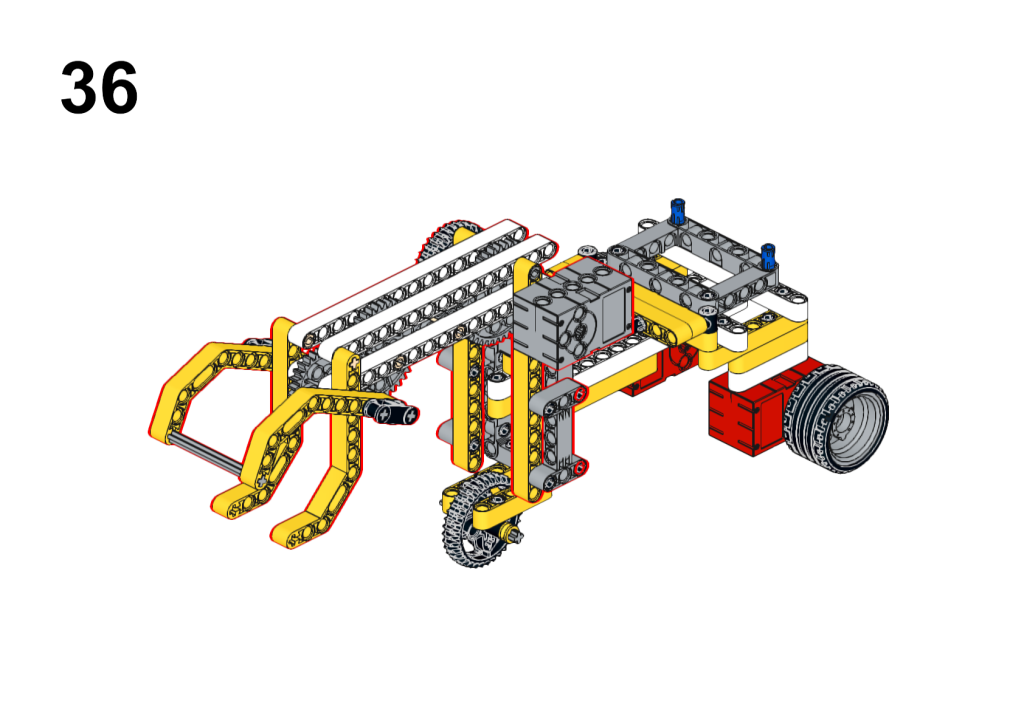
36. The completed assembly for the bricks only! See the finished diagram below.
37. Install the button in the form of the planetX, note that Nezha Inventor’s Kit does not contain this button, please get it as the standalone modules from the webshop.

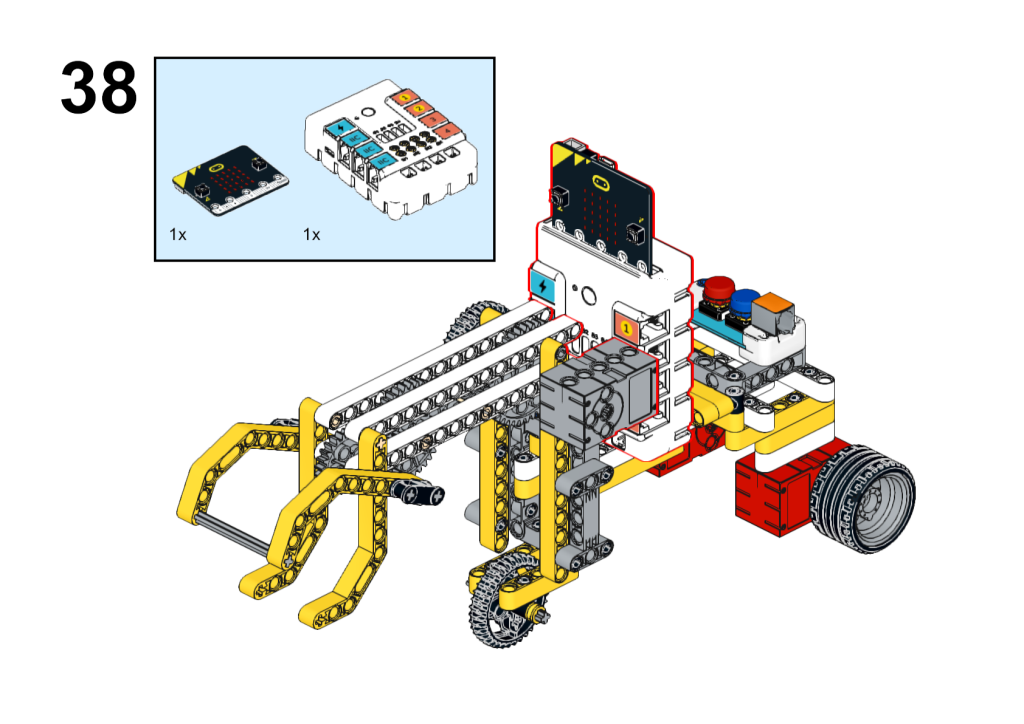
38. Connect the Nezha breakout board as well as the micro:bit board as the picture displays. Now, all get completed!
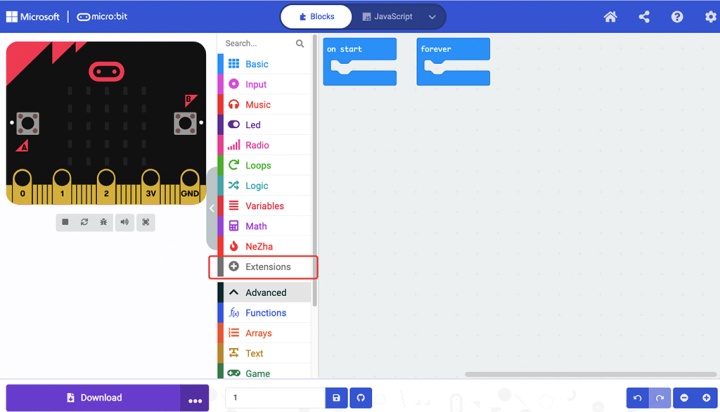
Here we use the MakeCode to do the program, go to MakeCode editor page, and please follow the steps below:
Click “Extensions” in the drawer to add the extensions that we need for this project.
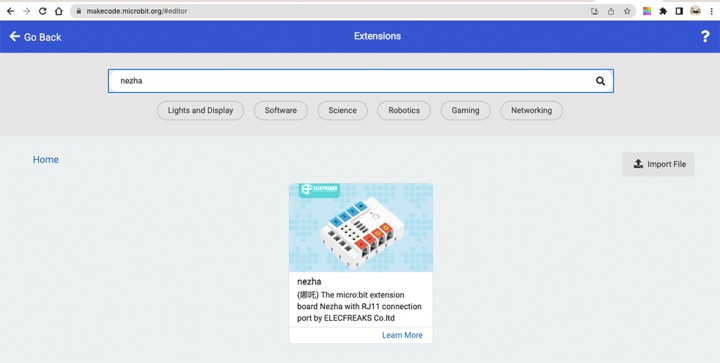
Search with “Nezha” in the dialogue box and click it to add it to the drawer.
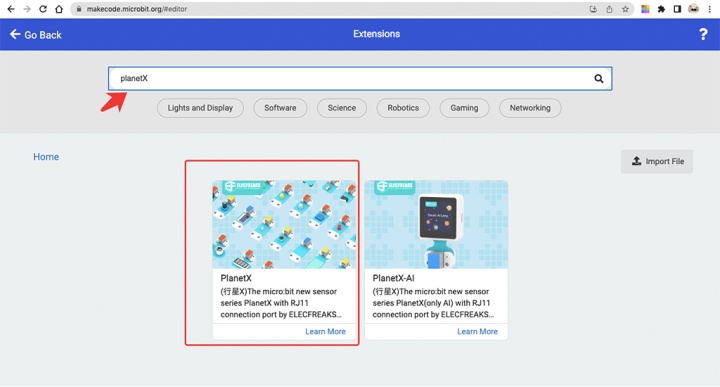
In the same way, search with “PlanetX” again there to add the extensions of PlanetX accordingly, see the circled parts in red below.
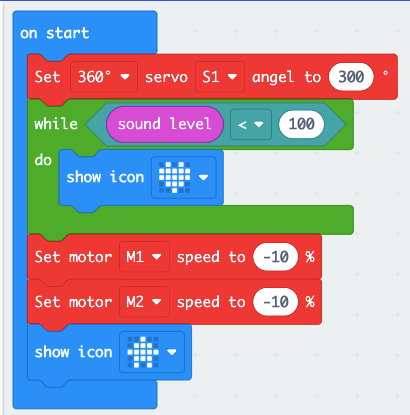
While on start, set the servo which connects to S1 at the angle of 300 degrees. Activate the sound sensor on the micro:bit V2 by showing an icon while the sound level is below 100, in this case, a program to drive the motors at the speed of -10% for the robot to move forward.
Note: Here we assemble the servos in their reverse directions and we need to give it a minus speed to make the robot drive forward.
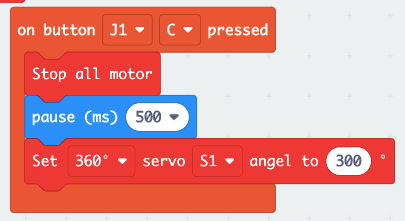
While the button C connecting to J1 is pressed, a program stops all motors, then pauses 500ms, and set the servo connecting to S1 to drive at 300 degrees.
While the button D connecting to J1 is pressed, set the servo connecting to S1 to drive at 60 degrees. 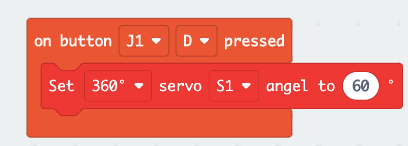
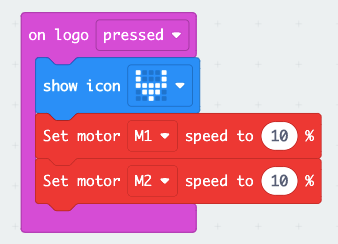
While touching the micro:bit logo, a program shows an icon and set the speed of both motors at 10% for reversing.
You may download the whole program with the link below for your reference:
https://makecode.microbit.org/_39XHaMAvea44
After powering on the device, the arm will be put on the floor. Flap your hands or make some noise near the micro:bit, then the robot shall move forward.
While pressing button C on the PlanetX button module, the robot car stops moving and the robot arm starts grasping the goods and lifting them up.
Touching the micro:bit logo to reverse the robot car and press button D to put the goods down.


