

On BBC Micro:bit, there are 3 touch footers: pin0, pin1, pin2. If you hold the GND pin with one hand and touch pin 0, 1, or 2 with the other, a very small (safe) amount of electricity will flow through your body and back into the micro:bit. This is called completing a circuit. It’s like you’re a big wire! Based on this principle, we can use pin0, pin1, pin2 as buttons. Today, we are going to learn how to use Micro:bit touch button.
Our Goal:
Learn usage of PIN Pressed.
Materials:
Micro:bit X 1
USB Cable X 1
Requirements:
1. Press pin1, count 1; press pin 2, count 2; press pin 0, reset.
2. Display total number on the screen.
Procedure
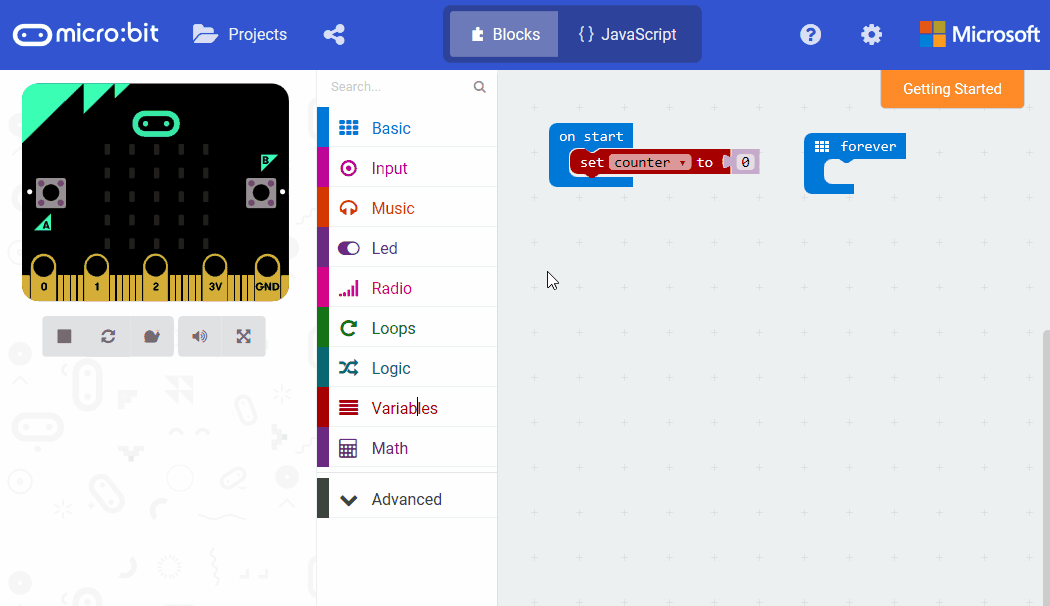
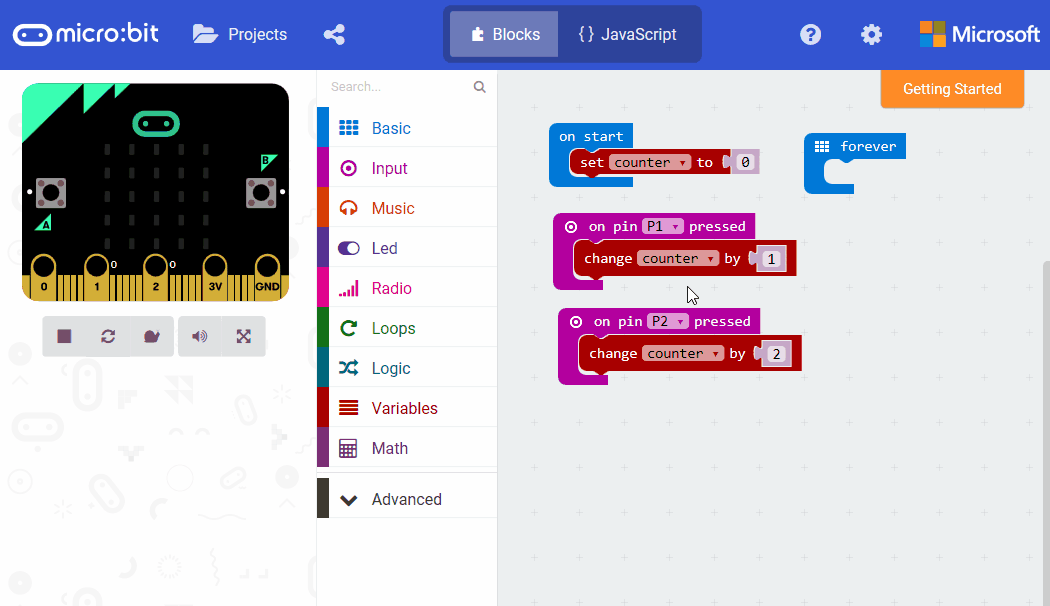
Step 1: In the drawer “variables”, choose “make a variables” to build a new variety called “counter” and set its initial value to be “0”.
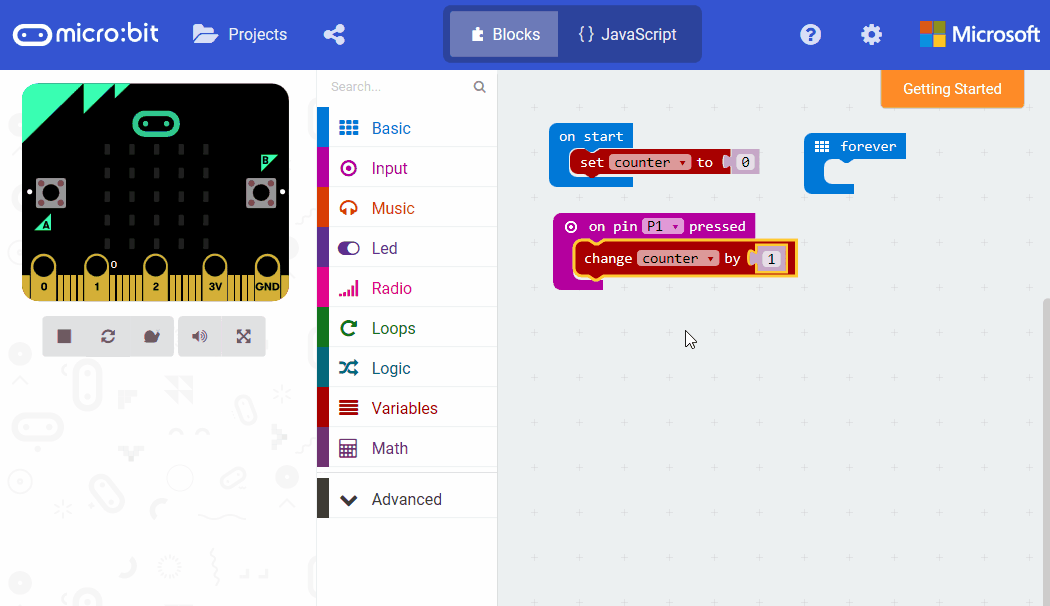
Step 2: Drag out “on pin pressed” block out of “Input” drawer and choose footer as P1. Drag out “change” block out of “variables” and set variety to be “counter”. And this program shows “counter” increase with “1”. This equals to:

Step 3: Copy and paste the above blocks and set footer to be “p2” and increase value to be “2”.
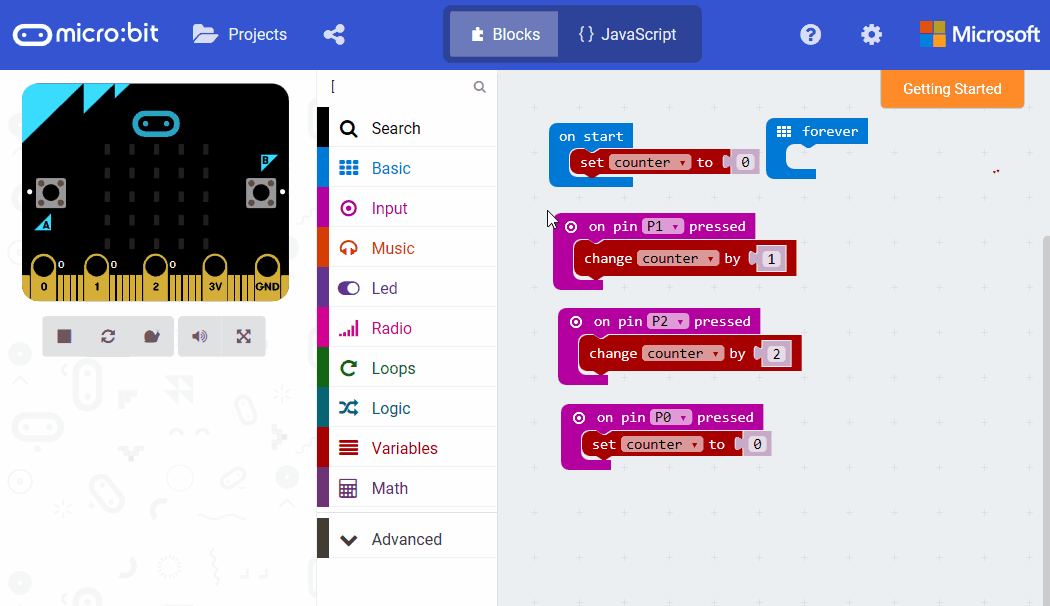
Step 4: Set touch function of “p0” and make “counter” reset.
Step 5: In block circulation, display variety “counter”.
Step 6: Download program into Micro:bit.
Note: You must press “GND” and make a current loop between your body and Micro:bit so that touch button can work.
Question:
Every time i touch P0, I want count minus “1”. Then how to revise the program? Your comments are welcomed!
Relative Reading: Start Your Micro:bit Programming Trip Micro: bit Fundamental Course–Button&Display


