

Purpose
To make a trolly that is able to carry the goods, we can program in the MakeCode editor to give commands such as lifting/putting down the arms, moving forward and stopping driving.
In next course we will make some improvements for an easier operation.
Blocks Build-up
Steps
Please download the io. file if you have Lego studio: The-Carrier-Trolly.io
After assembly, connect with Nezha breakout board.

Hardware connections

Software Programm
Click “Advanced” in the MakeCode to see more choices.

For programming, we need to add a package: click “Extensions” at the bottom of the MakeCode drawer and search with “nezha” in the dialogue box to download it.

Notice: If you met a tip indicating that some codebases would be deleted due to incompatibility, you may continue as the tips say or create a new project in the menu.
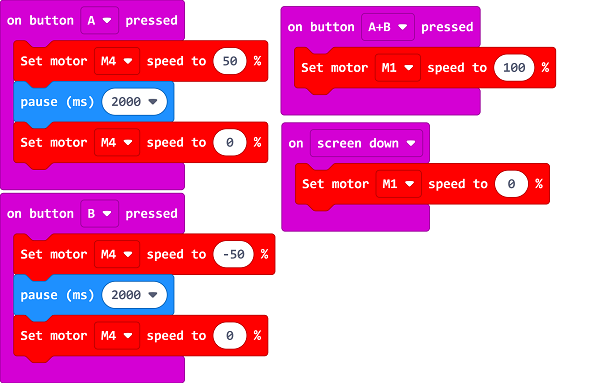
Code:
Link: https://makecode.microbit.org/_D2291z6iE6Dq
Result
Press button A to lift the arms.
Press button B to put the arms down.
Press button A+B to drive forward.
If taking up the trolly, the micro:bit’s front side would face downward, then the trolly stops driving.


