

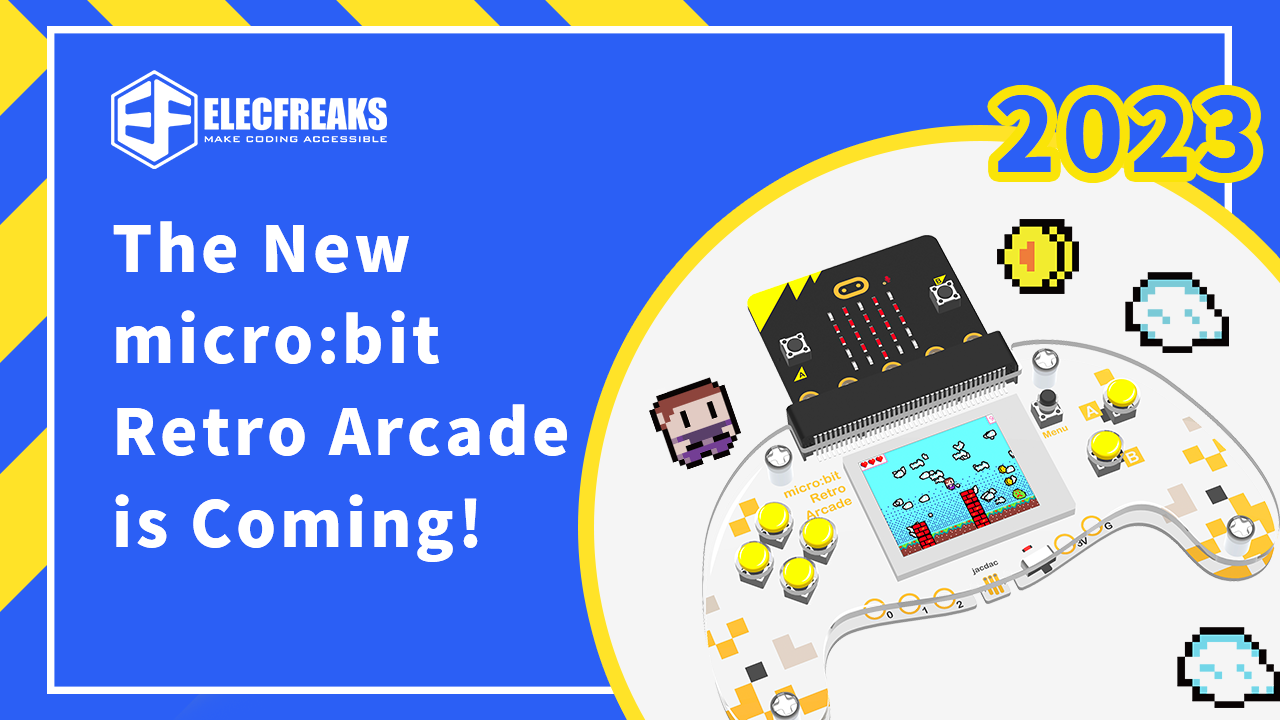
Based on the first generation of our ELECFREAKS Retro Arcade device, we’ve made another generation with the function of combing the micro:bit board as well as the Arcade. This means that we can both program it no matter on the micro:bit MakeCode or on the Microsoft Arcade platform.
In other words, you can create and customize your games with the features of the Arcade device by doing the plot setting, the characters designing, and scenarios designing, at the same time, you can use it as a remote controller to work just as a joystick to drive your cart or similar devices.
On the front side, it has a colorful TFT screen in 160*128 and the regular buttons as an Arcade device, such as the four directional buttons, the A/B buttons, and the reset button, not the same as the buttons we design on our Retro arcade device, we’ve made the buttons on the micro:bit Retro Arcade harder with more silvery feelings. Also, it has an edge connector which is designed for the connection with the micro:bit board, and on the bottom side, there are the connectors for the connection with the alligator clips, and the most significant feature is that we have made the Jacdac connector available here, which means you can have your Jacdac device connected to this product, obviously it gives more possibilities to do more projects for Jacdac. On the back side, there is a battery holder for three AAA dry batteries.
Let’s start with some introduction to how to get our micro:bit Retro Arcade started, here I am going to do a remote controller project by doing it as a joystick with the control to our Cutebot.
Firstly, we need to prepare the products below:
1. micro:bit v2 * 2
2. micro:bit Retro Arcade * 1
3. ELECFREAKS Smart Cutebot * 1
After getting those products on hand, let’s start the program for the “Joystick” first:
Step 1: Go to the Makecode editor for Arcade:
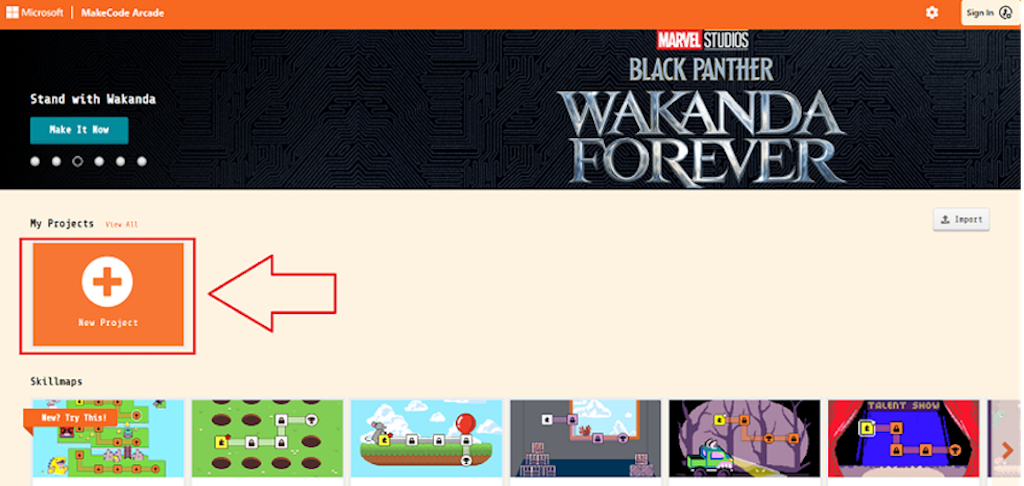
Click “New Project” to go to the edition page.
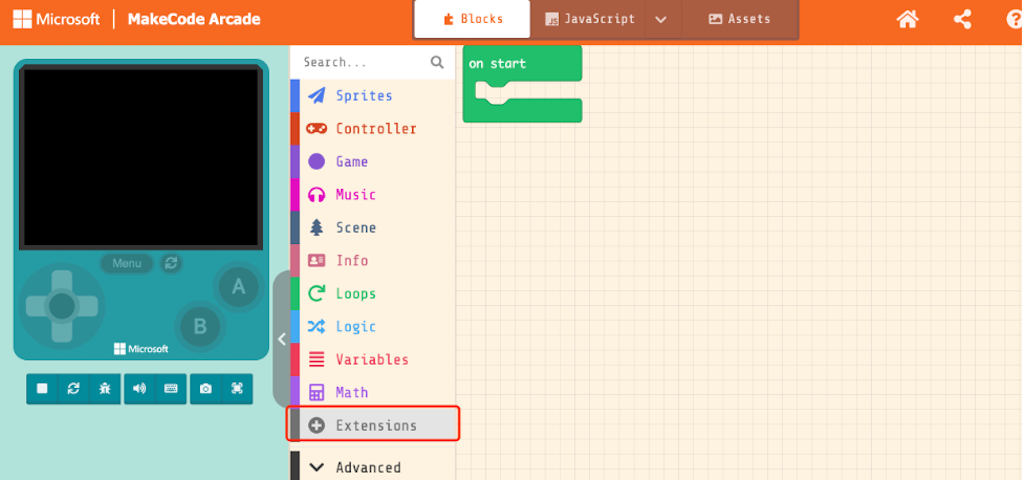
Click “Extensions” in the drawer and search with “radio” in the search box.
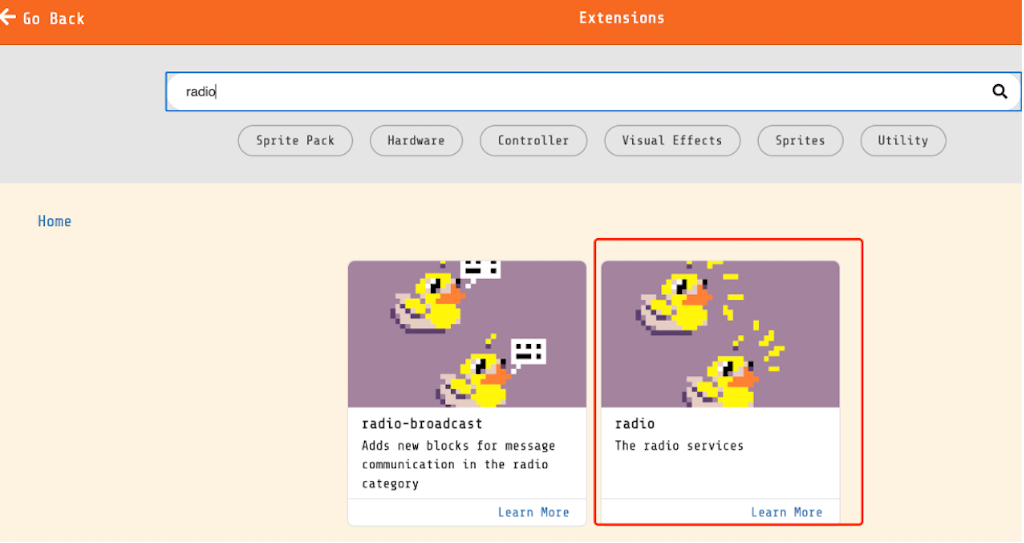
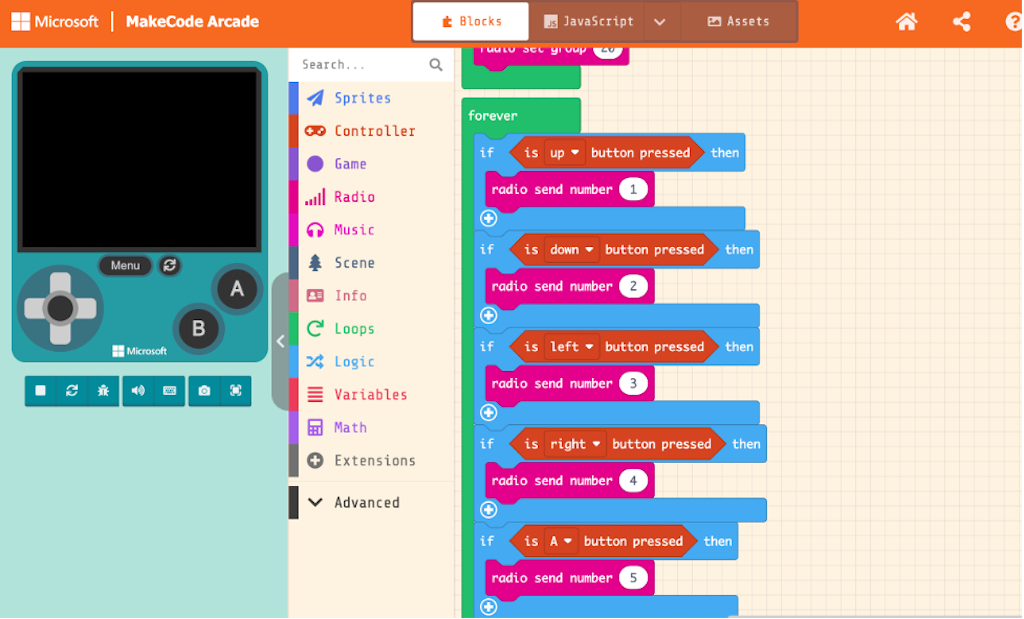
Select the second one circled in red and start the program, drag the “on start” block from the drawer, and set the radio set group as 20.

Drag the “forever” block in the editor page, select the “if” sentences 5 times, and assign the commands as follows, while pressing the button of “up”, set to send the radio command number as “1”; while pressing “down”, set the number as “2”; while pressing button “left”, set the number as “3”; while pressing button “right”, set the number as “4” and while pressing button “A”, set the number as “5”.
Here, we get the programs of the “Joystick” ready on the pilot, and let’s start the program prepared for the Cutebot now we will go to the program editor for micro:bit MakeCode:
https://makecode.microbit.org/
I believe you are very familiar with this platform since most products are operated here, and still, in the same way, add the extensions for the “cutebot” in Makecode and I am just displaying the program for the Cutebot here:
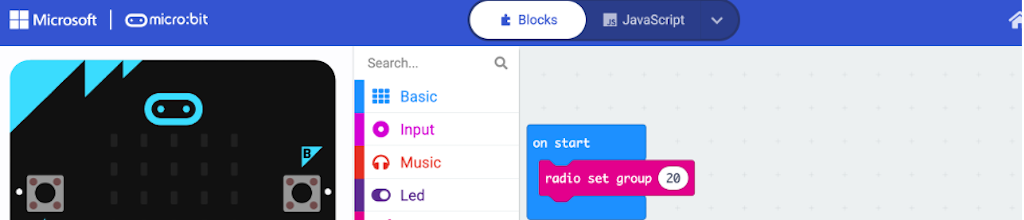
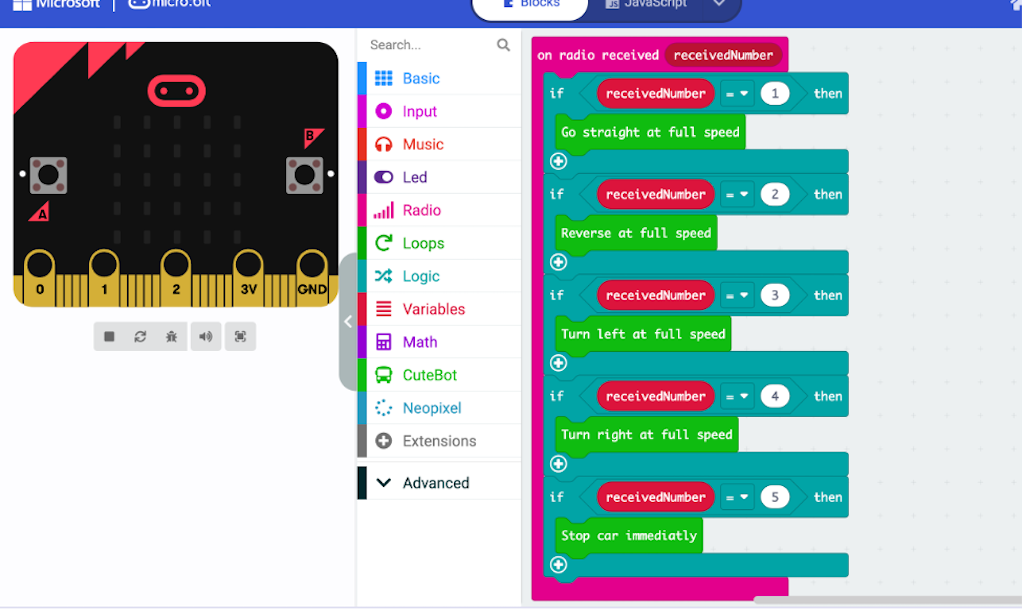
Similarly, drag the “on start” block from the drawer and set the radio set group to the same as the Joystick as “20”. Drag the “on radio received” block to do the execution functions as follows in accordance with the commands from the Joystick, drag 5 “if” sentences under the block and set if the received number is “1”, program the Cutebot to go straight at full speed; in the same rules, if the received number is “2”, program the Cutebot to reverse at full speed; if the received number is “3”, program the Cutebot to turn left at full speed; if the received number is “4”, program the Cutebot to turn right at the full speed and if the received number is “5”, program to stop the car immediately.
Here comes the end of this project for the remote control with the micro:bit Retro Arcade with the Smart Cutebot, I hope you will enjoy it, at the same time, we are keeping to make more projects and we will publish them on our Wikis and social media channels to provide better and more experiences.


