

Introduction
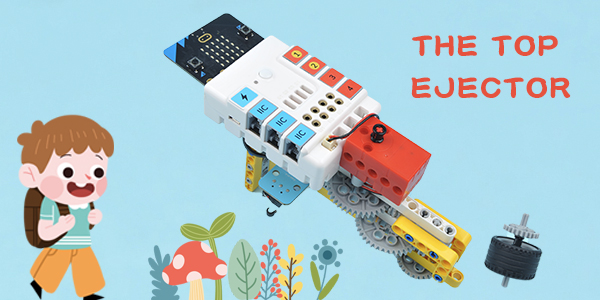
I’d like to use the micro:bit to design a course. In this course, I need to use the micro:bit to combine building blocks, motors and crash sensors to make something interesting for the children, and also allow them to build the device. I designed a simple top ejector. In the process of building, students can learn the knowledge about gear transmission, and then play games and competitions with their peers.
Materials Required
micro:bit X 1
USB cable X 1
RJ11 Cable X 1
Geek Motor X 1
Crash Sensor X 1
Assembly
Build-up steps in PDF:
Connect Nezha breakout board with the bricks
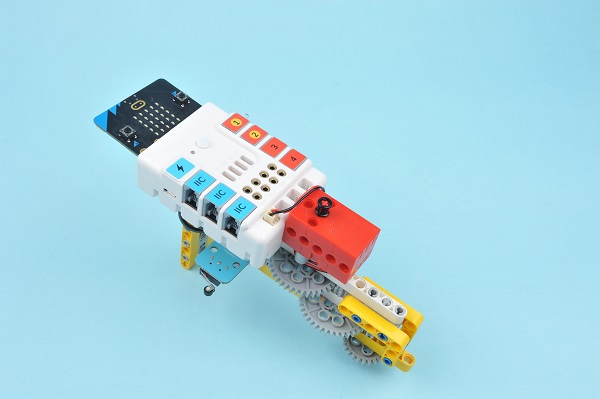
Students are able to make adaptations with their ideas, remember to use gear on the top.
Hardware Connection:
Connect the motor to M1 and the crash sensor to J1 on Nezha breakout board.
programming
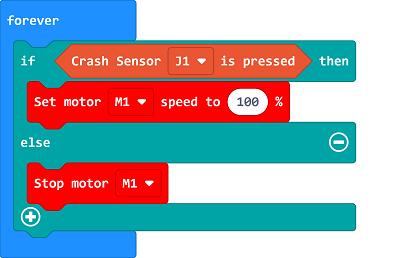
Program to start or stop the ejector by pressing the crash sensor. Click “Advanced” in the MakeCode to see more choices.

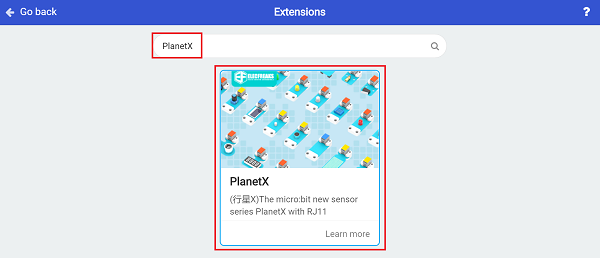
For programming, we need to add a package: click “Extensions” at the bottom of the MakeCode drawer and search with “nezha” in the dialogue box to download it.

For programming, we need to add a package: click “Extensions” at the bottom of the MakeCode drawer and search with “PlanetX” in the dialogue box to download it.
Notice: If you met a tip indicating that some codebases would be deleted due to incompatibility, you may continue as the tips say or create a new project in the menu.
Code:
Link: https://makecode.microbit.org/_WHyaJs9u5Jys
Result
Press the crash sensor to start the ejector and release it to stop the ejection.


