The definition of a “smart speaker” is a wireless audio and voice command device with an integrated virtual assistant that people can use through voice commands, such as asking the intelligent speaker to play music, announce the weather, set an alarm clock, etc. Some smart speakers can also integrate connectivity for Wi-Fi, Bluetooth, and other wireless protocol standards to add uses beyond audio playbacks, such as controlling smart home devices via voice. Some intelligent speakers also include a touchscreen. Smart speakers with touch screens are known as Smart Screens.
The simple version of the “smart speaker” is to achieve voice commands to control the device to play music, to gain voice intelligent control, such as voice control of the smart car forward, backward, start cruise mode, etc., can be divided into three steps to achieve the simple version of the “smart speaker”.
Click on “Advanced” in the code drawer of MakeCode to see more code options.
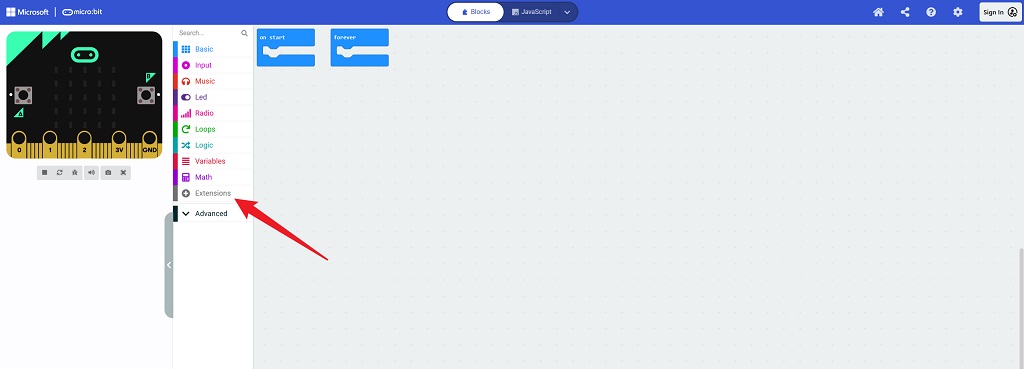
In order to program the MP3 module, we need to add an extension library. Find “Extensions” at the bottom of the code drawer and click on it. This will bring up a dialog box, search for “https://github.com/elecfreaks/pxt-mp3player” and click on download this library.
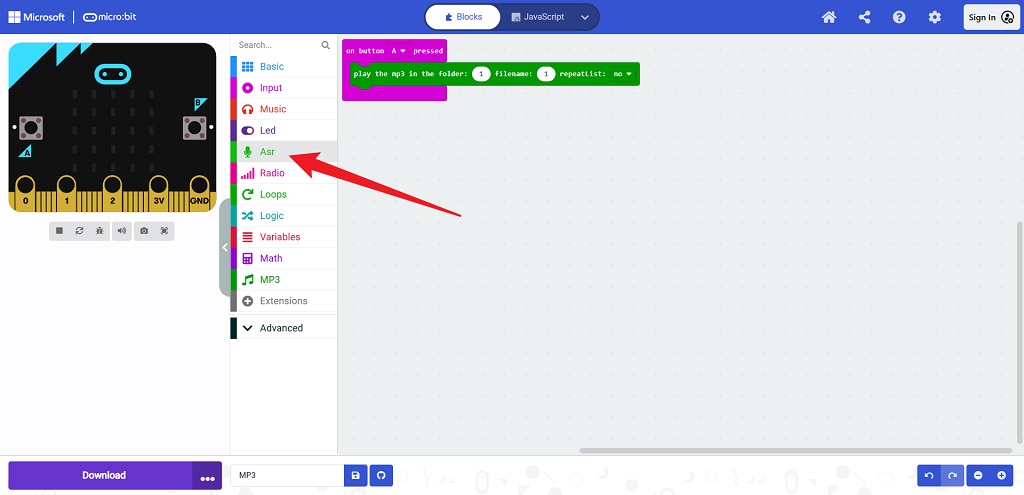
Once added successfully, the home page appears as shown below.
1.2.1 Familiarity with the use of modules
This is an example of the use of the MP3 module.
http://www.elecfreaks.com/learn-en/microbitOctopus/sensor/octopus_ef04104.html
1.2.2 Start writing the MP3 module code
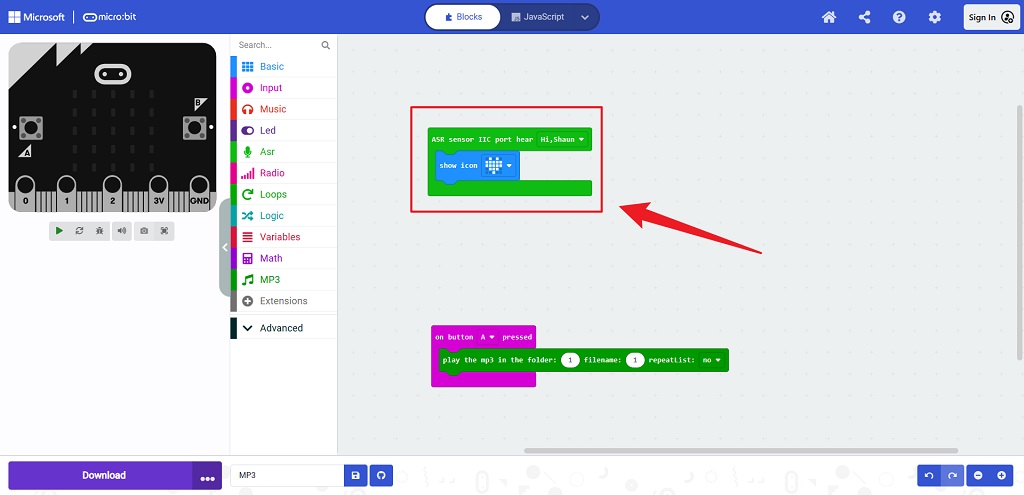
Let’s start the test by playing music using the micro:bit button A.
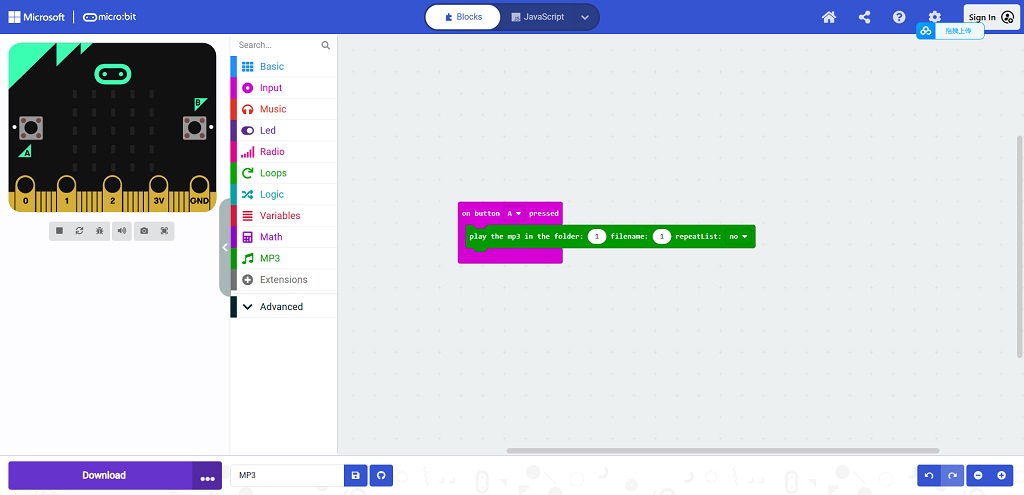
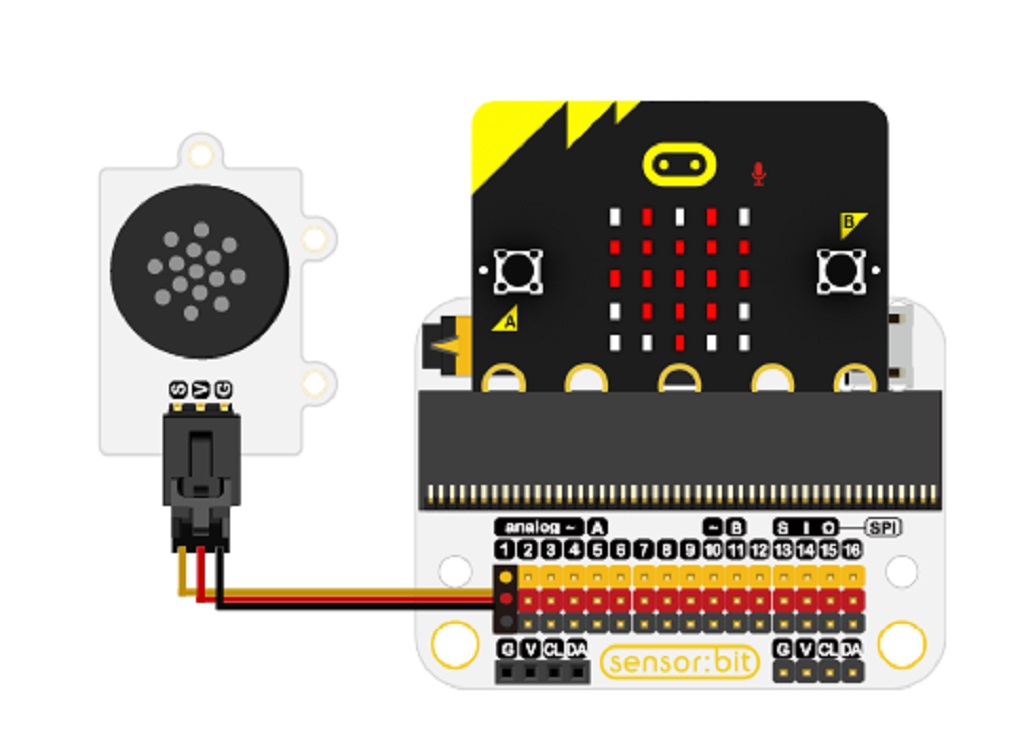
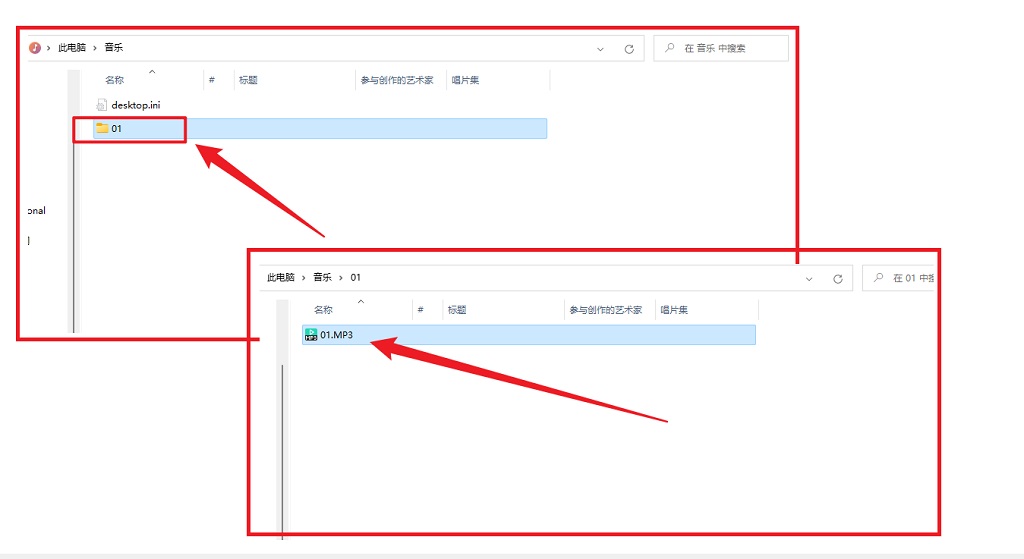
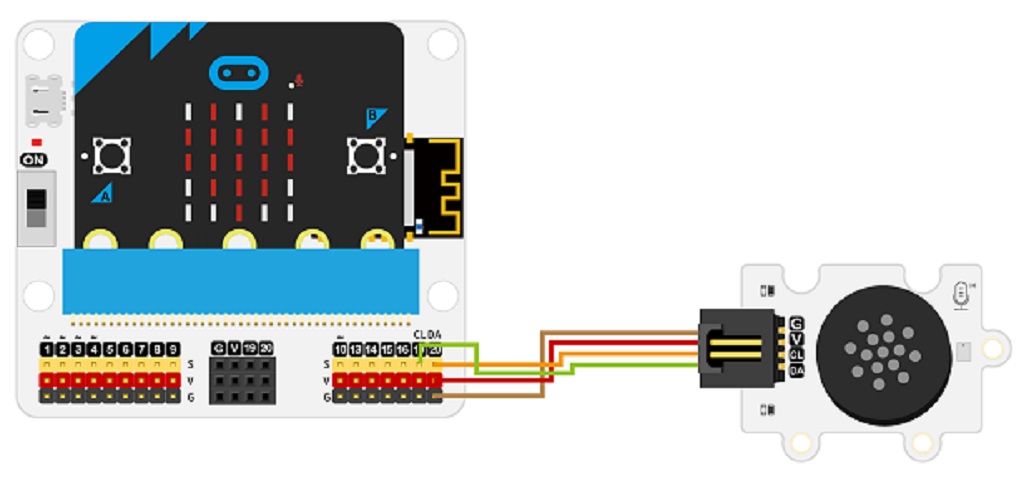
Because the MP3 module is based on specifying the contents of the SD card, it is played back. So pay attention to the physical copy order, the first copy in is 1, you can not modify the file name, can not specify the file name alone; the folder name must be two digits, 01 ~ 99, for example, 01; file name must be preceded by 3 digits 001 ~ 999, for example, 002 ~ Hi.MP3, similar to the following picture.
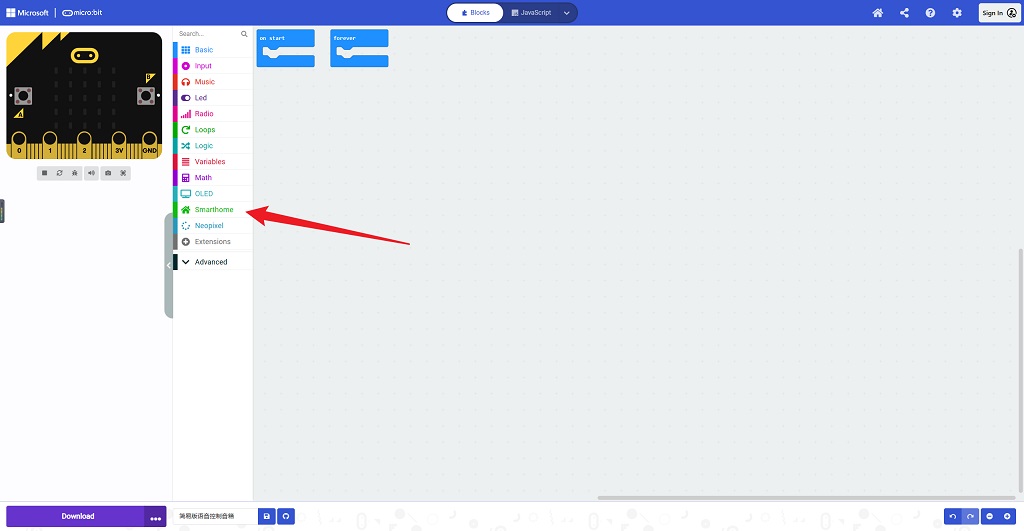
Click on “Advanced” in the code drawer of MakeCode to see more code options.

Search for “https://github.com/elecfreaks/pxt-ASR” in the pop-up dialogue box to download the code base for the speech recognition e-block.
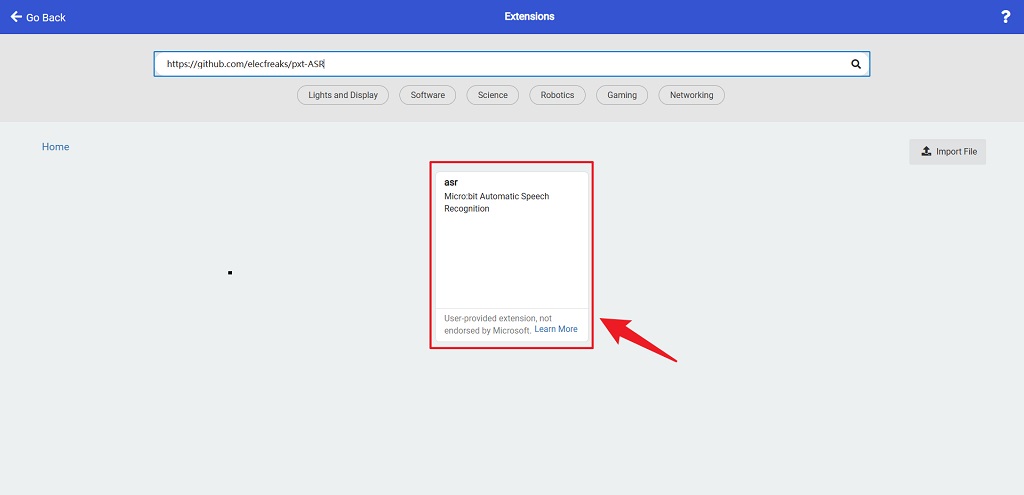
Once added successfully, the home page appears as shown below.
2.2.1 Familiarisation with the use of modules
This is an example of the use of the Speech Recognition Module module.
http://www.elecfreaks.com/learn-en/microbitOctopus/sensor/octopus_ef04108.html
2.2.2 Start writing the speech recognition module code
Start the test by using the default command “Hi, Shaun” to light up the love.
Next, press the A button to enter “learning mode”, which allows you to set up actions to be performed according to the vocabulary you are learning.
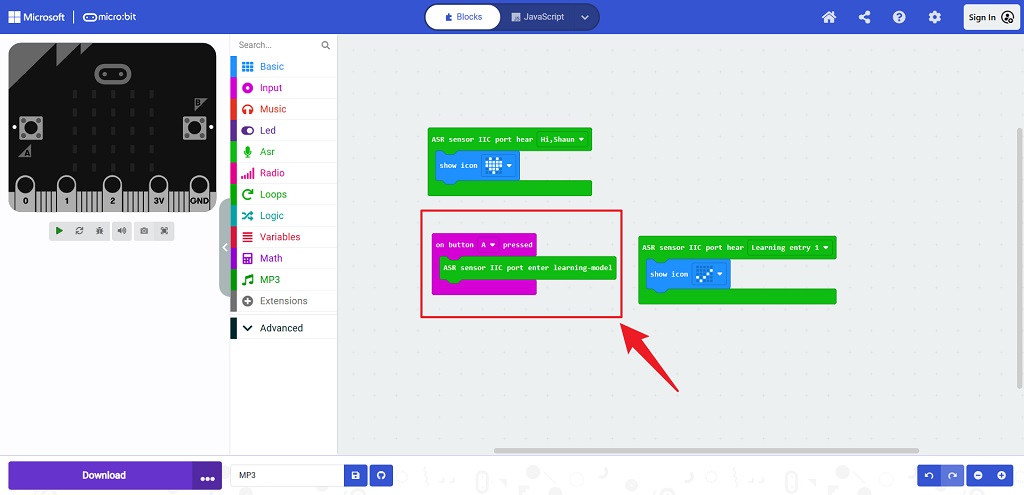
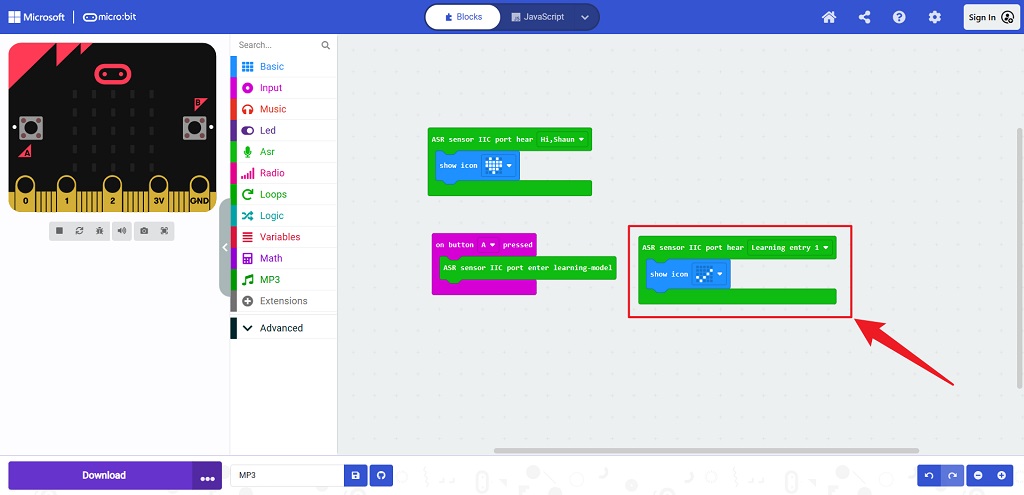
Follow the voice prompts to complete learning the first command, exit learning mode, say the corresponding command and perform a tick.
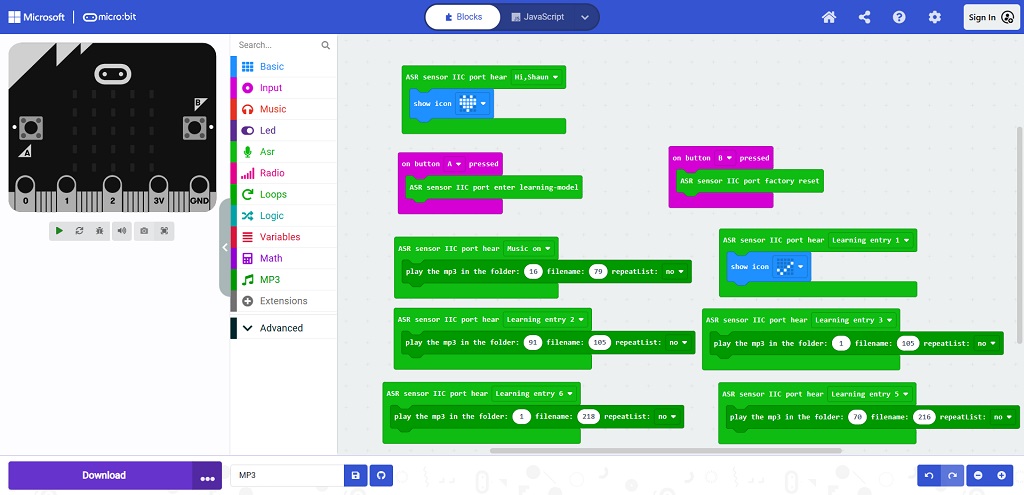
According to the above mastering MP3 module and voice recognition module, you can use the MP3 module as a speaker, store the music you want to play in advance, then through the voice recognition module to identify the corresponding specific words, you can carry out a simplistic voice control of the speaker function.
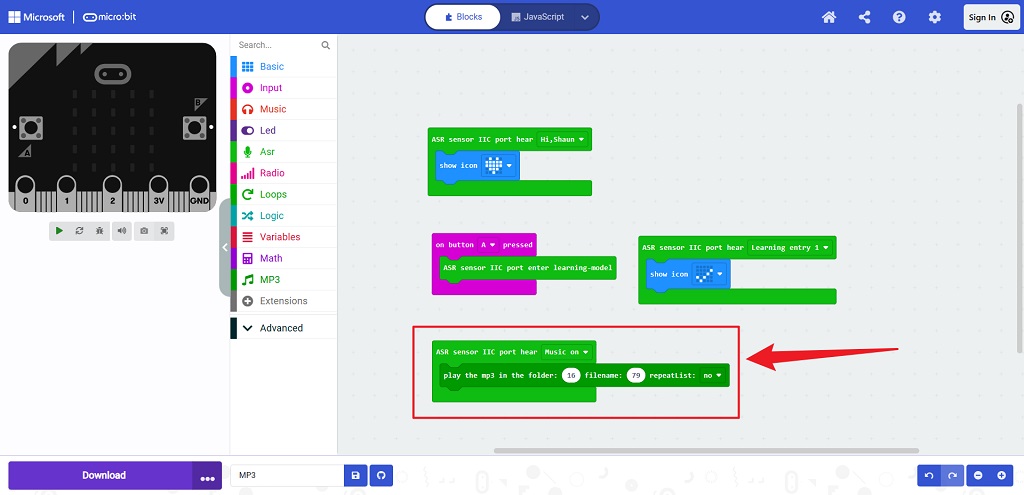
A wide variety of functions can also be implemented according to the instructions we want, as shown below.