

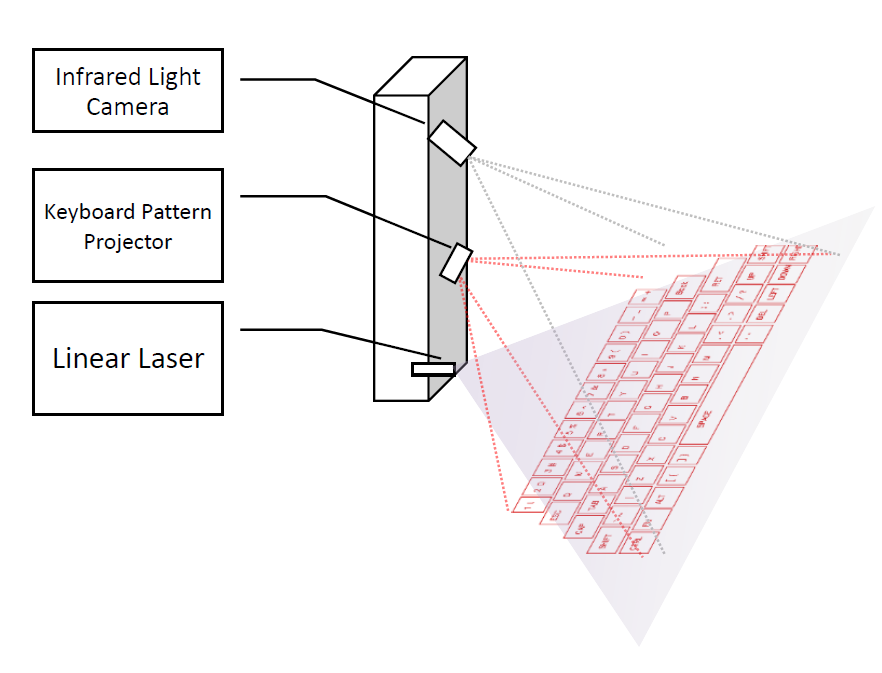
Open Source Laser Projection Keyboard
January 11, 2019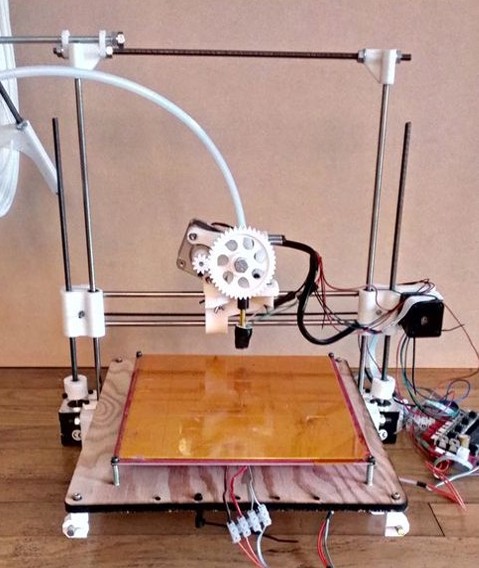
RepRap 3D Printer RAMPS In Stock
January 11, 2019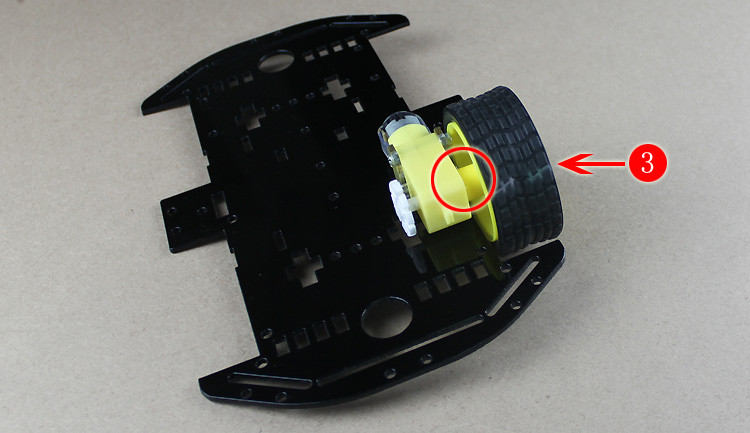
Hi, guys, we have not updated our new products for some time, and today, we have a thrilling news to share with you. Smart Car Chassis 4WD V4 Double and Smart Car Chassis 2WD V12 have been put into shelves, and friends who have preference for smart cars can shop in our store. Not only can you acquire a competitive price , but also the installation guide of 4WD will be demonstrated here . Actually nearly any serials of smart cars follow this one to be installed. Attentively follow our steps, and you can comfortably master the method.
Introduction of parts

Part 1: Smart car floor x 1.
Part 2 : Geared Motor x 4.
part 3 ???Smart car wheel x 4.
part 4 :Acrylic Fastener.
part 5 :Encoder disk x 4.
part 6 :M3 Screw Nut x 8.
part 7 ???nbsp;M3 * 28 Screw x 8.
step one

Firstly assemble the encoder disk with the geared motor as illustrated below. Drop some glue if necessary (not too much because the motor can’t work if it is too sticky—–pay special attention )
Step two

Place the acrylic fastener and the well-prepared motor installed in step one in the positions as demostrated above.
Step Three

Let the M3*28 screws go through the motor and the acrylic fastener, normally from outside to inside , and from upside to downside, but if you get the M3*30 screws, try to operate them from the other direction.
Step Four

Fix the motor in the other end with another fastener and two screw nuts .
Step Five

Until now, we have finished one wheel, and there are no exception to the other three wheels .The installation of four wheels means the completion of the first layer. Besides, for the second layer of the smart car , you try to slightly research it and we are convinced that you are able to handle it. Congratulations, one smart car has been presented before you through your effort.