

How to make an Auto-Mecanum Vehicle
January 10, 2019How to make an Arduino smart rc car for Arduino beginners
January 10, 2019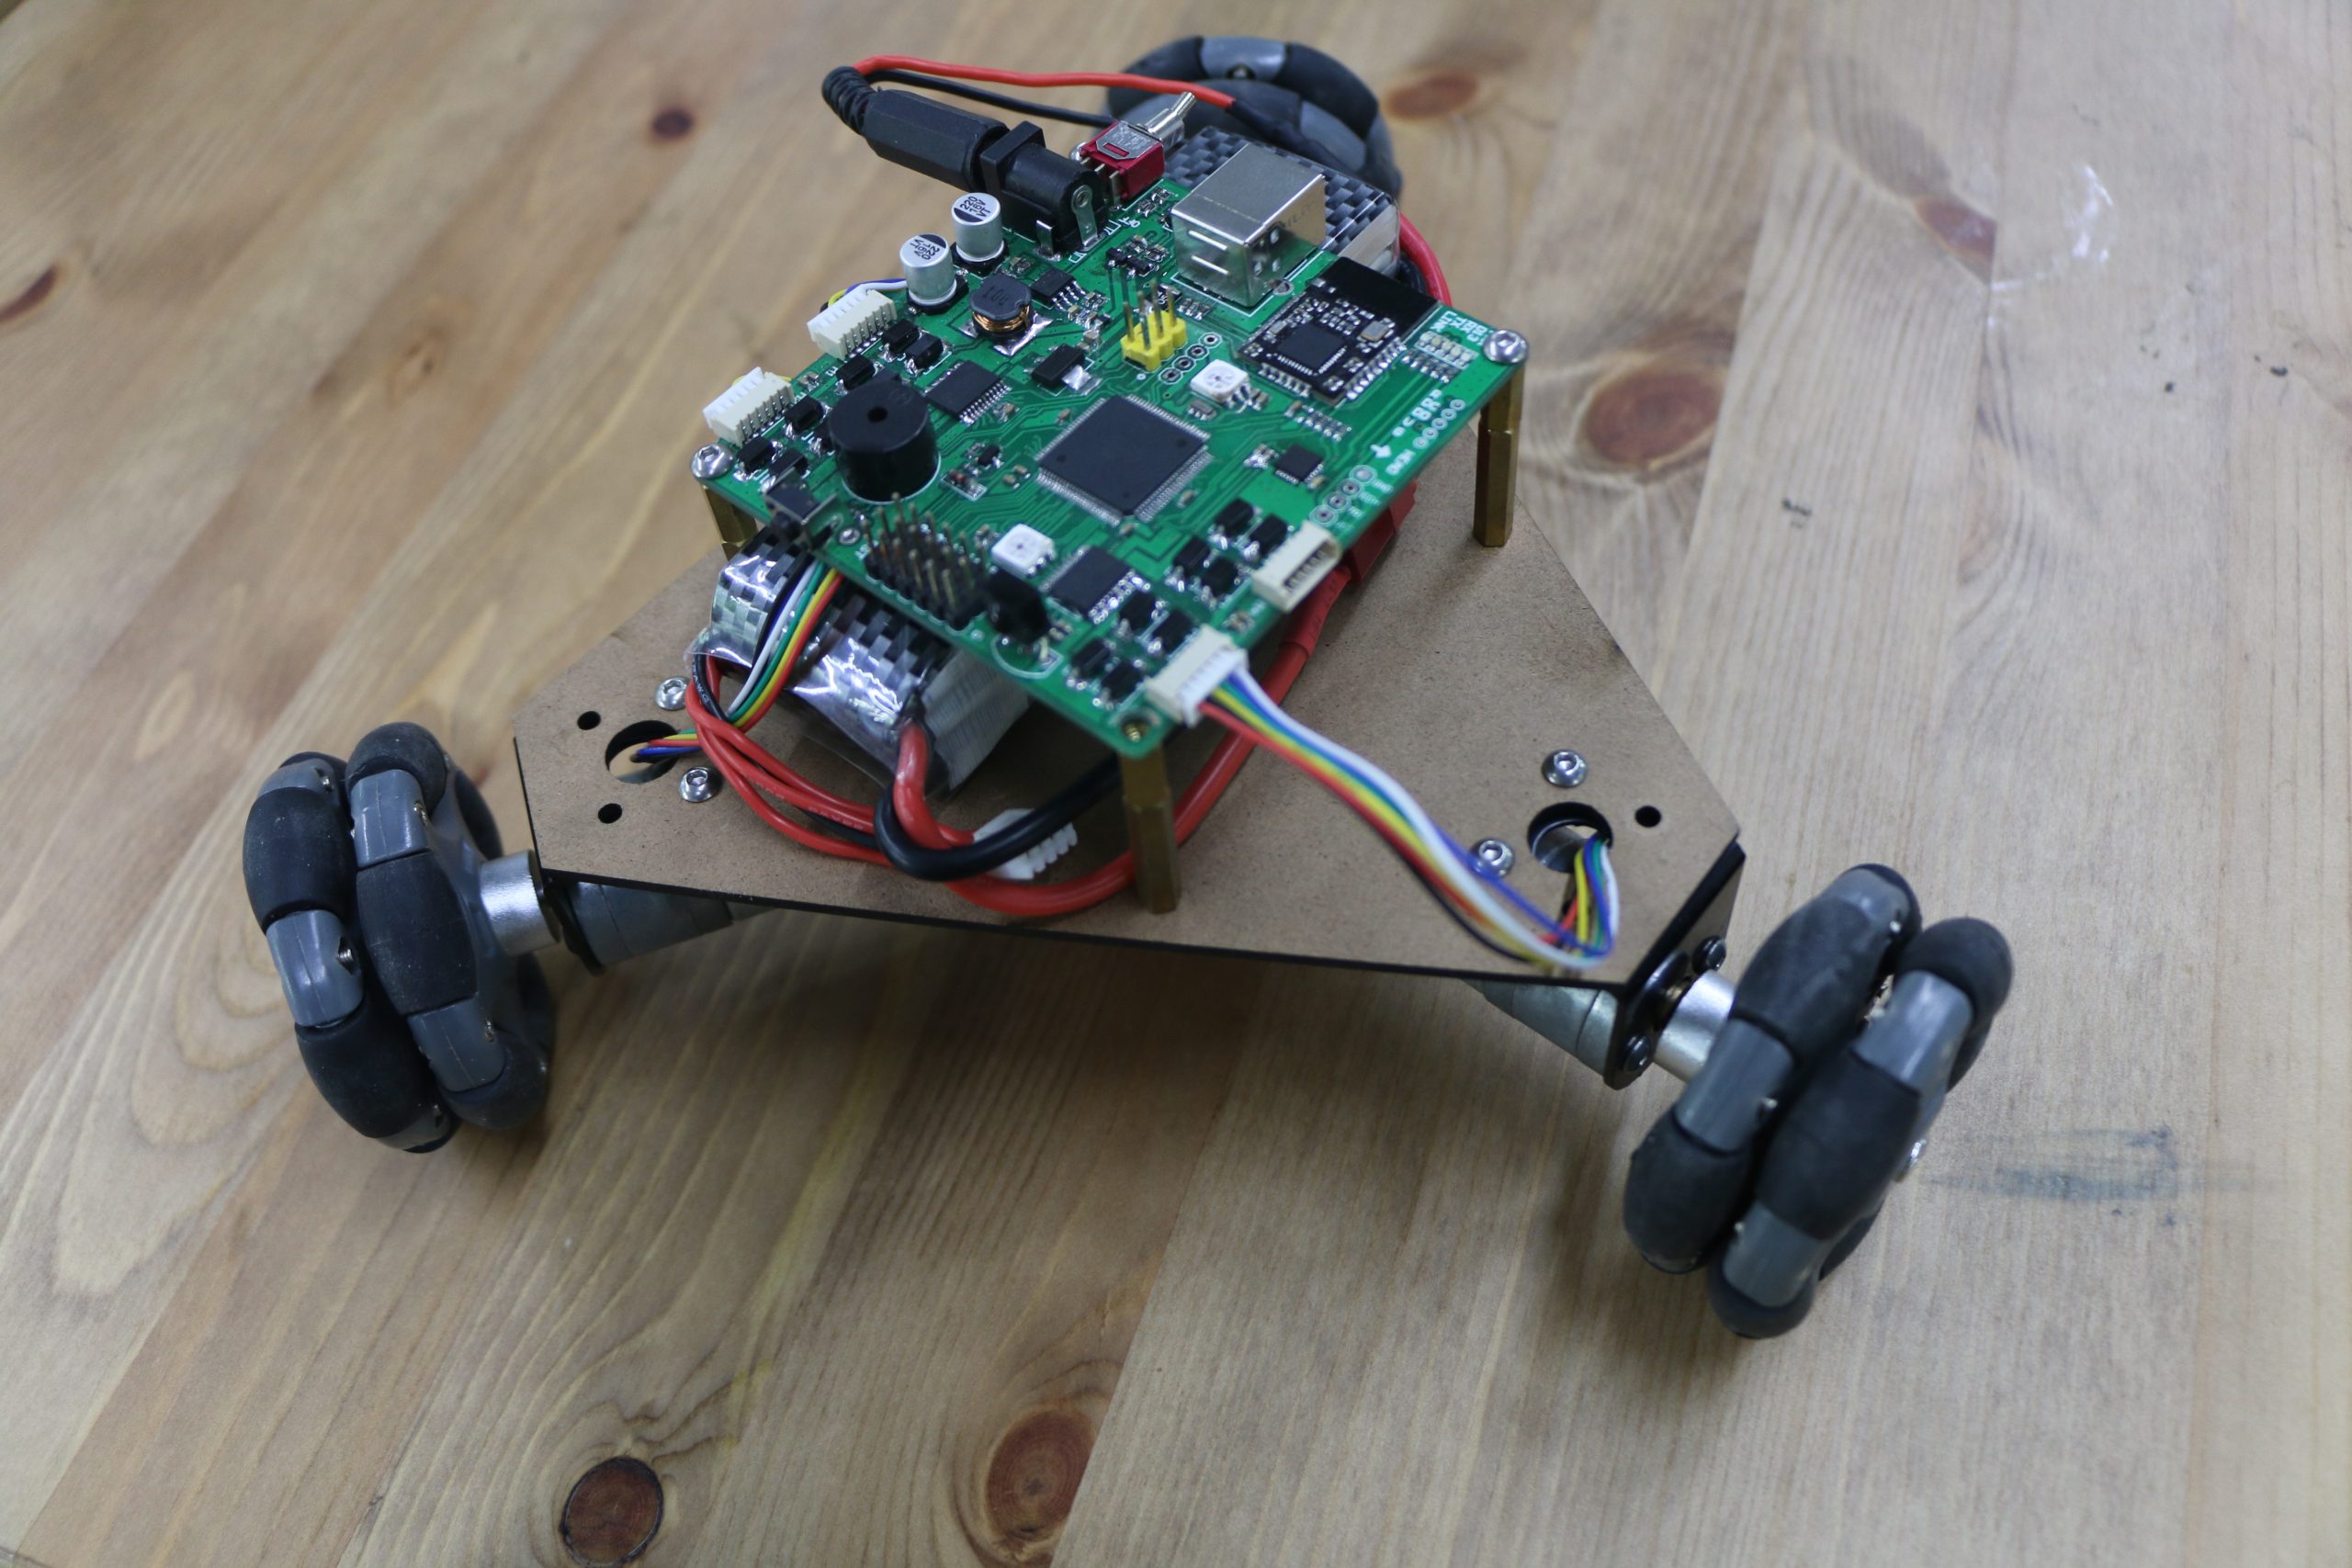
What can an Auto-Omni vehicle do?
The Auto-Omni vehicle is equipped with three omni wheels and it can automatically move to any directions, totally independent of human control, whether by a console or a mobile App.

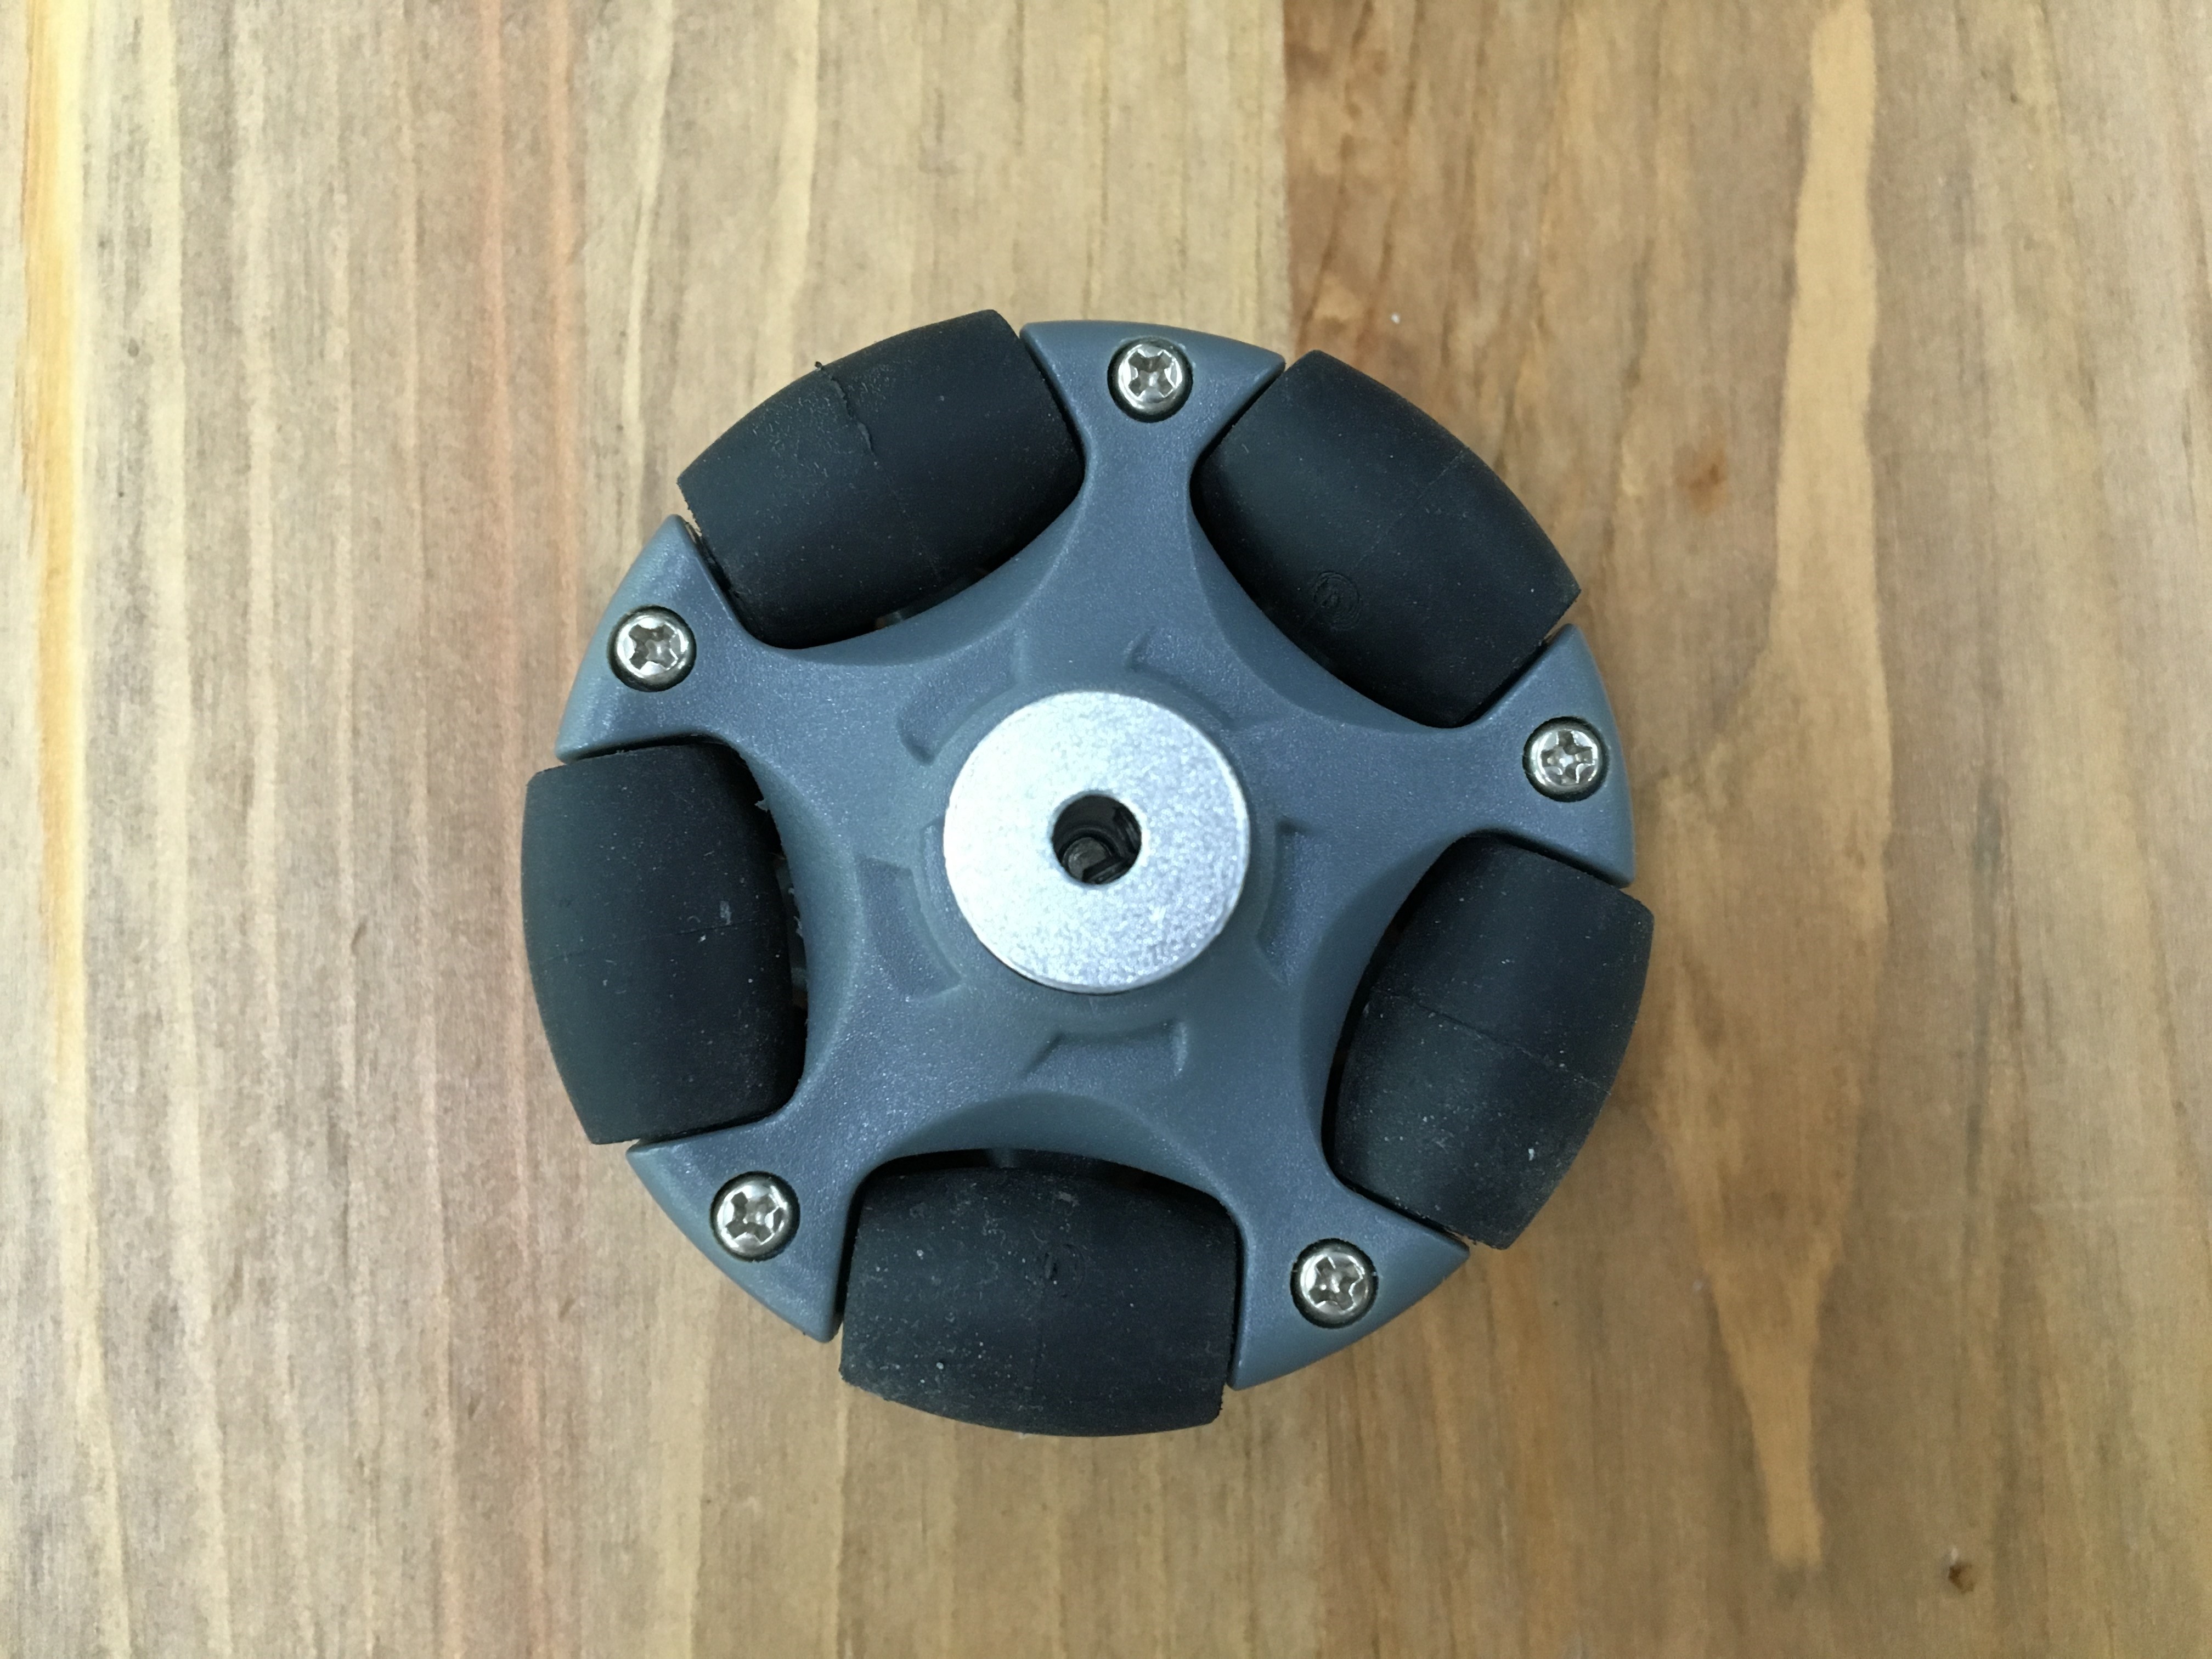
So what’s an omni wheel?
Omni wheels or poly wheels, similar to Mecanum wheels, are wheels with small discs around the circumference which are perpendicular to the turning direction. The effect is that the wheel can be driven with full force, but will also slide laterally with great ease. You can google it if you want to understand how it works and get the whole picture.
How did I build it?
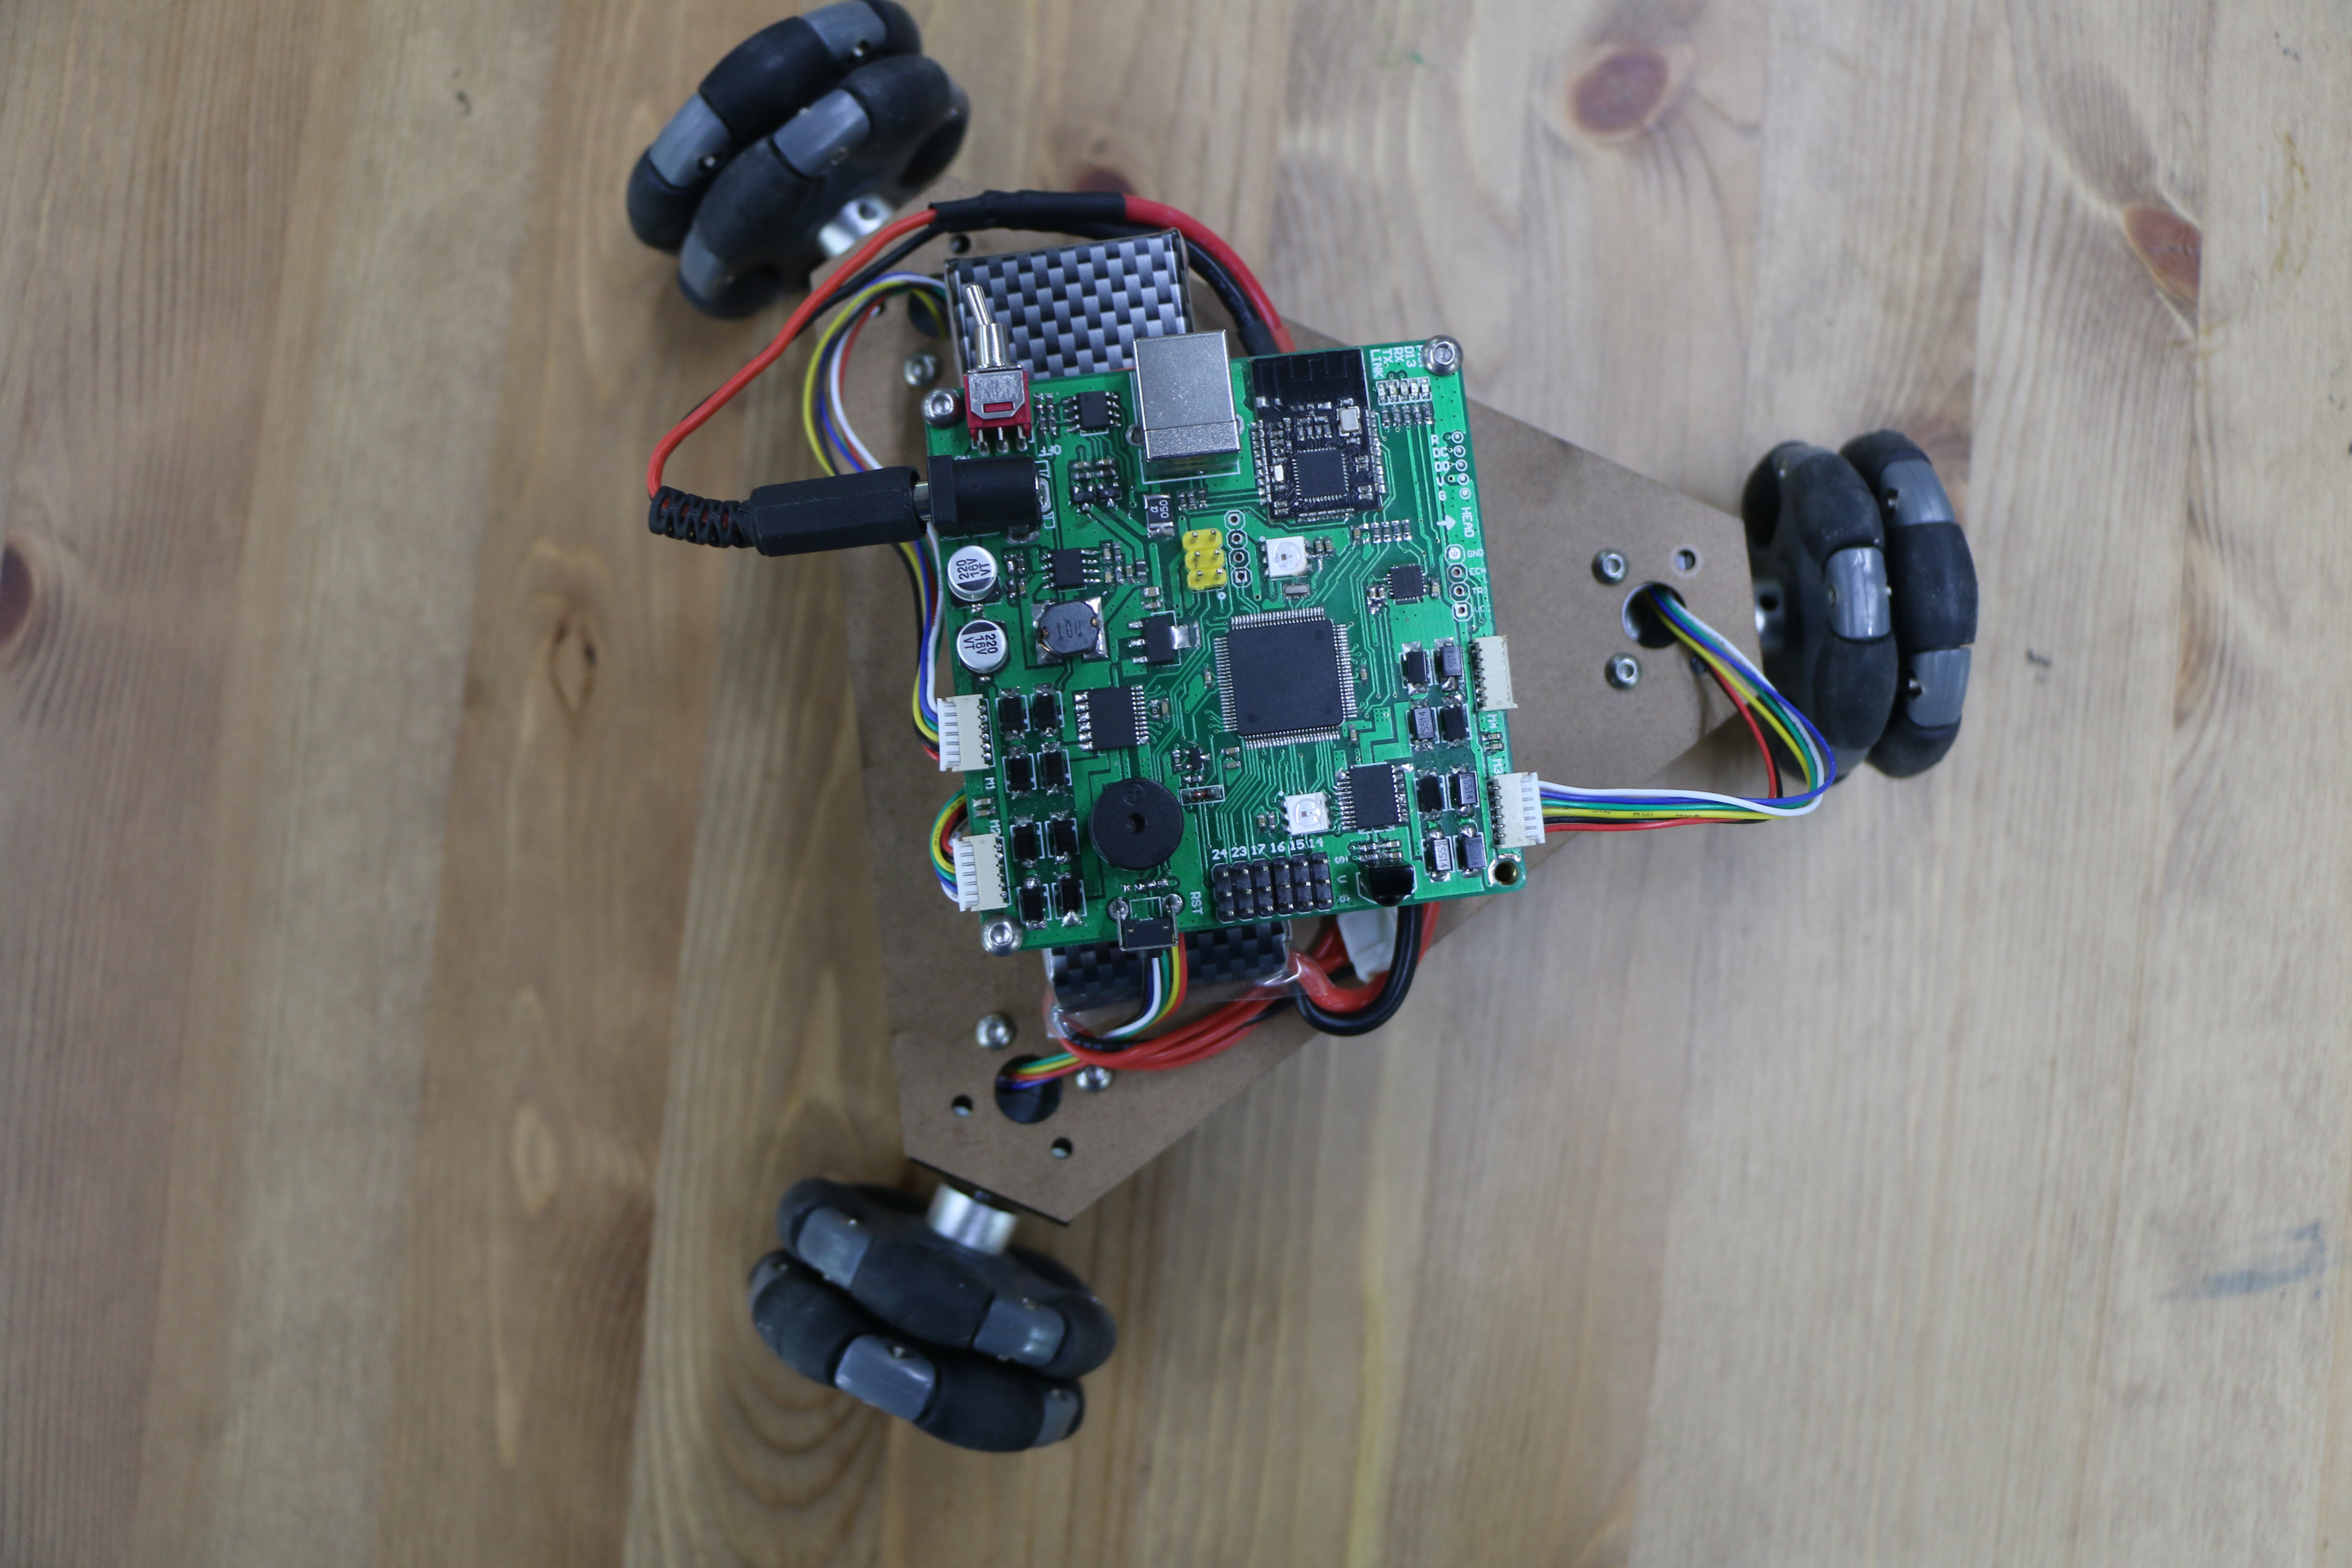
I used a FreaksBot control board to make the vehicle, because the control board was based on Arduino Mega2560 which was easy to drive encoder motors and to extend sensors including camera sensors, ultrasonic displacement sensors etc. You can also use the sensors to make a roving vehicle or automatic barrier vehicle, etc. But now I’ll only show you how to make a vehicle that can move automatically in any directions. Well, let’s begin!
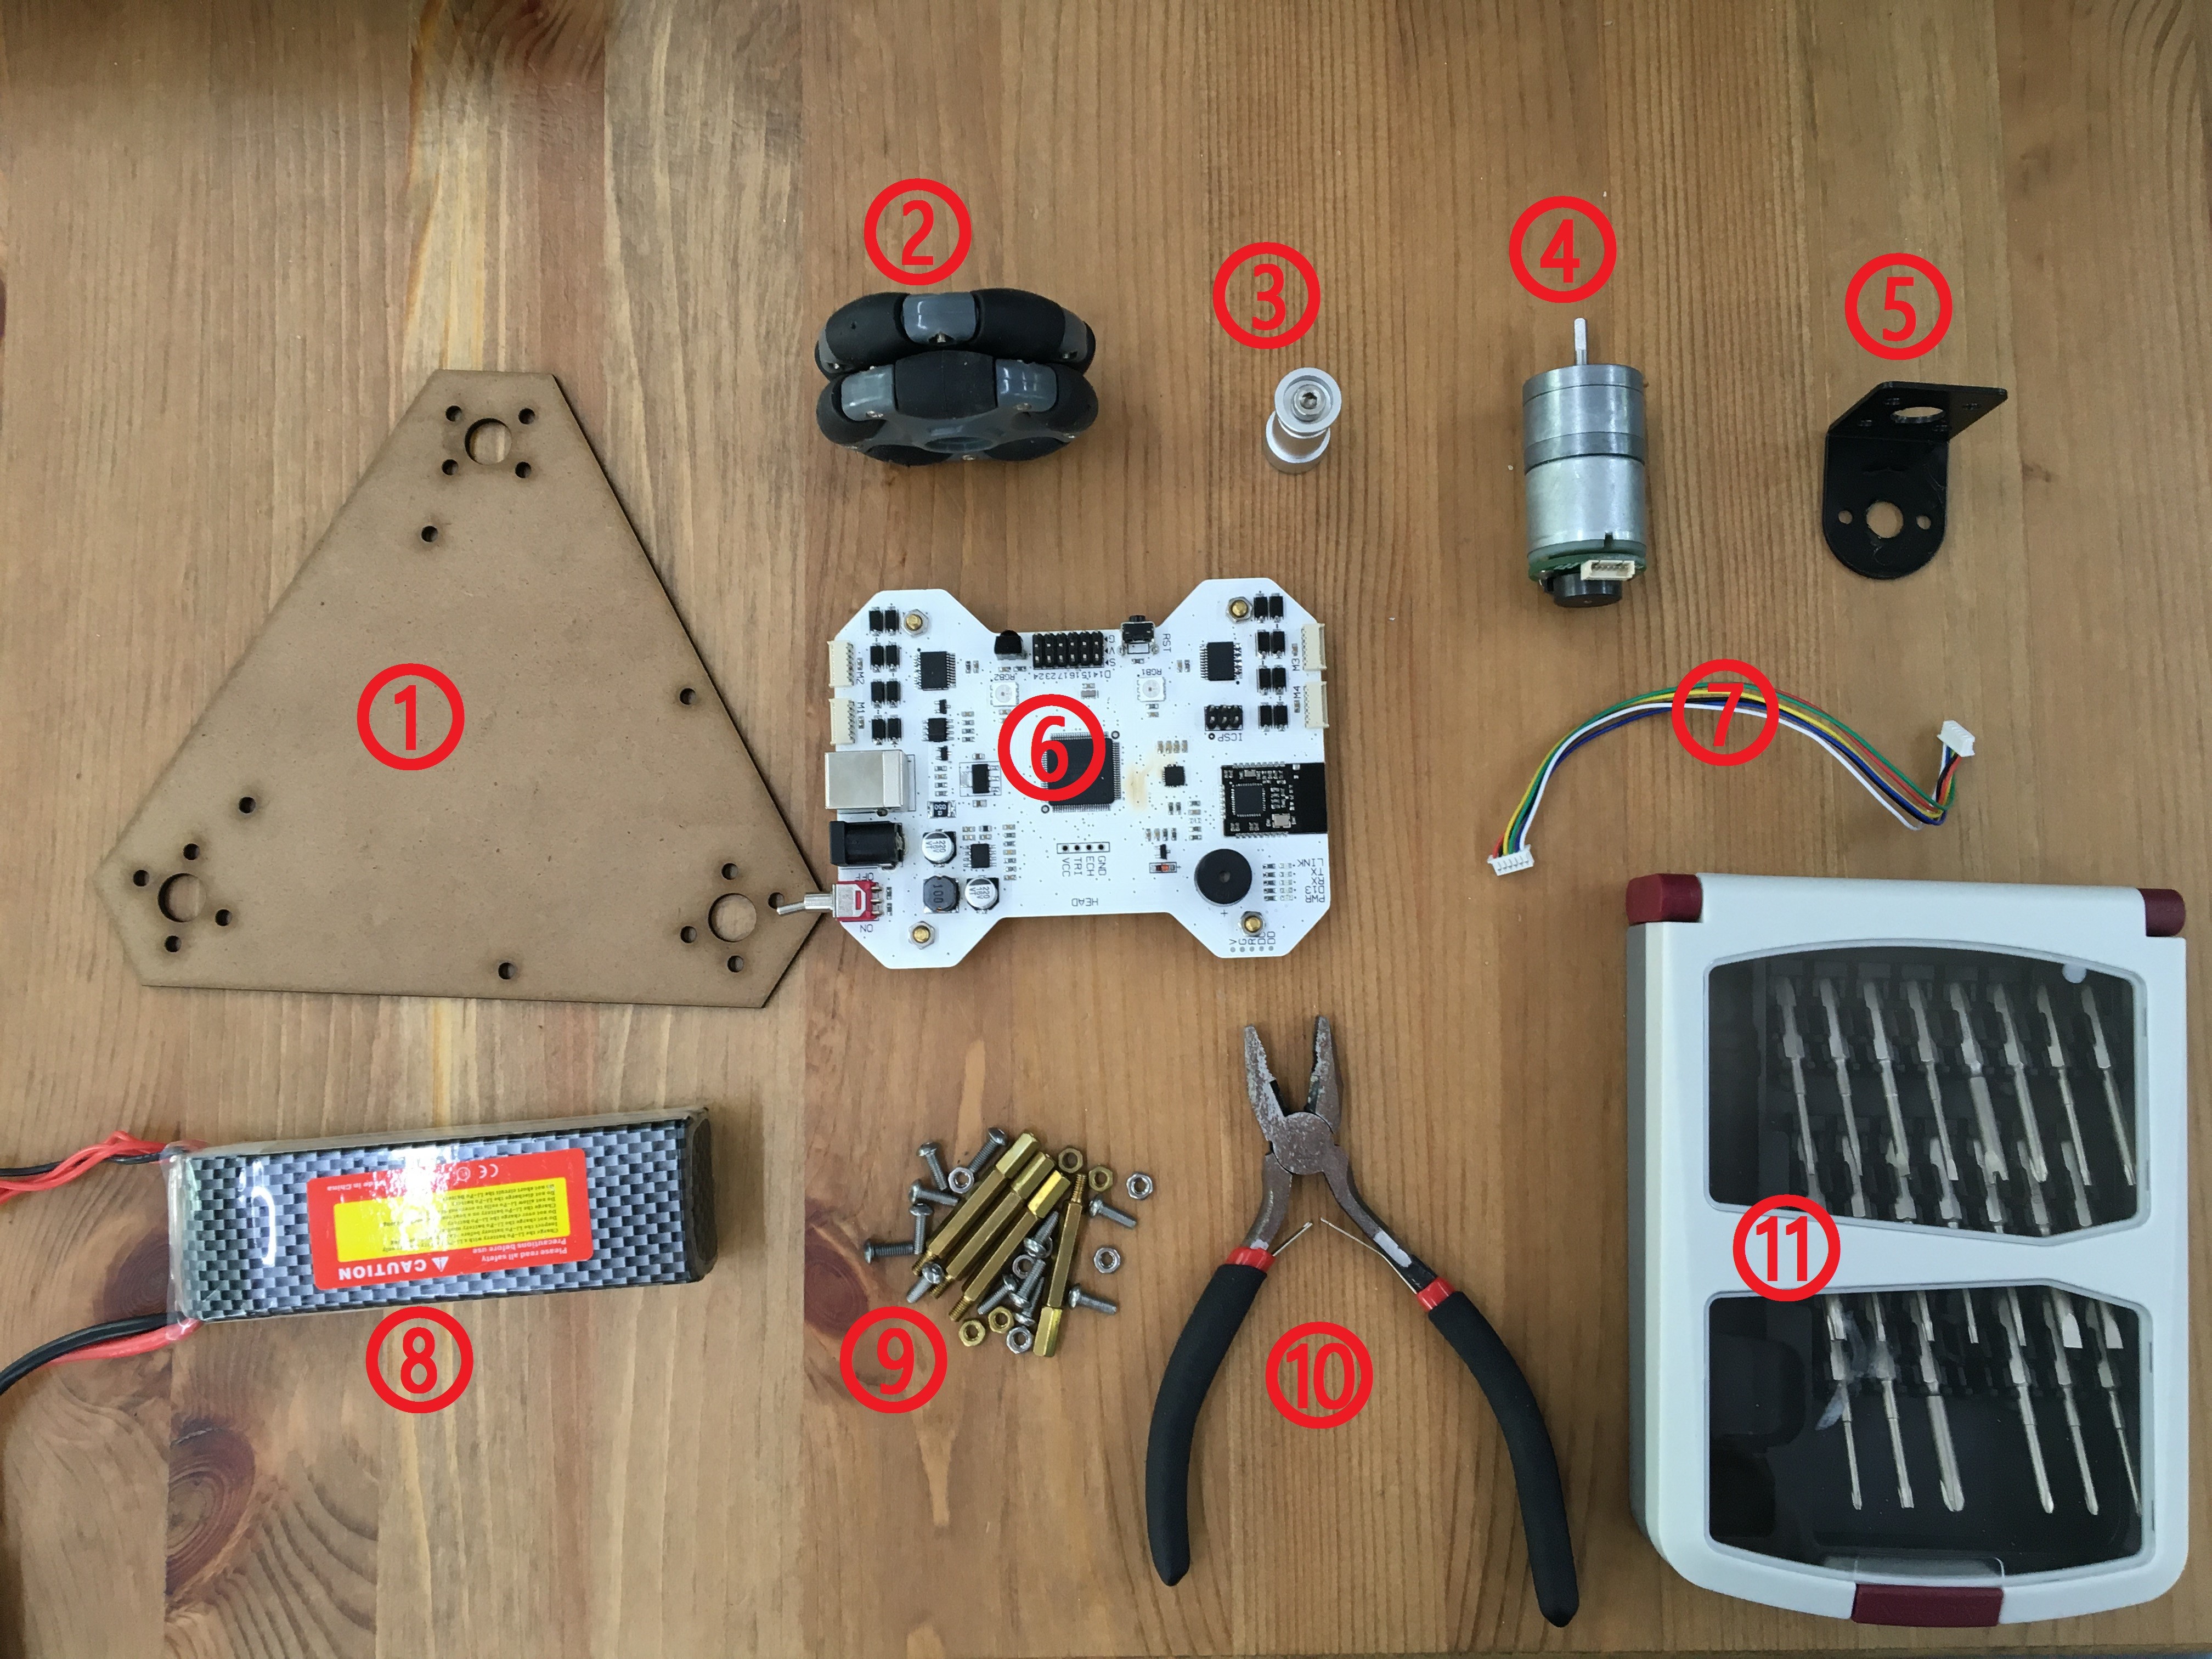
What to prepare?Parts needed in this project:
- Chassis made of wood board
- Omni wheel x3
- Shaft Connector x3
- Encoder motor x3
- motor supporter x3
- FreaksBot x1
- Encoder motor wire x 3
- RC battery x1
- Screw sets
- Pliers
- Screwdrivers
How to build one step by step?
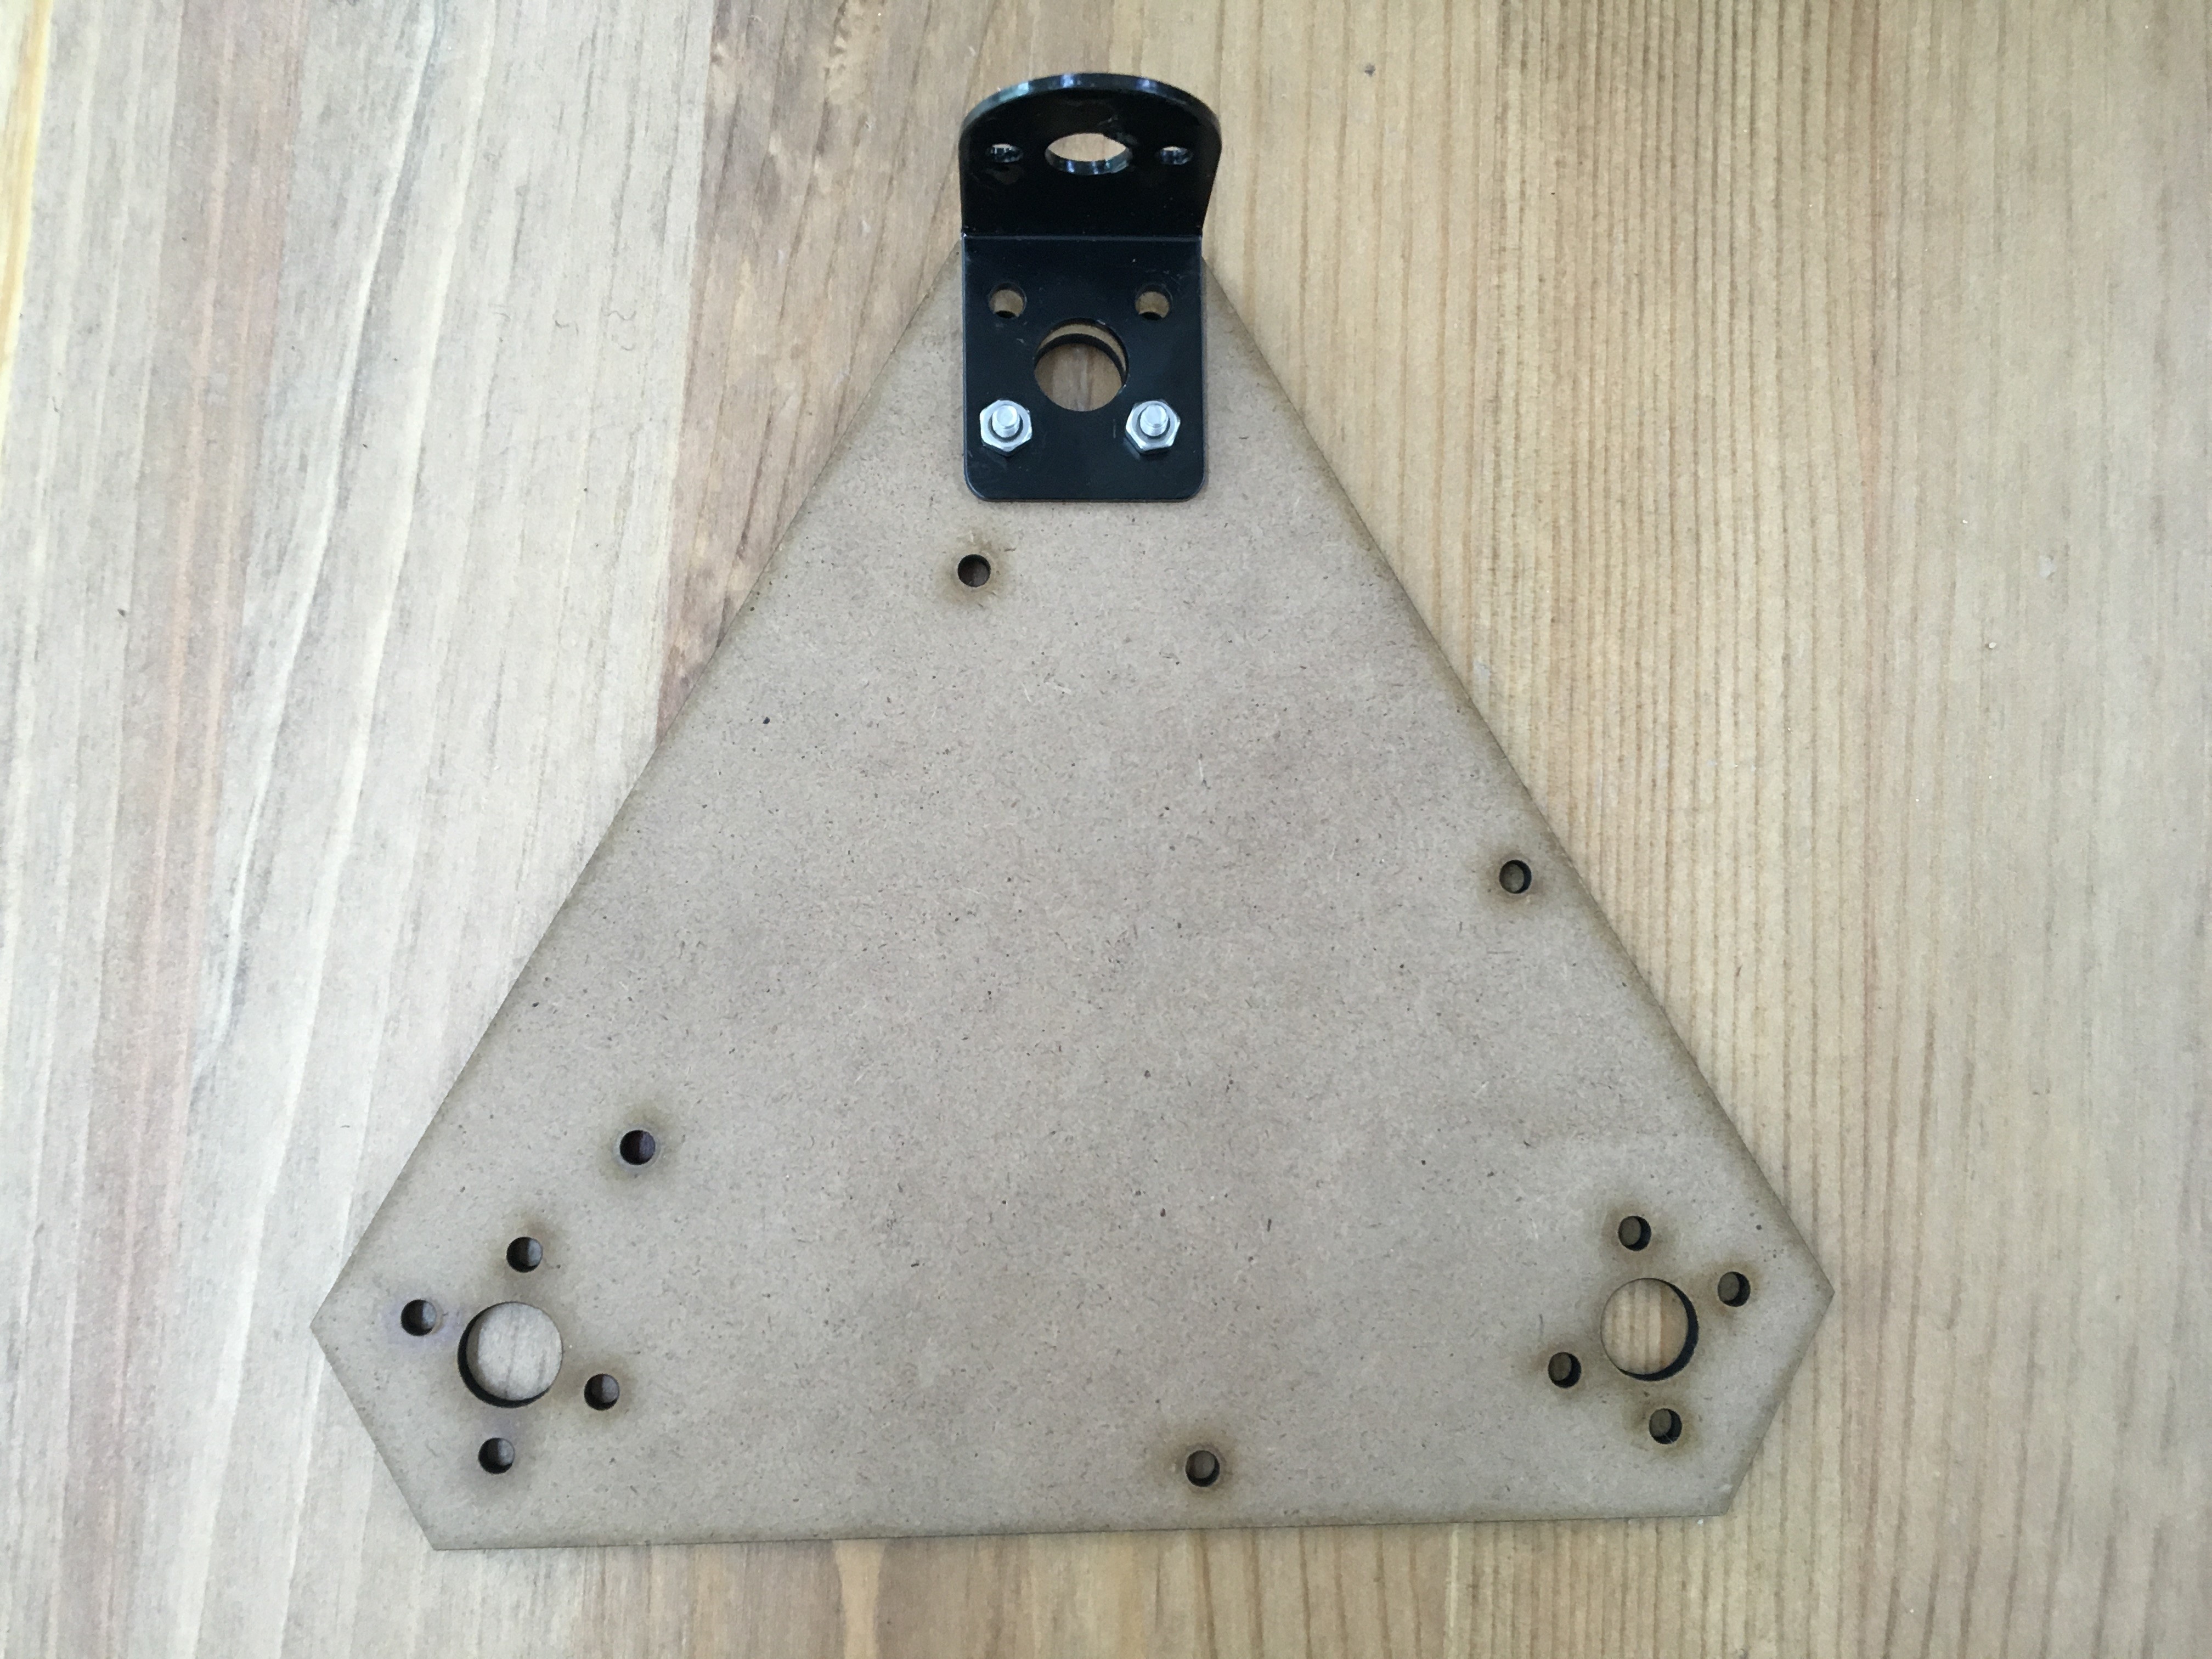
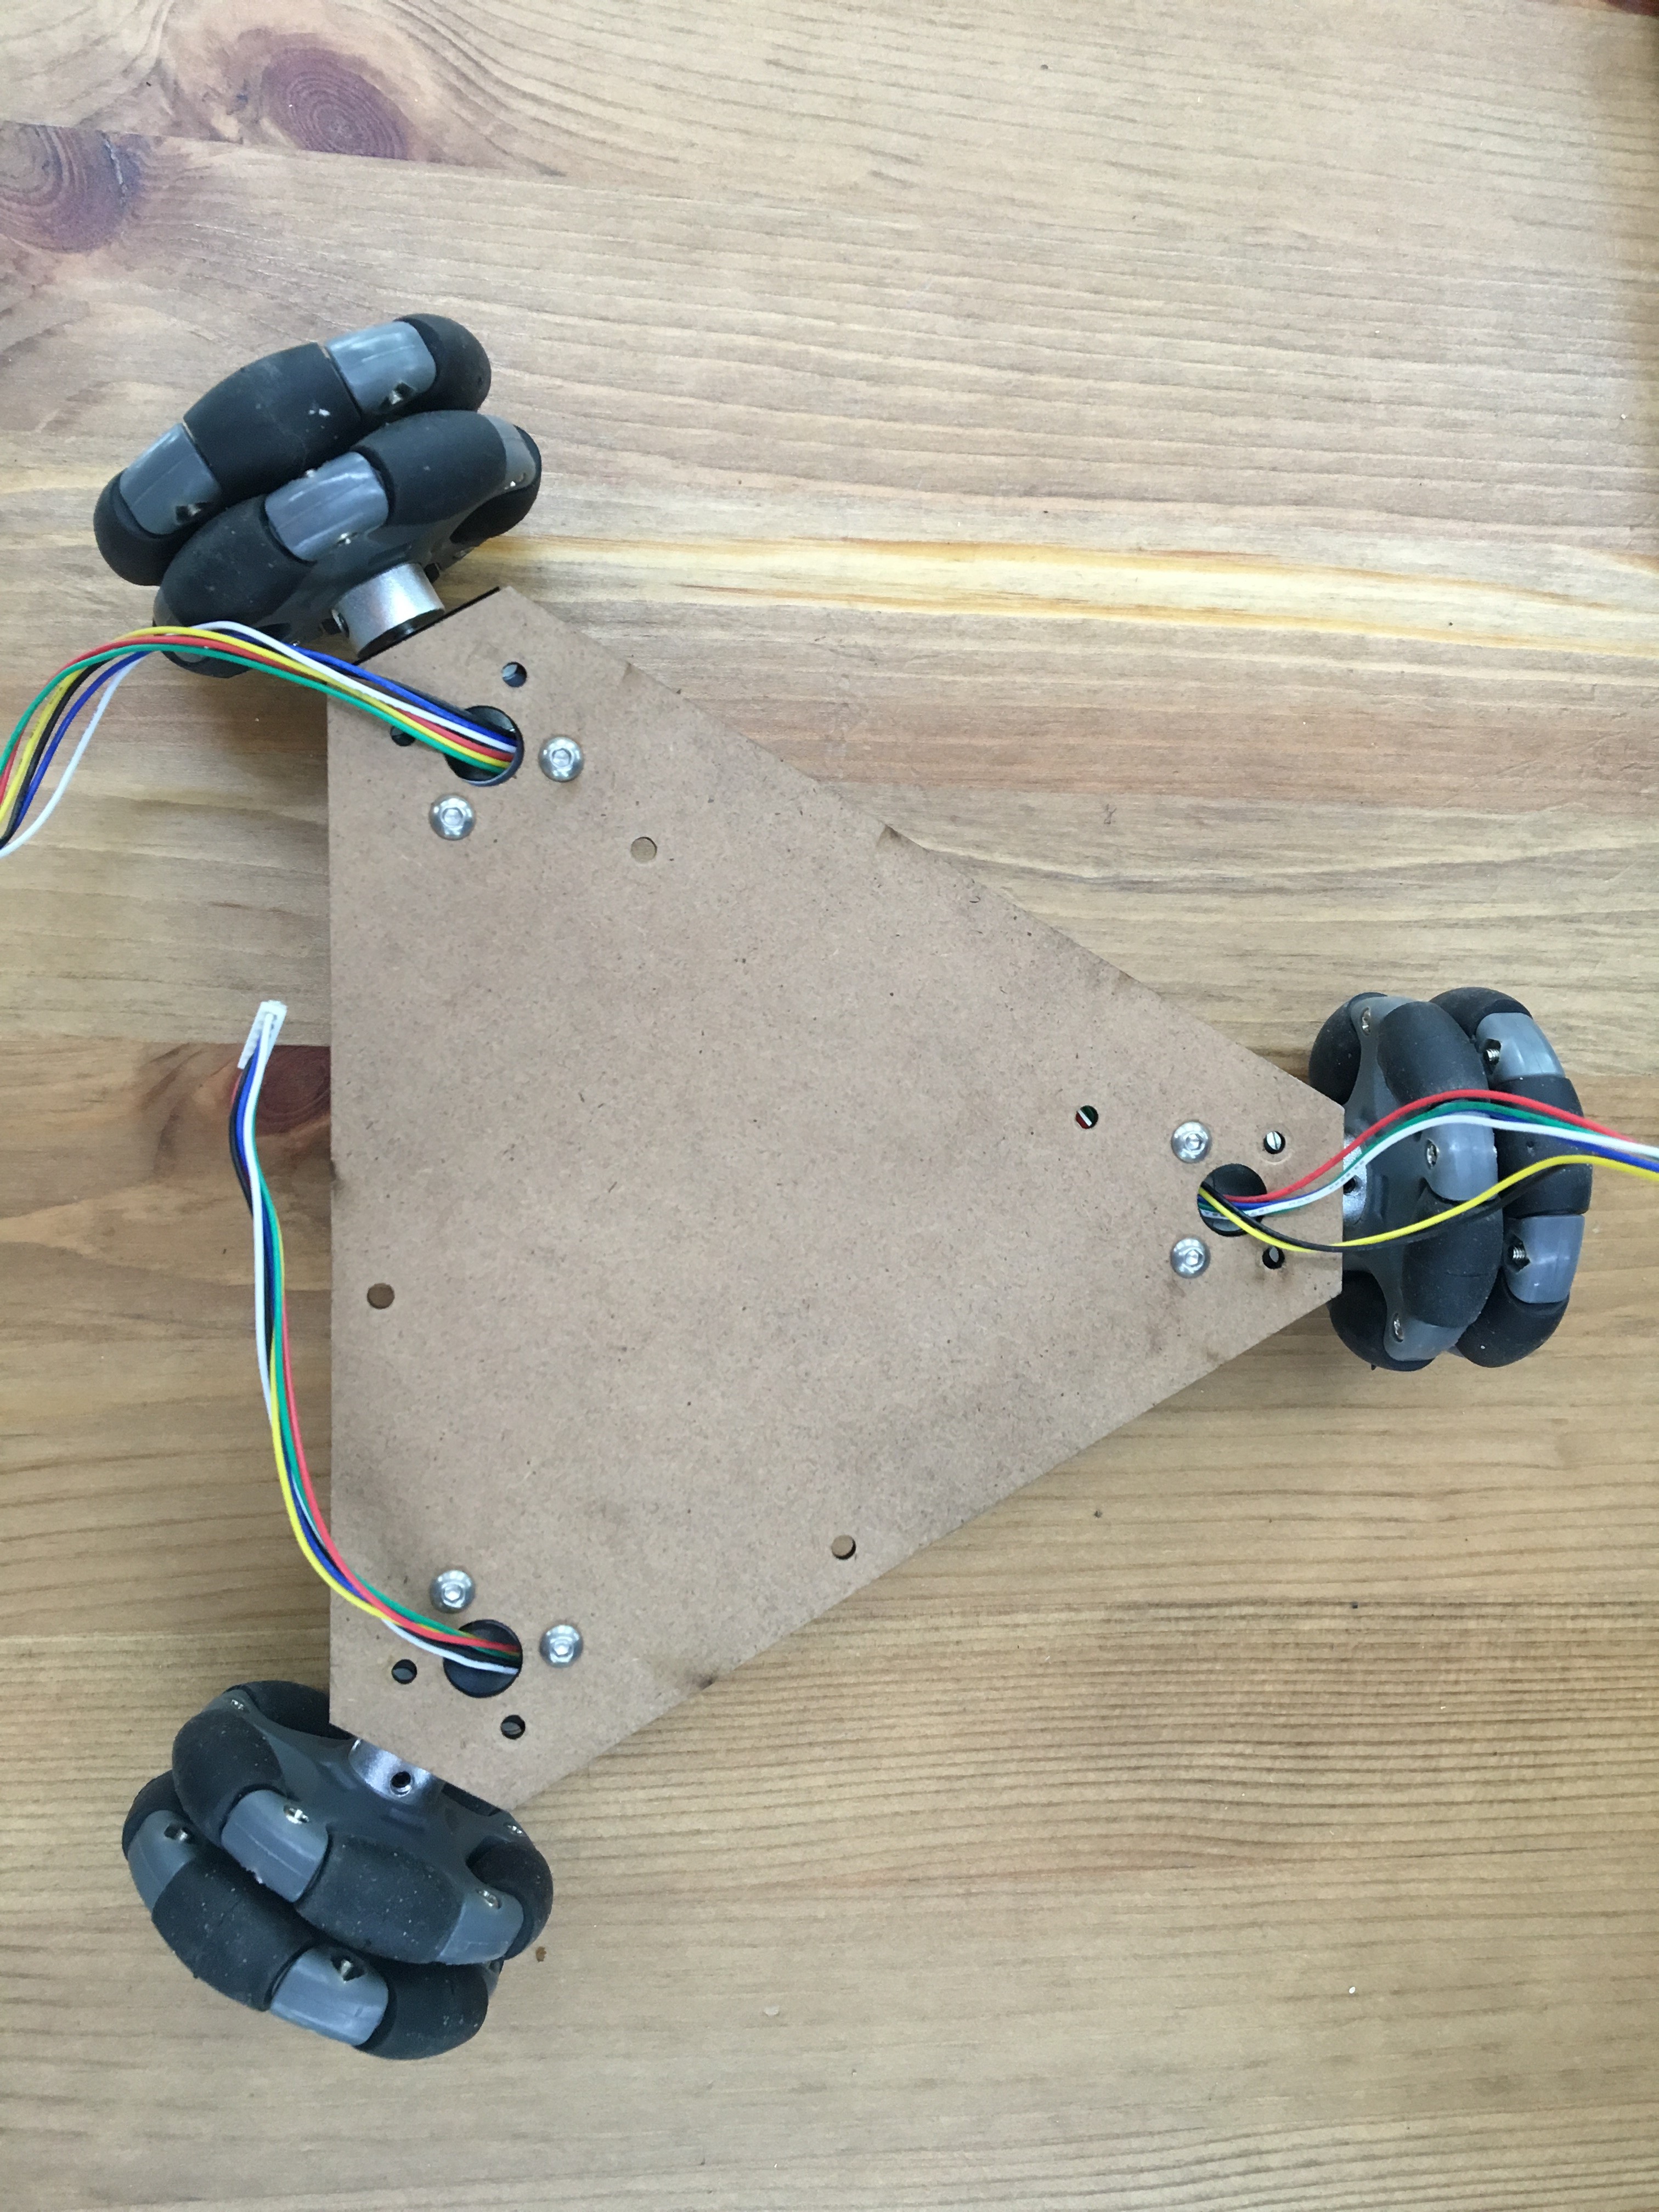
Step 1: Build chassis
The first thing to do is to cut a piece of wood board. We can use a laser cutter to do the job. Then we make holes on this board(You can download the CAD file on our website later on). Next we fix 3 motor supporters on the chassis. It’s no pickle for any of us.
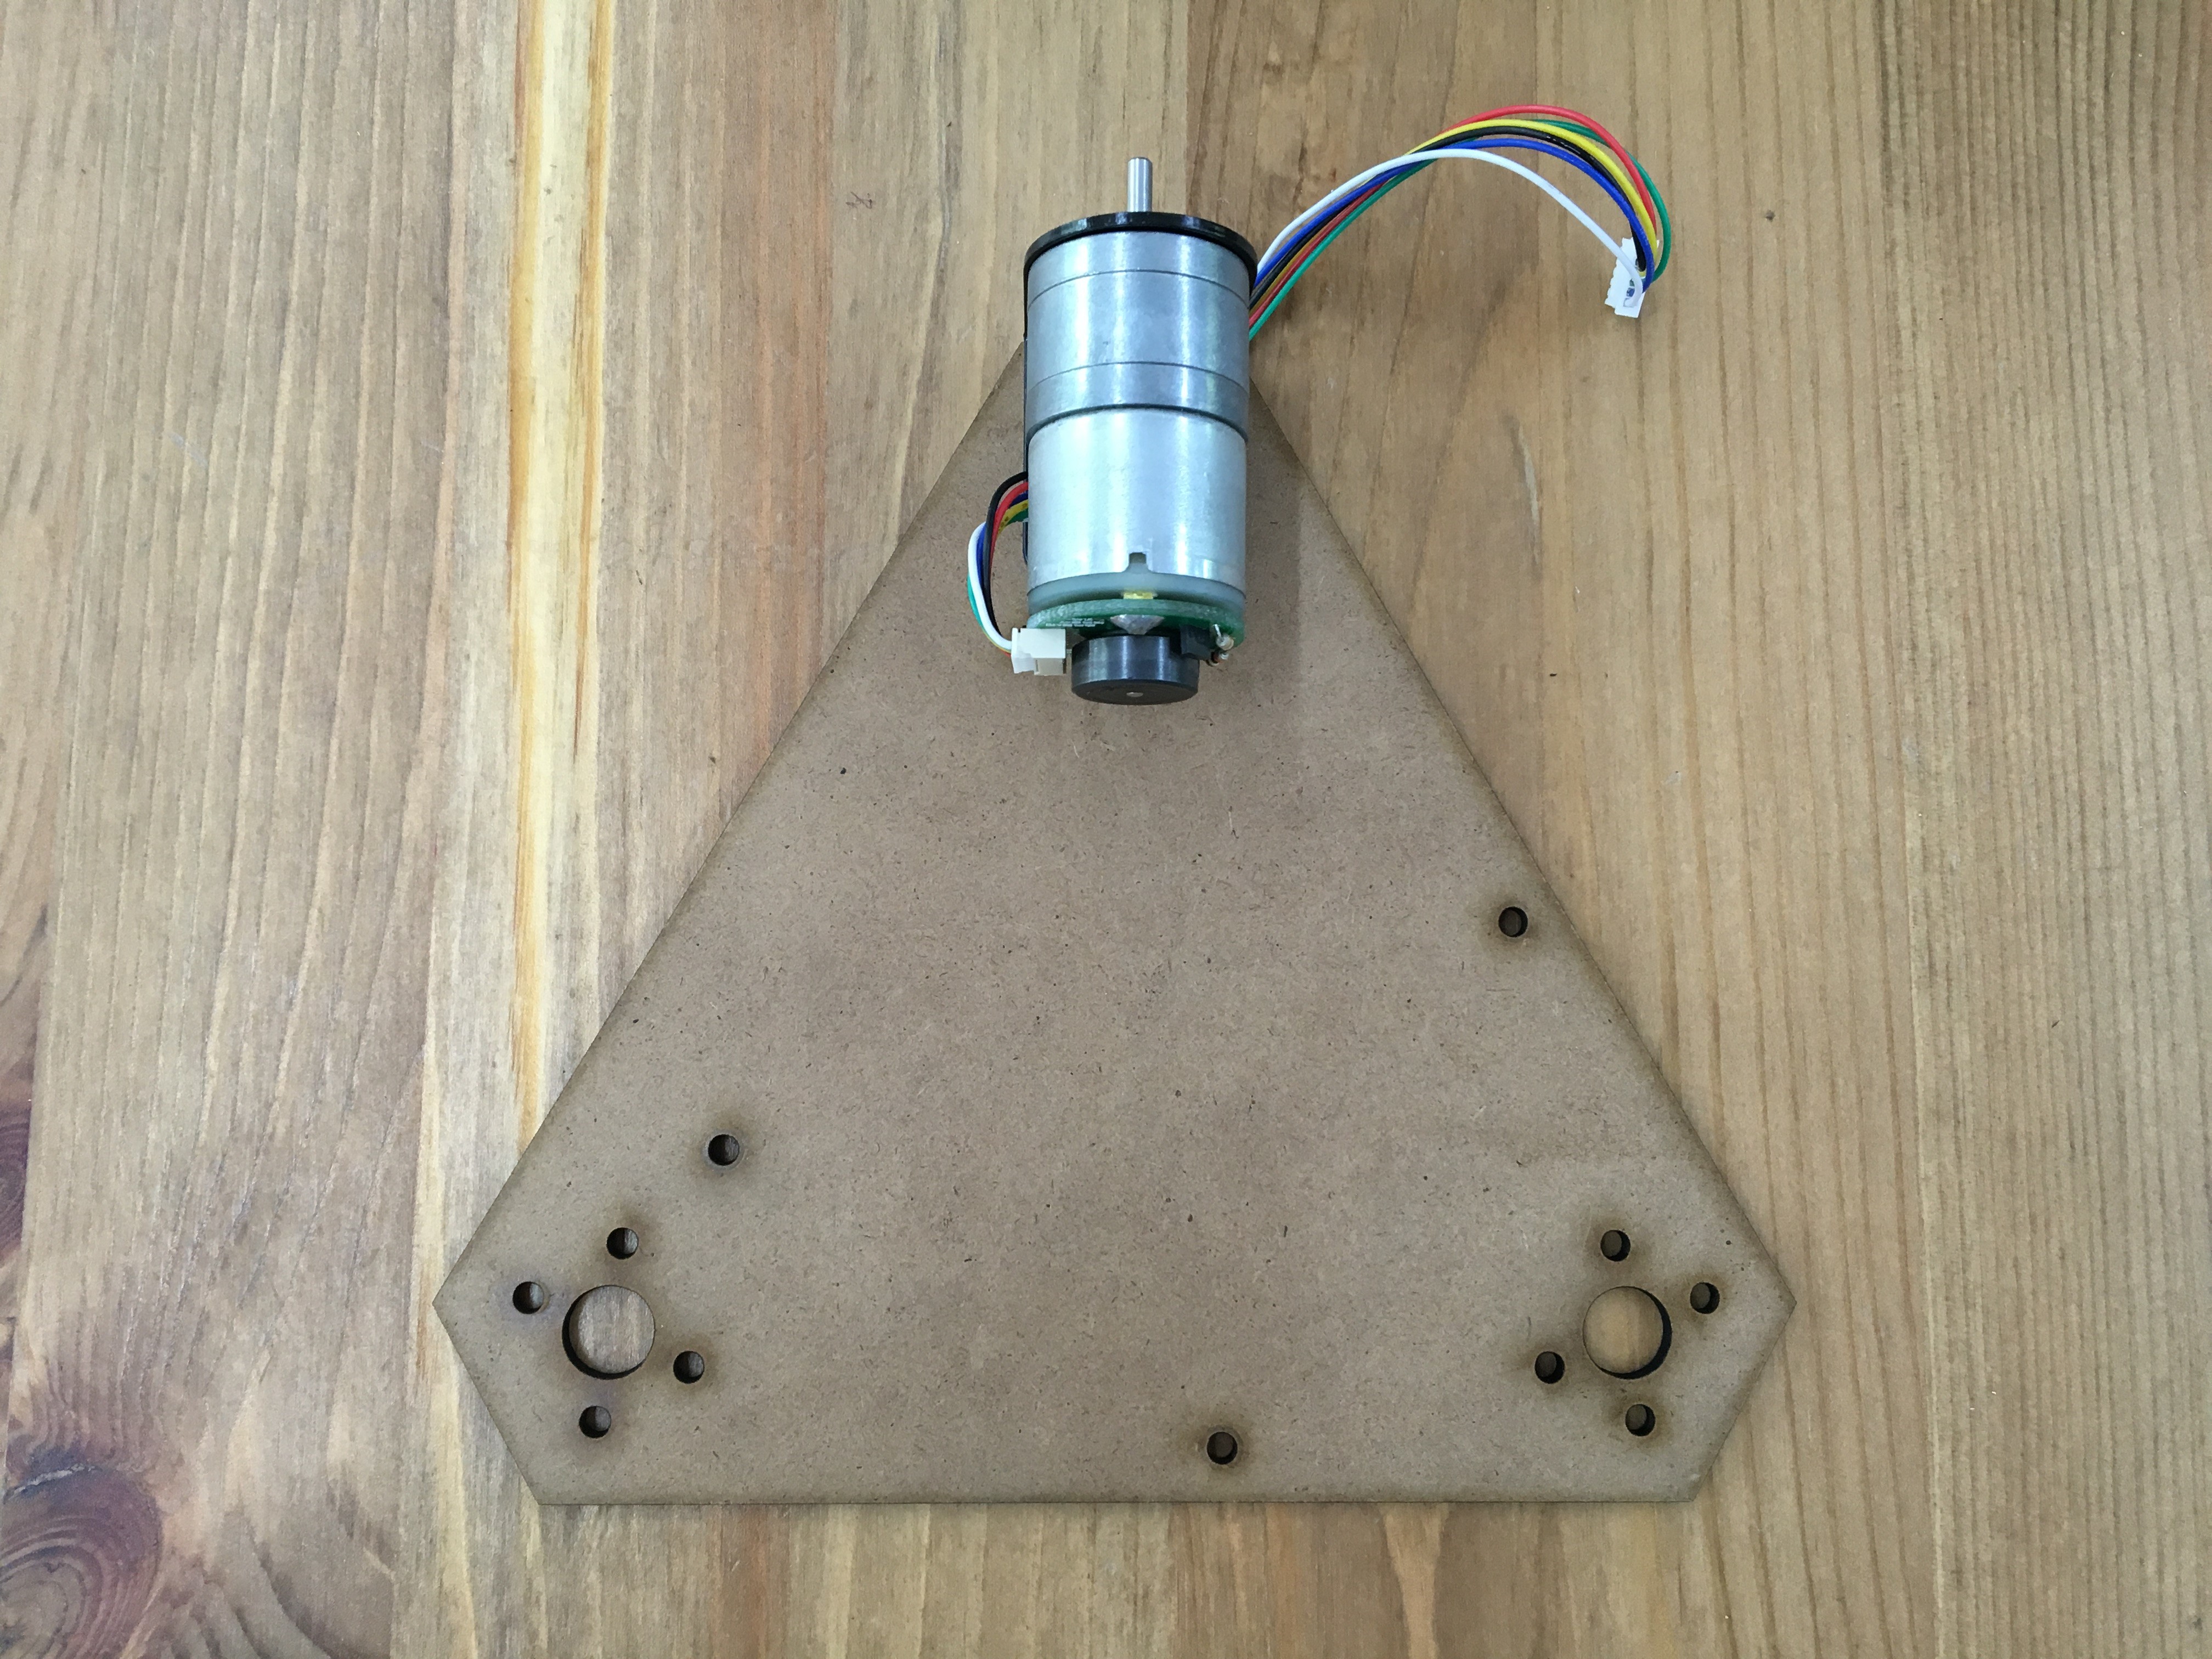
Step 2: Install encoder motors and wires
No need to explain this step. You just have to make sure they’re installed properly and firmly.
Step 3: Install Omni wheels and shaft connectors
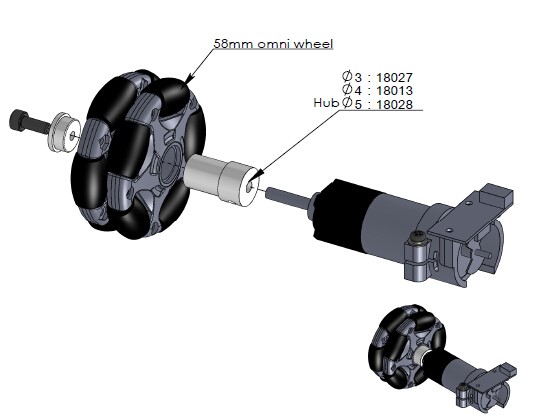
Step 4: Install Omni wheels on the motors
It’s coming along! Look! You don’t see triangular vehicle every day in your life, do you? It’s starting to look cool!
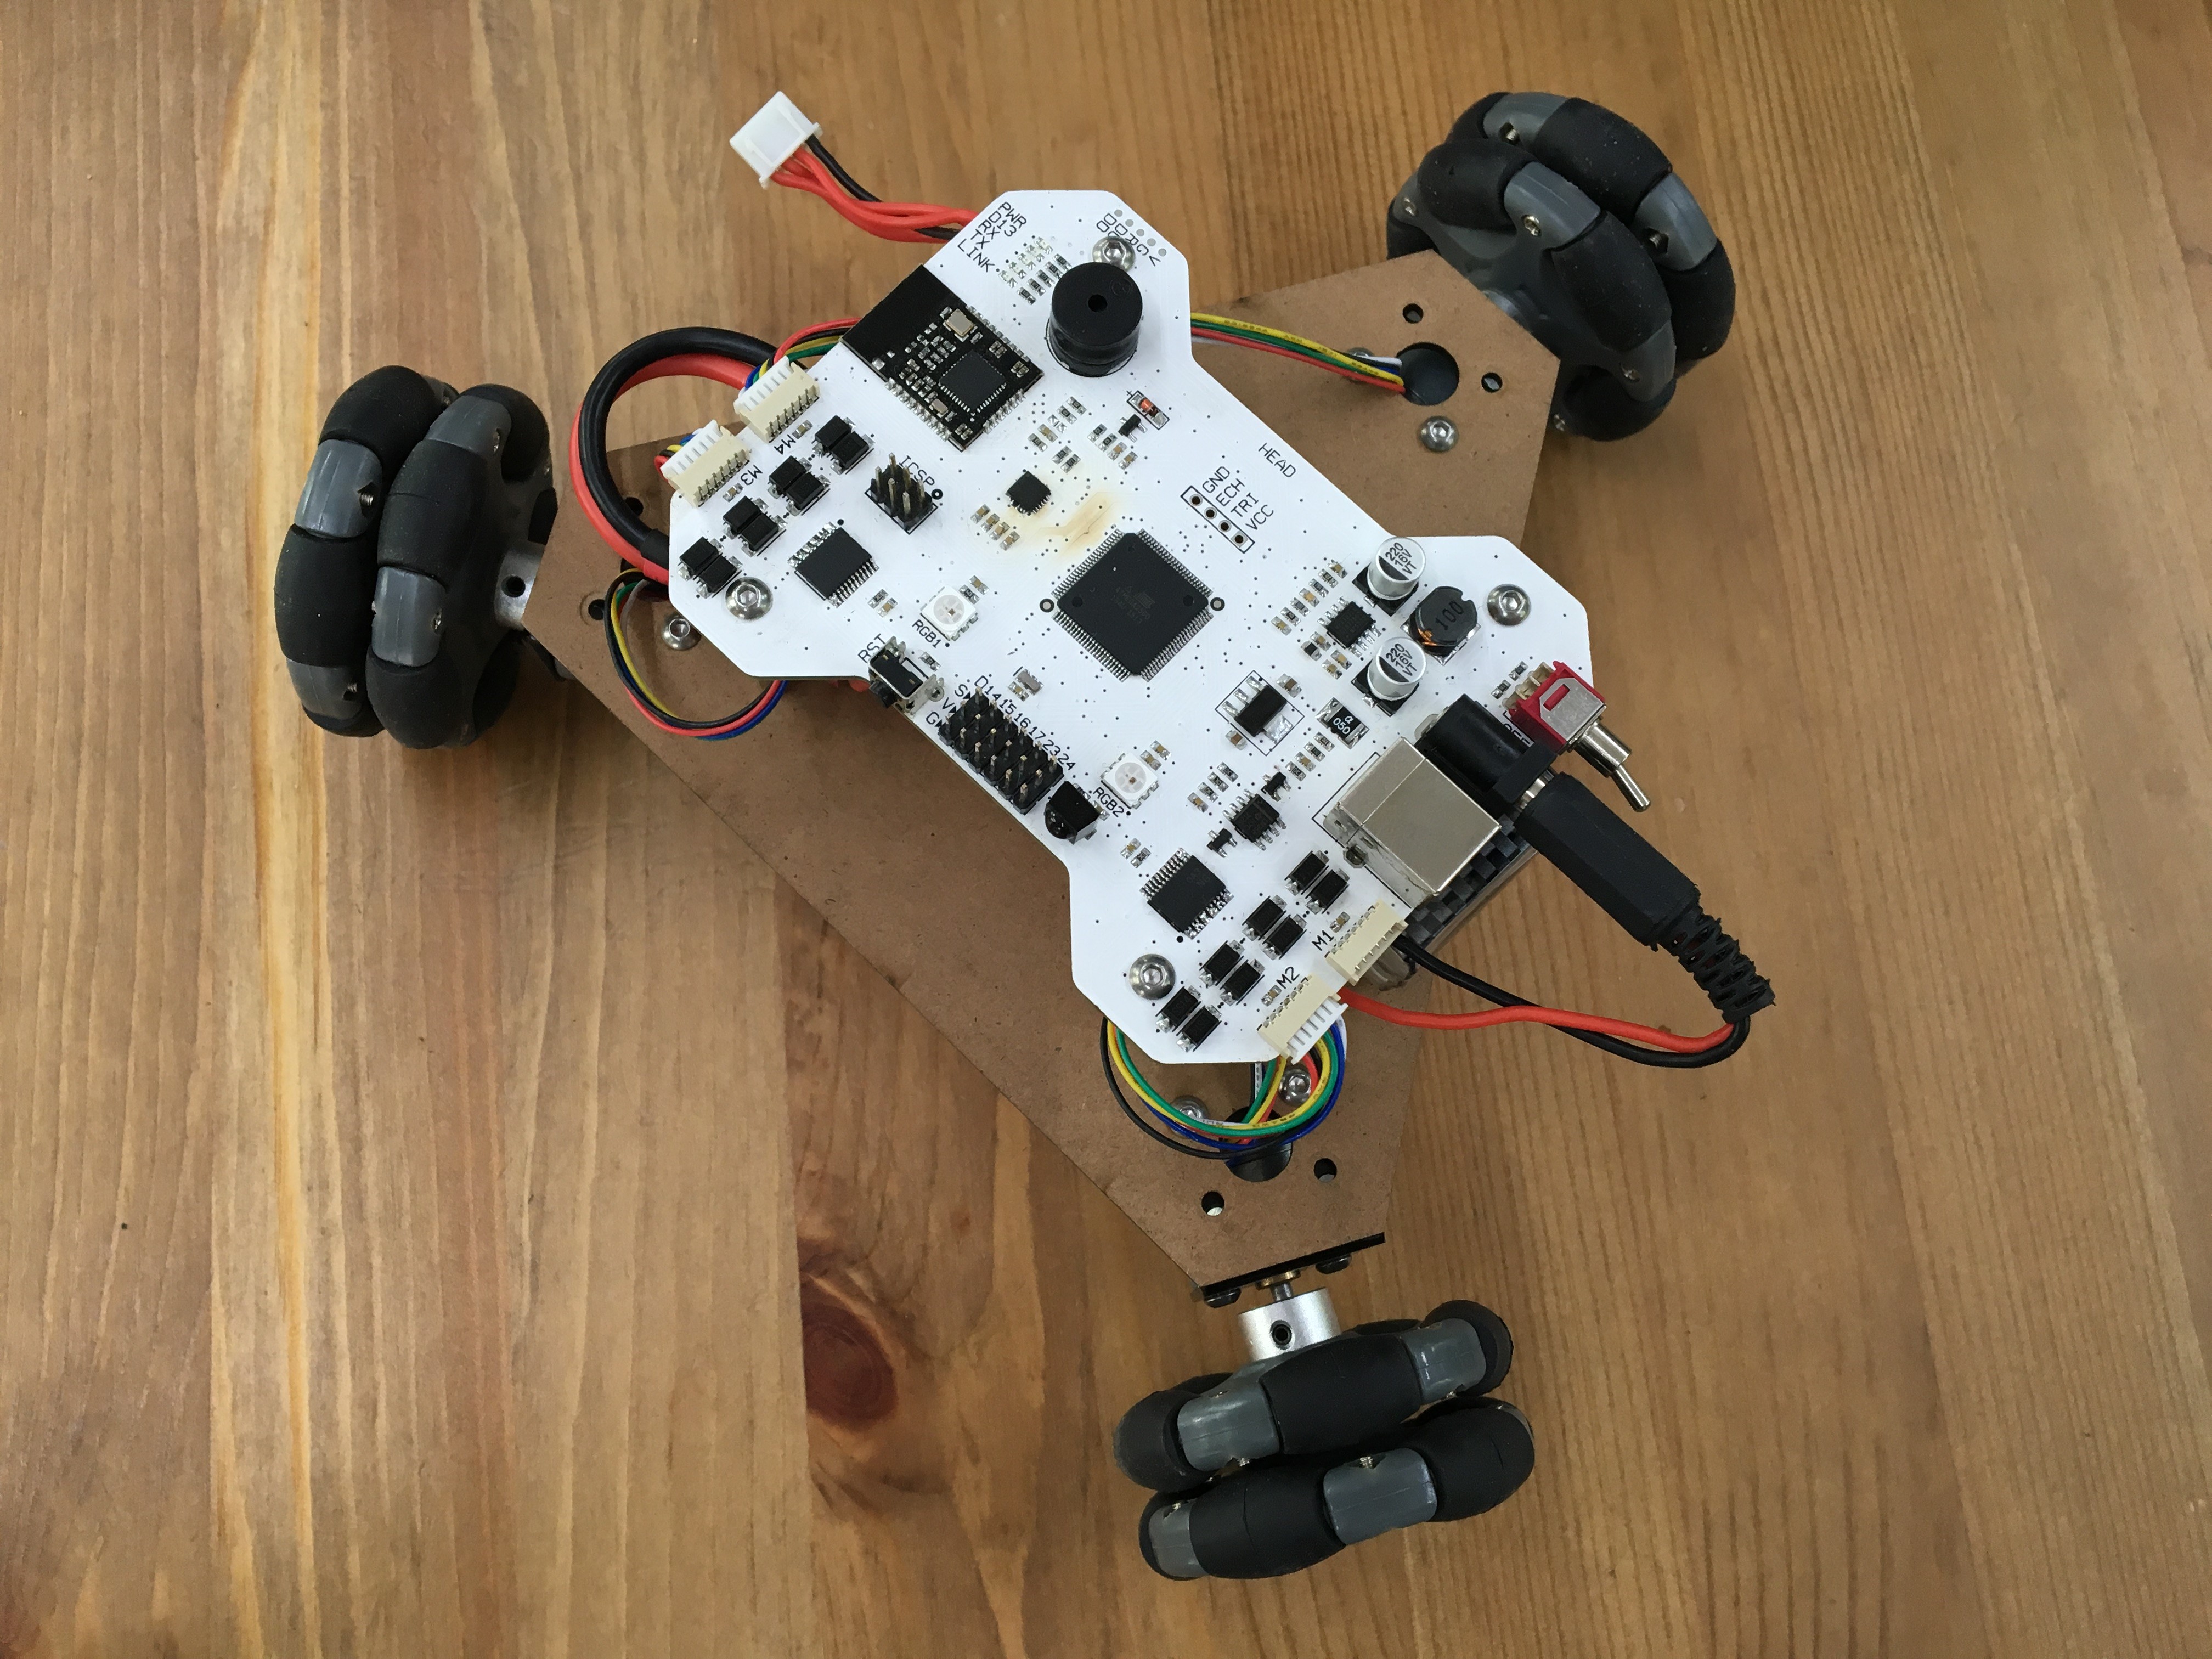
Step 5: Install FreaksBot and the battery
Connect all connectors and the vehicle is now completely installed. As the FreaksBot board integrates motor driver IC, we do not have to go through a complex wiring.
Step 6: Upload codes to FreaksBot
Assume that your computer has installed Arduino IDE. You can download the full code on our wiki, decompress and copy the codes to the libraries folder in the Arduino IDE installation directory. Now we’re all set. We just need to follow below steps to upload codes to FreaksBot.
#1 Connect FreaksBot to computer
#2 Open Arduino IDE
#3 Choose Examples file ‘EF_OmniCar’
#4 Set up board:”Arduino/Genuino Mega or Mega 2560”
#5 Set up Process:”Atmega2560 (Mega 2560)”
#6 Choose the right port
#7Click the upload button till the upload is completed.

At this point, the Auto-Omni vehicle is completed. Turn it on to feel the charm of your masterpiece! You can also use the App to control the Auto-Omni vehicle.