

EFCom/GPRS Shield Tutorials
January 11, 2019
AT Command Tester
January 11, 2019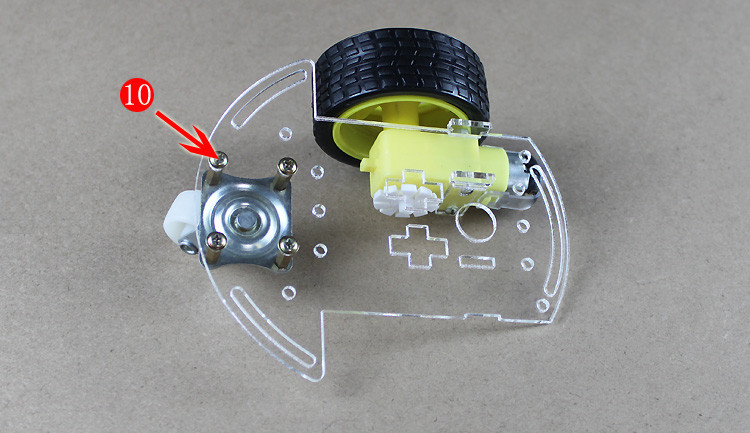
Hi, dear friends, from the date of establishment, ElecFreaks has released a wide range of products, and fortunately attained substantial attention and support , meanwhile, we also received lots of emails seeking for technical support from hobbyists all over the world. So we undertake to enrich our tutorials in diversified form, including text, picture, video, and so on. Following the launch of installation guide for 2WD and 4WD, currently we updated the guide for TINY. Although it is the same as the previous ones to a certain degree, we are available to consider it as a complementary way to consolidate the series guide.
Part Introduction

Part 1: Smart car floor x 1.
Part 2 : Smart car wheel x 2
part 3 :Caster x1
part 4 :Encoder disk x 2
part 5: Acrylic fastener x 4
Part 6 : Geared Motor x 2.
part 7 :M3 * 28 Screw x 2
part 8 :M3 Screw nut x 15
part 9 :M3 * 13MM + 6 Copper cylinderx 4
part 10 :M3 * 7.5 Cap screw x 10
Step 1

Firstly assemble the encoder disk with the geared motor as illustrated above. Drop some glue if necessary (not too much because the motor can’t work if it is too sticky—–pay special attention )
Step 2

Place the acrylic fastener in the position as demonstrated above and put the well-prepared motor installed just now into the corresponding position.
Step 3

Let the M3*28 screws go through the motor and the acrylic fastener, normally from outside to inside , and from upside to downside, but if you get the M3*30 screws, try to operate them from the other direction.
Step 4

Fix the motor in the other end with another fastener and two screw nuts .