

Materials
micro:bit x 1
Motor x 1
Bricks x N
Hardware Connections
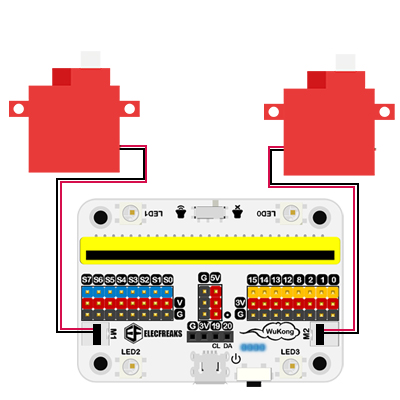
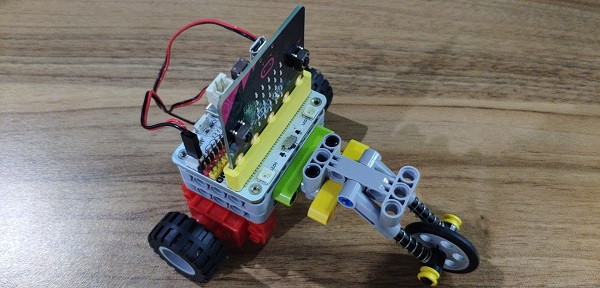
Insert the micro:bit to Wukong expansion and connect the motors to M1 and M2 ports accordingly.
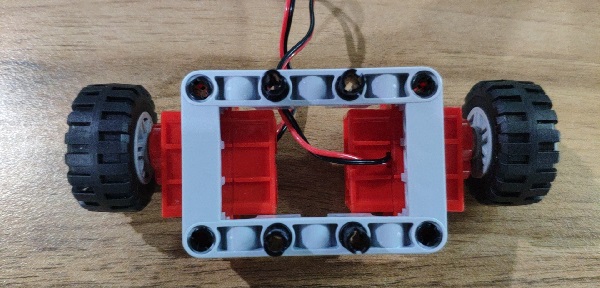
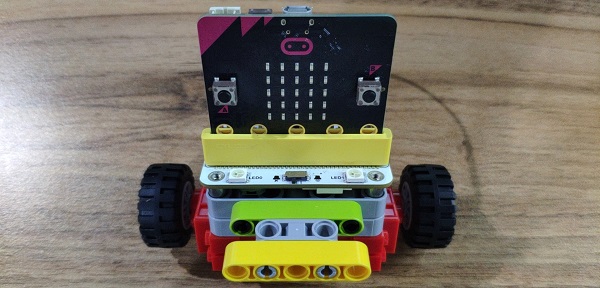
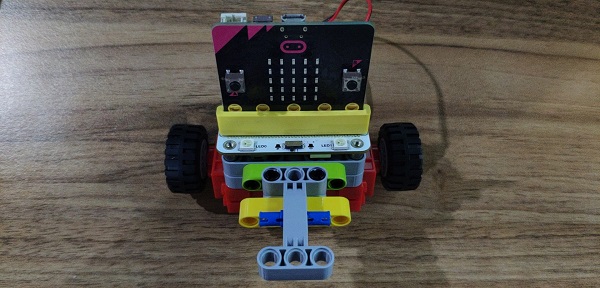
Bricks Build-up
Build the bricks as the picture shows:

Software programming
Go to the MakeCode coding page:(https://makecode.microbit.org/#editor) Add wukong extension package, and click extension in the menu of settings on the right upper side.
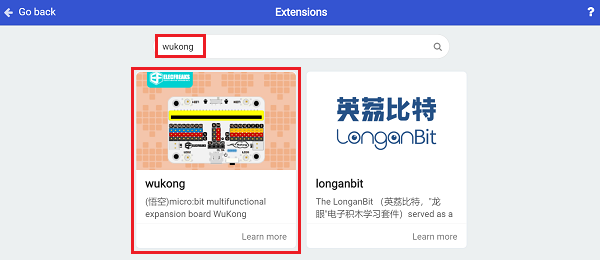
Search with“wukong” to download it.
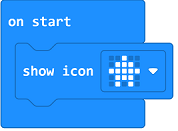
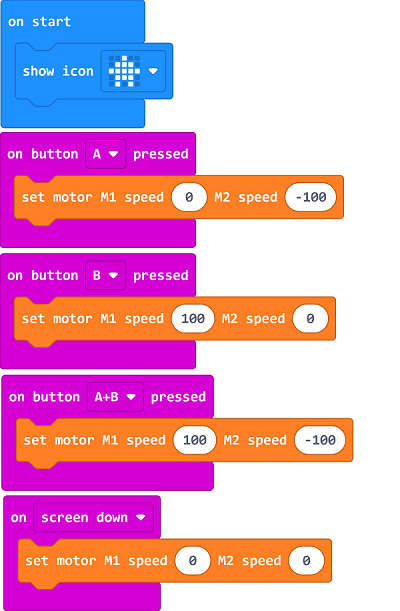
Now let us go to the coding page: Drag shows icon brick into on start.
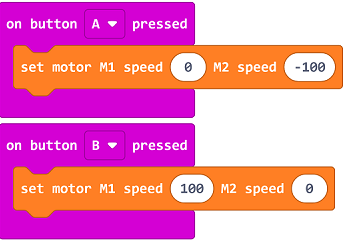
Controlling the turning direction through buttons A and B. While button A is pressed, set the speed of M1 at 0, and M2 at -100, thus making the car turn right; Then use the same way to code the car to turn left.
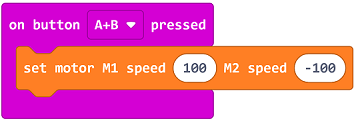
While button A&B is being pressed, set the speed of M1 at 100 and M2 at -100.
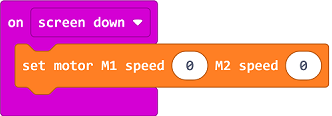
While the screen facing to the ground, set the speed of M1&M2 at 0.
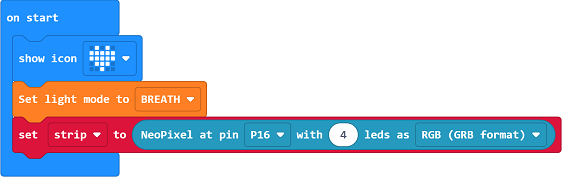
Complete program:
Link:https://makecode.microbit.org/_f2pbixKaTW6g
Result
Press button A to turn the car left and button B to turn the car right; press both A&B to drive the car forward; While the screen faces the ground, the car stops moving.


