😊New Customer Discounts😊All Order Get 5% Off.
Menu


Purpose
Use the Cutebot and the AI lens to achieve the line tracking function.
Materials required
Cutebot car x 1
Cutebot lithium battery pack x 1
AI Lens x 1
Connections:
Steps to install the lithium battery pack:
Assembly steps for bricks:
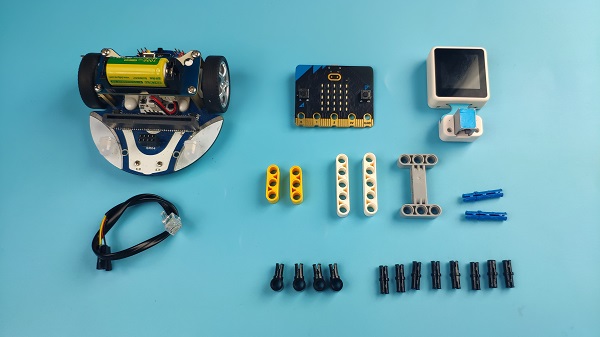
Parts list:
Steps of build-up:
Now we have finished the bricks build-up and next let’s connect the AI lens frames with the lithium battery boards.
Connections of the AI Lens:
Connect the RJ11 cable with the AI Lens and the other end in Dupont connection to the circled place in the below picture (make sure you connect to the right connections).
Tips: the bricks holder here is flexible to be adjusted, we may manually adjust the angles of the AI lens to meet the requirements of the functions that you want to achieve.
The finished project:
Software Platform
MicroSoft MakeCode(https://makecode.microbit.org/#)
Programming
Step 1
Click “Advanced” in the drawer to see more choices.
We need to add a package for programming. Click “Extensions” in the bottom of the drawer and search with “cutebot” in the dialogue box to download it.
WWe need to add a package for programming the AI lens kit. Click “Extensions” in the bottom of the drawer and search with “https://github.com/elecfreaks/pxt-PlanetX-AI” in the dialogue box to download it.
Note: If you met a tip indicating that the codebase will be deleted due to incompatibility, you may continue as the tips say or build a new project in the menu.
Step 2
In the “on start” brick, initialize the AI lens and switch the function to the line tracking mode, set the micro:bit to display the appointed icon.
In the “forever” brick, set to get one image form the AI lens and judge the deviation direction of the line on the image. If it deviates to the left side, it means the car deviates to the right, we should set the speed of the left wheel at the speed of 10% and the right at 40% to make the car turn left and go to the right way; if the line deviates to the right side, it means the car deviates to the left side, now we should set the speed of the right wheel at the speed of 10% and the left at 40% to make the car turn right and go to the right way; or we may set the speed of both wheels at 20% and the car moves forward with the line.
Code
Link: https://makecode.microbit.org/_L9vFzqgseV1h( https://makecode.microbit.org/_L9vFzqgseV1h)
Result
The cutebot car moves along with the black line.
Stay up-to-date with our latest promotions,discounts,sales,and special offers.