


Micro:bit Experiment 11: Rainbow LED Ring —???Elecfreaks Mirco: bit Starter Kit Course

Introduction
8 RGB Rainbow LED Ring is based on ws2812b bead. Its biggest characteristic is single IO control and infinite cascade connection. In this experiment, we are going to use micro:bit to drive 8 RGB Rainbow LED Ring and realize rainbow color gradual change.
Component List
Hardware:
1 x Micro:bit Board
1 x Micro-B USB Cable
1 x Microbit Breadboard Adapter
1 x Transparent Breadboard - 83 * 55 mm
1 x 8 RGB Rainbow LED Ring
1 x Breadborad jumper wire 65pcs pack
2 x Alligator Clip Wires
Tips: If you want all components above, you may need Elecfreaks Micro:bit Starter Kit. Software: Microsoft Makecode Online Editor
Major Component Introduction 8 RGB Rainbow LED Ring  8 RGB Rainbow LED Ring is an LED ring made of 8 ws2812b beads in cascade connection. Ws2812b is an intelligent outer control LED source, which has integrated control circuit and light emitting circuit. It has same appearance with 5050LED bead. The digital protocol adopts communication method of single line goes to zero. After pixel point restoration, DIN will receive the data sent from the controller. Once the first 24-bit data received was extracted by the first pixel point, it will be sent to the internal digital lock storage device of pixel point and the rest data amplified through the inner transformation processing circuit will be sent to the next pixel point from DO port. Every time it passes through a pixel point transmission, the signal will decrease 24bit. The pixel point uses automatic transformation forwarding technique, thus the pixel cascade connection quantity do not limited by signal transmission but the speed of transmission only. LED has advantages of low voltage drive, energy-saving and environment protect, wide scattering angle, good consistency, ultra-long life, etc.. To integrate control circuit onto LED, the circuit will become more simple, easier to install and have smaller volume.
Hardware Connection
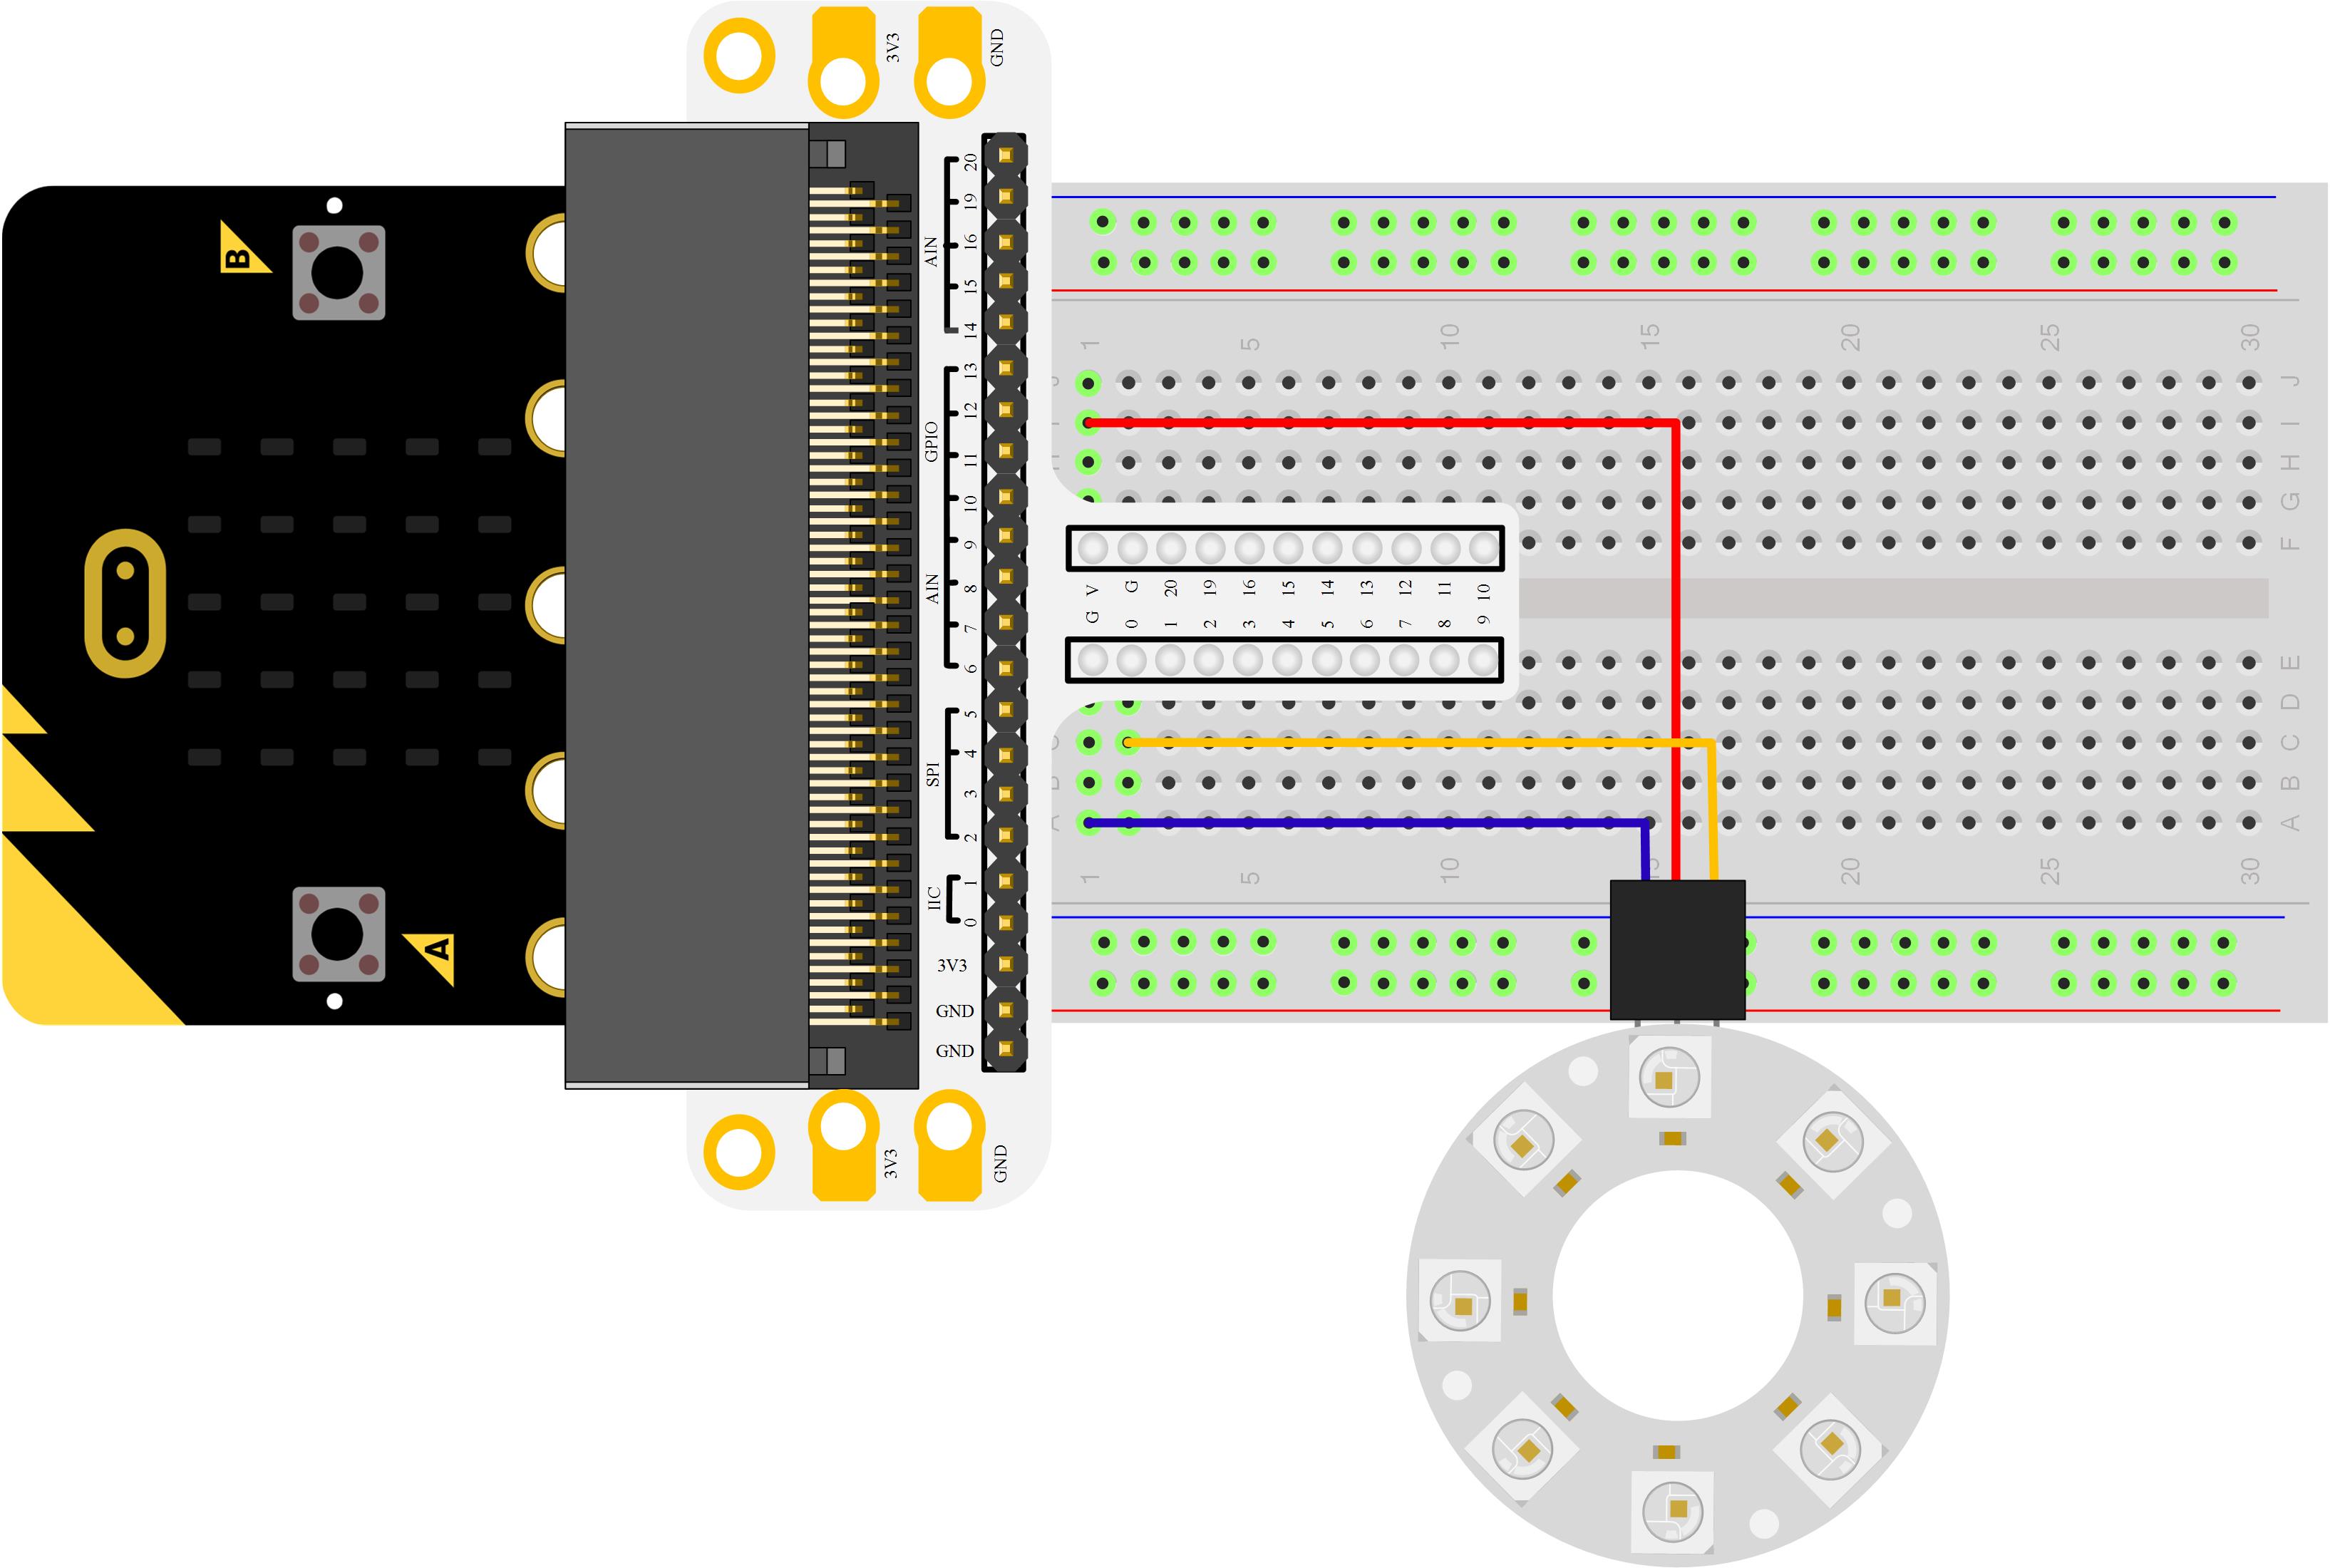
Please complete the hardware connection according to the picture below.

Note: There are two cables lead out by the ring. One is DI and the other is DO. We should connect DI. After connection, we can see:  Programming
Open Microsoft Makecode, write your code in the edit area. I would like to suggest you program by yourself. In this experiment, we will add a package of code to enable us to use our Of course, you can see the whole code in the link below. Just click “Edit” to edit your program, then click “Download” to download the code into Micro:bit
Code Explanation
set to NeoPixel set to NeoPixel used for initialize the bead. Among it, three parameters need to be set: “pin” is set to be the footer connect LED strip, “with x leds” set to be the quantity of bead, and “as RGB” to be the type of bead. show rainbow It is used to make the light of LED strip form rainbow color gradual change. show After we set the color of LED, it will not start to work. To make it works, you have to use “show”. sotate pixels Make LED color move in circle.
Experiment Result
We can see the light of 8 RGB Rainbow LED Ring is rotating with rainbow color.
Question
Imagine the ring is a big eye, if we want to make it blink, then how to design circuit and program? We look forward to your comments or further discussion with us.
Relative Readings:
Start Your Micro:bit Programming TripMicro:bit Experiment 01: LED Scroller —— Elecfreaks Micro:bit Starter Kit CourseMicro:bit Experiment 02: Button —— Elecfreaks Mirco:bit Starter Kit CourseMicro:bit Experiment 03: Trimpot —— Elecfreaks Mirco:bit Starter Kit CourseMicro:bit Experiment 04: Photocell —— Elecfreaks Mirco:bit Starter Kit CourseMicro:bit Experiment 05: RGB LED —— Elecfreaks Mirco:bit Starter Kit CourseMicro:bit Experiment 06: Self-lock Switch —— Elecfreaks Mirco:bit Starter Kit CourseMicro:bit Experiment 07:Temperature Sensor —— Elecfreaks Mirco: bit Starter Kit CourseMicro:bit Experiment 08:Servo —— Elecfreaks Mirco: bit Starter Kit CourseMicro:bit Experiment 09:Buzzer —— Elecfreaks Mirco: bit Starter Kit CourseMicro:bit Experiment 10: Motor —— Elecfreaks Mirco: bit Starter Kit Course
About the Author


How to Send Micro:bit Data to ThingSpeak IoT Platform
January 11, 2018

VC0706 Camera Module DIY Guide
December 18, 2014

nRF24L01 Module Demo for Arduino
May 6, 2011


Children’s Programming Education is the Future Trend
March 20, 2024


ELECFREAKS AI Smart Lens Now Compatible with Gigo Building Blocks!
February 21, 2024


Comments