Assemble the hardware
Contents
4. Assemble the hardware#
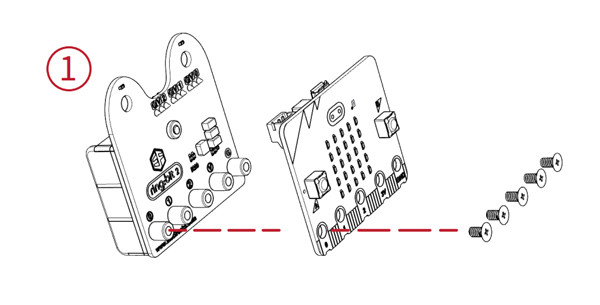
4.1. Step 1#
Attach the micro:bit to the Ring:bit expansion board using the short flat head screws.
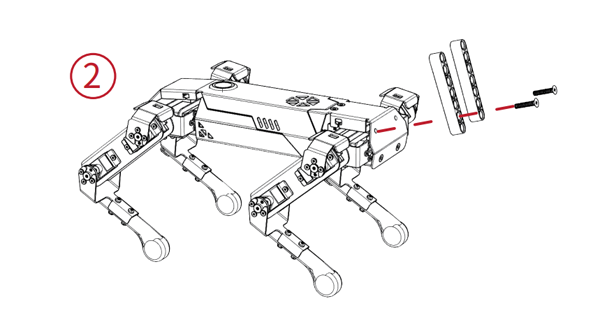
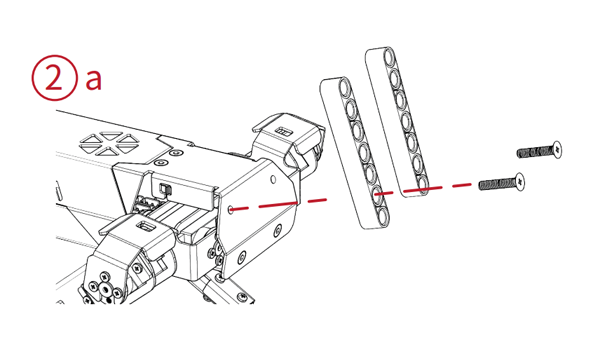
4.2. Step 2#
Use the longer flat head screws to fasten the seven-hole beam to the corresponding screw holes on the XGO.
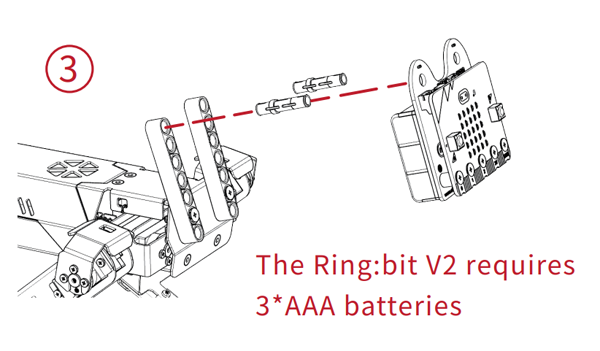
4.3. Step 3#
Mount the Ring:bit expansion board with the micro:bit installed on the seven-hole beam using the long pins.
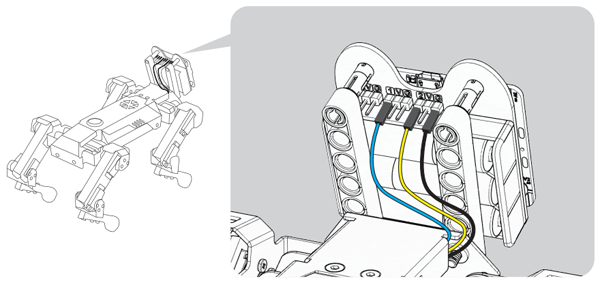
4.4. Step 4#
Connect the DuPont cable reserved by XGO to the corresponding port of the Ring:bit, among which the black DuPont cable is connected to the G port, and the yellow DuPont cable and the blue DuPont cable are connected to the No. 1 and No. 2 ports. Select the appropriate port number.
4.5. Step 5#
Connect your computer to the micro:bit with a USB cable:
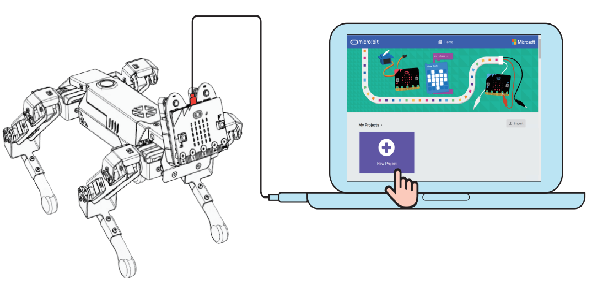
Start Program#
The programming of XGO is done on the Makecode platform; the Makecode platform can use graphical programming, as well as python code programming and JavaScript code programming;
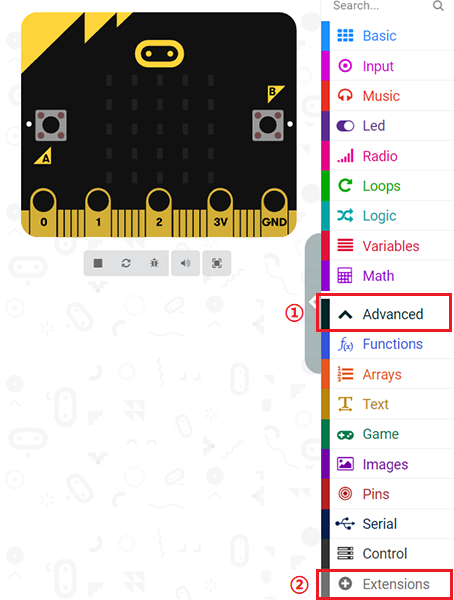
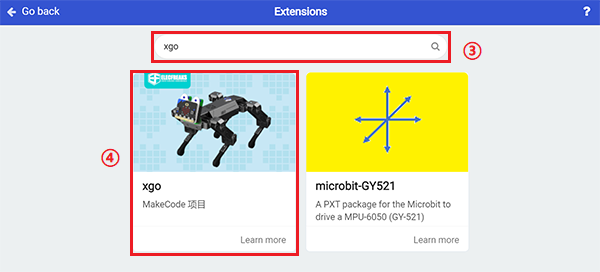
4.6. Add XGO extension library#
The steps are as follows:#
Create a new program, name the program name and click the Advanced button in the building block library, as follows:
4.7. Programming Guide#
Initialize XGO

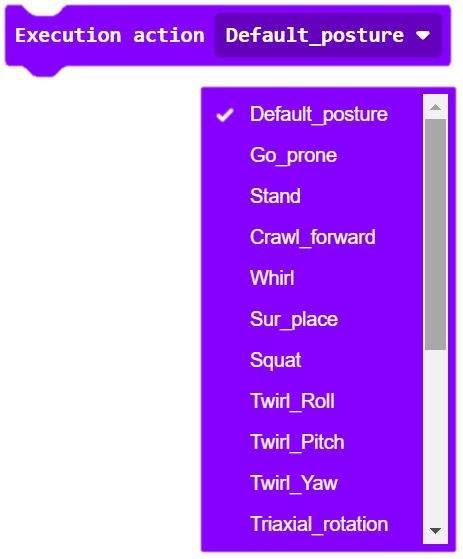
Set XGO actions, a total of 12 actions, you can choose one action;
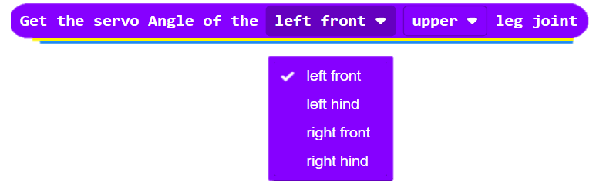
Get the servo angle of XGO’s limb joints and get the current power of XGO;

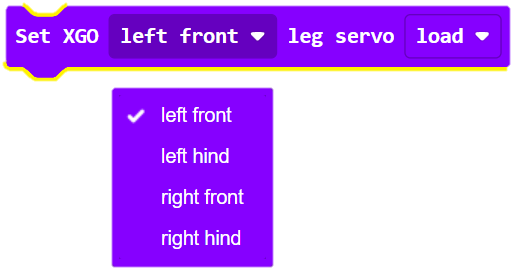
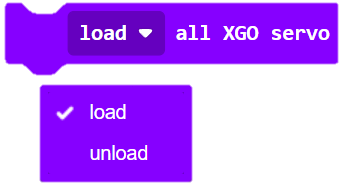
Set XGO single leg servo loading and all leg servos to debug mode;
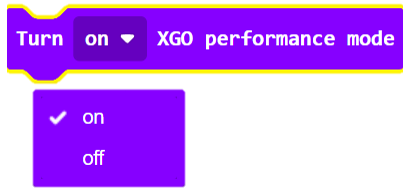
Turn on or off the performance mode of XGO;
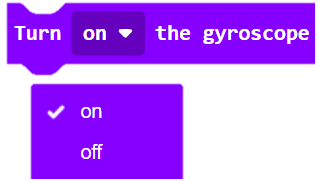
Turn on or off the XGO’s gyroscope;
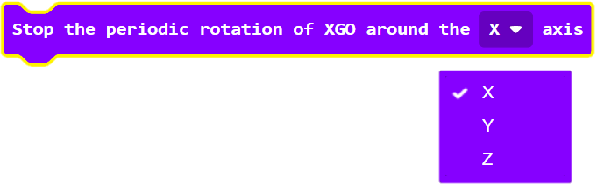
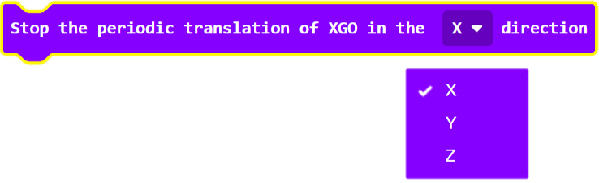
Stop the XGO cycle reciprocating around the X, Y, Z axes;
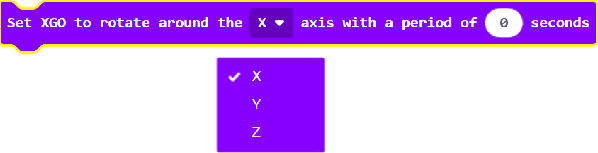
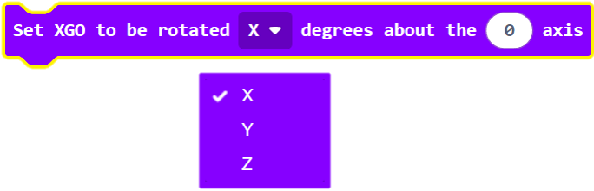
Set the time and degree of XGO reciprocating rotation around X, Y, Z axes;
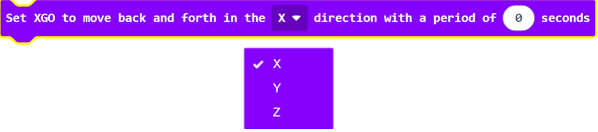
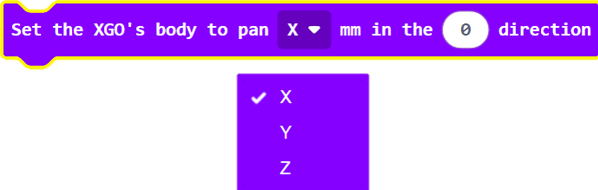
Set the time for XGO to pan or stop and move in the X, Y, Z directions;
Set the distance and time of the XGO leg raise;


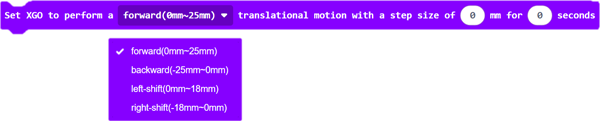
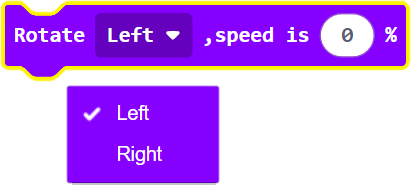
Set the direction, speed and time of XGO’s rotational motion;


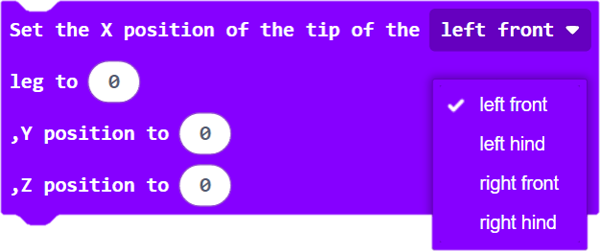
Set the toe direction of the XGO quadruped;
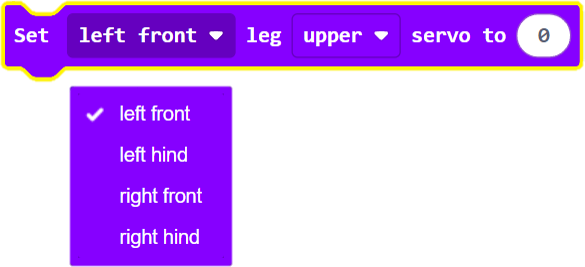
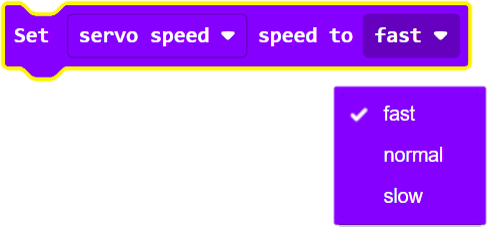
Set the servo rotation of the XGO quadruped joint and set the servo speed or step frequency;
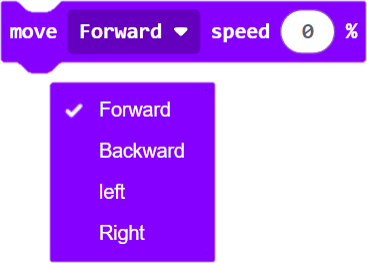
Set the XGO movement or rotation and the corresponding speed;
set XGO body height;

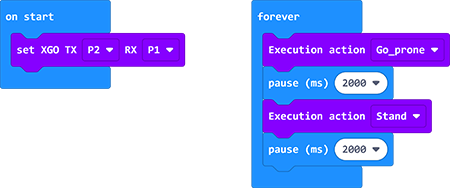
Simple example#
Link:XGO
At the same time, you can directly download the program below;
4.8. FAQ#
Note: If you want to run the numbered code program, you need to turn on the switch of Ring:bit, and also pay attention to whether the power of XGO is sufficient