Case 05: A Line-follwing Car
Contents
8. Case 05: A Line-follwing Car#
8.1. Purpose#
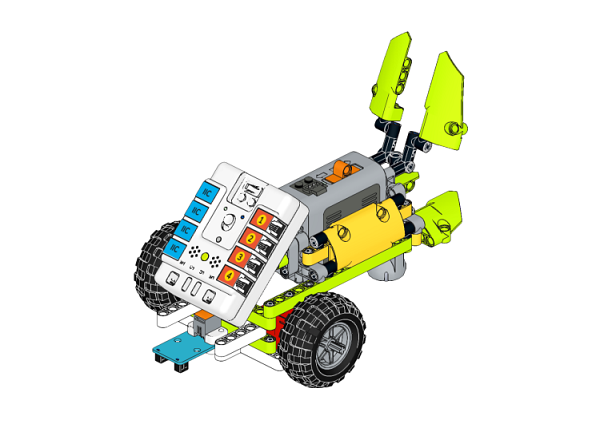
Make a line-following car with NezhaA Inventor’s Kit.
8.2. Purchse#
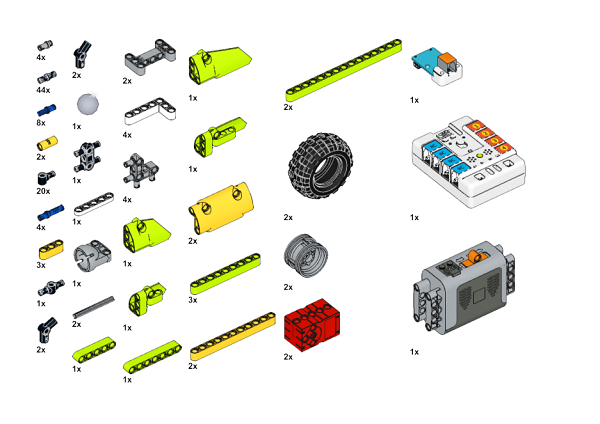
8.3. Materials Required#
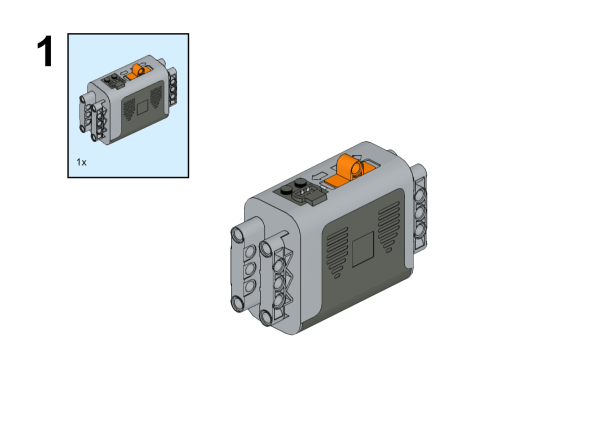
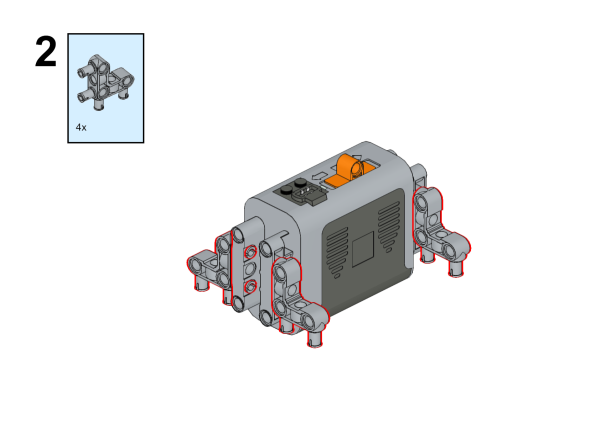
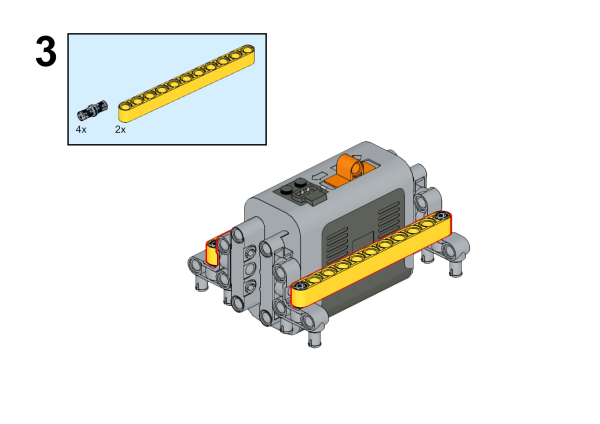
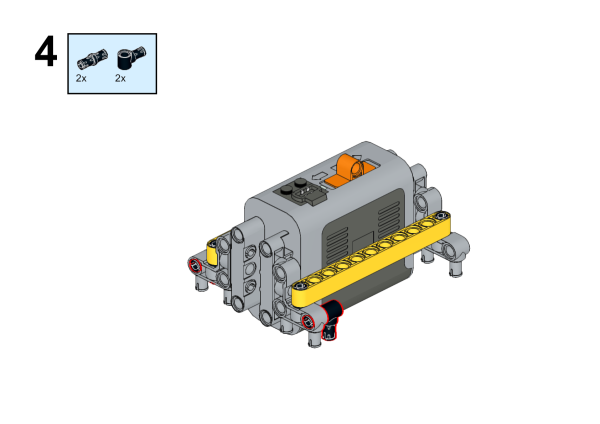
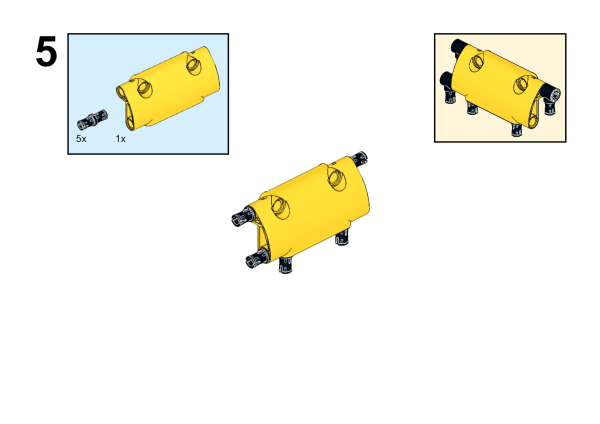
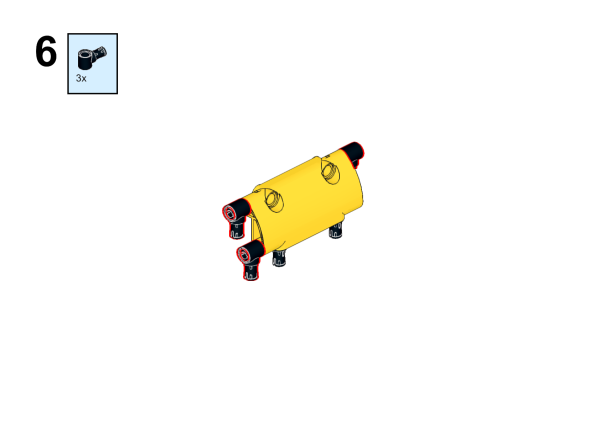
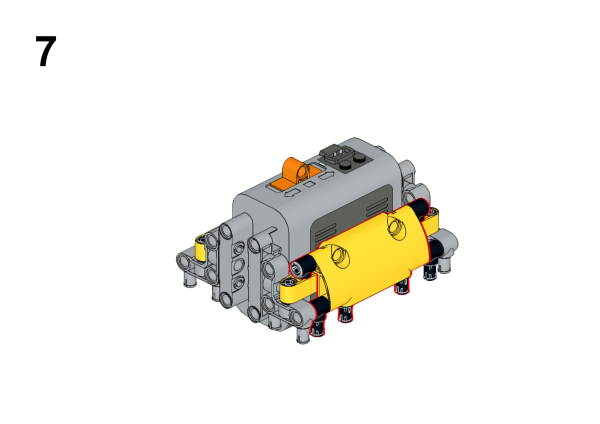
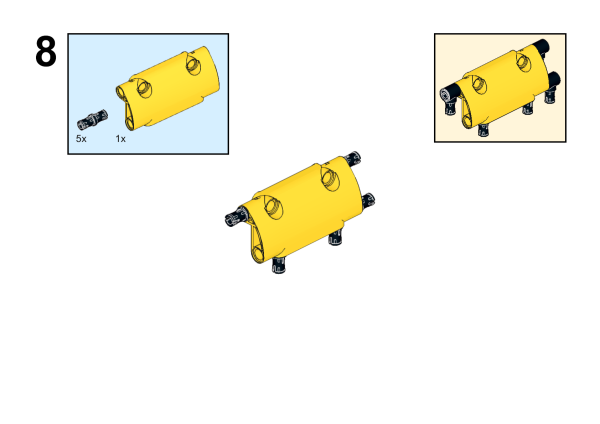
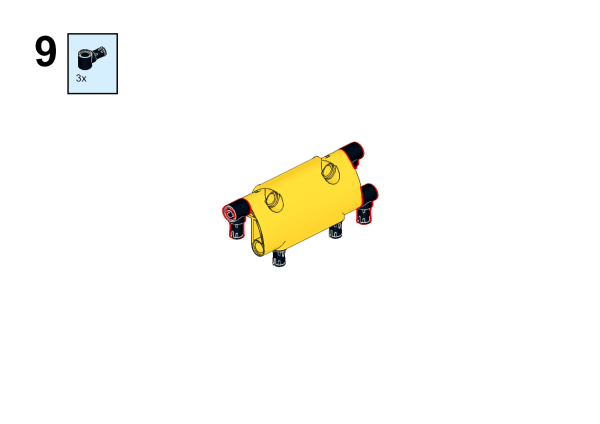
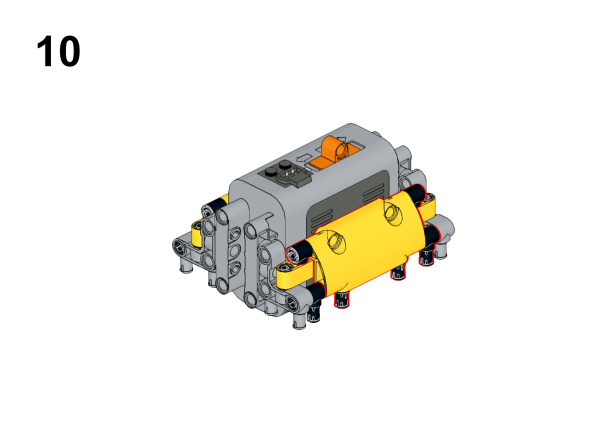
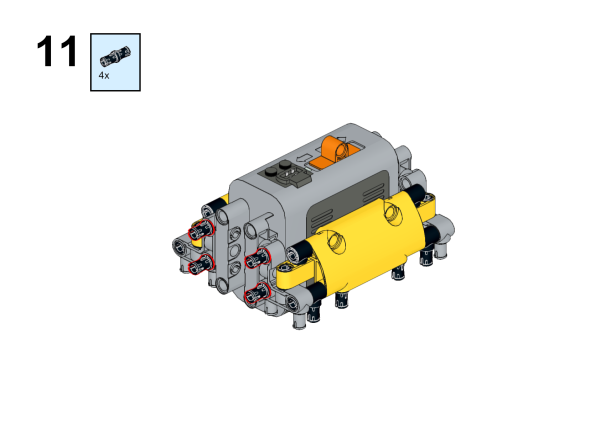
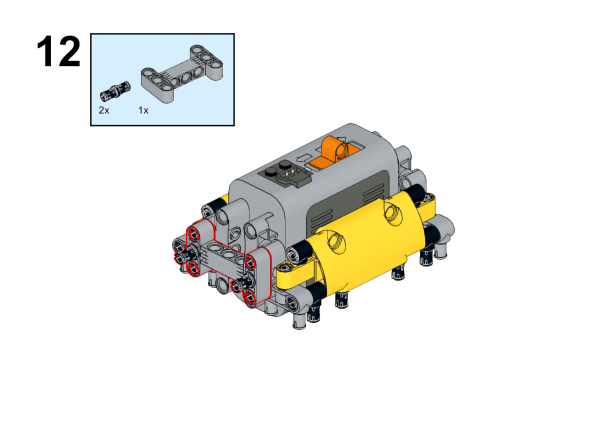
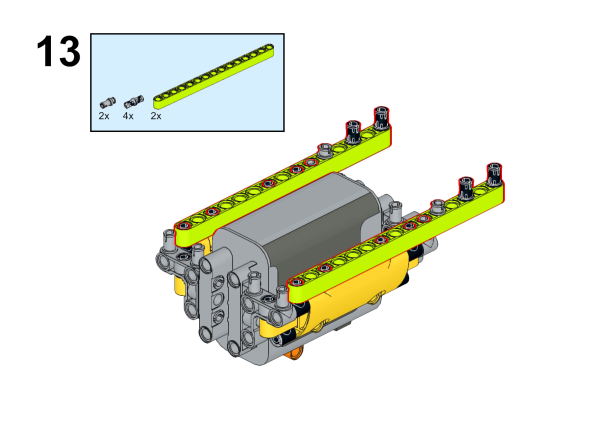
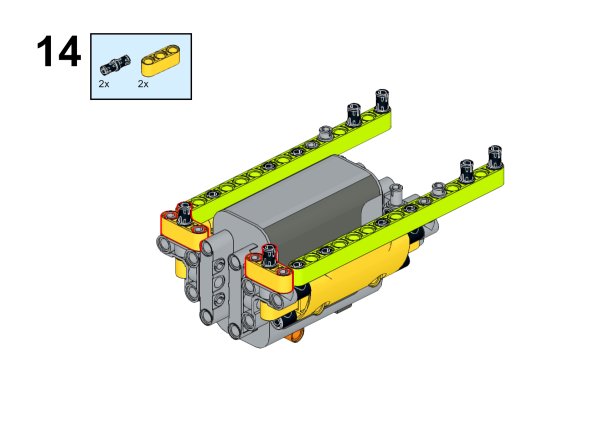
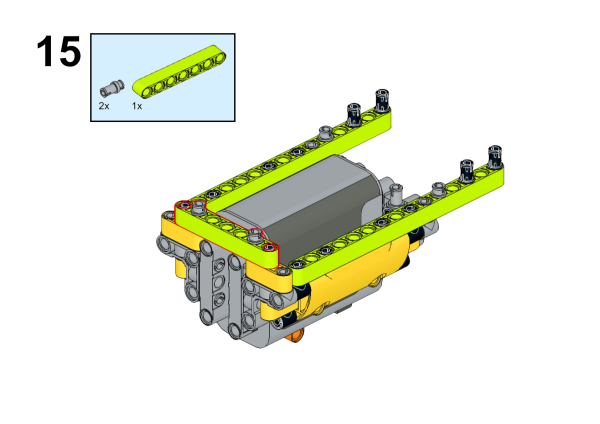
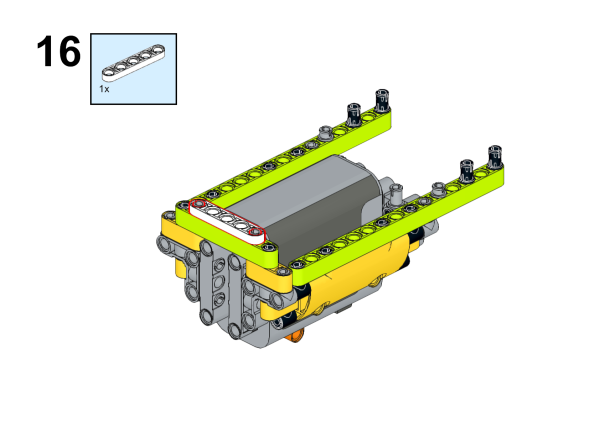
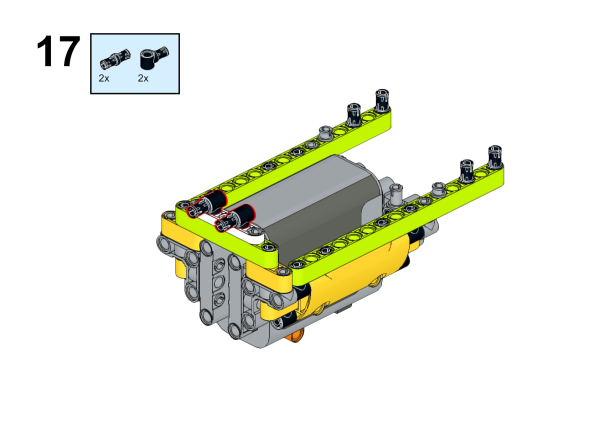
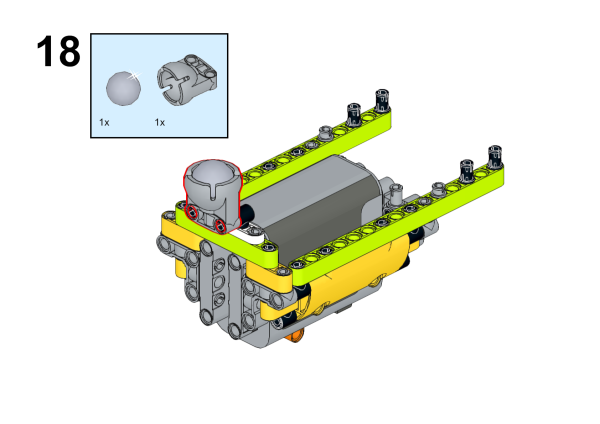
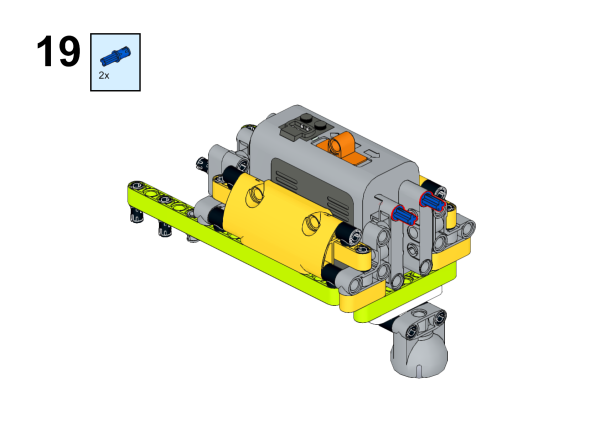
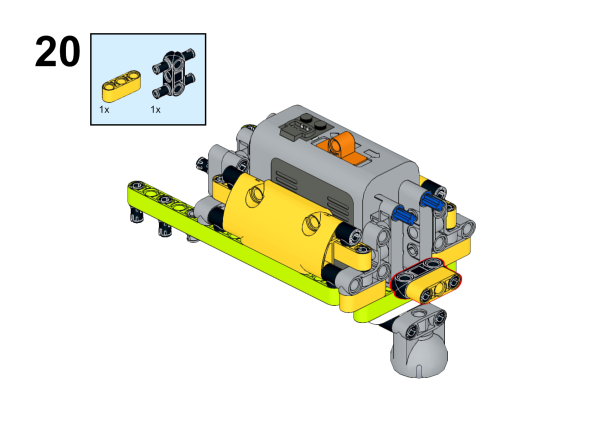
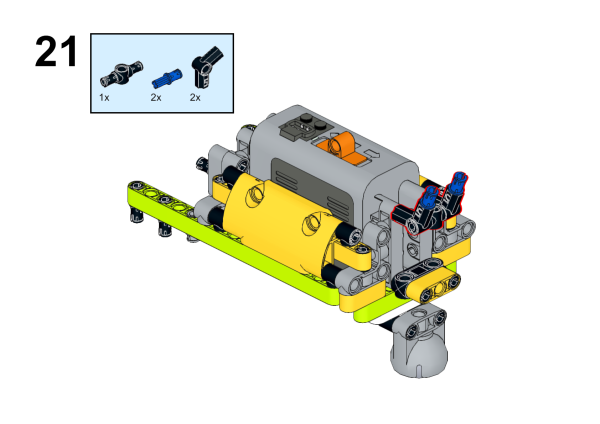
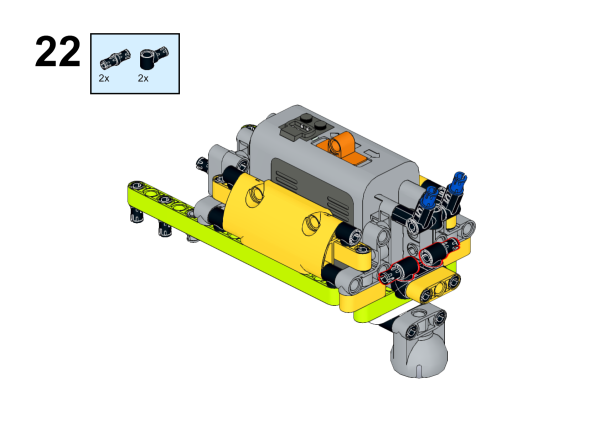
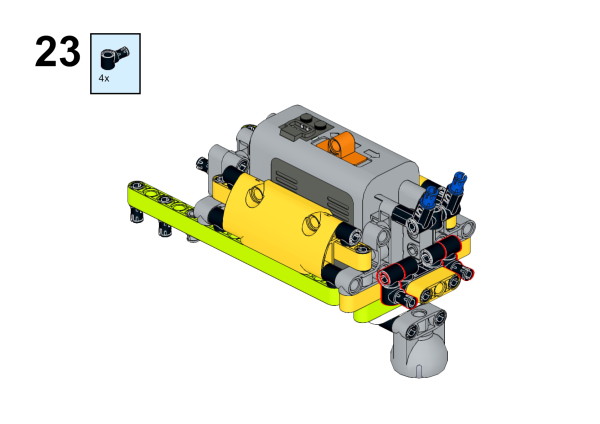
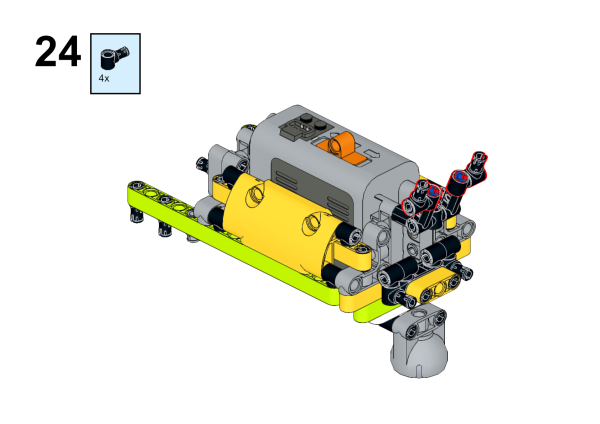
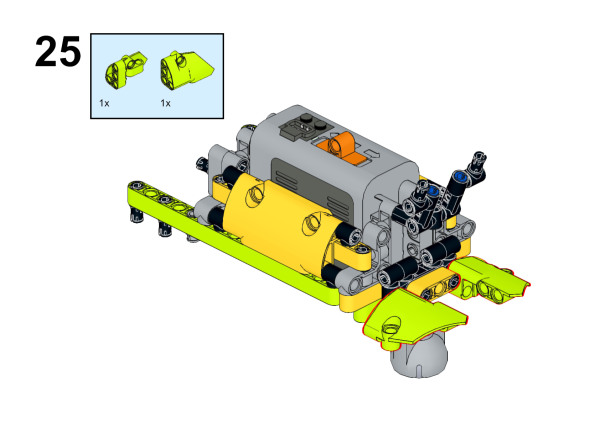
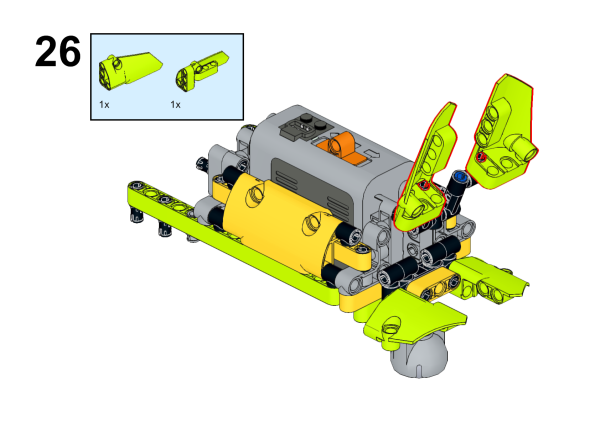
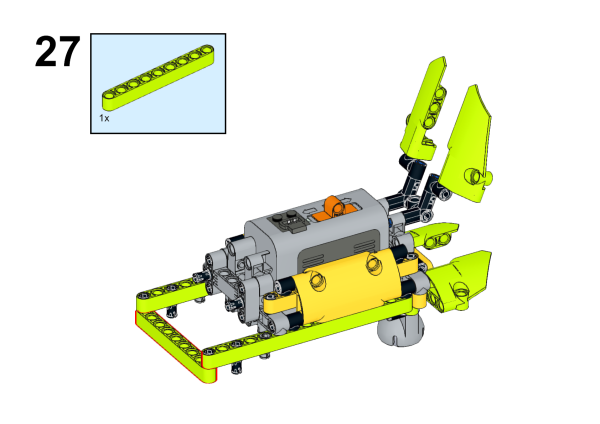
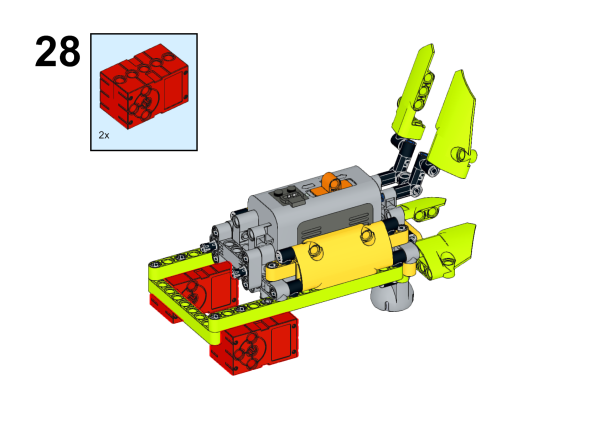
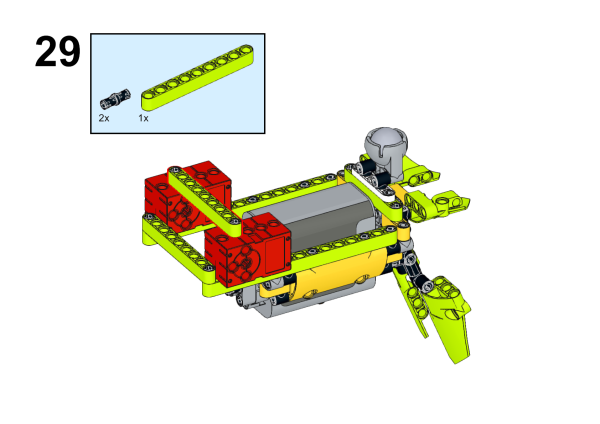
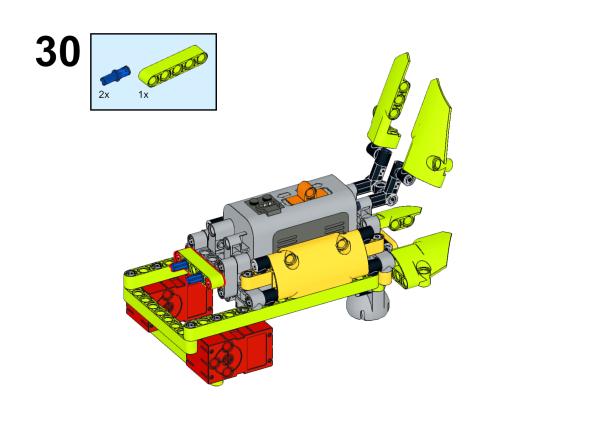
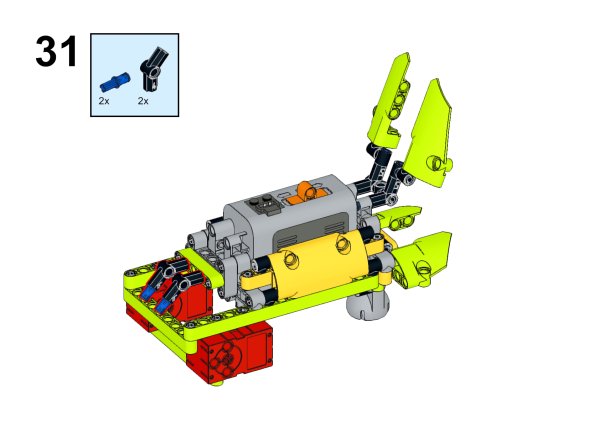
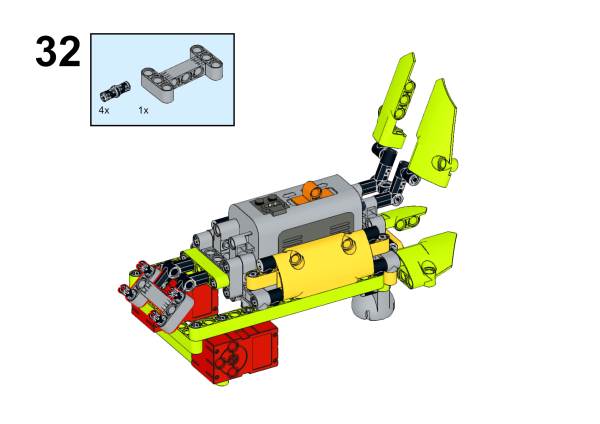
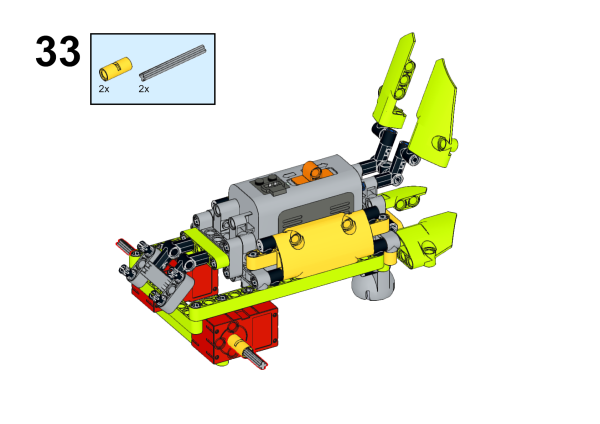
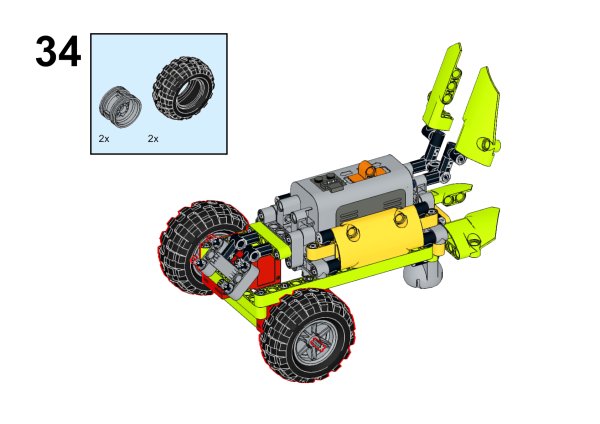
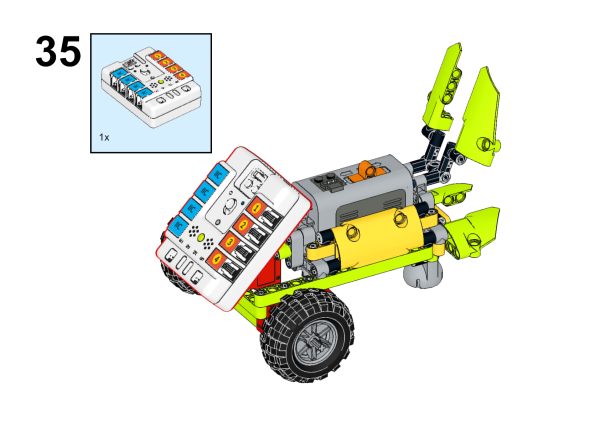
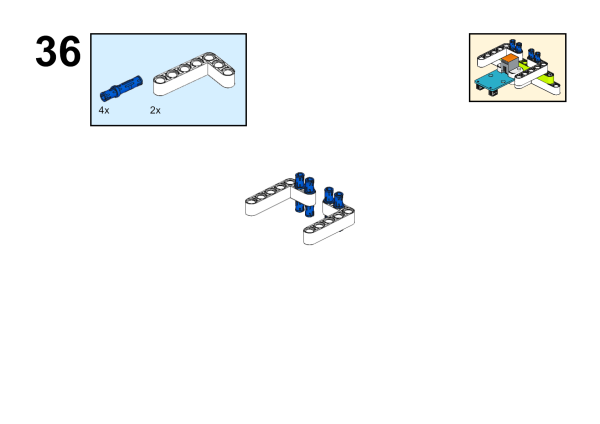
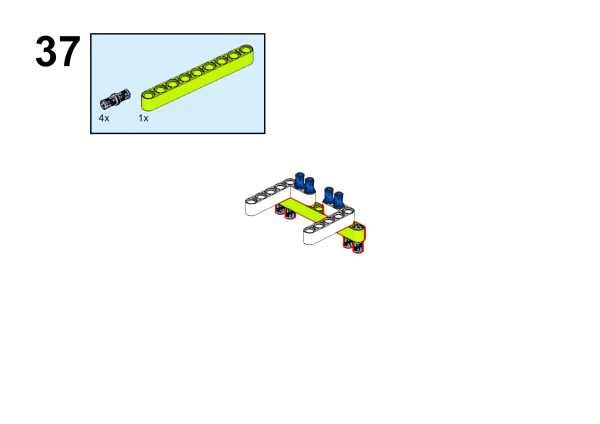
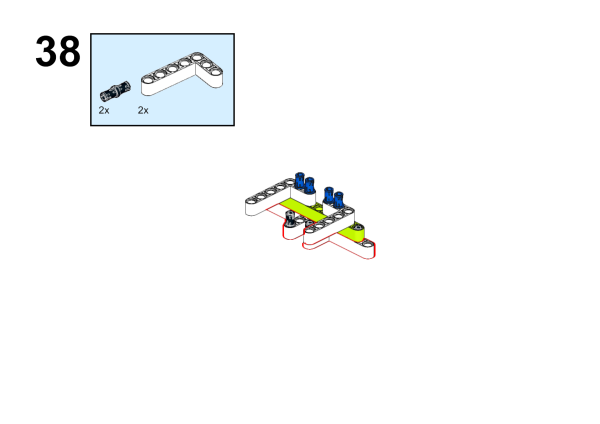
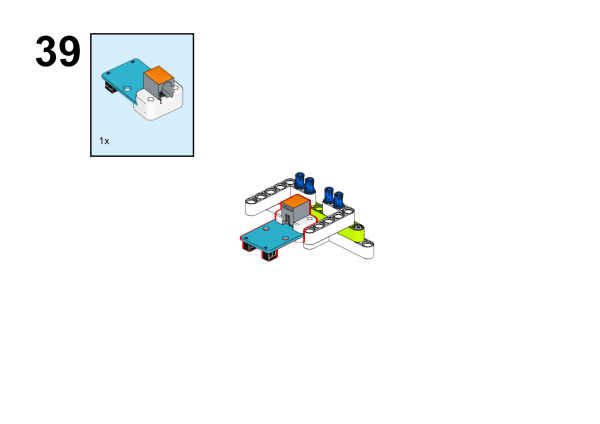
8.4. Assembly Steps#
8.5. Hardware Connections#
Connect two motors to M1 and M2 port and the line-tracking sensor on Nezha-A master box. 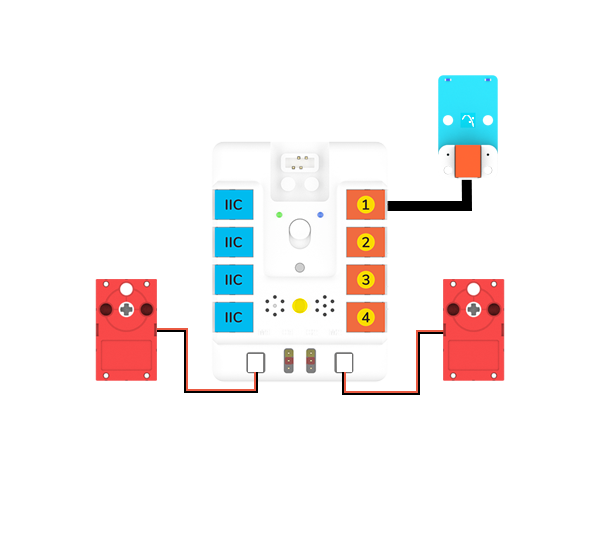
8.6. Programming#
8.6.1. Prepare the programming#
Steps for preparation please refer to: Arduino 3 in 1 Breakout Board
Import the libraries and the subsidiary libraries of Nezha-A master box and then import the libraries of the line-tracking sensor: PlanetXTracking-main.zip Download and import the self-defined library connections for Nezha-A master box: RJPins-main.zip
8.6.2. Sample Projects:#
// Language ArduinoC
#include <NezhaA.h>
#include <RJPins.h>
#include <PlanetXTracking.h>

PlanetXTracking trackingJ1(J1);    //Create an instance of PlanetXTracking category
NezhaA nezha;    /Create an instance of NezhaA category

void setup() {
  nezha.begin();    //Initiliaze the buzzer, motor, servo and light
}

void loop() {
  if (trackingJ1.isTracked(Right)) {
    nezha.setMotorSpeed(M1, 0);    //Set the speed of the motor connecting to M1 at 0%
    nezha.setMotorSpeed(M2, 15);    //Set the speed of the motor connecting to M2 at 15%
  }
  if (trackingJ1.isTracked(Left)) {
    nezha.setMotorSpeed(M1, 15);    //Set the speed of the motor connecting to M1 at 15%
    nezha.setMotorSpeed(M2, 0);    //Set the speed of the motor connecting to M2 at 0%
  }
}
8.6.3. Result#
After powering on, the car drives along with the map.