Cutebot & AI Lens Signpost Car
Contents
20.2. Cutebot & AI Lens Signpost Car#
Purpose#
Materials required#
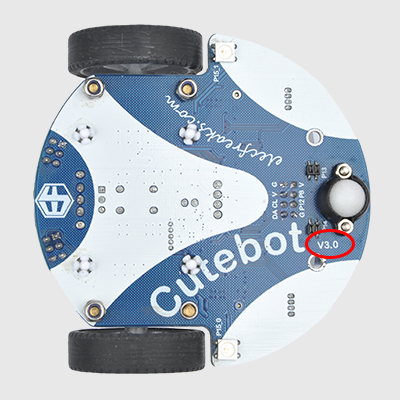
1 × Cutebot V3.0
1 × AI Lens Kit
Note: The AI Lens kit works with Cutebot V3.0 only(You can see the version number printed on the baseboard).
Connections:#
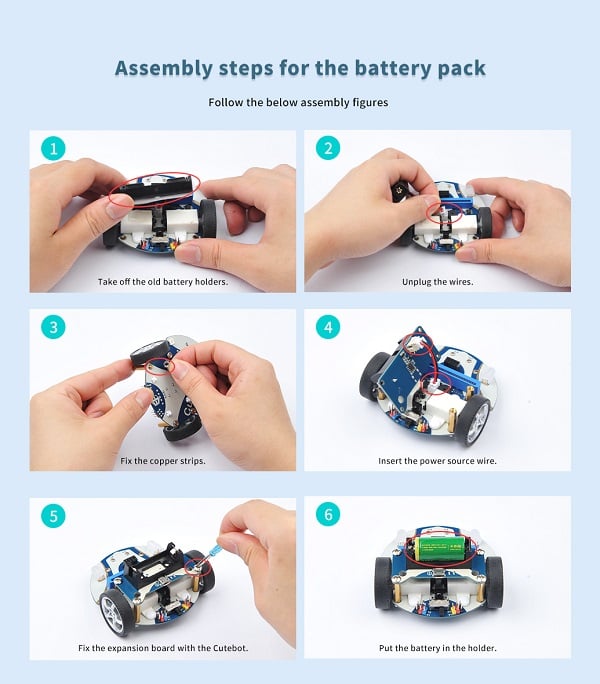
Steps to install the lithium battery pack:#
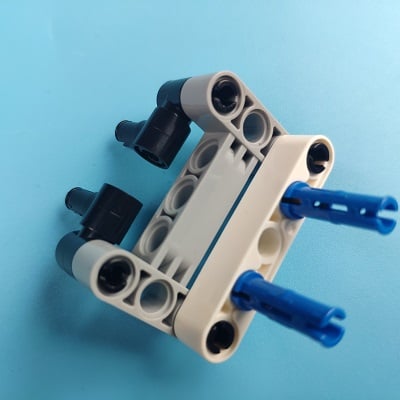
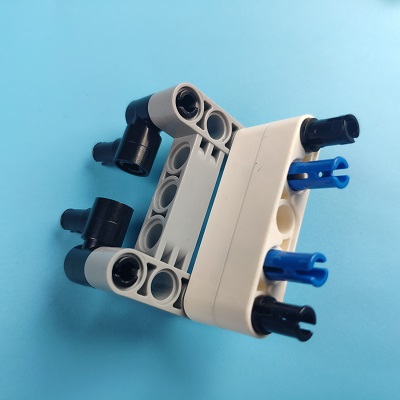
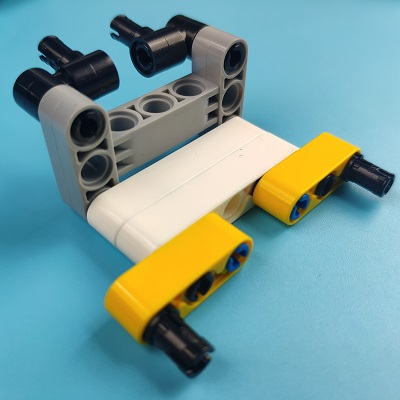
Assembly steps for bricks:
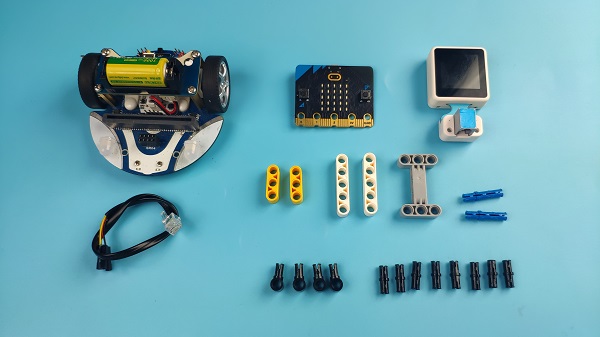
Parts list:
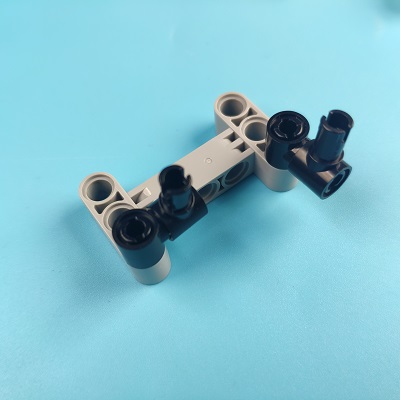
Steps of build-up:
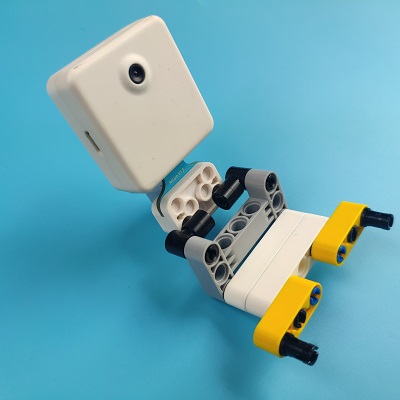
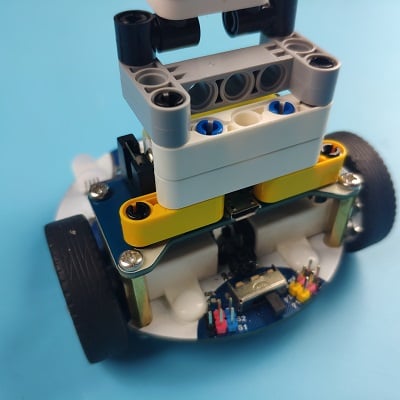
Connections of the AI Lens:#
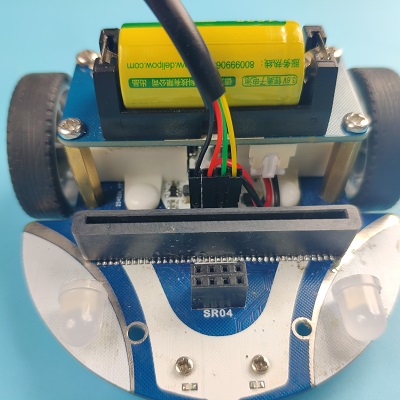
Connect the RJ11 cable with the AI Lens and the other end in Dupont connection to the circled place in the below picture (make sure you connect to the right connections).
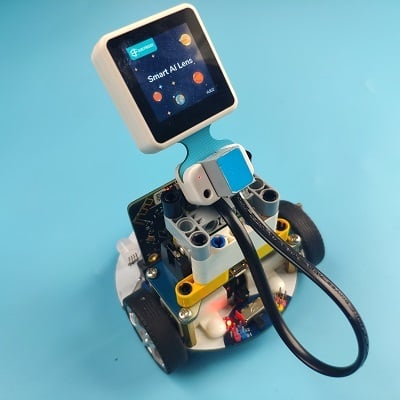
Tips: the bricks holder here is flexible to be adjusted, we may manually adjust the angles of the AI Lens to meet the requirements of the functions that you want to achieve.
Software Platform:#
Programming#
Step 1#
Click “Advanced” in the drawer to see more choices.
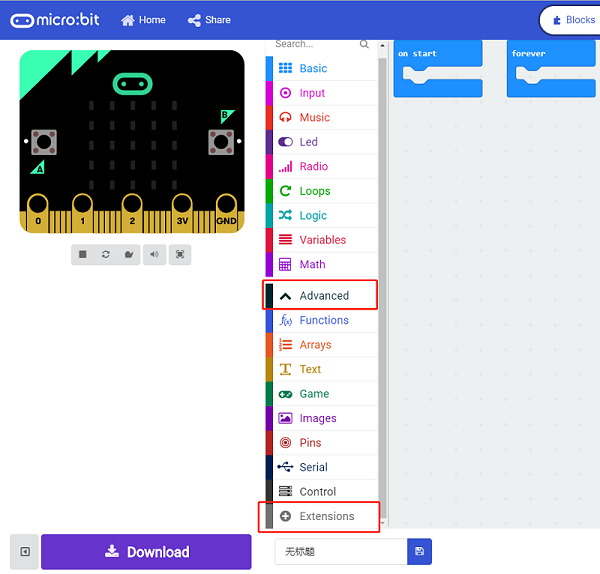
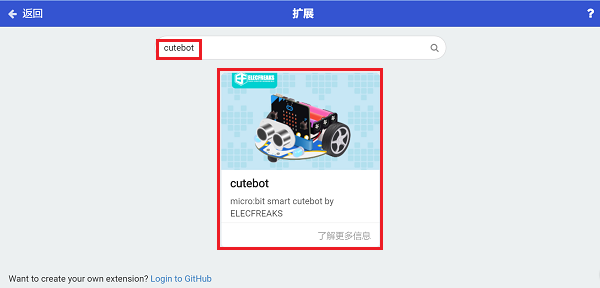
We need to add a package for programming. Click “Extensions” in the bottom of the drawer and search with “cutebot” in the dialogue box to download it.
We need to add a package for programming the AI Lens kit. Click “Extensions” in the bottom of the drawer and search with “https://github.com/elecfreaks/pxt-PlanetX-AI” in the dialogue box to download it.

Note: If you met a tip indicating that the codebase will be deleted due to incompatibility, you may continue as the tips say or build a new project in the menu.
Step 2#
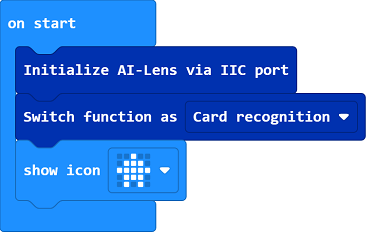
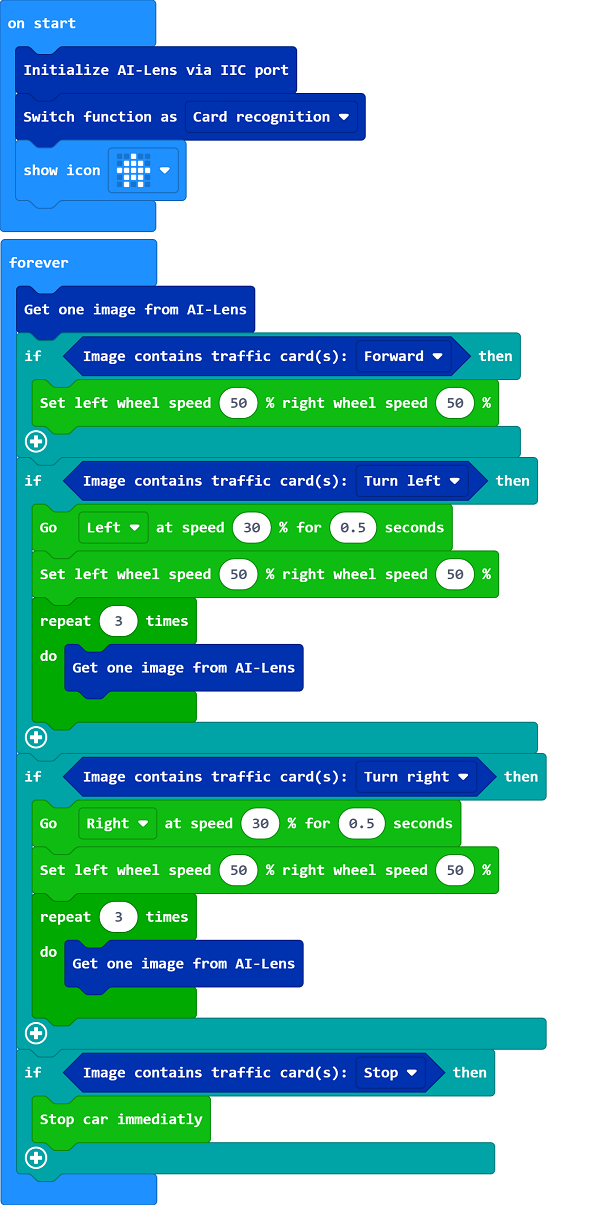
In the “on start” brick, initialize the AI Lens and switch the function to the cards recognition mode, set the micro:bit to display the appointed icon.
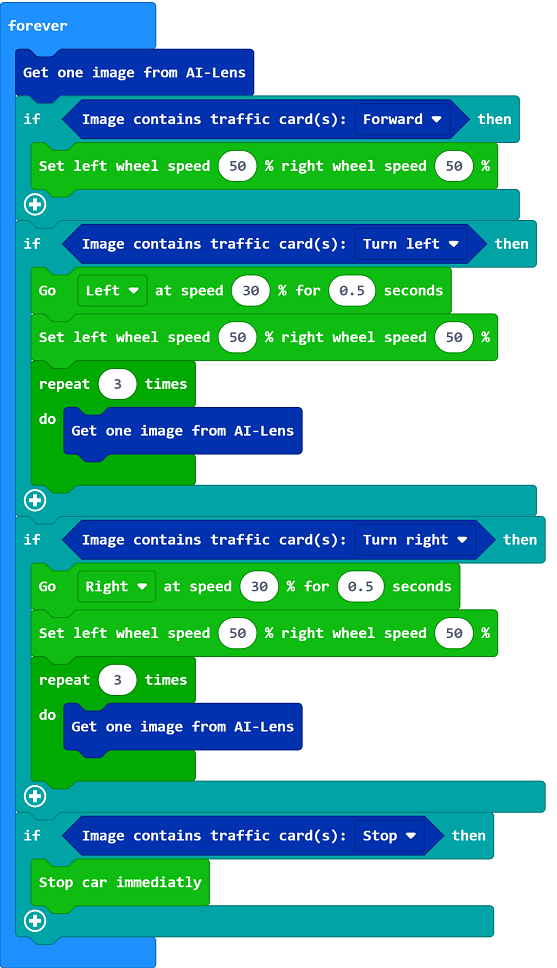
In the “forever” brick, set to get one image form the AI Lens and judge the cards icon on the image. If it reconizes the “forward” icon, we set the speed of the left wheel at the speed of 50% and the right at the same to make the car go forward; if it recognizes a “turn-left” icon, we set the car to turn left for 0.5s at the speed of 30% and then move forward, note the AI Lens has three buffers and we need get three images to clear the buffer after the execution. If it recognizes a “turn-right” icon, we set the car to turn right for 0.5s at the speed of 30% and then move forward. Note the AI Lens has three buffers and we need get three images to clear the buffer after the execution. If it recognizes the “stop” icon, the car stops moving accordingly.
Code#
Link: https://makecode.microbit.org/_6FyFLHM7zKAt
You may also download it directly below:
Result#
If the AI Lens regognizes the “forward” card, the car moves forward; if it recognizes the “turn-left” card, the car turns left and then goes forward; if it recognizes the “turn-right” card, the car turns right and then goes forward; if it recognizes the “stop” card, the car stops moving.