Case 05: Wipers
Contents
8. Case 05: Wipers#
8.1. Purpose#
To build a wiper.

8.2. Products Link#
8.3. Materials#
8.4. Background Knowledge#
8.5. Bricks build-up#
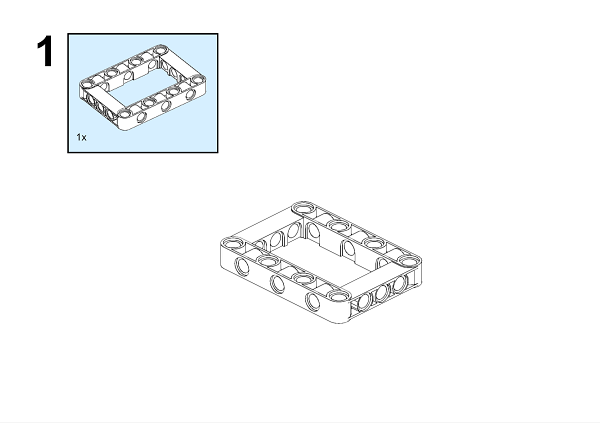
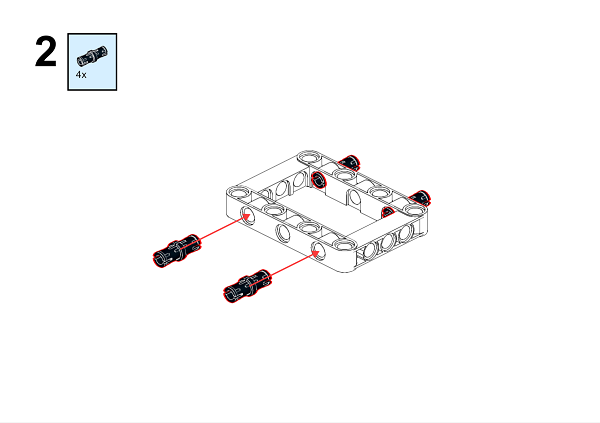
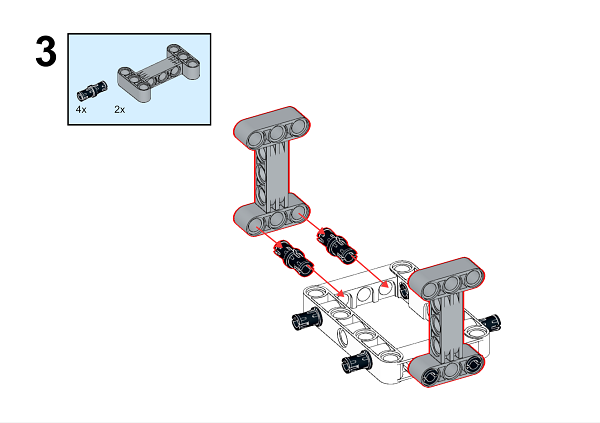
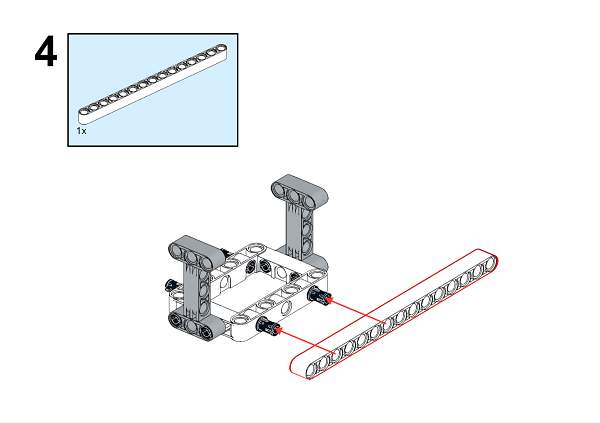
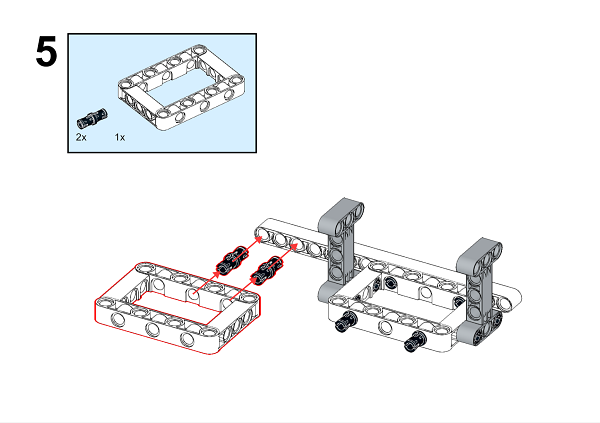
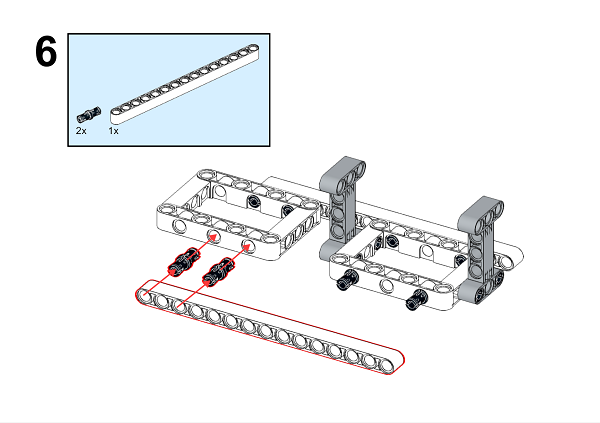
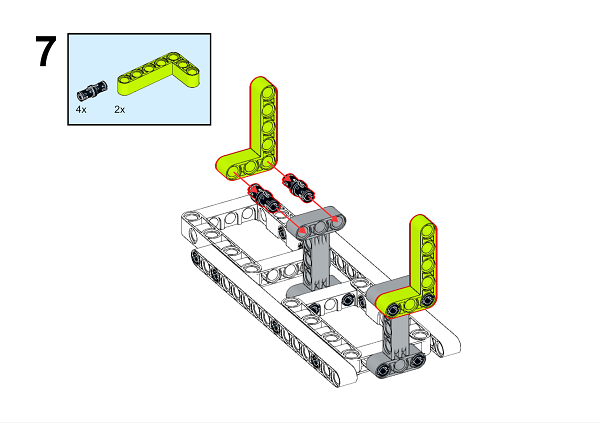
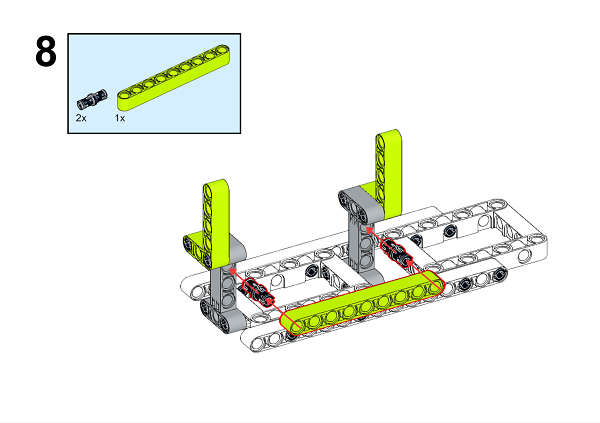
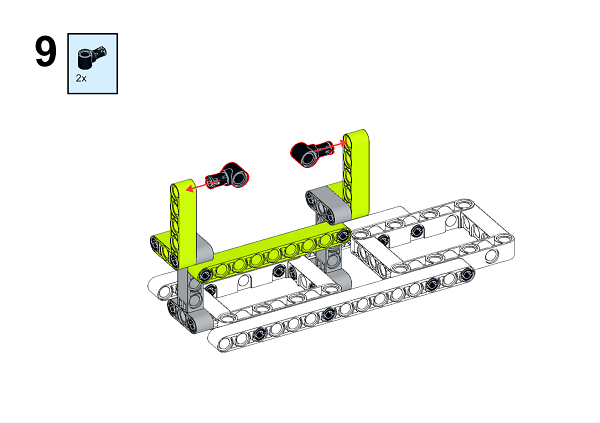
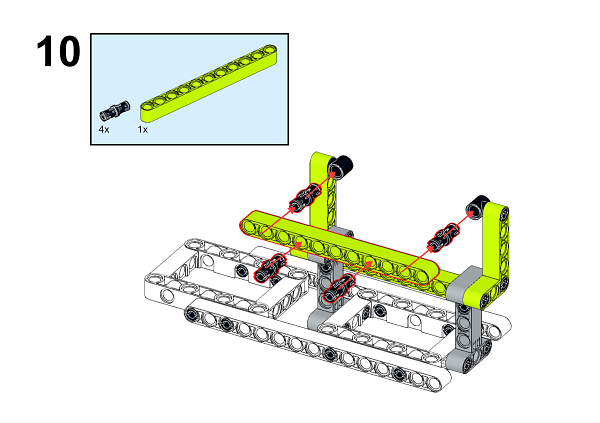
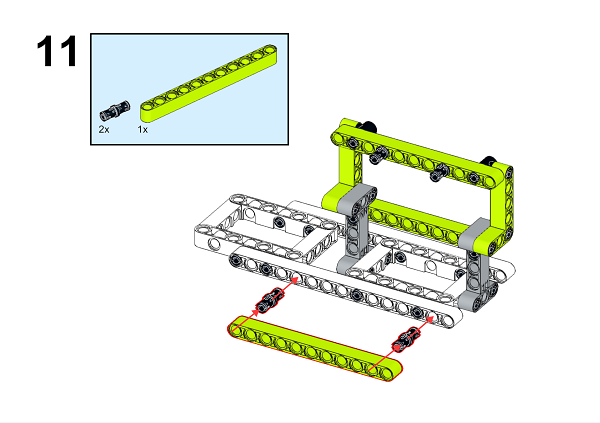
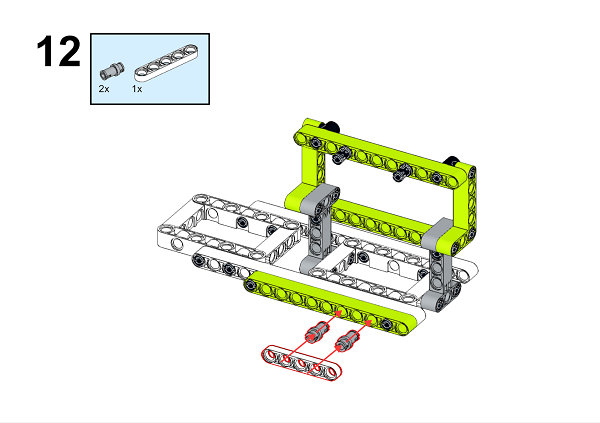
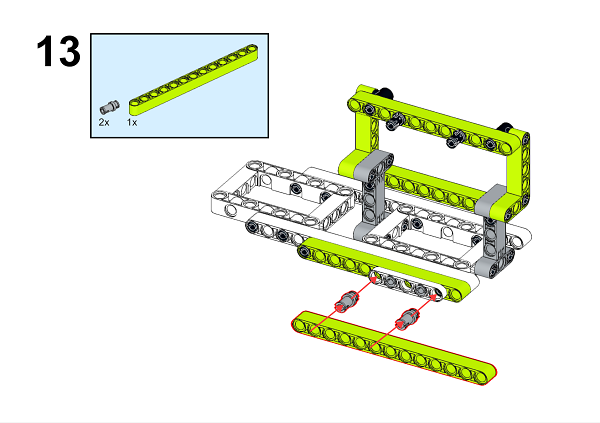
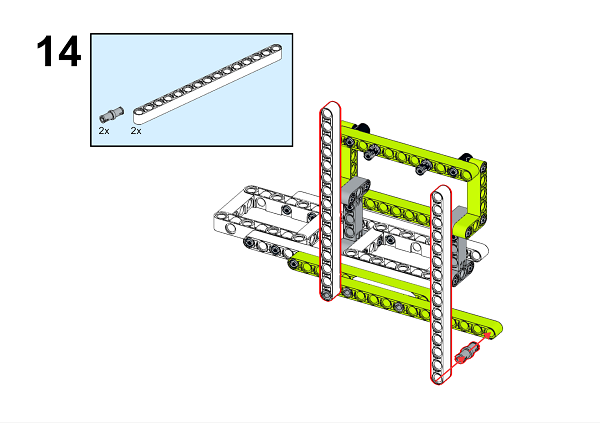
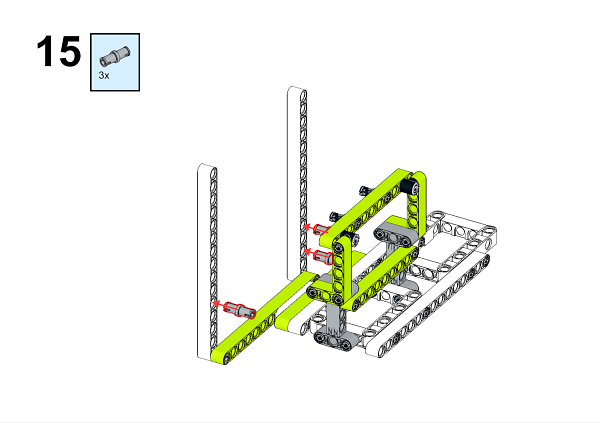
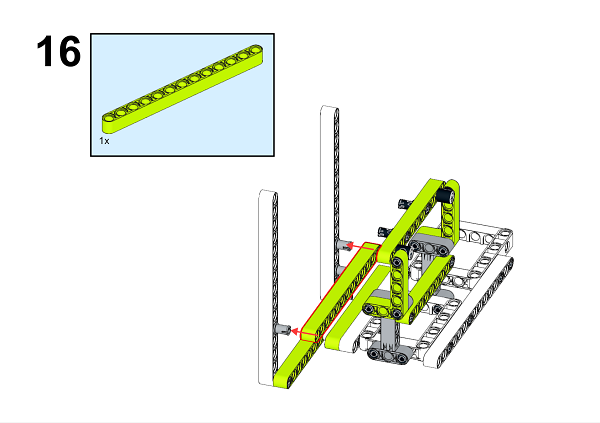
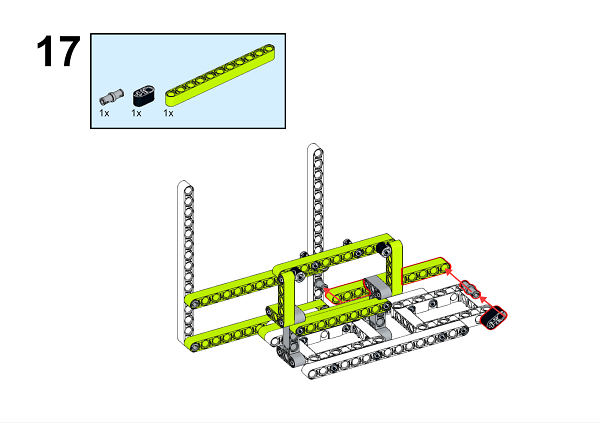
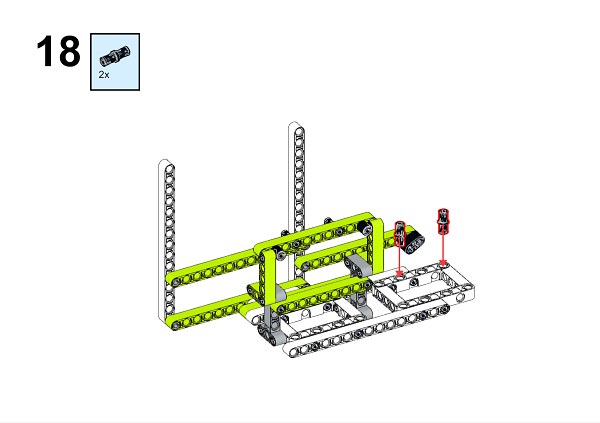
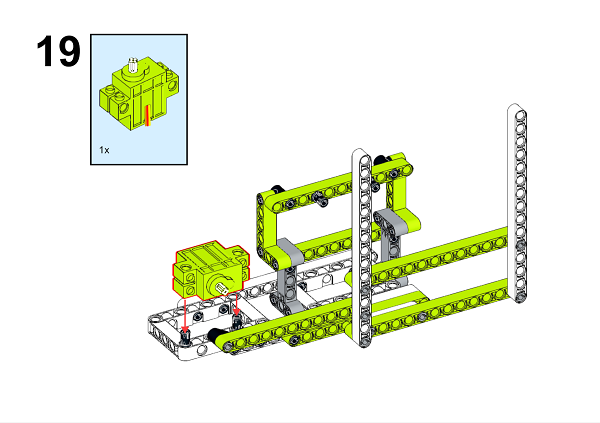

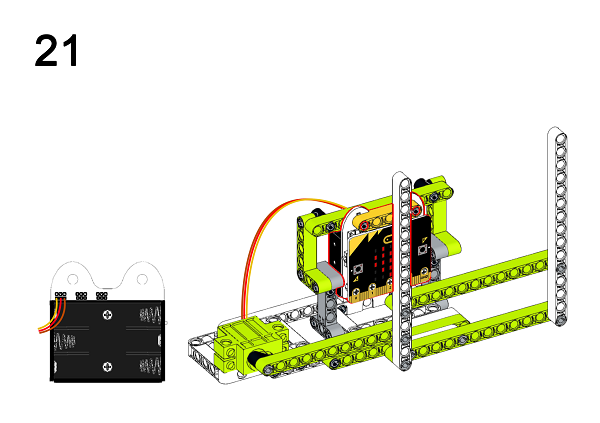

A detailed assembly instruction can be downloaded via the below links: Githubdownload
8.6. Software#
8.7. Code#
Step 1#
Click “Advanced” in the MakeCode drawer to see more choices.
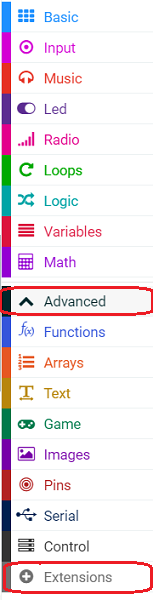
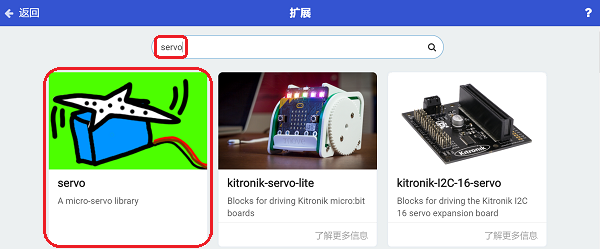
In order to programme for the Ring:bit Bricks Pack, we need to add an extension. Click “Extensions” at the bottom of the drawer. Search “servo” in the dialogue box to download it.
Note: If you met a tip indicating codebase will be deleted due to incompatibility, you may continue as the tips tell or build a new project.
Step 2#
While button A being pressed, set the servo connected to P0 port turning 180 degrees; while buttom B being pressed, set the servo connected to P0 port turning 90 degrees.

Note: As the servo we used is in 360 degrees, the “servo” extension in MakeCode is suitable for servos in 180 degrees, therefore, setting the turning angle to 0 degree or 180 degrees will lead to the servo turning clockwisely or anti-clockwisely, and 90 degrees means to stop turning.
Code#
Link: https://makecode.microbit.org/_6Pvbj1fPt33f
You can also download it directly below:
Result#
When button A being pressed, the wiper begins working; while buton B being pressed, the wiper stops working.
8.8. Exploration#
8.9. FAQ#
8.10. Relevant File#
Parallelogram mechanism: the two cranks as well as the connecting rod and frame are equal in length, their rotation speed and direction are in consistent.
Reciprocating motion: back and forth on both sides near a certain position.
The displacement of the reciprocating motion is equal to 0 because it is a positive stroke and a negative stroke. Mostly used in mechanical movements, such as pendulum, piston movement, etc.