Case 01: Rubber Bands Launcher
Contents
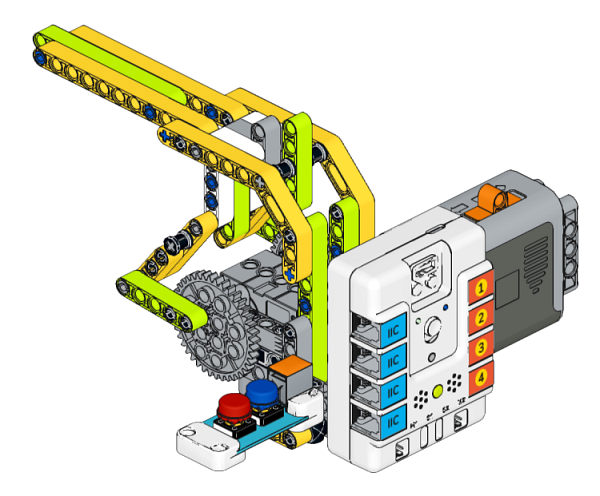
4. Case 01: Rubber Bands Launcher#
4.1. Purpose#
Make a rubber bands launcher through NezhaA Inventor’s Kit.
4.2. Purchase Link#
4.3. Materials Required#
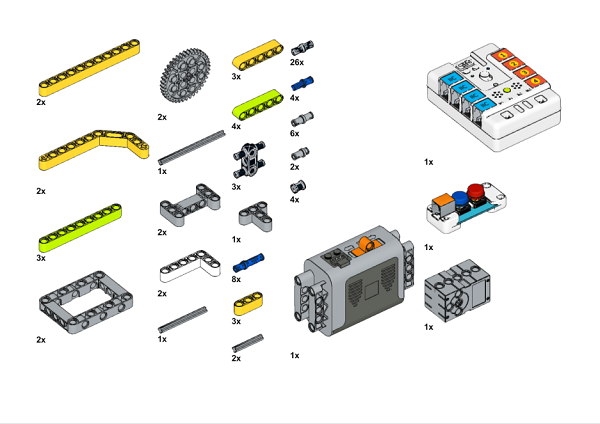
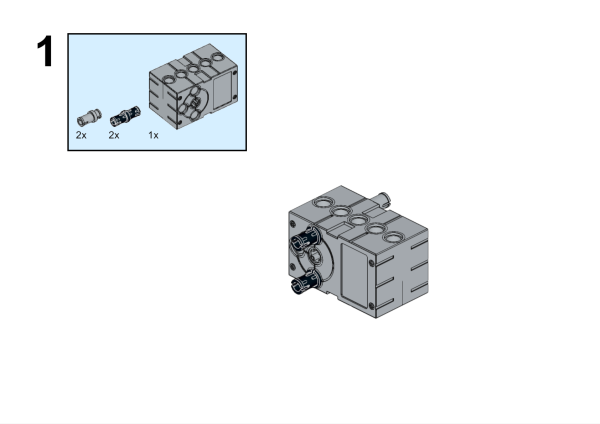
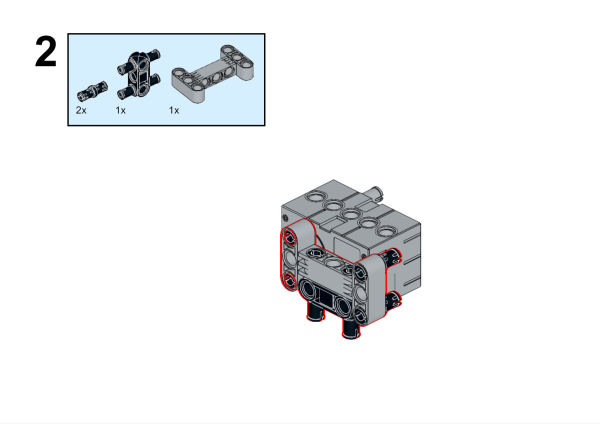
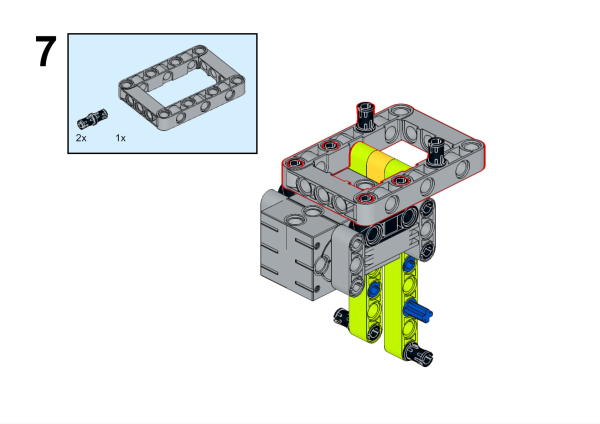
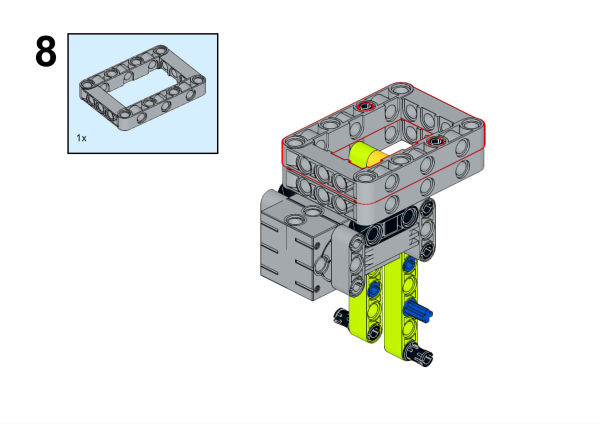
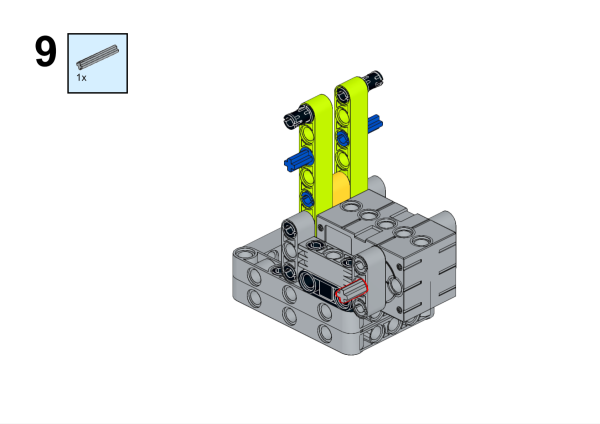
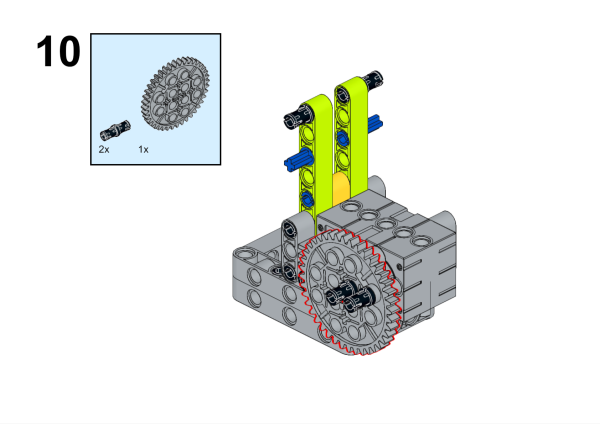
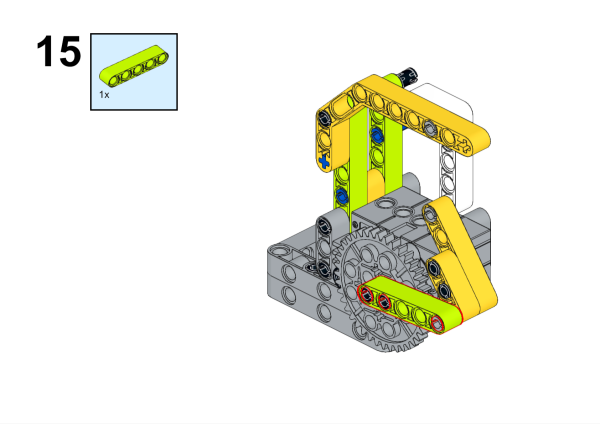
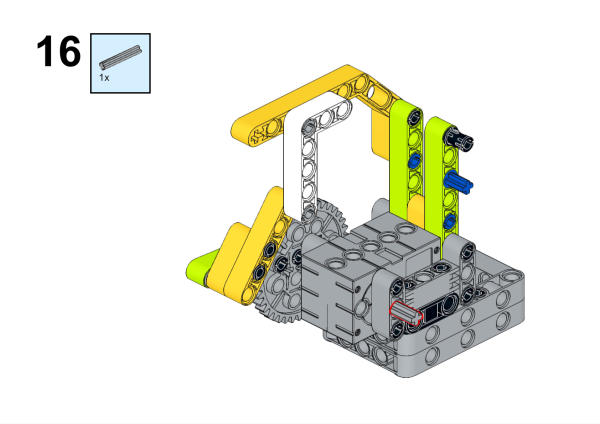
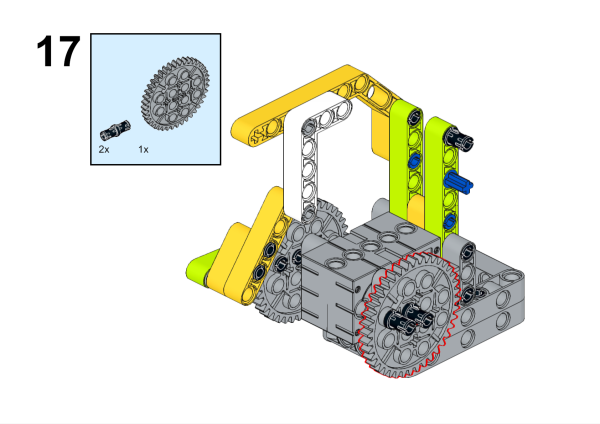
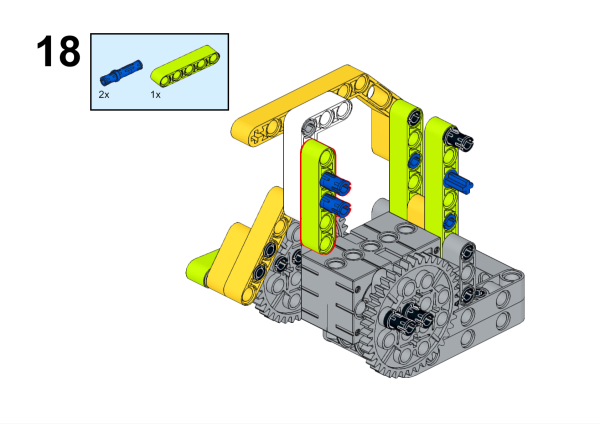
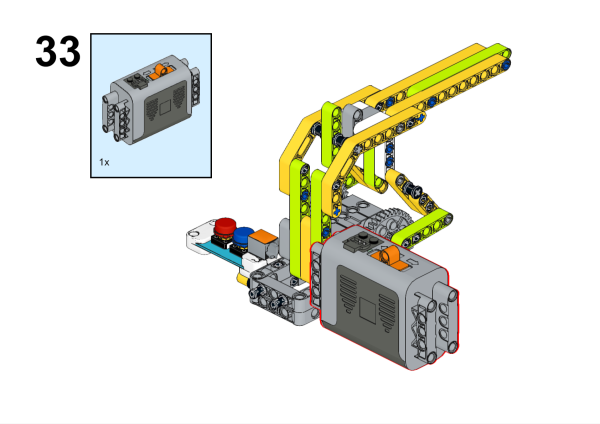
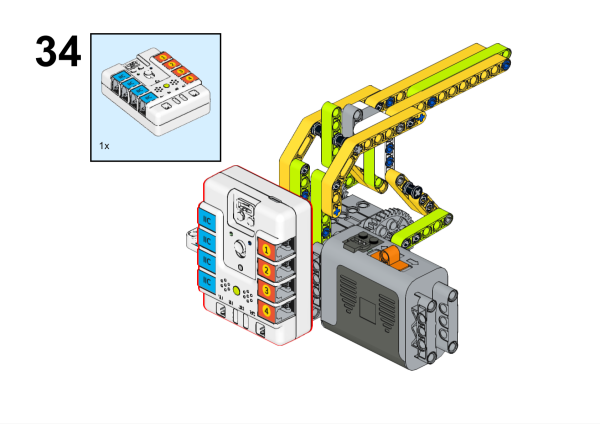
4.4. Assembly steps#
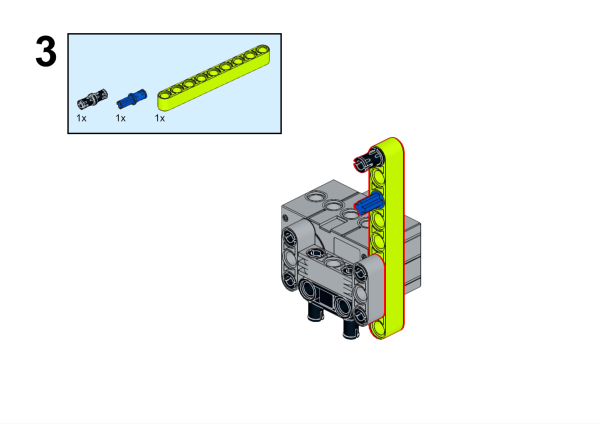
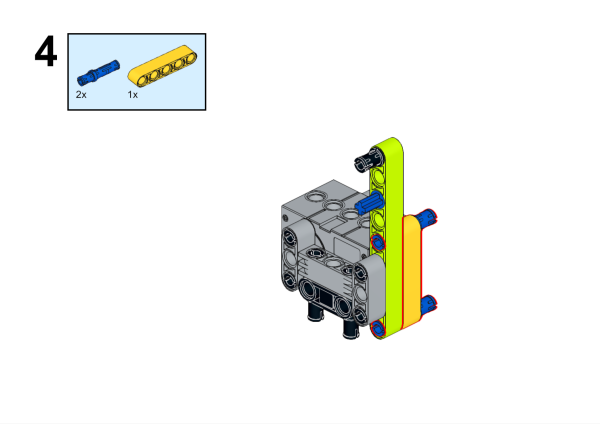
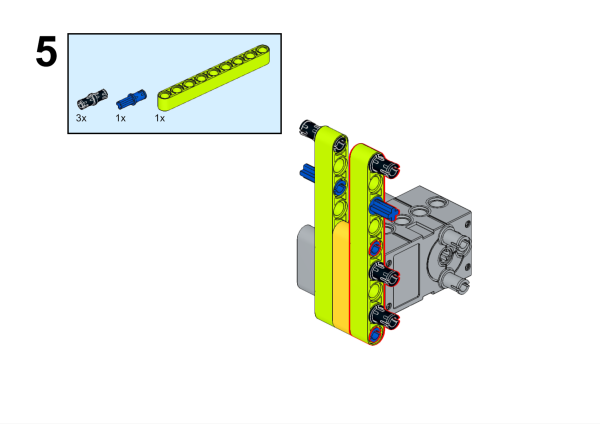
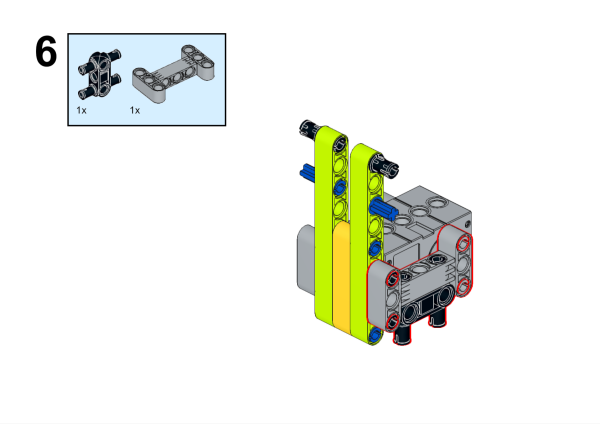
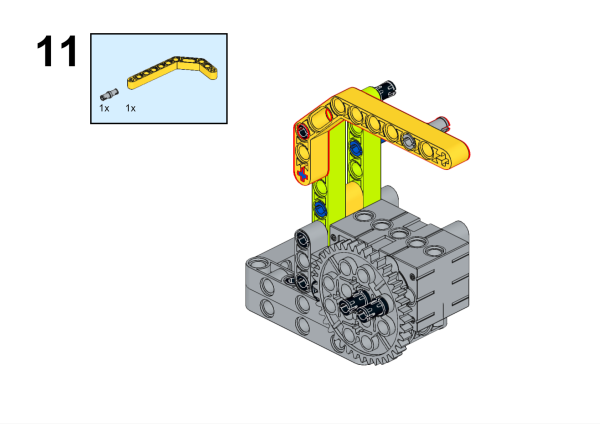
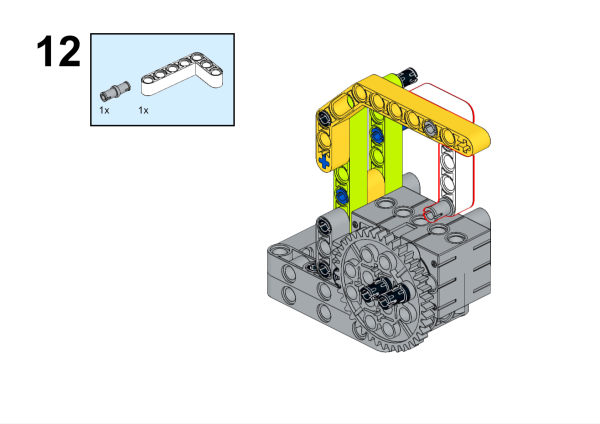
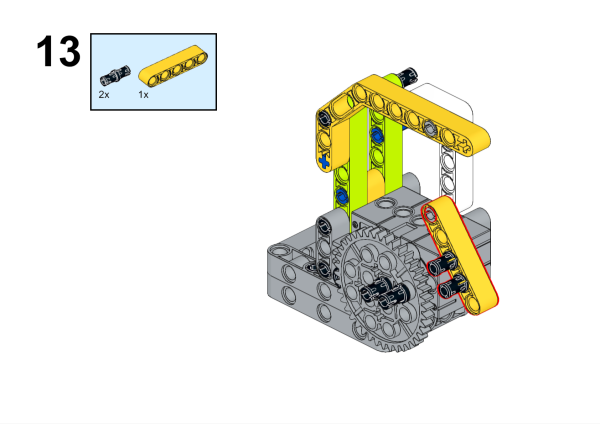
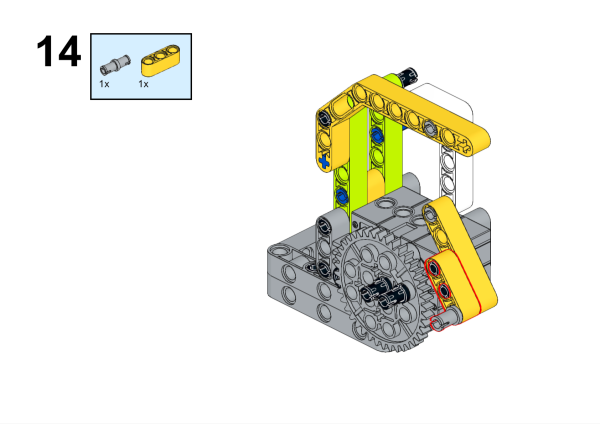
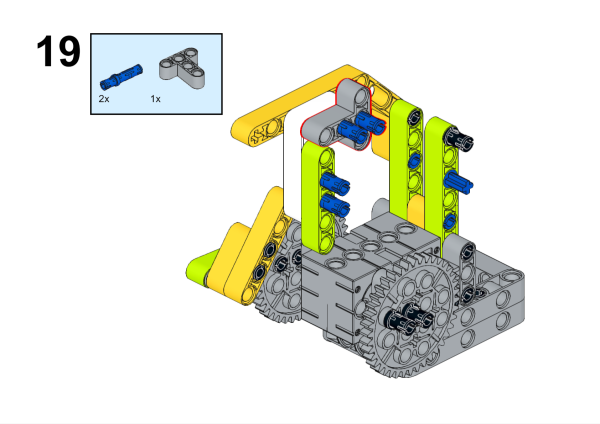
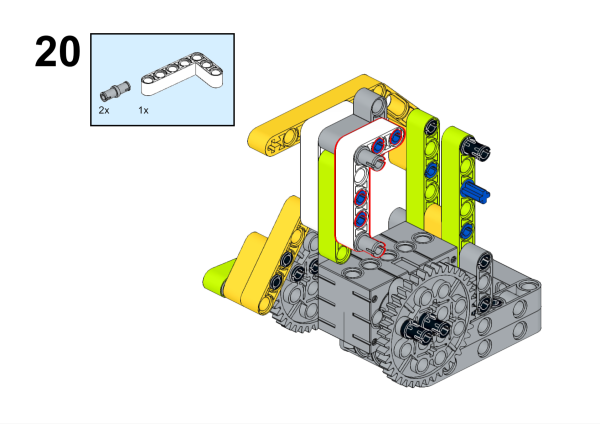
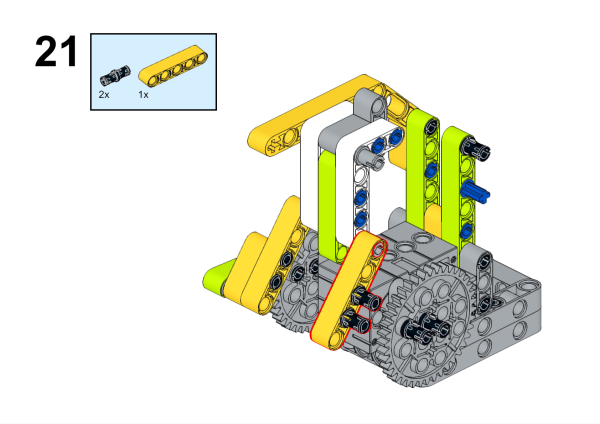
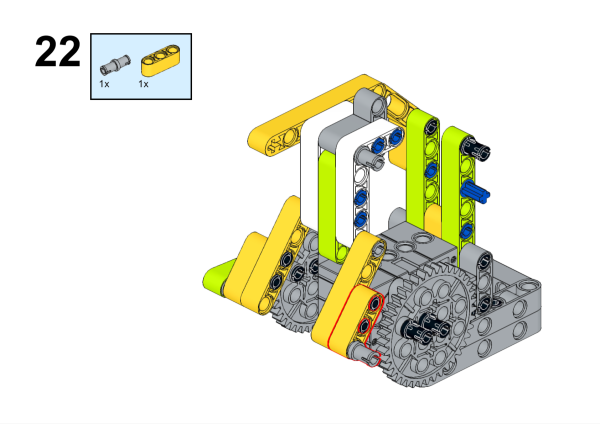

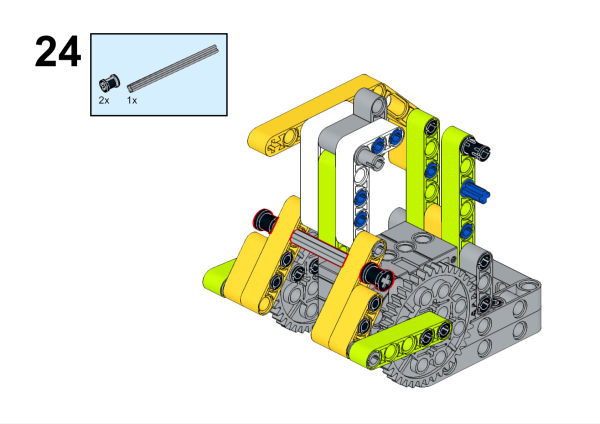
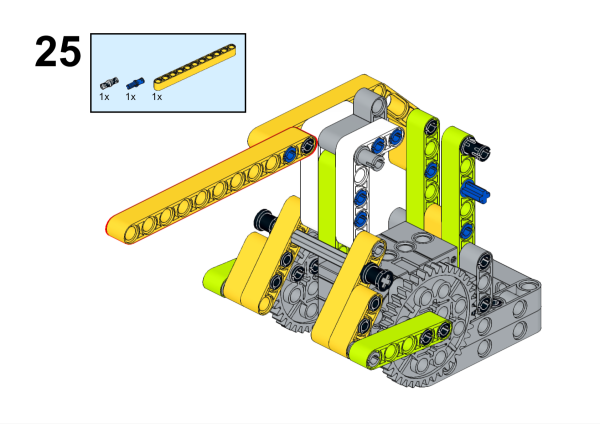
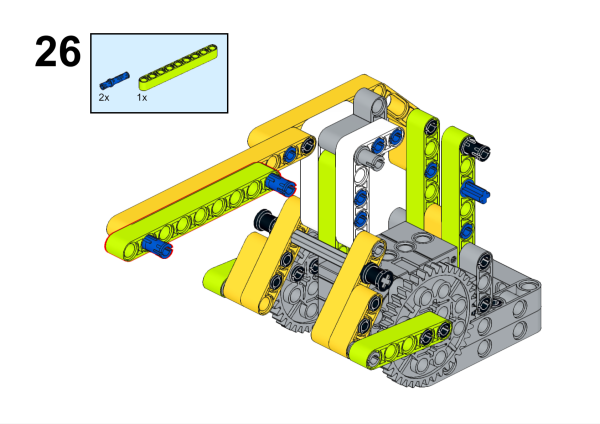
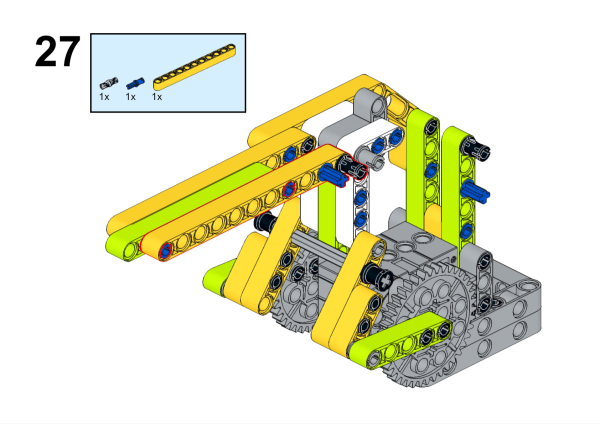
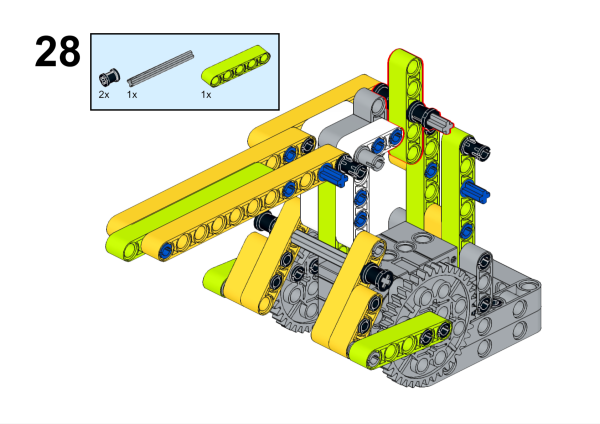
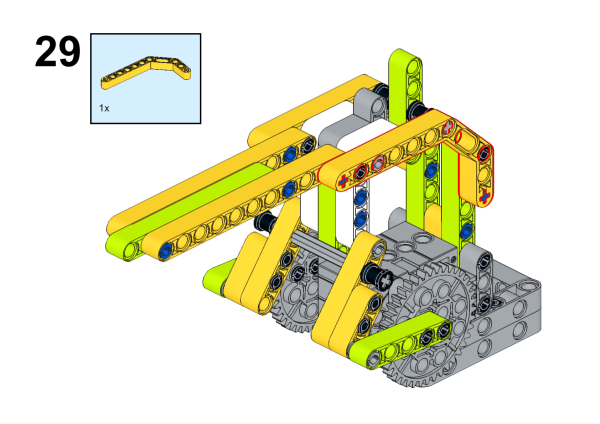
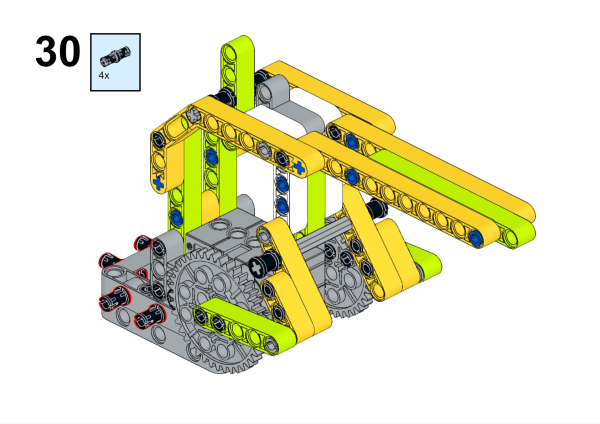
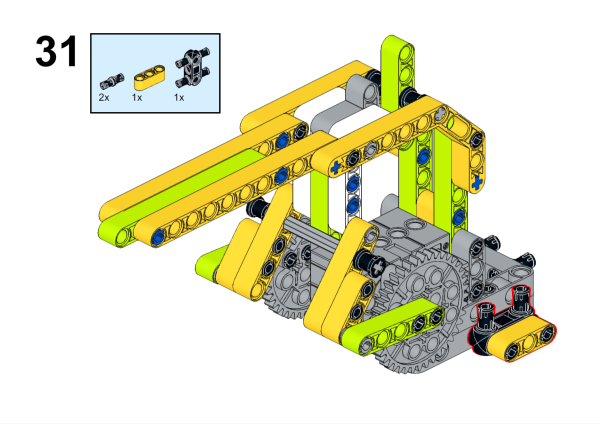
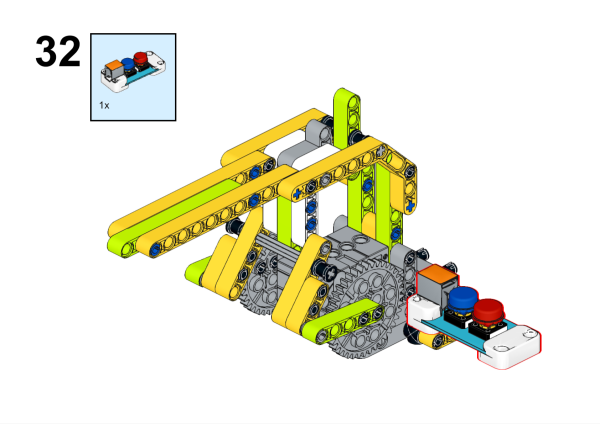
Wrap the rubber bands with the device:
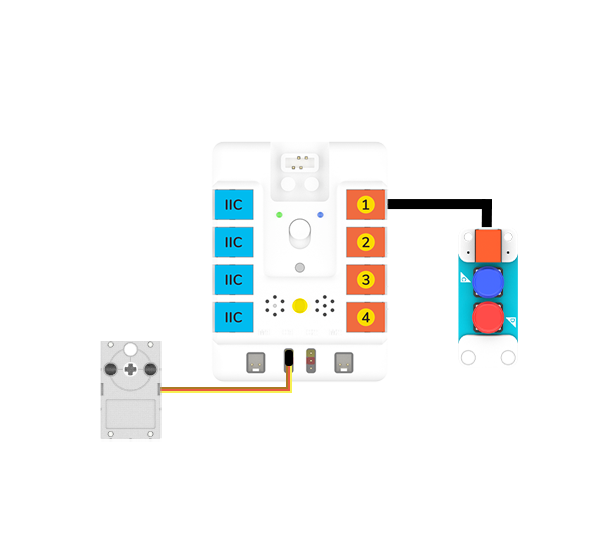
4.5. Hardware Connection#
Connect the two buttons to J1 port and the Servo to S1 port on Nezha-A master box.
4.6. Programming#
4.6.1. Prepare the programming#
Steps for preparation please refer to: Arduino 3 in 1 Breakout Board Import the libraries and the subsidiary libraries of Nezha-A master box and then import the libraries of the two buttons: PlanetXButton-main.zip Download and import the self-defined library connections for Nezha-A master box: RJPins-main.zip
4.6.2. Sample Code:#
#include <PlanetXButton.h>
#include <NezhaA.h>
#include <RJPins.h>

PlanetXButton buttonJ1(J1);    //Create an instance of PlanetXButton category
NezhaA nezhaA;    //Create an instance of NezhaA category

void setup() {
  nezhaA.begin();    //Initiliaze the buzzer, motor, servo and light
}

void loop() {
  if (buttonJ1.isPressed(C)) {    //While button C is pressed
    nezhaA.setServoAngle(S1, 190);    //Set the angle of the servo as 200 degrees at S1 port.
  }
  if (buttonJ1.isPressed(D)) {
    nezhaA.setServoAngle(S1, 270);
  }
}
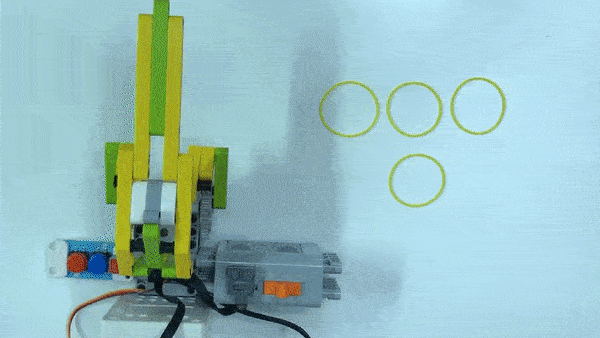
4.6.3. Result#
Control the rubber band through this rubber band launcher.
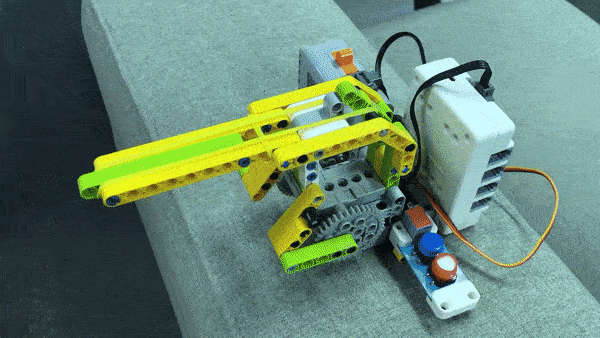
Note The angle of the servo that controls the launch needs to be adjusted according to the number of rubber bands. Using too many rubber bands will cause excessive tension and damage the servos. It is recommended that no more than three rubber bands be used for launching.