Assembly
Contents
3. Assembly#
3.1. Introduction#
Hello, now it’s time for us to do the assembly. We’re going to assemble the Ring:bit smart car step by step in this wiki. Let’s get started with your nimple hands!
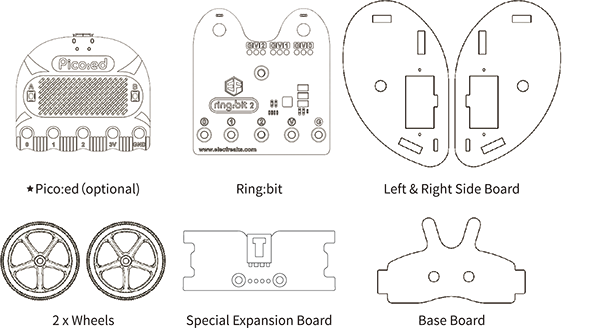
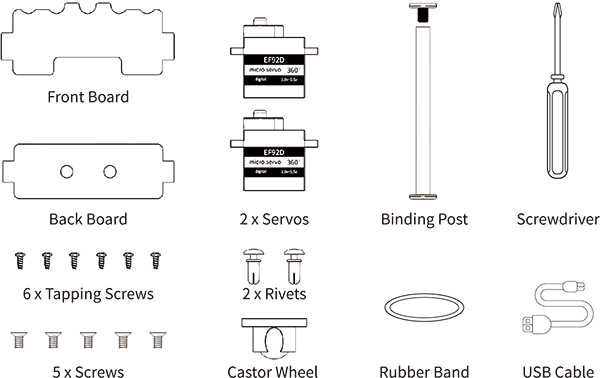
3.2. Ring:bit Car V2 Components List#
First of all, these two pictures below are the parts diagram of Ring:bit smart car, you can first familiarize yourself with the parts style and name, and then check if your kit has all the parts inside.
3.3. Assembly Step#
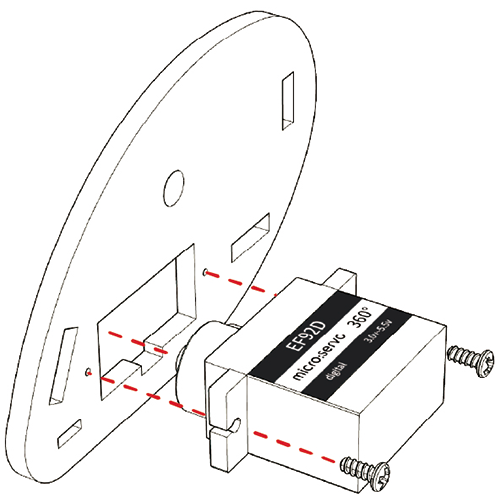
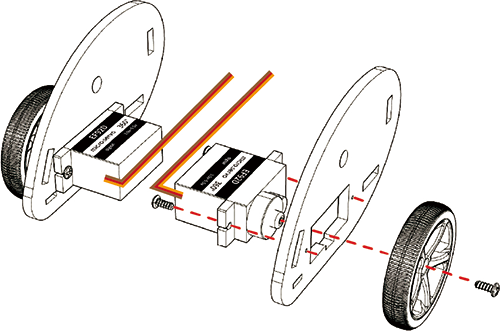
Step-1#
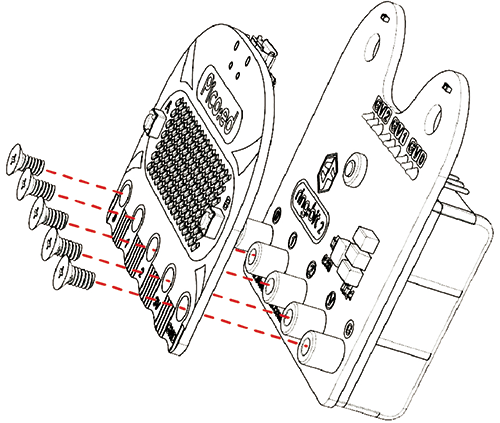
Fisrt, use the tapping screw to fix the servo to the side board.(as below pictures)
Then, use the screw to fix the wheel to the servo.(as below pictures)
Step-2#
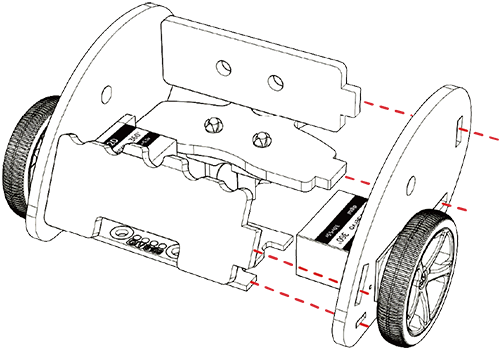
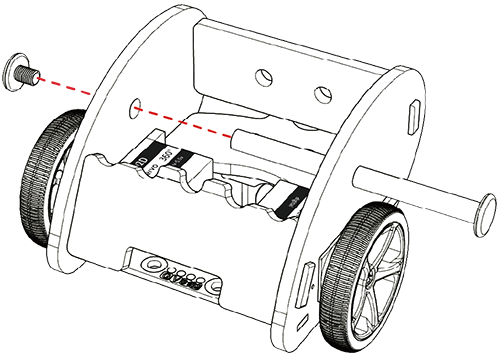
Use the rivet to install the castor wheel on the chassis.
Step-3#
Assemble the front board, the back board and the base board to the side board as below picture.
Step-4#
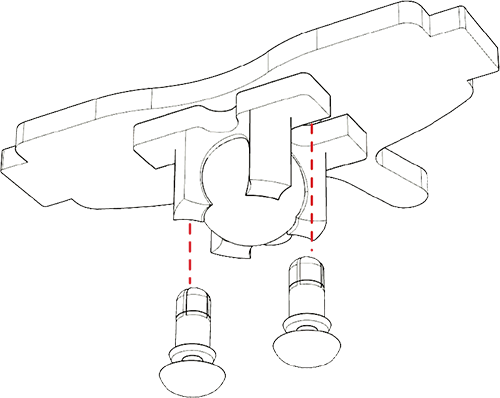
Use the binding post to fix all installed components.
Step-5#
Use the screw to fix the Ring:bit to the micro:bit board.
Step-6#
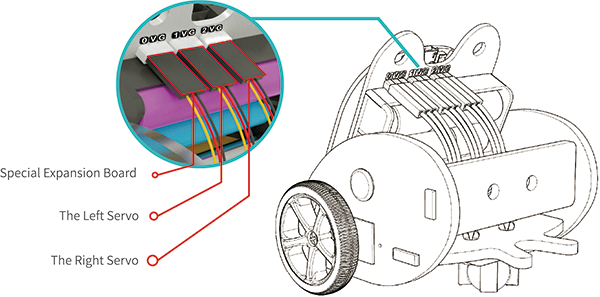
Connecting wire as below pictures, you can connect the pins as you wish but make sure the programming be consistent with the connectons.
Note: No matter which connection you use, make sure the yellow line connects with the number pins(0/1/2).
Completed#
Fix the assembled Ring:bit to the front board.
Congratulations, with your great assembly skills and continued hard work, you have finally assembled the Ring:bit car. In the next lesson, let’s experience a new journey together by writing code to drive the Ring:bit smart car.