case 05:Flashlight
Contents
8. case 05:Flashlight#
8.1. Our Goal#
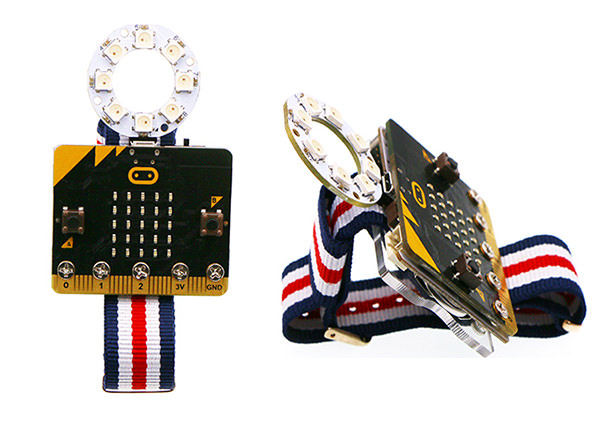
Use watch kit to create a wearable flashlight.
8.2. Material#
1 x Watch kit
8.3. Hardware Connection#
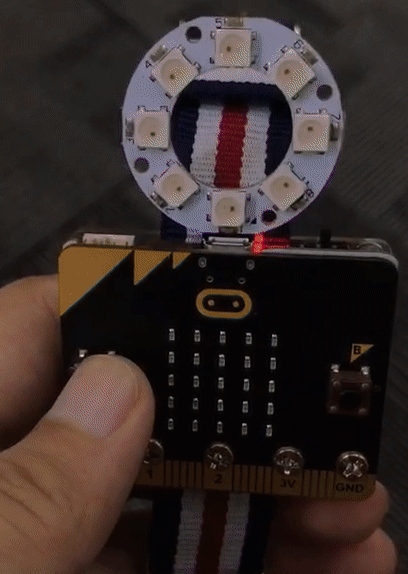
Plug the LED ring into power:bit just like the picture below.
8.4. Software#
8.5. Programming#
Step 1#
Click
Advancedin the code drawer of MakeCode to see more options.

To program for the LED ring, we have to add a package. Find
Add Packagein the bottom of code drawer and click it. This will pop up a dialogue box. Search for “neopixel” and click to download this package.
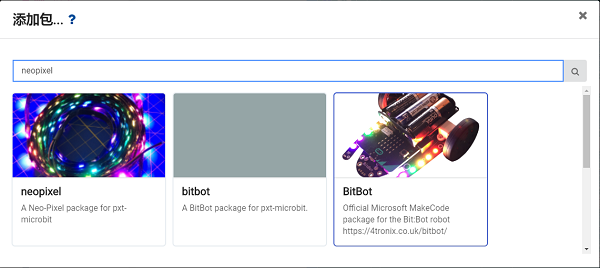
Note: If you get a hint that some packages will be deleted due to the problem of incompatibility, you can either follow the prompts, or create a new project in the project menu.
Step 2#
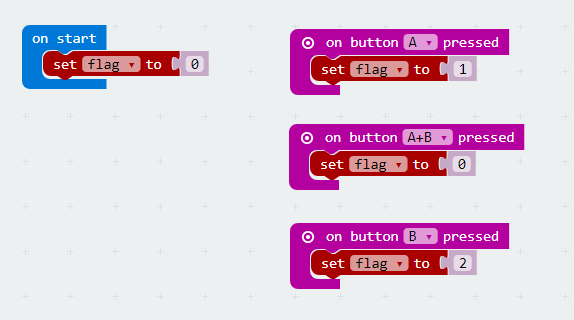
When start our program, create a variable
flagand set its value to 0.When button A is pressed, set the value of the variable
flagto 1.When button B is pressed, set the value of the variable
flagto 2.When button “A+B” is pressed, set the value of the variable
flagto 0.
Step 3#
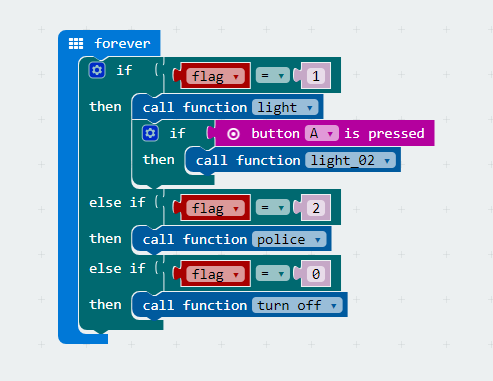
Create a forever loop to continuously judge if statements.
When
flagequals to 1,call functionlight(turn on 3 LEDs); whenflagequals to 1 and button A is pressed, call functionlight_02(All LEDs turned on).When
flagequals to 2,call functionpolice(simulate alarm light).When
flagequals to 0,call functiontrue offto turn off all LEDs.
Step 4#
Function
lightallows 8 LEDs connected to P2 port and turns on the LED number 4~6 with white light.

Function
light_02will turn on all LEDs.

Function
policeallows number 0~4 LEDs become blue and number 4~8 LEDs become red. Each section delays for 0.1 second.
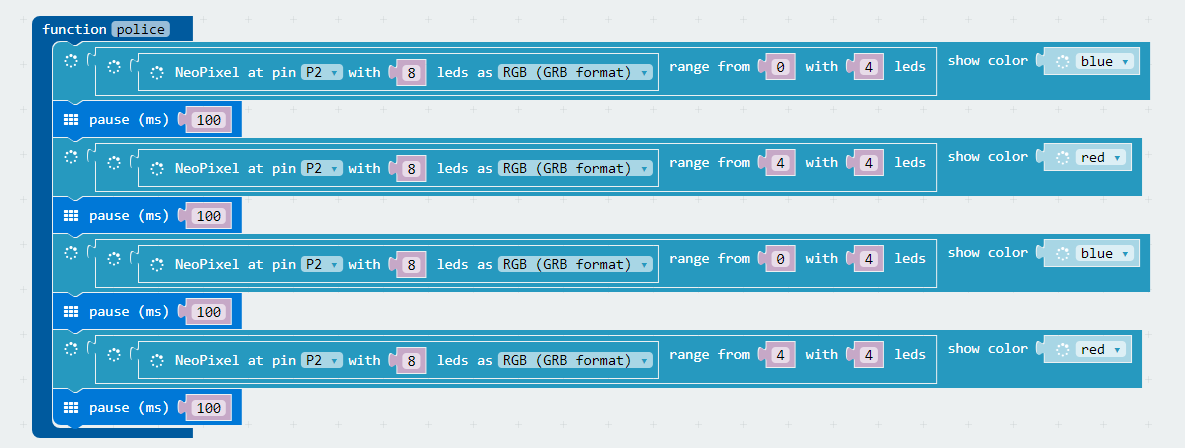
Function
true offwill turn off all LEDs.

Program#
Link of the whole program: https://makecode.microbit.org/_goJVKXdyqVRX
You can also download the program from the page below.
8.6. Result#
Press button A, all LEDs on LED ring are turned on.
Press button B, LEDs are flashing.
Press button A+B, all LEDs are turned off.
8.7. Think#
8.8. FAQ#
Q: Why the LED light looks yellow while in the code it is white?
A: Due to the insufficient battery power, the current can’t support to drive the LED ring.