MG811二氧化碳传感器电子积木
Contents
32. MG811二氧化碳传感器电子积木#
32.1. 简介#
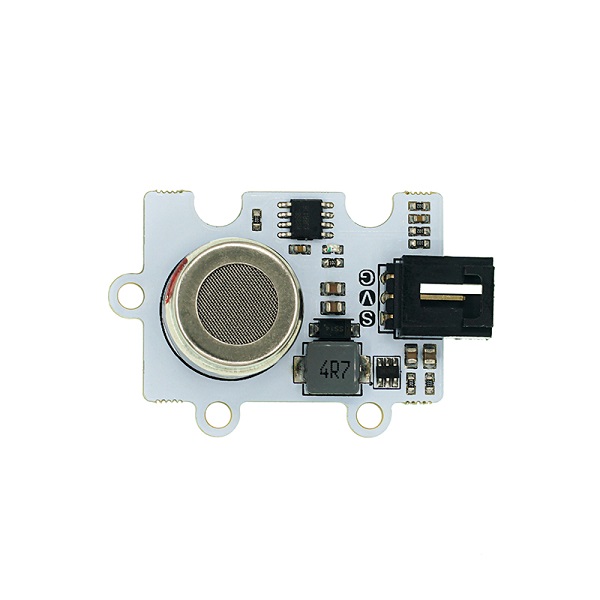
Octopus MG811 CO2 Gas Sensor是我们OCTOPUS系列的二氧化碳传感器电子积木,它的基本设计是根据OCTOPUS电子积木系列设定的,它的外形、PCB固定孔、电子积木的接口的设定是相同的。 这款CO2传感器CO2浓度越高,输出的电压值就越小。通过我们的说明书和样例代码,用户可以轻松的读取CO2数值。 该模块采用工业级的MG-811 CO2探头,对CO2极为敏感,同时还能排除酒精和CO的干扰。该探头对环境温湿度的依赖小,性能稳定,快速恢复响应。模块自带信号放大电路,进一步提高灵敏度。另外,板子上的加热电路直接把5V转换成稳定6V,为探头加热供电,提高模块适应性。
注意:
此款为电化学二氧化碳传感器,模块工作时,探头会自动加热,请勿用手触碰,以免烫伤!
存储时请密封保存,以免探头因长期暴露在空气中,导致探头“中毒”,此时需要连续加热48小时来恢复活性!
本产品采用MG-811探头属于电化学传感器,为得到更精确的测量值,请先对传感器进行标定操作。
32.2. 特性#
传感器探头工作电压:6v
内置升压电路,支持3.7~5v DC电源输入,电源电流大于500mA
OCTOPUS电子积木系列
接线方便
32.3. 参数#
品名:MG811二氧化碳传感器电子积木
SKU:EF04100
工作电压:DC 3.7~5v
连接模式:G-GND,V-VCC,S-信号引脚
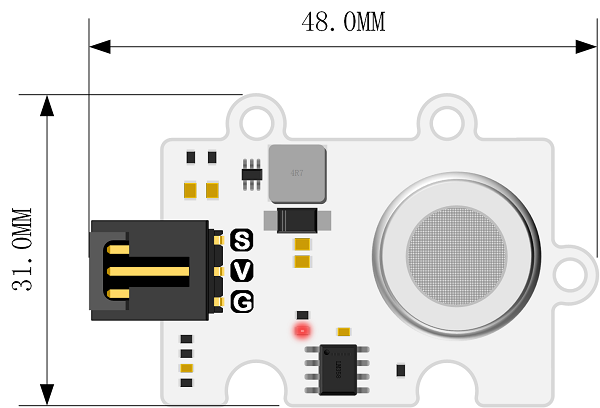
尺寸:31 * 48mm
净重:9.6g
32.4. 外型与定位尺寸#
32.5. 快速上手#
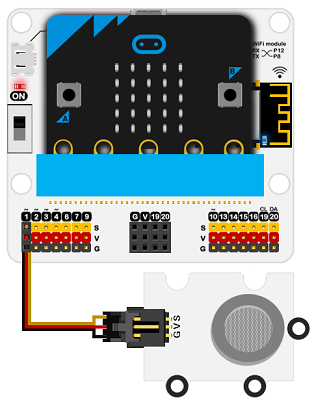
所需器材及连接示意图#
如下图所示,将二氧化碳气体传感器连接到扩展板的P1端口。
以iot:bit为例
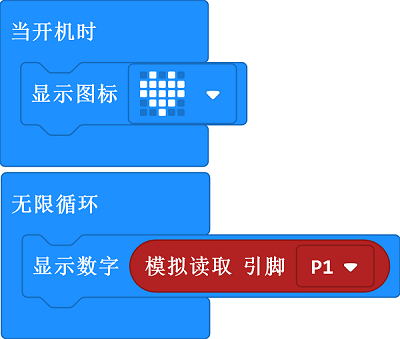
如图所示编写程序#
参考程序#
请参考程序连接:https://makecode.microbit.org/_KJVXj9Co2UXU
你也可以通过以下网页直接下载程序,下载完成后即可开始运行程序。
---结果#
硬件连接后需要预热三分钟,等读数相对稳定后再将传感器探头靠近被测气体进行检测。
随着环境二氧化碳气体浓度的改变,micro:bit的led显示器上显示的数值随之变化。
32.6. python编程#
步骤 1#
下载压缩包并解压Octopus_MicroPython-master 打开Python editor
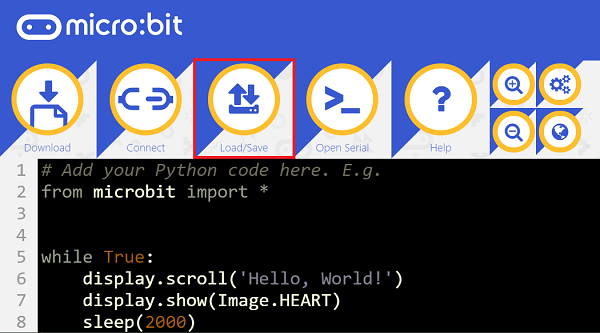
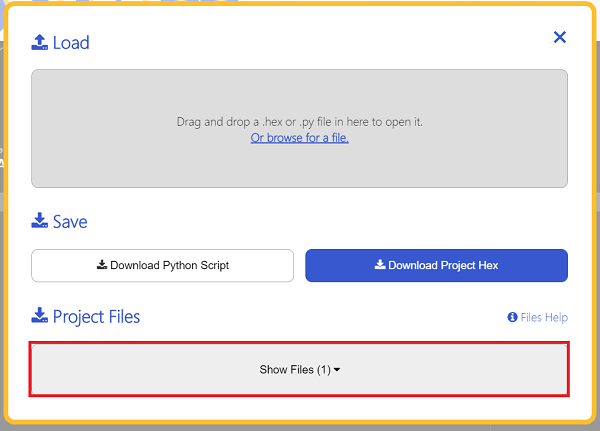
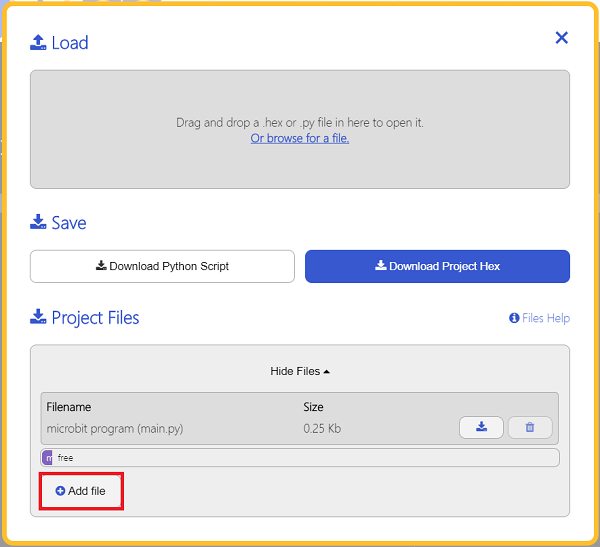
为了给二氧化碳气体传感器编程,我们需要添加co2.py。点击Load/Save,然后点击Show Files(1)下拉菜单,再点击Add file在本地找到下载并解压完成的Octopus_MicroPython-master文件夹,从中选择co2.py添加进来。

步骤 2#
参考程序#
from microbit import *
from co2 import *

co2 = CO2(pin1)
while True:
    print(co2.get_co2())
结果#
在micro:bit的LED矩阵上显示当前二氧化碳传感器返回的读数。
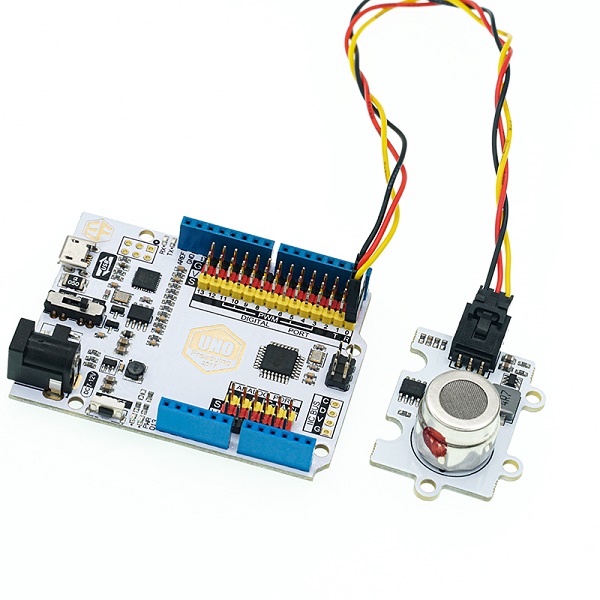
硬件连接#
将模块通过带扣杜邦线插入Arduino UNO上的A0引脚,Arduino主控板必须外接供电(7.5V-9V)。
软件编程#
标定操作#
本模块采用的MG-811探头属于电化学传感器,为得到更精确的测量值,请先对传感器进行标定操作。 给本模块提供稳定的电源,探头工作后会进行加热。请将本模块放在空气清新的地方,连续加热48小时。然后测量本模块的输出电压,将输出电压值(单位:V)除以8.5,得到的数值填入代码中的宏定义:
#define ZERO_POINT_VOLTAGE (此处改成:电压值(V)/8.5)
例如,用万用表测量CO2模块输出的电压为2.4V,那么2.4/8.5=0.282, 则修改如下:
#define ZERO_POINT_VOLTAGE (0.282)
代码修改完,重新上传至Arduino主控板。至此,标定完成了。之后可用于实际的测量。
示例代码#
/*******************Demo for MG-811 Gas Sensor Module V1.1*****************************
************************************************************************************/

/************************Hardware Related Macros************************************/
#define         MG_PIN                       (A0)     //define which analog input channel you are going to use
#define         DC_GAIN                      (8.5)   //define the DC gain of amplifier

/***********************Software Related Macros************************************/
#define         READ_SAMPLE_INTERVAL         (50)    //define how many samples you are going to take in normal operation
#define         READ_SAMPLE_TIMES            (5)     //define the time interval(in milisecond) between each samples in
                                                     //normal operation

/**********************Application Related Macros**********************************/
//These two values differ from sensor to sensor. user should derermine this value.
#define         ZERO_POINT_VOLTAGE           (0.220) //define the output of the sensor in volts when the concentration of CO2 is 400PPM
#define         REACTION_VOLTGAE             (0.030) //define the voltage drop of the sensor when move the sensor from air into 1000ppm CO2

/*****************************Globals***********************************************/
float           CO2Curve[3]  =  {2.602,ZERO_POINT_VOLTAGE,(REACTION_VOLTGAE/(2.602-3))};
                                     //two points are taken from the curve.
                                     //with these two points, a line is formed which is
                                     //"approximately equivalent" to the original curve.
                                     //data format:{ x, y, slope}; point1: (lg400, 0.324), point2: (lg4000, 0.280)
                                     //slope = ( reaction voltage ) / (log400 –log1000)

void setup()
{
   Serial.begin(9600);              //UART setup, baudrate = 9600bps
   Serial.print("MG-811 Demostration\n");
}

void loop()
{
    int percentage;
    float volts;

    volts = MGRead(MG_PIN);
    Serial.print( "SEN0159:" );
    Serial.print(volts);
    Serial.print( "V           " );

    percentage = MGGetPercentage(volts,CO2Curve);
    Serial.print("CO2:");
    if (percentage == -1) {
        Serial.print( "<400" );
    } else {
        Serial.print(percentage);
    }

    Serial.print( "ppm" );
    Serial.print("\n");

    delay(500);
}

/*****************************  MGRead *********************************************
Input:   mg_pin - analog channel
Output:  output of SEN-000007
Remarks: This function reads the output of SEN-000007
************************************************************************************/
float MGRead(int mg_pin)
{
    int i;
    float v=0;

    for (i=0;i<READ_SAMPLE_TIMES;i++) {
        v += analogRead(mg_pin);
        delay(READ_SAMPLE_INTERVAL);
    }
    v = (v/READ_SAMPLE_TIMES) *5/1024 ;
    return v;
}

/*****************************  MQGetPercentage **********************************
Input:   volts   - SEN-000007 output measured in volts
         pcurve  - pointer to the curve of the target gas
Output:  ppm of the target gas
Remarks: By using the slope and a point of the line. The x(logarithmic value of ppm)
         of the line could be derived if y(MG-811 output) is provided. As it is a
         logarithmic coordinate, power of 10 is used to convert the result to non-logarithmic
         value.
************************************************************************************/
int  MGGetPercentage(float volts, float *pcurve)
{
   if ((volts/DC_GAIN )>=ZERO_POINT_VOLTAGE) {
      return -1;
   } else {
      return pow(10, ((volts/DC_GAIN)-pcurve[1])/pcurve[2]+pcurve[0]);
   }
}
结果#
打开串口监视器,大约五分钟后,你会得到你周围二氧化碳浓度的数据。